

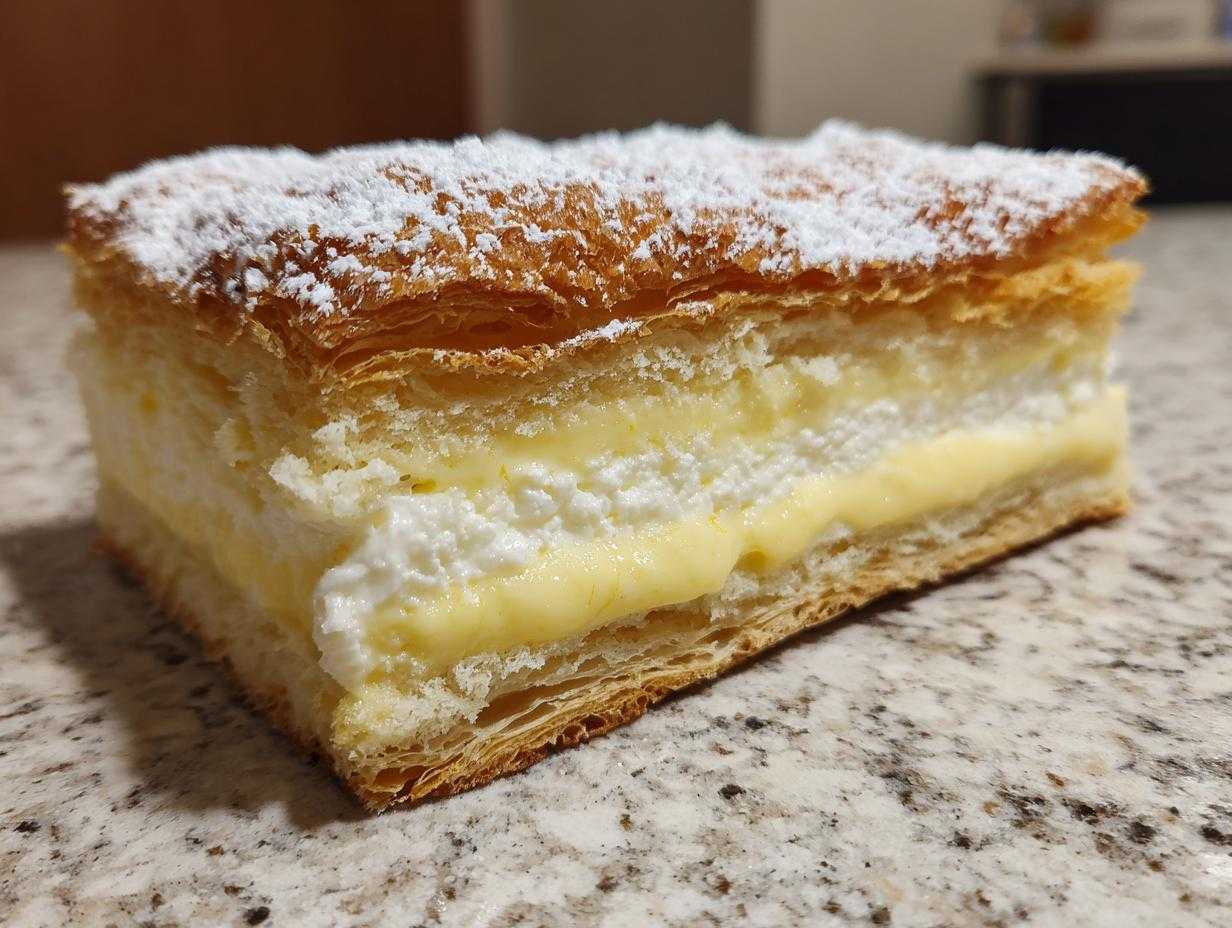
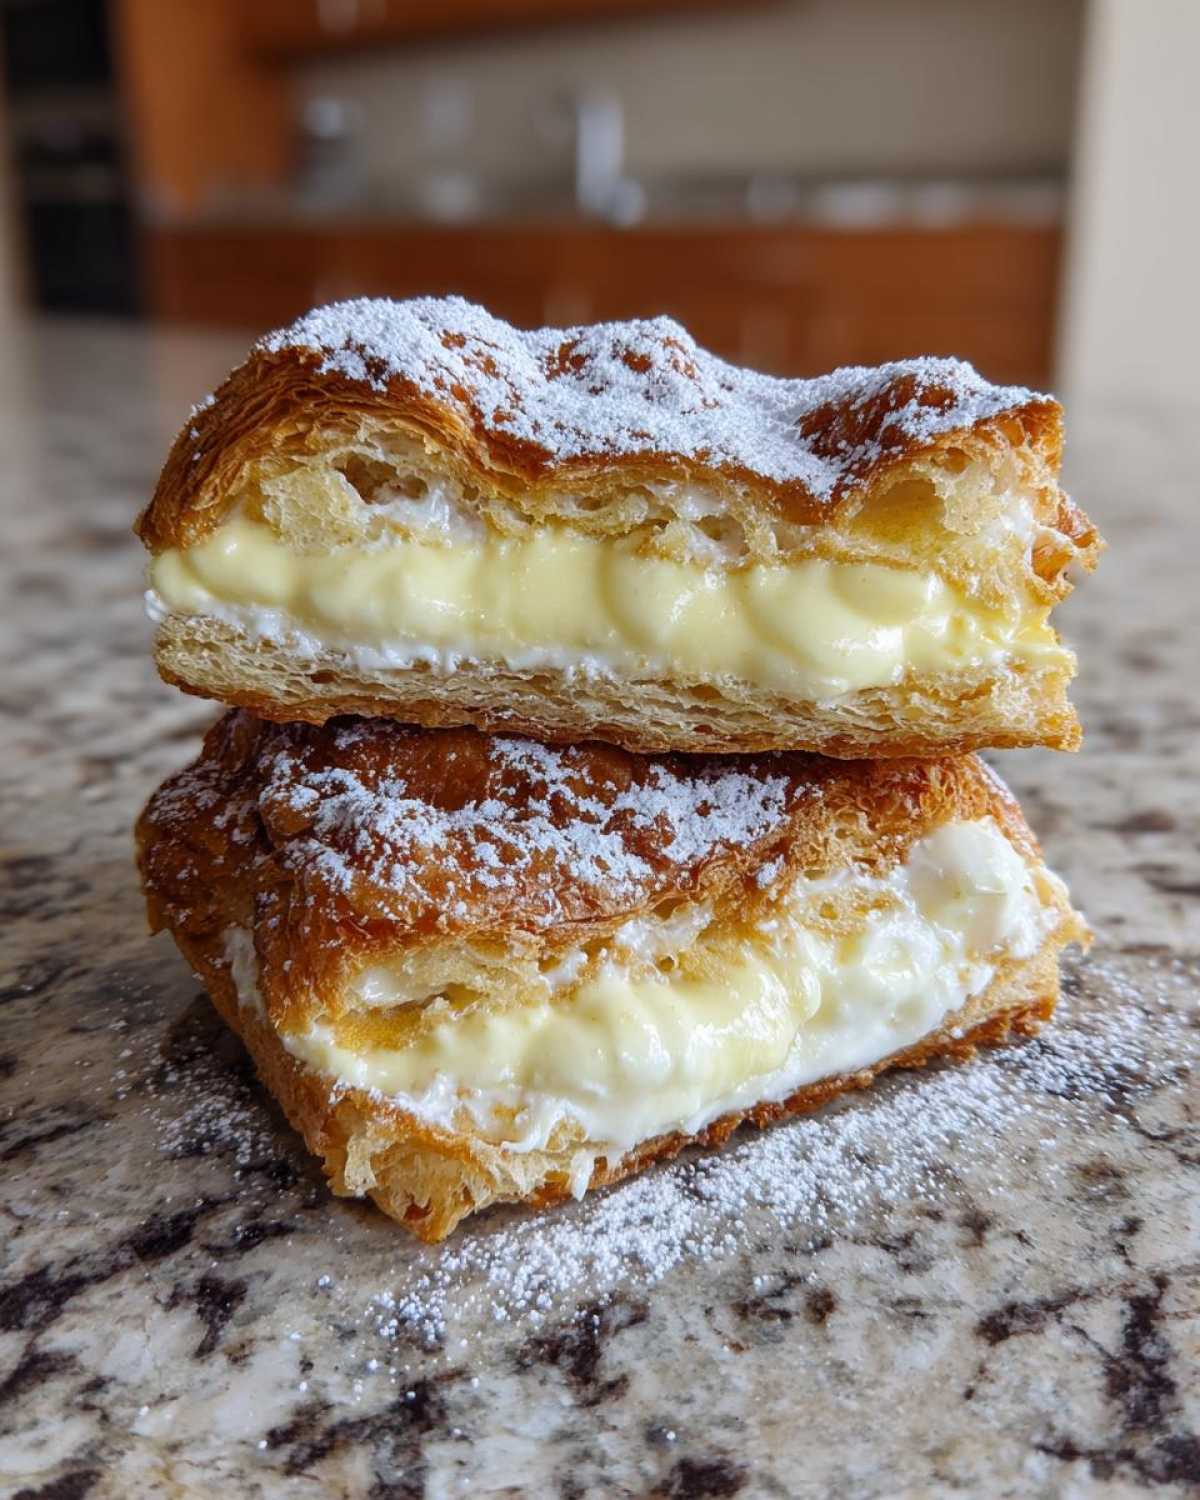
Oh, you have to trust me on this one. When it comes to those classic European desserts—the ones that look like they took three days and a professional pastry chef—we sometimes think they’re impossible to replicate at home. Well, forget those intricate layered tortes for a minute, because I’ve cracked the code on one of the most stunningly simple yet impressive treats: the **Karpatka Cake**, or as some folks know it, the Polish Cream Cake. This isn’t just any cake; it’s theatre! We’re talking about achieving those ridiculously light, crisp pastry peaks that look exactly like snow-capped mountains sitting atop a cloud of rich, homemade vanilla custard filling.
I’ve gone through so many batches, I probably have the technique for the choux-style pastry memorized by now. The key is getting that perfect contrast: shatteringly crisp on top, unbelievably creamy in the middle. If you’ve been intimidated by trying to make this dessert, don’t be! I’m going to walk you through exactly how to get that puff just right so your Karpatka Cake looks exactly like the dazzling **Polish Cream Cake** you see in bakeries.
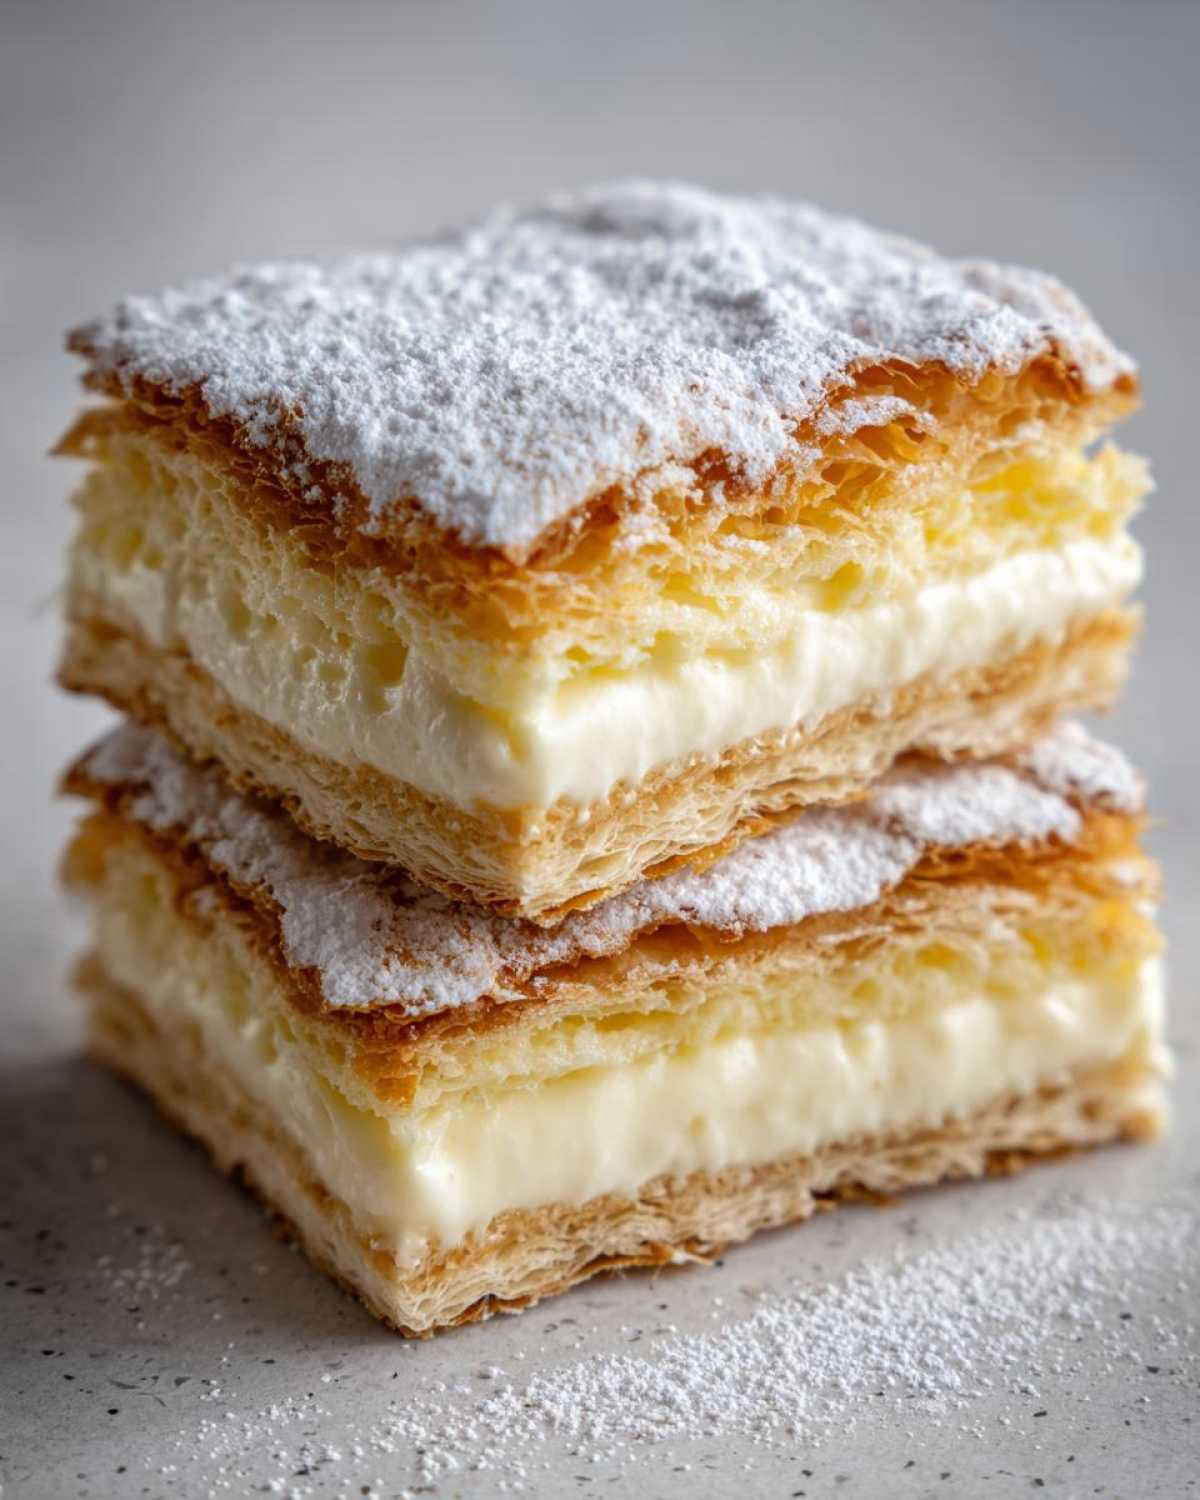
Why This Karpatka Cake (Polish Cream Cake) Recipe Works
Look, there are a million dessert recipes out there, but this specific technique guarantees success for the Karpatka Cake (Polish Cream Cake). You don’t need to worry about flat layers or watery cream here. I’ve tweaked and tested this until it’s foolproof, even for a busy weeknight.
- It delivers that authentic, slightly chewy, yet incredibly crisp pastry texture that defines the ‘mountain’ look.
- The filling sets up perfectly firm—no sad, soupy cream oozing out when you try to slice it!
- We use two different baking temperatures for the two layers, which is a small trick that makes a huge difference in the final texture.
Achieving the Signature Puffed Pastry Peaks
The pastry dough is almost like a choux—it’s boiled stovetop before the eggs go in. That process gelatinizes the starch, which traps steam like crazy in the oven! That steam is what pushes the dough up dramatically. Just promise me you won’t peek while it’s puffing up; that’s recipe suicide!
The Rich and Stable Vanilla Cream Filling Cake
My real secret weapon is how we finish the custard. We cook it down thick on the stove, but then—and this is huge—we beat luxurious, softened butter into the completely cooled custard base. This turns our simple pastry cream into something sturdy, creamy, and rich. It’s the perfect foundation for that delicate top layer of our Karpatka Cake.
Essential Ingredients for Authentic Karpatka Cake (Polish Cream Cake)
Now we get down to the nitty-gritty—the ingredients! When you’re making something as specific as a Polish Cream Cake, substitutes can really change the game, especially with the texture we’re aiming for. I’ve broken this down into the two main parts: the pastry dough that puffs up like crazy, and that gorgeous, heavy cream filling. You’ll need to make sure your butter strategy is on point for both!
I actually find gathering everything first, what we call *mise en place*, makes the process feel half as long. It’s a good habit I picked up years ago. If you’re curious about other great foundational techniques, I learned a bunch while perfecting my classic Caesar dressing, which relies on perfect emulsification, similar to getting our filling right. You can check out that technique guide here if you’re interested.
For the Puffed Pastry Layers of Your Karpatka Cake
For this stovetop pastry, the temperature of the butter is everything. It has to be cold and cubed right before we boil it with the water. Don’t even think about using soft butter here initially!
- 1 cup all-purpose flour
- 1 cup cold unsalted butter, cubed
- 1 cup water
- 4 large eggs (they should be room temperature when you add them!)
- 1/2 teaspoon salt
For the Vanilla Cream Filling Cake
This filling doubles down on richness because after we make the cooked custard base, we beat in a whole cup of softened butter. That’s what gives it that incredible stability and velvety mouthfeel. Remember: the custard part needs to be completely cold before you even touch the butter!
- 1 cup whole milk
- 1/2 cup granulated sugar
- 1/4 cup cornstarch (this is the real thickener!)
- 2 large egg yolks
- 1 teaspoon vanilla extract
- 1 cup unsalted butter, softened
- Powdered sugar for dusting the top layer
How to Make Karpatka Cake (Polish Cream Cake) Step-by-Step
Okay, deep breath! This is the fun part where we turn humble ingredients into that incredible, towering Karpatka Cake. The method flows logically, but you need to respect the cooling times, or you’ll end up with a sad, flat pastry layer. It works so much better if you tackle the pastry first, let it cool, then jump into the quick filling prep while it chills out.
If you’ve ever felt frustrated watching a perfect French pastry deflate, remember that timing is everything here. It reminds me a bit of timing the layers for my chocoflan—one step out of sync and the whole magic trick falls apart! If you want to see another recipe where timing is everything, check out my impossible cake here.
Preparing and Baking the Pastry Layers
First things first: grab a sturdy saucepan. Get your water, cubed cold butter, and salt in there and bring it to a rolling boil over medium heat—you want that butter totally melted! As soon as it hits that boil, yank it off the heat. Throw ALL the flour in at once and stir like your life depends on it! You need to mix hard and fast until it comes together in this smooth, shiny ball of dough that’s pulling away from the sides. That’s the classic pâte à choux base forming! Put it back on low heat for just one minute, stirring, just to evaporate any extra moisture.
Let that dough ball cool down for five minutes—it needs to chill slightly so it doesn’t cook the eggs. Now, beat in your eggs, one by one. Seriously, beat it well after each egg until it’s glossy and pulls off the beater in a smooth ribbon. Don’t rush this part!
Divide the dough exactly in half. You need two 9-inch round pans lined with parchment paper. Spread half the dough evenly into the first pan. Pop this bottom layer into a 400°F (200°C) oven and bake it for about 25 minutes until it’s puffed up, golden brown, and feels firm. Resist the urge to open the door during that first 20 minutes—that’s how you get those mountains!
For the top layer, take the second half of the dough and spread it on the second parchment-lined pan. This layer gets a generous sprinkle of powdered sugar right before it goes in. This top layer bakes a tiny bit lower, so drop the temp to 375°F (190°C) for about 20–25 minutes until it’s crisp. Once they are both nicely browned, take them out and let them cool down completely on racks. They have to be stone cold before we fill them!
Creating the Smooth Custard Cream Filling
This custard is the heart of the amazing Polish Cream Cake. Heat your milk in a saucepan until it’s just simmering—not boiling furiously! While that’s warming, whisk your sugar, cornstarch, and egg yolks together in a bowl until they look pale yellow. Now, temper them: slowly drizzle about half the hot milk into the yolk mixture while whisking non-stop. Pour that tempered mixture back into the saucepan with the remaining milk.
You must cook this over medium heat, stirring constantly, until it gets seriously thick, like spoonable pudding. Pull it off the heat, stir in your vanilla, and then—this is critical—press plastic wrap right onto the surface of the pudding. It has to cool completely like that, otherwise you’ll get a nasty skin. Once that custard base is fully cooled, you can beat your softened butter until it’s fluffy. Then, slowly beat in that cooled custard one little spoonful at a time. Keep going until it’s all combined into one smooth, pipeable, dreamy filling!
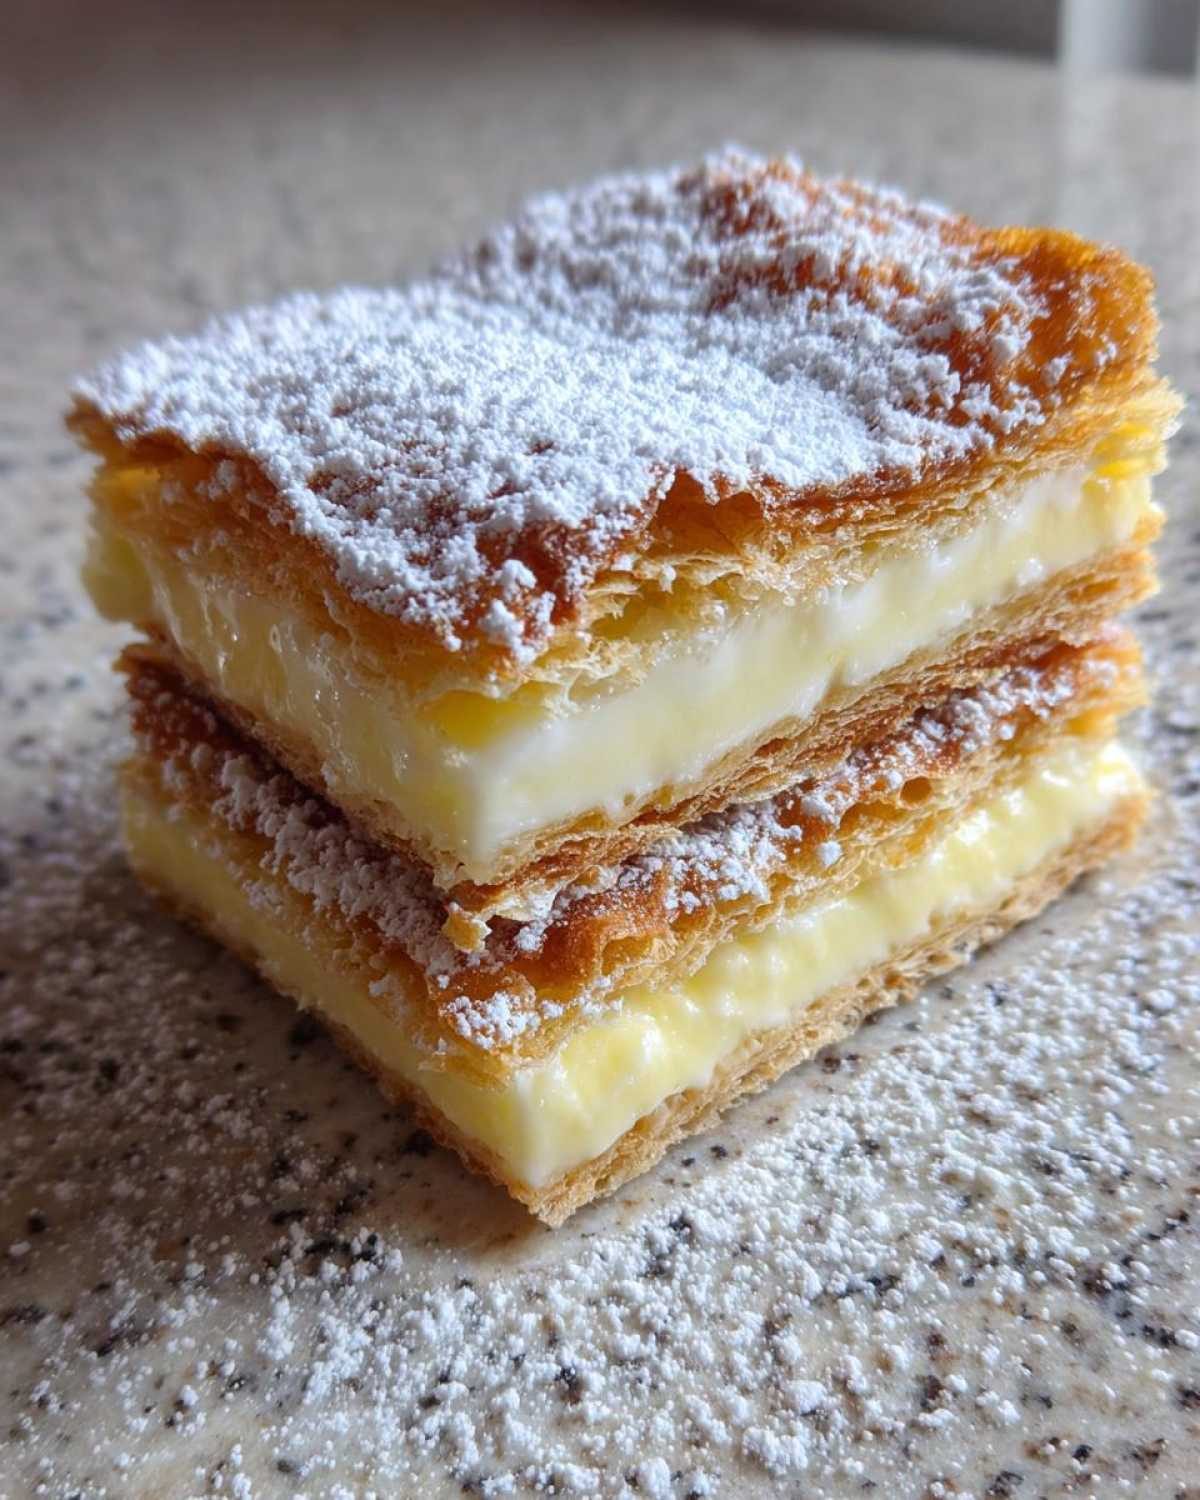
Assembling Your Homemade Polish Cake
Time for the big reveal! Place your bottom, un-sugared pastry layer on your serving platter. Take all that beautiful, thick vanilla cream filling and spread it evenly across that bottom crust. Make sure it’s level right to the edges.
Now, the moment of truth! Carefully lift that top, crisp, powdered sugar crust—try not to break those precious peaks—and gently lay it over the cream. Don’t press down hard! Just a gentle settling is all you need. This cake needs structure, so cover it gently and move it to the fridge. You absolutely must chill this for at least 4 hours, but honestly, overnight is better. That chilling time lets the filling firm up perfectly and helps the layers meld just right before you dust it one last time with powdered sugar for serving.
Tips for Success with Your Karpatka Cake (Polish Cream Cake)
Even with a great recipe, sometimes baking throws you a curveball! Don’t sweat it if your first attempt at this amazing Karpatka Cake (Polish Cream Cake) isn’t picture-perfect. Most issues are totally fixable, and usually, they come down to just one small timing mistake. I learned the hard way what *not* to do, so let me save you some grief!
We want those crispy peaks and that cloud-like filling, right? It’s all about respecting the physics of the dough and the cool-down times for the cream. If you’ve ever had a baking disaster involving cookies that spread too thin, you know how even small details matter. This is one of my favorite go-to recipes when I want something impressive, kind of like when I need my perfect chocolate chip cookies to hold their shape—little adjustments make a difference! You can see my method for those foolproof chocolate chip cookies if you ever need a simple, reliable bake.
Troubleshooting Common Karpatka Cake Issues
The biggest worry people have is getting that massive puff in the pastry. If your pastry layer comes out flat or sinks right after you pull it out, nine times out of ten, it’s because you cracked the oven door too soon. Seriously, resist every urge! That blast of cool air hits the steam trapped inside the dough, and *poof*, it collapses immediately. Keep the oven shut tight for the initial 20 minutes on the bottom layer, and the first 15 on the top.
The other common headache is the filling separating. It becomes greasy or grainy instead of smooth.
- Fillings Separated? This almost always means the cooked custard base was even slightly warm when you started beating it into the softened butter. The heat melts the butter too fast, and they just won’t emulsify correctly. You need that custard base completely chilled down to room temperature first.
- Filling Too Runny? Double-check your cornstarch! It has to be measured correctly, and the custard base needs that full cooking time until it’s thick enough to hold a track when you move the spoon through it. Don’t stop cooking just because it’s bubbling!
If you follow these timing rules—especially keeping the components cool at the right stages—your Custard Cream Cake will be stunning every single time.
Storage and Reheating Instructions for Karpatka Cake
Because this beautiful Karpatka Cake is loaded with that gorgeous, rich custard filling, storage is really important. This is not a cookie, folks; we need to treat it like a dairy-based dessert. It absolutely must stay refrigerated. If you leave this out on the counter, you’re playing with fire, and frankly, you risk sacrificing that perfect, fluffy texture.
I always store leftovers tightly wrapped in plastic wrap, right in the cake pan if possible, or transferred to an airtight container. If you wrap a slice individually, you protect those delicate pastry peaks from absorbing any fridge smells! You can keep your finished Polish Cream Cake refrigerated for about 3 to 4 days, and it’s usually even better on day two once the filling has really settled into that bottom crust.
Now, can you freeze it? Honestly, I strongly advise against it. The custard filling—even though it’s stable when cool—tends to get a little grainy or weeping after thawing because of the butter and egg yolks. If you absolutely must freeze it (maybe you made it for Wielkanoc weeks early!), I suggest baking and cooling both pastry layers and freezing them completely separated in plastic wrap and foil. Then, make the filling fresh right before you plan to assemble. That’s the only way I trust it.
One last crucial tip: wait until you are about an hour away from serving before you dust that gorgeous top layer with extra powdered sugar. If you powder it right after assembling and chilling, the moisture from the filling and the fridge will start dissolving that white dusting. We want that sharp, snowy contrast when it hits the table! Before you serve, just pop the lid off and give it a fresh shower of sugar. For some other great tips on keeping things fresh, check out my refrigerator dill pickle recipe at this link—proper cooling always wins!
Variations on the Traditional Polish Dessert
Okay, so you’ve mastered the structure of the classic Karpatka Cake, and now you’re feeling adventurous? That’s the spirit! While the beauty of this Traditional Polish Dessert lies in its pure, creamy simplicity, it adapts so beautifully to small flavor twists. You don’t need to invent a whole new cake; just subtly shift the flavor profile of that magnificent custard filling. Trust me, these tweaks keep things interesting without compromising the epic puff and structure.
I love experimenting with the filling when I have leftovers, which happens way less often than I’d like! If you’re looking for another super simple but impressive way to use cream cheese and bright flavors, you should see my lemon cream cheese dump cake recipe—it’s pure genius for busy weeks. You can find that here.
Bright Zing: The Lemon Cream Karpatka
This is easily my favorite variation for summer afternoons. It keeps the richness but adds incredible brightness. When you are mixing the cooled custard with the softened butter (Step 3 in the filling assembly), just add the finely grated zest of one large lemon right into that mix. Don’t use too much white part of the peel, though, as that can be bitter!
If you want to bump up the acidity even more, swap out about two tablespoons of the whole milk in the initial custard base for fresh lemon juice. Just be super careful that you slowly temper that mixture, as the acid can make the milk curdle slightly if you rush it. A little splash of lemon juice in the final dusting of powdered sugar also looks fantastic!
A Subtle Nutty Depth: Almond Extract Swap
If you’re not a big vanilla lover, or if you want something that feels a little more robust and European, try swapping the vanilla extract entirely for almond extract. You only need about half the amount, though, since almond is much stronger! Use just 1/2 teaspoon of almond extract when you mix it into the hot custard base.
To complement this, you can lightly toast some slivered almonds and gently press them into the sides of the filling before placing the top crust on. That little bit of crunch around the edge is just divine against the soft cream and the crisp pastry.
Chocolate Whisper Caramel Layer
This variation moves a little further away from the original, but it’s amazing for chocolate lovers. After the custard has cooked and cooled, and you’ve mixed in the softened butter, divide the filling in half. Leave the first half as is!
For the second half, gently fold in about a quarter cup of high-quality, sifted cocoa powder. If you find the mixture gets too stiff, add a tablespoon of milk to loosen it back up. When assembling, you layer the vanilla cream, then the chocolate cream, and then top it with the powdered sugar crust. It creates a beautiful striped effect when you cut into it!
Serving Suggestions for Your Custard Cream Cake
When you finally pull that magnificent, chilled Karpatka Cake from the fridge and dust those peaks one last time, you’ll realize it truly needs very little help. This Custard Cream Cake is so rich and perfectly balanced on its own—that crisp pastry texture and the velvety vanilla cream—that overloading it feels almost criminal!
Traditionally, this Polish Cream Cake is served exactly as is. It’s meant to be the star! I mean, why mess with perfection, right? However, if you absolutely feel like you need an accompaniment—maybe if you’ve made an extra-large batch and want to offer a slight contrast—I have a couple of ideas that won’t fight the delicate flavors.
Perfect Pairings: Coffee and Tea
The richness of the butter and custard just begs for something strong and slightly bitter to cut through it. A good, strong cup of coffee is my absolute number one suggestion. It cleanses the palate between bites and makes the sweetness of the cream really shine.
If you’re feeling modern, skip the plain brew and try one of my favorite recipes for a slightly sweet, chilled pick-me-up. This iced brown sugar latte is fantastic; the caramelized notes in the sugar complement the vanilla base note of the custard beautifully. You can find the recipe for a great shaken espresso right here. Otherwise, a simple, strong black Earl Grey tea works just as perfectly.
Light Fruit Touches (Use Sparingly!)
If you insist on fruit, remember: less is more. You don’t want juices soaking into that beautiful bottom crust, so avoid anything too wet. Small, fresh berries are your best bet—a sprinkle of raspberries or halved strawberries on the serving plate, next to the slice, works wonders.
I sometimes take a few fresh blueberries and macerate them for just five minutes in a tiny splash of lemon juice and a pinch of sugar. That little bit of bright acidity stops the cake from feeling too heavy. Serve those berries on the side, perhaps nestled right against the base of the slice, rather than drizzling them over the top pastry mountain!
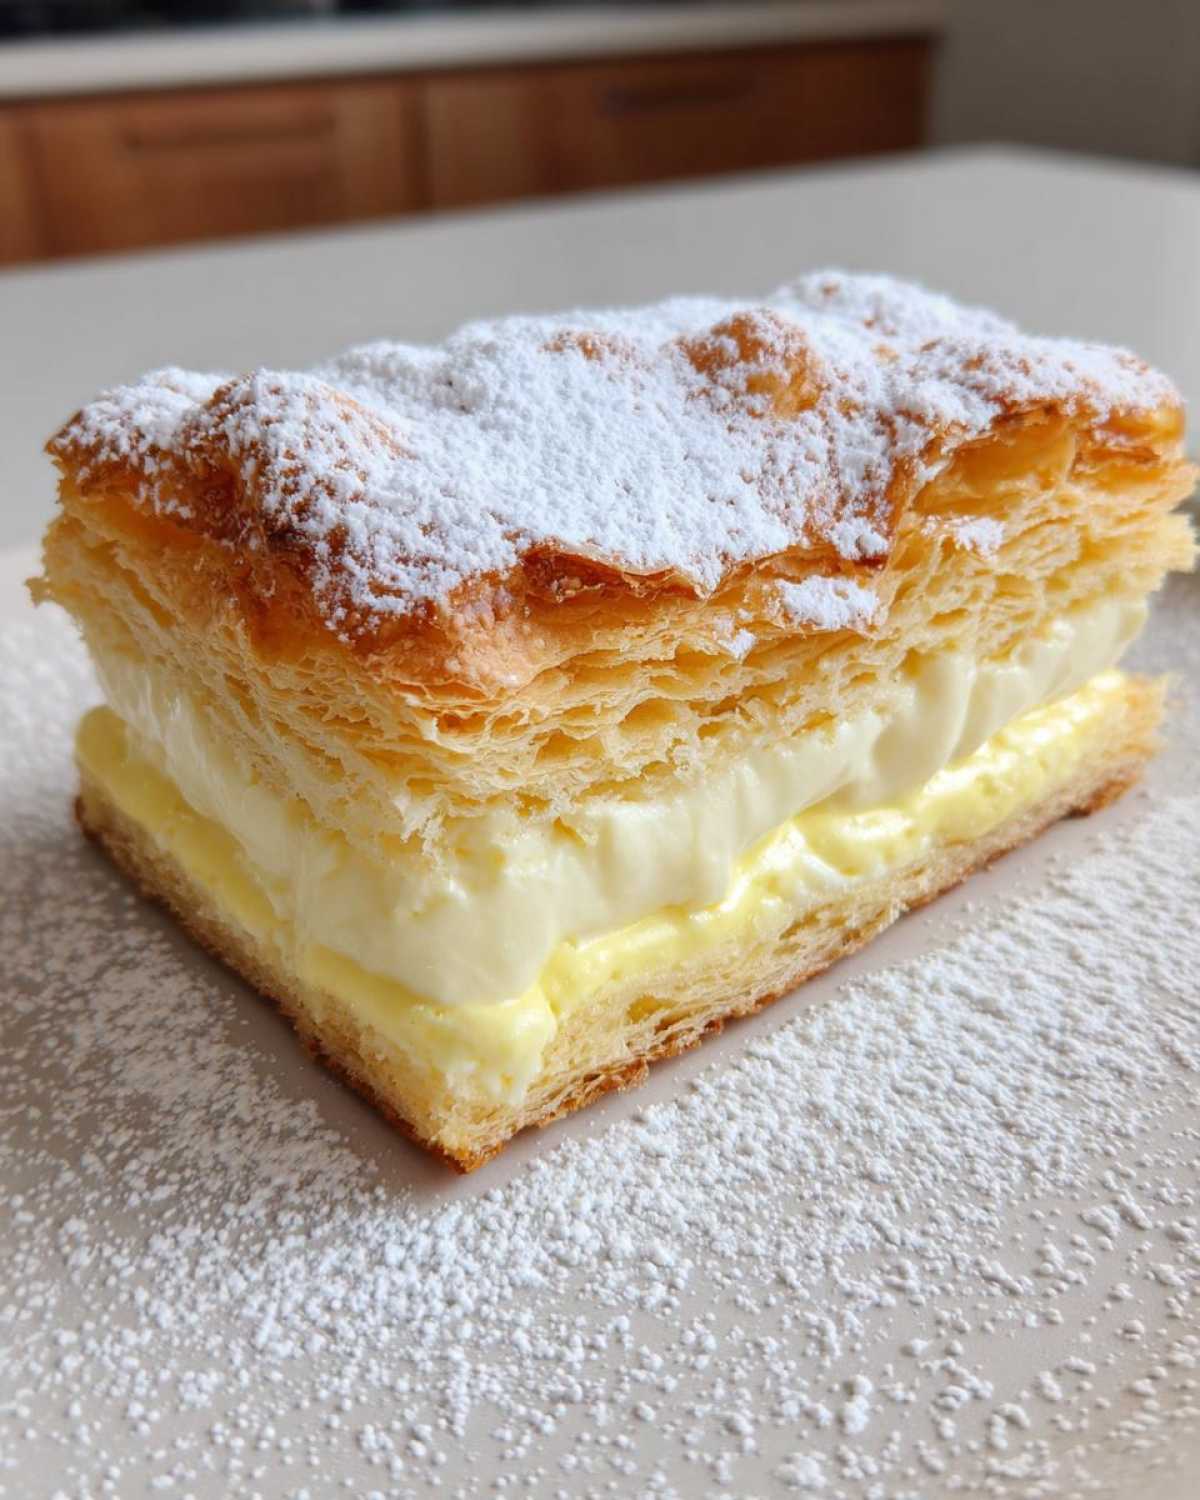
The Final Dusting
No matter what you serve alongside it, make sure you save the final, dramatic dusting of powdered sugar for the very last minute before serving. That contrast between the brilliant white sugar and the golden brown peaks is what signals to everyone that they are about to eat something truly special. It’s the perfect finishing touch for your Karpatka Cake.
Frequently Asked Questions About Karpatka Cake (Polish Cream Cake)
I know you’re going to love making this Karpatka Cake (Polish Cream Cake), but sometimes lingering questions pop up once you get down to the real measuring and mixing. Baking tradition is wonderful, but sometimes we need a little practical advice for the modern kitchen. Here are the things people ask me most often when they try to nail this amazing Polish dessert!
If you’ve got extra questions after trying out the recipe, please don’t hesitate to drop me a line! I’m always happy to troubleshoot, kind of like when I help folks figure out a super simple recipe like my 5-ingredient corn soup over here. The community is the best part of baking!
Can I use store-bought puff pastry for this Karpatka Cake Recipe?
That’s the million-dollar question when time is short! You absolutely *can* use store-bought puff pastry for this recipe, sure. It will certainly give you two distinct pastry layers with cream in the middle, making it a Puff Pastry Cream Cake. However, I must warn you: the result will be different from the classic Karpatka Cake.
Traditional Karpatka uses that stovetop choux dough—the one we boil and beat eggs into. That dough creates a hollow, airy, slightly chewy base with those signature rugged peaks. Store-bought puff pastry is laminated, meaning it’s flaky and layers upon layers of butter. It will rise, but it won’t give you that specific, authentic mountain texture we are aiming for here. If you use store-bought, you’ll get a lovely layered cake, just not true Karpatka.
What is the difference between Karpatka and Mille-Feuille style cake?
This is a great question because they both involve pastry and cream, but the pastry itself is the huge differentiator in this Dessert with pastry cream layers! Mille-Feuille (which means ‘a thousand leaves’) is strictly made with traditional laminated puff pastry—very thin, very flaky layers. The filling is usually a slightly lighter pastry cream, and the whole thing is often assembled in small rectangles.
Karpatka, on the other hand, uses that very specific choux-style dough we made on the stovetop. Because the dough structure is different, the rise is puffier, less distinctly layered, and more irregular, forming those rugged ‘mountains.’ While both are divine, the texture of biting through the Karpatka pastry is distinctly chewier and less fragile than a true Mille-Feuille.
How far in advance can I assemble the cake?
For the best texture, you want to assemble this the day before you plan to serve it. You need at least 4 hours of firm chilling time so the custard sets up against both pastry layers, making it stable enough to slice cleanly. I wouldn’t recommend assembling more than 24 hours in advance, though, because the moisture from the cream will eventually start to soften that wonderful crisp top crust too much.
Why is my custard filling grainy instead of smooth?
Graininess almost always points back to temperature management when you’re mixing the cooled custard into the softened butter. If you try to blend a warm custard into room temperature butter, the emulsion breaks, and you get greasy little pockets instead of smooth cream. Make absolutely sure your cooked custard base is room temperature or colder before you start adding it slowly to your beaten butter!
Share Your Homemade Polish Cake Creation
Whew! You did it! If you followed along, you now have a stunning, towering, absolutely authentic Karpatka Cake sitting in your fridge, just waiting for its big moment. I truly hope the process brought you as much joy as it brings me every time I make this Polish Cream Cake.
Now that you’ve conquered the mountain pastry and wrangled that glorious custard filling, I desperately want to hear all about it! I live for seeing your kitchen successes. Did your top layer puff up perfectly? Did you get those lovely rugged peaks? Tell me everything!
Please take a moment to leave a rating right below this post. Your feedback helps other bakers feel brave enough to try out this Custard Cream Cake for the first time. And if you snapped a photo of your finished masterpiece—especially if you tried one of the fun flavor twists—please share it on social media and tag me! Knowing I helped you create something so traditionally beautiful is the absolute best part of my day.
If you need to reach out with a specific question about technique or you just want to tell me how much your family loved this Traditional Polish Dessert, you can always get in touch with me directly through the contact page here. Happy baking, and enjoy every single creamy, crisp bite!
PrintAuthentic Karpatka Cake (Polish Cream Cake)
Make the traditional Polish Karpatka, a dessert featuring two layers of crisp, puffed pastry resembling mountains, filled with rich vanilla custard cream.
- Prep Time: 45 min
- Cook Time: 50 min
- Total Time: 95 min
- Yield: 10 servings
- Category: Dessert
- Method: Baking
- Cuisine: Polish
- Diet: Vegetarian
Ingredients
- 1 cup all-purpose flour
- 1 cup cold unsalted butter, cubed
- 1 cup water
- 4 large eggs
- 1/2 teaspoon salt
- For the Cream Filling:
- 1 cup whole milk
- 1/2 cup granulated sugar
- 1/4 cup cornstarch
- 2 large egg yolks
- 1 teaspoon vanilla extract
- 1 cup unsalted butter, softened
- Powdered sugar for dusting
Instructions
- Prepare the Pastry Dough: Combine water, cubed butter, and salt in a saucepan. Bring to a boil over medium heat, stirring until the butter melts completely.
- Remove the pan from the heat. Add all the flour at once and stir vigorously until a smooth ball of dough forms that pulls away from the sides of the pan.
- Return the pan to low heat and cook for 1 minute, stirring constantly. Remove from heat and let the dough cool for 5 minutes.
- Beat in the eggs one at a time, mixing well after each addition until the dough is smooth and glossy. Do not overmix.
- Divide the dough in half. Line two 9-inch round cake pans with parchment paper. Spread one half of the dough evenly into one prepared pan.
- Bake the bottom layer at 400°F (200°C) for 25 minutes until golden brown and puffed. Remove from oven.
- For the top layer, spread the remaining dough onto the second parchment-lined pan. Sprinkle generously with powdered sugar. Bake at 375°F (190°C) for 20-25 minutes until golden and crisp. Let both layers cool completely.
- Prepare the Custard Filling: Heat the milk in a saucepan until simmering. In a separate bowl, whisk together sugar, cornstarch, and egg yolks.
- Slowly temper the hot milk into the yolk mixture while whisking constantly. Return the mixture to the saucepan.
- Cook over medium heat, stirring constantly, until the mixture thickens significantly, resembling a thick pudding. Remove from heat, stir in vanilla extract, and cover the surface directly with plastic wrap to prevent a skin from forming. Cool completely.
- Beat the softened butter in a large bowl until creamy. Gradually beat in the cooled custard mixture until the filling is smooth and light.
- Assemble the Cake: Place the bottom pastry layer on a serving plate. Spread the entire custard filling evenly over the bottom layer.
- Carefully place the top, powdered-sugar-dusted pastry layer on top of the cream. Press down very gently to adhere.
- Chill the cake for at least 4 hours before serving. Dust the top with extra powdered sugar before slicing.
Notes
- For the best ‘mountain’ peaks, do not open the oven door during the first 20 minutes of baking the pastry layers.
- Ensure the custard base is completely cool before beating it into the softened butter; otherwise, the filling will separate.
- You can use a store-bought puff pastry for a quicker version, but the texture will differ from traditional Karpatka.
Nutrition
- Serving Size: 1 slice
- Calories: 450
- Sugar: 35g
- Sodium: 180mg
- Fat: 28g
- Saturated Fat: 16g
- Unsaturated Fat: 12g
- Trans Fat: 0g
- Carbohydrates: 45g
- Fiber: 1g
- Protein: 6g
- Cholesterol: 110mg


Comments are closed.