

")
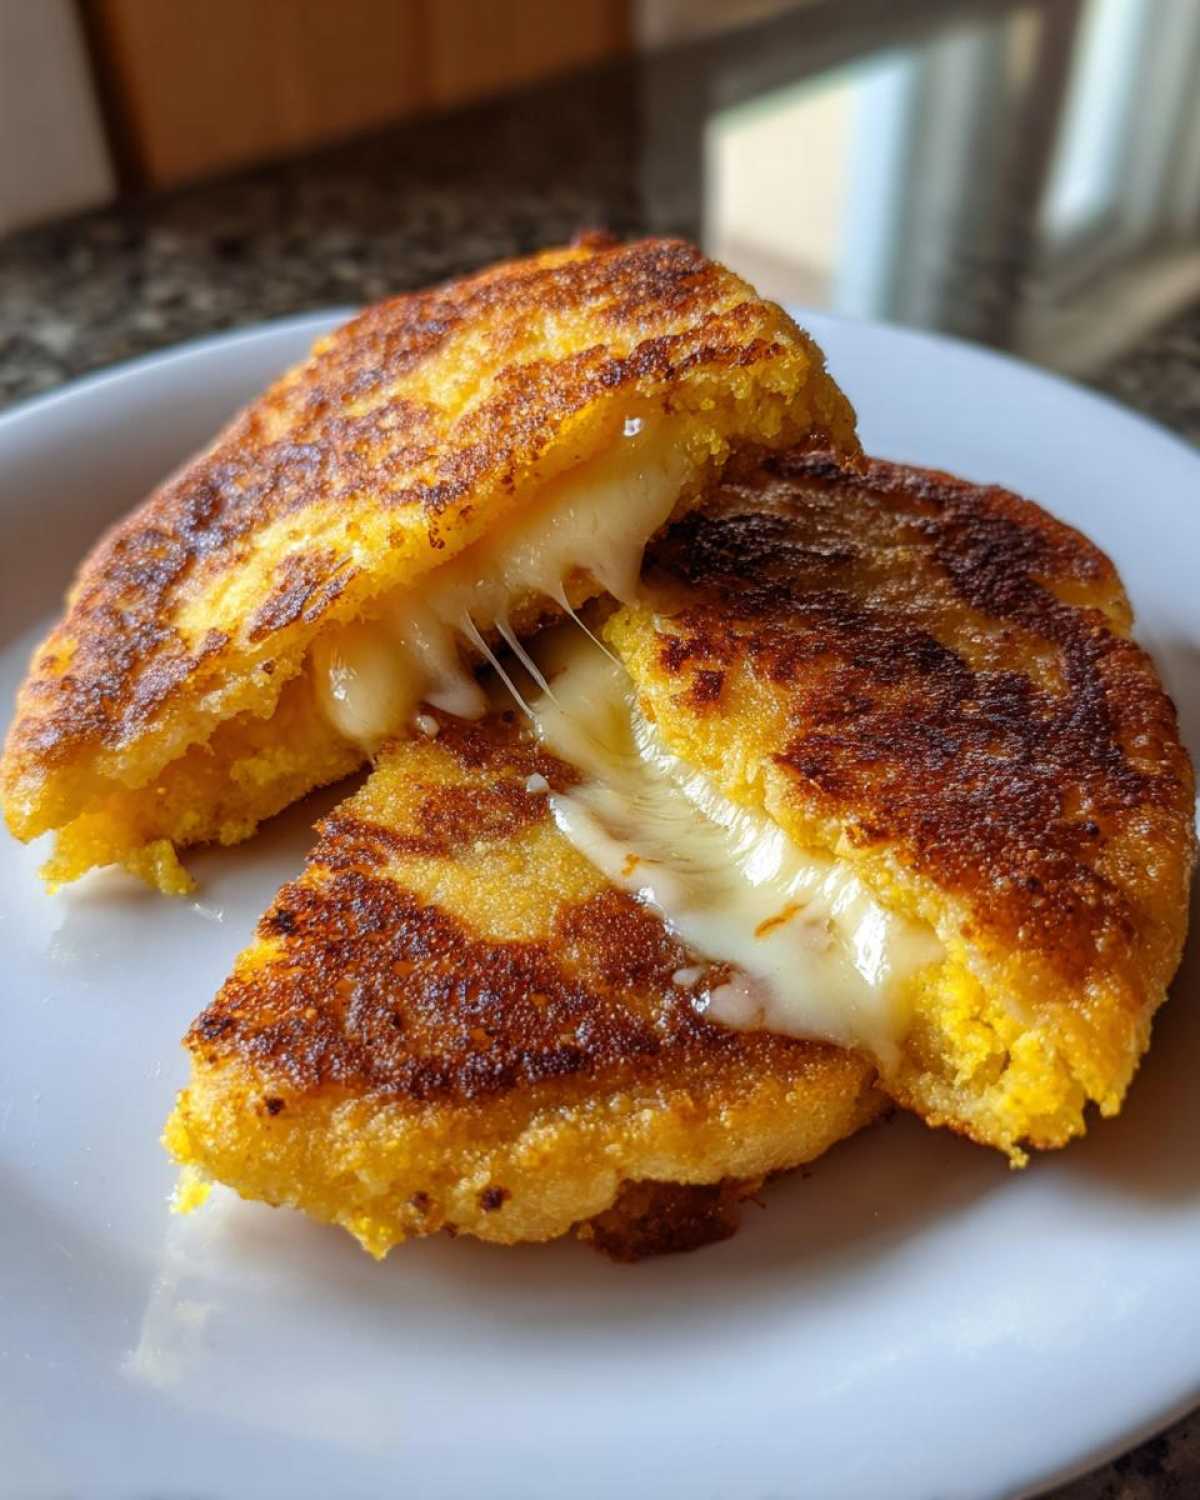
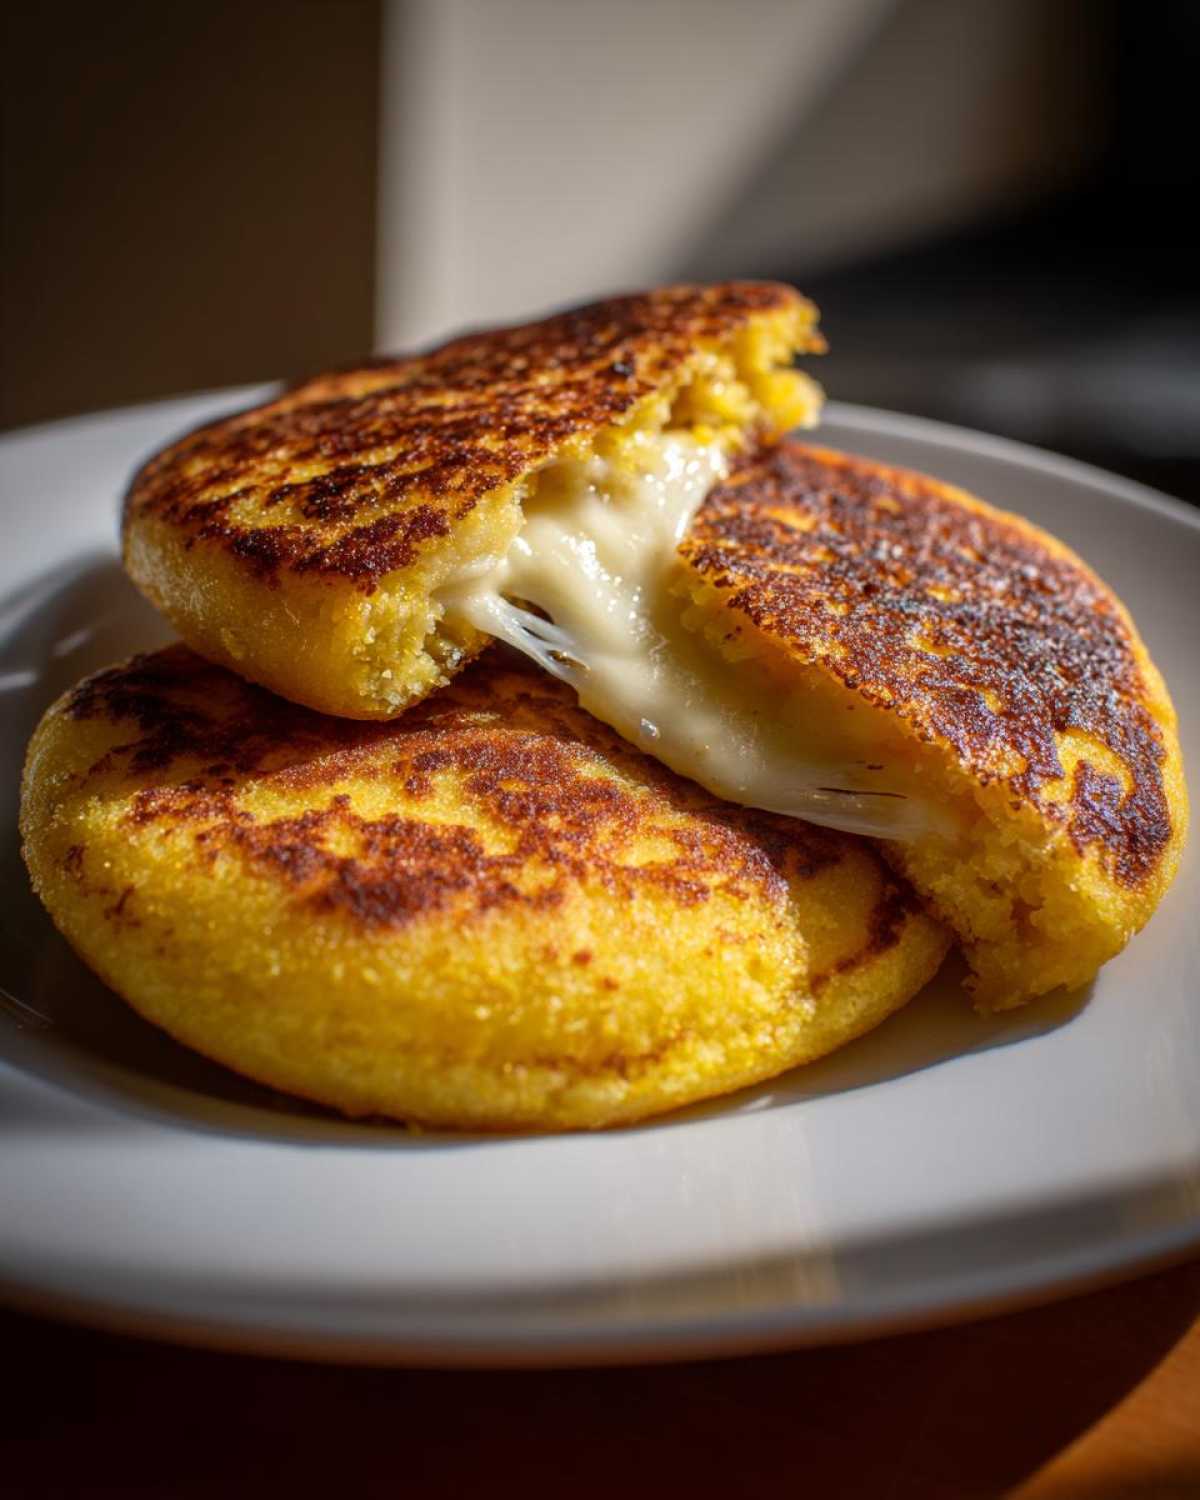
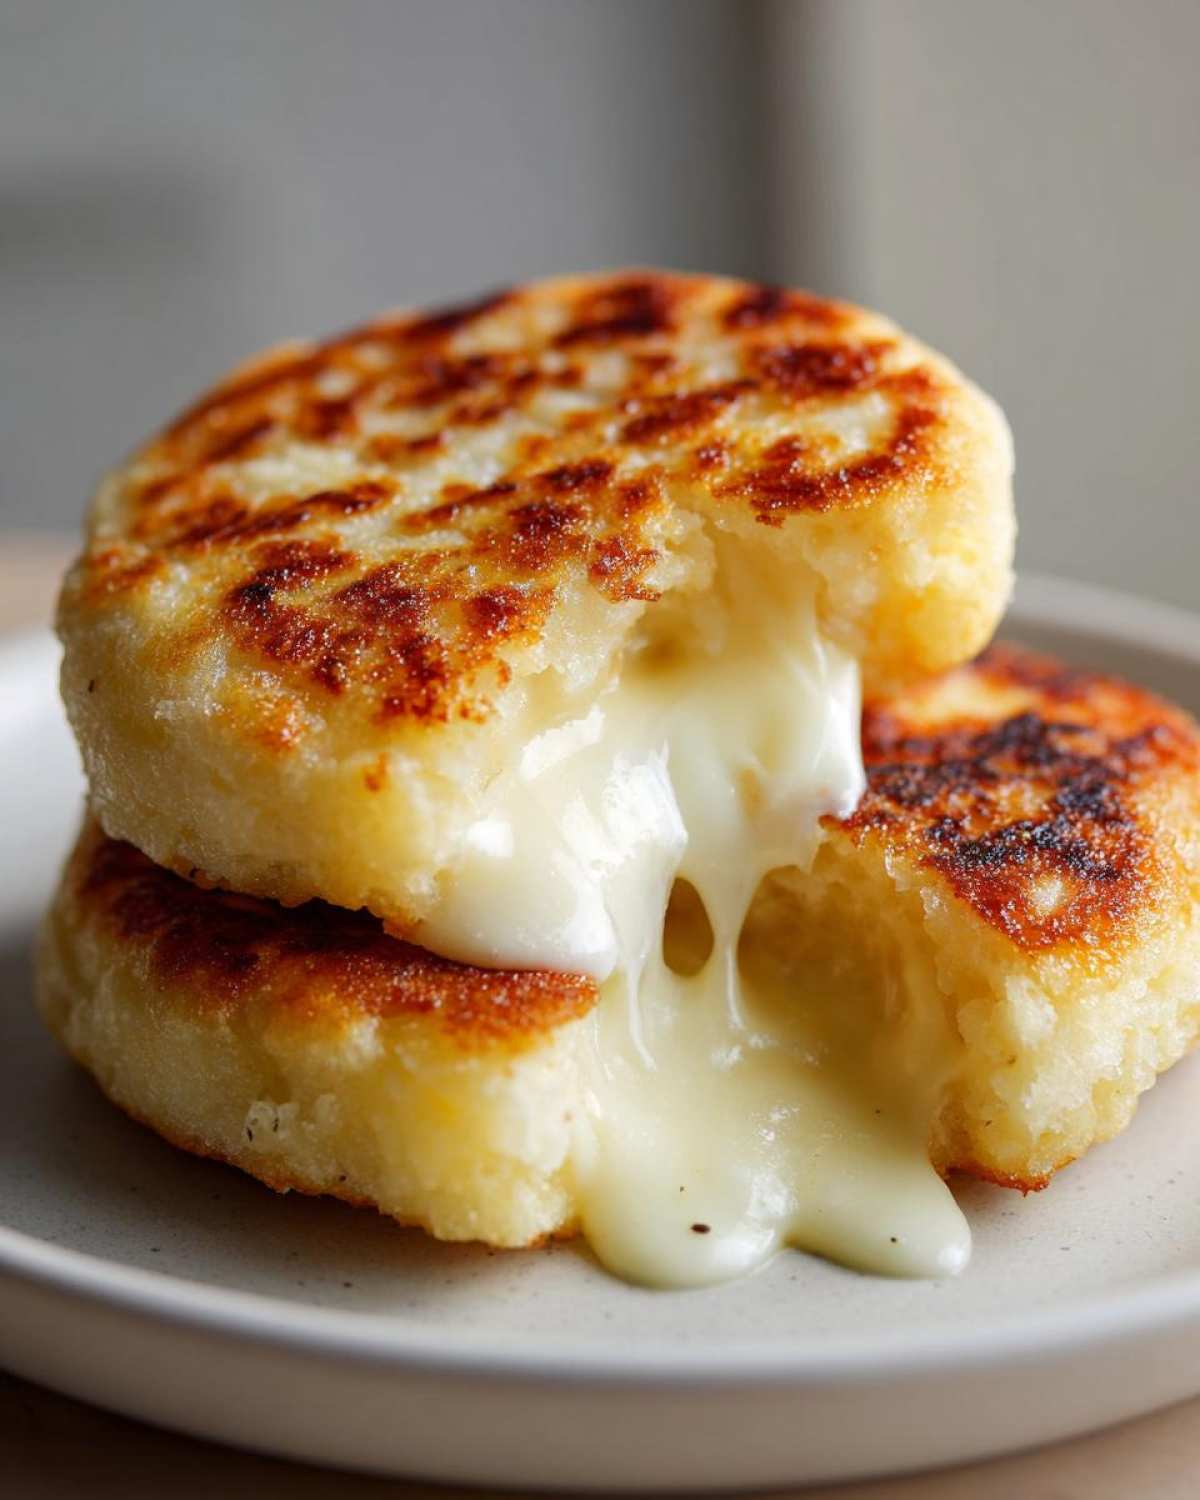
When I need total comfort food that’s quick, satisfying, and tastes like home, nothing beats a hot, freshly made Arepas Con Queso (Cornmeal Pockets). Seriously, if you haven’t mastered these yet, you are missing out on life! I remember my first batch—they were either doughy lumps or they puffed up and exploded cheese all over my stovetop. Oops! But I kept tweaking until I hit that perfect sweet spot: a crust that crackles when you bite it, giving way to warm, gooey cheese inside. This guide is my absolute best, no-fail way to make truly authentic Venezuelan and Colombian style arepas from scratch. Forget the store-bought stuff; we’re making them real!
Why This Homemade Arepas Recipe Delivers the Best Arepas Con Queso (Cornmeal Pockets)
Listen, there are a million ways to make these cornmeal pockets, but this method guarantees success every single time. Why? Because we focus on the fundamentals that the best South American home cooks swear by. Trust me when I say this detailed process is what separates a good arepa from a legendary one.
Here’s what you gain by following these exact steps:
- The Fluffy Interior: That magical 5-minute rest lets the cornmeal do its job right!
- No Leaks Guaranteed: I’ll show you the hand technique that seals the cheese in tight, preventing blowouts.
- Authentic Flavor Base: Using melted butter *in* the dough gives them that rich, slightly savory depth.
- Ultimate Crispy Shell: Two-stage cooking ensures a deep golden crust that can hold up to any topping.
If you’re looking for an Arepa recipe for beginners that yields impressive, restaurant-quality results, this is it. You’re going to nail the perfect Arepa texture on your very first try!
Essential Ingredients for Perfect Arepas Con Queso (Cornmeal Pockets)
Okay, let’s talk ingredients! The beauty of these Traditional Cornmeal Pockets is how few pantry staples you actually need. As long as you have the right kind of flour, you’re halfway there. You absolutely *must* use precooked white cornmeal—that’s what we call Masarepa. Regular cornmeal won’t soften correctly, trust me! We’re keeping things simple here, with just salt, warm water, and a touch of butter mixed right into the dough for flavor.
You’ll need about two cups of that magic corn flour for four big pockets. Don’t forget the butter needs to be melted before it goes in; it gets absorbed much better that way. For more simple meals, check out my recipe for Easy 5 Ingredient Corn Soup too!
What Cheese to Use for Arepas
This is where the magic happens for your Arepas Con Queso! You need a cheese that melts beautifully but doesn’t turn into total soup when it gets hot. My absolute favorite is a 50/50 blend of low-moisture mozzarella (for that fantastic pull) and a slightly firmer, saltier cheese like queso fresco or maybe Oaxaca cheese if you can find it. If you’re in a pinch, regular string cheese works surprisingly well because it’s firm enough not to escape, but it melts super creamy.
You want about 1.5 cups total. The key is shredding it yourself! Pre-shredded cheese has anti-caking agents that stop it from getting that perfect gooey texture inside your corn flour pockets with cheese.
How to Make Arepas Dough for Your Cornmeal Pockets
Alright, let’s get our hands dirty! Making the dough is the most important step if you want that amazing, crispy outside fluffy inside Arepas result. First, grab your warm water—it shouldn’t be hot, just comfortably warm—and dissolve your salt right into it. That’s step one!
Next, we add the Masarepa recipes flour slowly while stirring constantly. Keep stirring! Once it’s all combined, you have to respect the dough’s nap time. Seriously, let that mixture sit for about five minutes. This is non-negotiable; it lets the corn soak up every drop of water it needs. If you skip this rest, you’ll end up with a crumbly mess, and nobody wants that for their Homemade Arepas Recipe.
After resting, mix in your melted butter. Now, use your hands and knead it for a few minutes until it feels completely smooth. If your dough feels too dry and cracks when you press it, don’t panic! Just add water a teaspoon at a time until it feels right. If it’s sticking everywhere, add cornmeal a tablespoon at a time. This little adjustment is how we nail the consistency every time!
Achieving the Perfect Arepa Texture
Kneading is where you build trust in your dough. You’re looking for a consistency that reminds you of soft playdough—smooth, pliable, and it should comfortably hold its round shape without slumping over. When you press your thumb into it, it should leave a nice indentation but not stick to your skin. That smooth, uniform feel is what ensures you get that signature perfect Arepa texture inside once it’s cooked. If you can roll a ball between your palms and it stays perfectly round, you’ve won the dough battle! Check out some other ways to use this great flour over at my guide for Masarepa recipes!
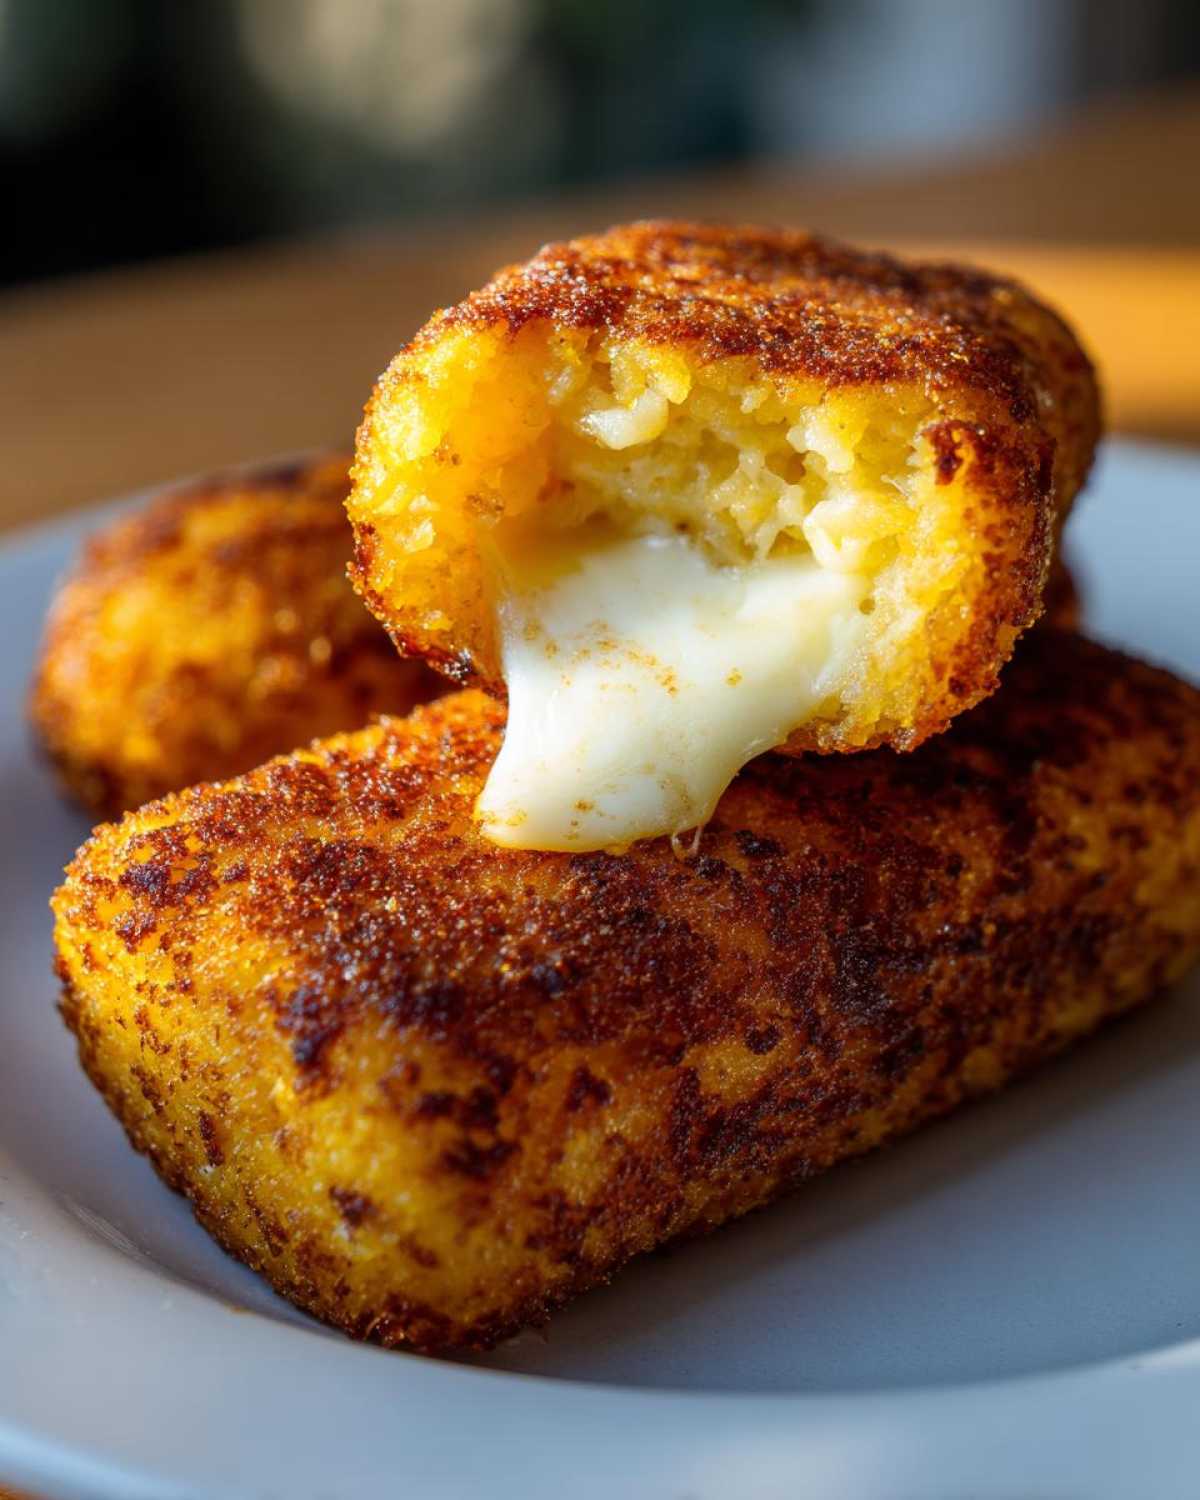
Stuffing and Sealing Your Arepas Con Queso (Cornmeal Pockets)
Okay, now that we have this beautiful, slightly soft dough, it’s time for the best part: stuffing them full of cheesy goodness! This is when your Cornmeal Pockets with Cheese really start to feel like a traditional meal. First things first, take your perfectly kneaded dough and divide it into 8 equal pieces. I like to weigh them out just to be sure, but eyeballing it works fine if you’re used to it. Roll each piece into a nice, snug ball.
Take one ball and gently flatten it between your palms until it looks like a little pancake, maybe half an inch thick. Don’t make it too thin, or it won’t hold the filling! Scoop about a tablespoon (or slightly more, if you’re feeling brave!) of your shredded cheese mixture right into the center of that pancake.
Here’s the critical step that keeps things tidy: Take a second dough disk and place it right on top of the cheese. Now, you need to use your fingertips to pinch the edges together firmly. Really work those edges until they are completely sealed. You want to make sure absolutely no cheese can peek out! I learned this the hard way; a leak means cheese hits the hot griddle and burns, and suddenly your beautiful Homemade Arepas Recipe smells a little smoky.
Once sealed, gently pat the whole thing back into a nice, uniform, round patty shape. Don’t press too hard after sealing, or you might force the cheese out the weak spots! If you’re looking for fun additions to try later, peek at my Arepas stuffing ideas, but for now, focus on that tight seal. These stuffed beauties are ready for the heat!
Cooking Arepas on a Griddle: Getting Crispy Outside Fluffy Inside Arepas
Get your griddle or heavy skillet nice and hot! We are going for that perfect duality—a deeply golden, crispy shell that contrasts beautifully with the molten cheese inside. This two-stage cooking method is my secret handshake for mastering Cooking Arepas on a griddle. First, brush your hot surface generously with melted butter—don’t skimp here; this fat is what gives you that signature crust flavor!
Place your sealed Savory Stuffed Corn Cakes onto the buttered surface. You want medium heat to start. Let them cook for about 5 to 7 minutes per side. You’re looking for that lovely deep golden-brown color to develop. Don’t poke them too much during this initial stage; let the heat build that crust up!
Once both sides have a nice crust, you need to drop the heat down to medium-low. This is the crucial second stage. Keep turning them every few minutes for another 5 to 10 minutes. This lower, slower heat allows the warmth to travel deep inside where the cheese is waiting, ensuring it gets perfectly gooey and stretchy without burning the exterior. When they sound slightly hollow when tapped and feel firm all over, they are done! I’ve poured my heart into making this technique foolproof, you can see even more pointer on this over at my guide to Cooking Arepas on a griddle!
Expert Tips for Making Amazing Arepas Con Queso (Cornmeal Pockets)
Even with the best recipe, sometimes little kitchen hiccups happen, right? I’ve learned a few extra tricks along the way that have taken my Best Arepas Con Queso from good to truly spectacular. These are the little things I always remember that make the difference between a happy morning and a slightly messy one!
Remember how I mentioned the dough adjustments? That’s rule number one: always taste and feel your dough before you seal anything. If it seems too dry and won’t hold together, add water a tiny teaspoon at a time. If it’s wet and leaving residue all over your hands, add cornmeal one tablespoon at a time. It’s about listening to the dough—it tells you what it needs!
Now, let me tell you about the great cheese escape of ’21. I was rushing, trying to make a huge batch, and I didn’t pinch the edges well enough on about three of them. Sure enough, that mozzarella found every tiny crack and burst out onto the hot griddle. Smoke alarm blaring! Since then, my secret is sealing them, pressing the seams down firmly, and then gently patting the whole thing back into shape. If you’re worried about leakage, you can even place the sealed pockets on a baking sheet and pop them in a 350°F oven for just 5 minutes *before* they hit the hot griddle. That little bit of ambient heat helps set the seal. You can find more ways to perfect your technique over at my guide to the Best Arepas Con Queso!
Also, don’t forget that final crisping step I mentioned in the cooking section. If you take them off the griddle and they still seem a little pale, throwing them in a warm oven for five minutes afterward gives you that next-level crunch you can’t get from the skillet alone. It’s a little extra step, but wow, is it worth it for that ultimate crispy exterior!
Serving Suggestions for Traditional Cornmeal Pockets
Nothing beats pulling these piping hot Arepas Con Queso straight off the griddle! Honestly, they are amazing all by themselves, but the way they pair with simple, fresh accompaniments really takes them to the next level. This is why they are such a staple in so many South American breakfast ideas.
First off, don’t overthink it. A simple smear of good quality salted butter when they’re still steaming hot is pure perfection. If you want something creamier, a dollop of nata—which is just thick, slightly tangy cream, similar to sour cream—is traditional and cools down the heat perfectly. A thick slice of creamy avocado on the side is a must-have for me. The salty cheese, the warm corn, and the lush avocado? Heavenly! If you want more ideas for hearty starts to the day, check out my favorite South American breakfast ideas!
Variations and Arepas Stuffing Ideas Beyond Cheese
Listen, Arepas Con Queso is a classic for a reason—that gooey cheese pull is unparalleled! But once you master the dough, you unlock a whole world of possibilities. We call these other combinations Arepas stuffing ideas, and they turn this simple pocket into a full-on meal any time of day. You don’t always need cheese to make these cornmeal cakes shine!
Once you master the sealing technique—remember, tight edges are everything!—you can start experimenting. I love having a few different fillings ready in the fridge, so I can quickly stuff and cook a batch depending on what I’m craving. For some amazing savory inspiration, you absolutely have to check out my guide on Savory Stuffed Corn Cakes!
Here are a few no-fail alternatives to try next time you make your Venezuelan Arepas Recipe:
- Shredded Chicken and Avocado (Reina Pepiada Inspired): Mix pre-cooked, shredded chicken with a little bit of mayo, lime juice, and finely chopped cilantro. If you want to keep it cheesy, add a sprinkle of queso blanco!
- Black Beans and Sweet Plantain: This is a wonderfully sweet and savory combo popular in Colombia. Mash some seasoned black beans lightly and mix with small, caramelized pieces of sweet plantain (maduros).
- Pulled Pork and Coleslaw: A slightly Latin-fusion twist! Use seasoned slow-cooked pulled pork and pile it in with a little bit of crunchy, vinegary slaw for texture.
No matter what you stuff inside, the process of making the dough and getting that nice crust remains the same. It’s all about that perfect shell holding something delicious inside!
Frequently Asked Questions About Arepas Con Queso
I know tackling a new recipe like this can bring up a few questions, especially when it comes to achieving that perfect, authentic result. Don’t worry! We’ve all been there. Here are the most common things people ask when they are learning How to Make Arepas at home. If you’re new to this, these answers should make you feel like an expert preparing for your first batch of Arepa recipe for beginners!
Can I bake my Arepas Con Queso instead of griddling?
Yes, you absolutely can, and it’s a great hands-off option if you’re making a huge batch! If you bake them, you’ll typically place the sealed pockets on a lined baking sheet and cook them in a 375°F oven for about 20 to 25 minutes. The difference, though, is texture. Baking them often results in a softer, dryer exterior, more like a baked corn bun. Our favorite method is the griddle because it gives you that hard, beautifully browned, and crispy shell you just can’t replicate in the oven alone. The oven is great for finishing them off once they’ve been griddled, but if you bake solo, expect less crunch!
Are Arepas gluten free corn pockets?
That is one of the best parts about this dish! Yes, these wonderful gluten free corn pockets are naturally gluten-free because they are made exclusively with precooked cornmeal, or Masarepa. There are no wheat flours involved in the traditional recipe at all! Just make sure when you buy your cornmeal that the package specifically states it contains *only* corn, as some specialty flours might have additives, but if you buy standard white Masarepa, you are safe to go!
What is the best way to seal the edges really tightly?
This is crucial if you want to avoid those cheesy blowouts we talked about! Once you have your two disks—one cheese-filled and one plain—stacked, use your index finger and thumb to firmly pinch the sides together, almost like crimping a pie crust, but gentler. After you’ve gone all the way around, take the entire stuffed patty and gently pat it between your palms until it’s one smooth circle again. This second smooth-patting motion forces any air out and ensures the seam bonds completely. That tight seal is the secret to beautiful, unbroken Colombian Arepas Recipe pockets!
How soon after cooking should I eat my Arepas Con Queso?
Immediately! Seriously, these are not the type of food to eat lukewarm. The entire appeal hinges on the combination of that shatteringly crisp exterior meeting the molten, stretchy cheese inside. As soon as they come off the griddle, brush them with that last bit of butter and give them to your family right away. They lose that fantastic texture quickly as they cool down, becoming a bit chewier. These are meant to be a vibrant, hot cornerstone of your South American breakfast ideas!
PrintAuthentic Arepas Con Queso (Cornmeal Pockets)

Make classic Arepas Con Queso using precooked cornmeal. This recipe guides you through making the dough, preparing the cheese filling, stuffing, and cooking them until they are crispy outside and fluffy inside.
- Prep Time: 15 min
- Cook Time: 20 min
- Total Time: 35 min
- Yield: 4 servings
- Category: Breakfast
- Method: Griddling
- Cuisine: Venezuelan/Colombian
- Diet: Vegetarian
Ingredients
- 2 cups precooked white cornmeal (masarepa)
- 2 1/2 cups warm water
- 1 teaspoon salt
- 2 tablespoons unsalted butter, melted (plus extra for cooking)
- 1 1/2 cups shredded white cheese (such as mozzarella, queso fresco, or a mix)
Instructions
- In a large bowl, mix the warm water and salt until the salt dissolves.
- Gradually add the cornmeal to the water mixture, stirring constantly with your hands.
- Let the mixture rest for 5 minutes to allow the cornmeal to fully absorb the water.
- Add the melted butter to the dough. Knead the dough for about 3 to 5 minutes until it is smooth and no longer sticky. The dough should hold its shape when pressed.
- Divide the dough into 8 equal portions. Roll each portion into a smooth ball.
- Flatten each ball into a disk about 1/2 inch thick.
- Place about 1 tablespoon of the shredded cheese in the center of one dough disk.
- Place a second dough disk on top of the cheese. Gently press the edges together to seal the cheese inside, forming a stuffed patty. Ensure the seal is tight to prevent cheese leakage during cooking.
- Heat a griddle or heavy skillet over medium heat. Lightly brush the surface with melted butter.
- Place the stuffed arepas on the hot griddle. Cook for about 5 to 7 minutes per side, until they develop a golden-brown crust.
- Reduce the heat to medium-low. Continue cooking for another 5 to 10 minutes, turning occasionally, until the outside is deeply golden and you can feel the cheese inside is fully melted.
- Remove from the griddle and serve immediately.
Notes
- If the dough seems too dry, add water one teaspoon at a time. If it is too wet, add cornmeal one tablespoon at a time.
- For a crispier exterior, you can finish the cooked arepas in a 350°F oven for 5 minutes after griddling.
- Use a firm, slightly salty cheese that melts well for the best flavor.
Nutrition
- Serving Size: 1 arepa
- Calories: 280
- Sugar: 1
- Sodium: 350
- Fat: 12
- Saturated Fat: 7
- Unsaturated Fat: 5
- Trans Fat: 0
- Carbohydrates: 35
- Fiber: 2
- Protein: 10
- Cholesterol: 30


Comments are closed.