

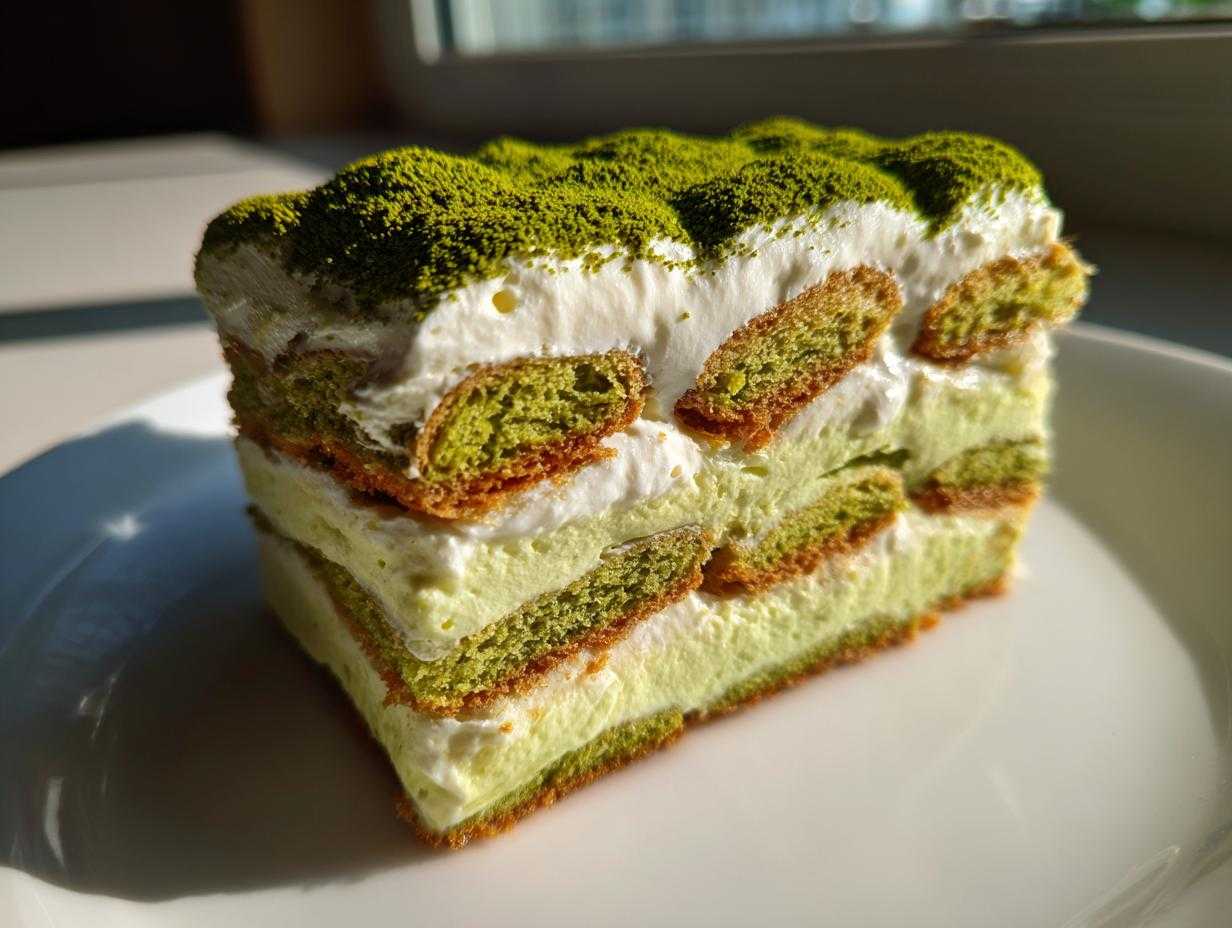
Oh my gosh, if you thought Tiramisu was only for coffee lovers, prepare to have your mind blown! I’m obsessed with fusion desserts that take two amazing traditions—in this case, Italian richness and Japanese earthiness—and just smash them together successfully. Trust me, getting that perfect creamy, airy texture while balancing the vibrant bitterness of green tea is a real art form, but I think I finally nailed it. This isn’t just any green tea dessert; this is the Matcha Tiramisu with Ladyfingers that will make everyone ask for the recipe. I spent weeks trying to figure out exactly how long to dip those Savoiardi cookies. Too long, and you weep a soggy mess; too short, and it’s just dry biscuits! But don’t worry, I’ve mapped out the exact technique so you get that perfect texture every single time. If you want a refresher on the classic version first, check out my Classic Tiramisu Italian Dessert Recipe!
Why This Matcha Tiramisu with Ladyfingers is Your New Favorite Dessert
What’s not to love about this gorgeous creation? We’re taking something familiar and giving it a huge, beautiful upgrade. Honestly, the visual impact alone makes it worth the effort—that almost neon green against the dark brown dusting is just stunning!
- The flavor is exactly right: that earthy quality of high-quality matcha cuts through the richness of the mascarpone perfectly.
- It’s completely no-bake, which means less stress when you’re putting together a big dinner party.
- Those classic ladyfingers soak up just the right amount of green tea base, giving you that signature melt-in-your-mouth texture.
Gathering Ingredients for Your Matcha Tiramisu with Ladyfingers
Okay, this is where we build the foundation. Don’t skimp on the quality here, especially the green tea! The flavor actually sings through, so you want good stuff. I learned pretty quickly that using culinary-grade matcha meant my dessert tasted a little dusty, so now I only grab ceremonial grade for this recipe. It makes a huge difference in both the color and the incredible, subtle flavor profile you want in an Authentic Matcha Tiramisu. You’ll need a few core items, and make sure your dairy is COLD before you start whipping!
If you are interested in other ways I use fantastic matcha, you should definitely check out my Matcha Green Tea Ice Cream Recipe!
For the Creamy Matcha Mascarpone
This is the heart of the dessert, so everything needs to be perfectly chilled before mixing so it whips up beautifully and holds its shape.
- 6 large egg yolks (these get cooked gently, so don’t sweat it!)
- 3/4 cup granulated sugar
- 1 1/2 cups heavy cream, super cold
- 16 ounces mascarpone cheese, also cold
For the Matcha Soak and Assembly
This section includes how we turn the ladyfingers into perfect green tea sponges.
- 1 1/2 cups strong brewed matcha tea, cooled completely
- 1/4 cup white rum OR vanilla extract (seriously optional, but the rum adds a lovely warmth!)
- 1 package (7 ounces) standard ladyfingers (you need those classic Savoiardi cookies!)
- 2 tablespoons high-quality matcha powder, strictly for dusting the top
How to Make Matcha Tiramisu Step-by-Step Instructions
Alright, gather ’round! This is where the magic happens, and contrary to what you might think about making authentic Italian desserts, this is mostly assembly, not baking. That means we move fast, but we move gently! We have to treat those eggs with respect and those ladyfingers with extreme care. If you want the recipe reference handy while you work, you can check out my Tiramisu Truffles Recipe for general technique ideas.
Preparing the Matcha Soak and Zabaione Base
First things first: we need that gorgeous soaking liquid ready to go. Whisk your cooled, strong brewed matcha tea in a shallow bowl—I recommend adding that splash of rum or vanilla now, too. Get it nice and combined.
Now for the yolks—this is technically creating a zabaione, which makes the cream base safe and gives it that rich color. Set a heatproof bowl over a saucepan of barely simmering water, watch carefully so the water doesn’t touch the bottom of the bowl! Whisk those egg yolks and sugar constantly, like you mean it, until the mixture gets pale, thick, and hits about 160°F. You definitely need a thermometer for this part to make sure you’re safely warming them up, not scrambling them! Take it off the heat right away and let it cool down a bit before moving on. No one wants warm mascarpone!
Creating the Creamy Matcha Tiramisu with Ladyfingers Filling
This step requires a soft touch! In a totally separate bowl, whip your cold heavy cream until it holds stiff peaks. We want air in there! Set that aside for a minute. Remember that slightly cooled yolk mixture? Whisk that gently into your cold mascarpone cheese until it’s smooth. Pay attention here: keep mixing only until it’s smooth, stop right there. Overmixing mascarpone is how you get soup!
Now, the folding. Take your beautiful whipped cream and fold it into the mascarpone base in about two separate additions. Use a spatula and go slow, cutting down the center and scooping up. We are delicately incorporating air here, not beating it back down. You want a light, airy, bright green cloud of yumminess.
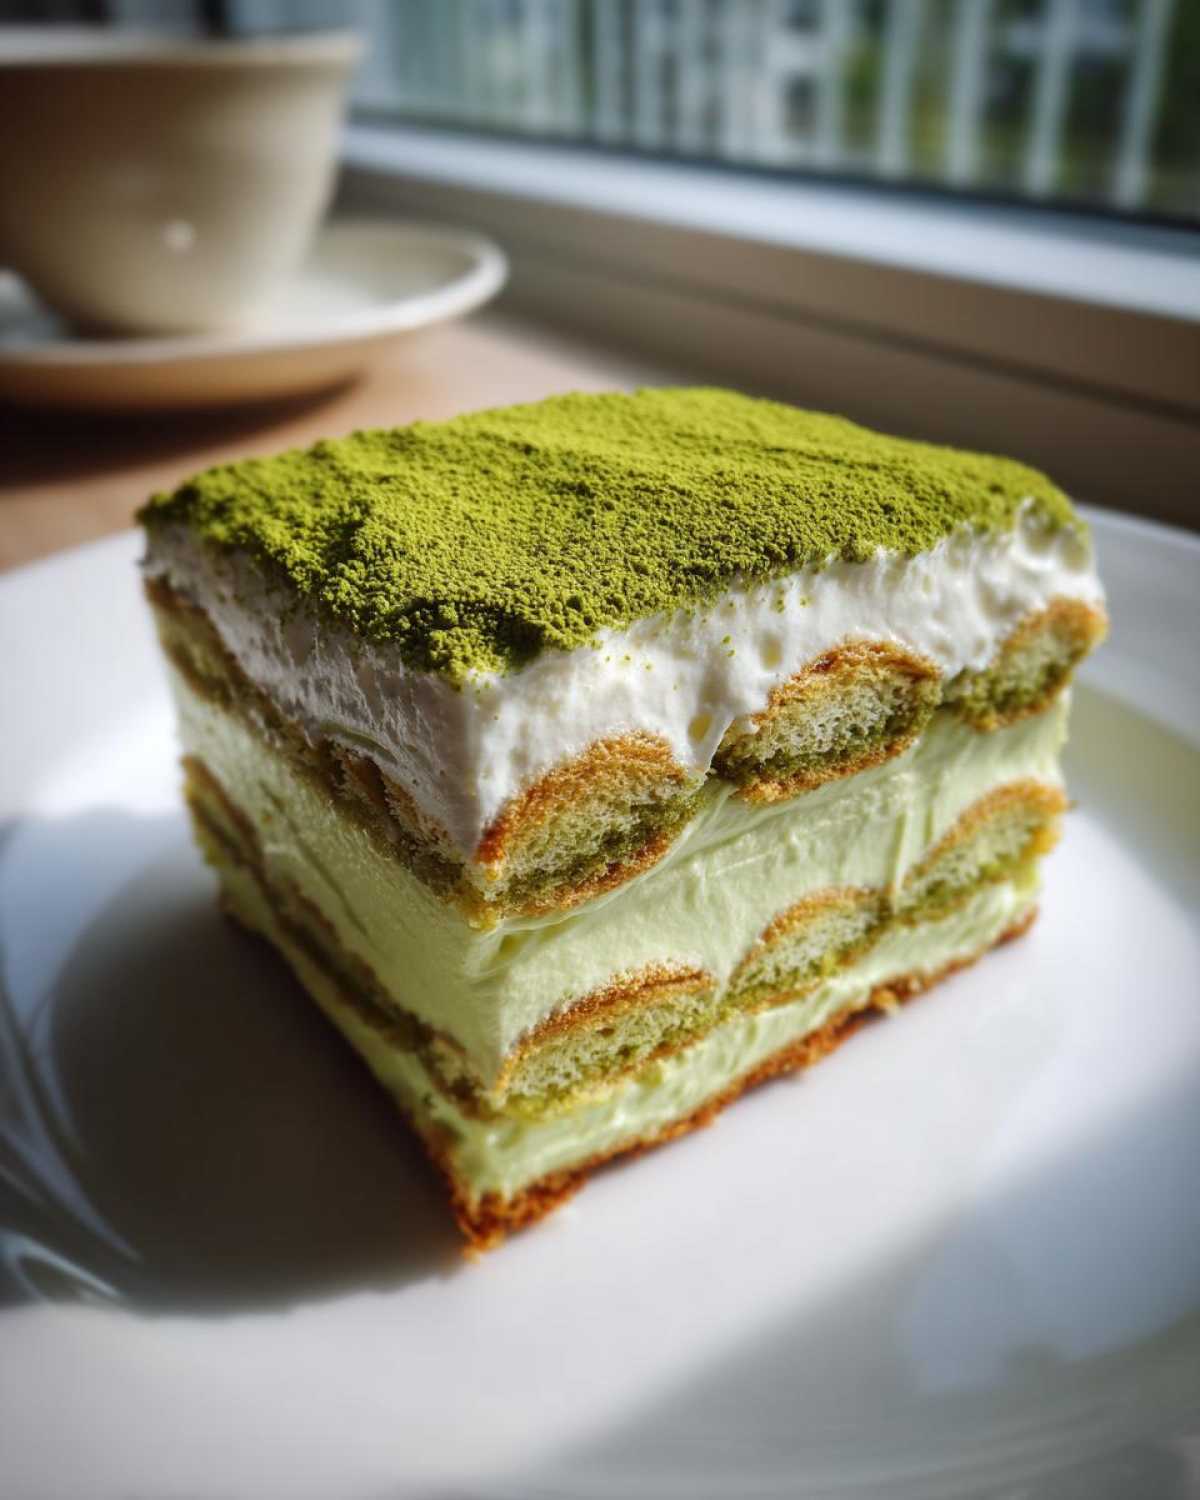
Assembling Your Layered Matcha Tiramisu Dessert
Time to meet those ladyfingers! You need a shallow dish ready. Take one ladyfinger and dip it quickly into that matcha liquid—I mean one second per side. Seriously, if you stop to think about it, it’ll be too late! If they get too wet, your whole dessert will weep green puddles. We want them just slightly softened.
Lay those dipped cookies in a snug single layer across the bottom of your 8×8 dish. Then, grab half of your glorious cream and spread it evenly right over the top. Repeat the process: another fast dip and arrange layer two of the ladyfingers on top of the cream. Finish it off by spreading the rest of the matcha mascarpone cream right over the top. Make it pretty and even!
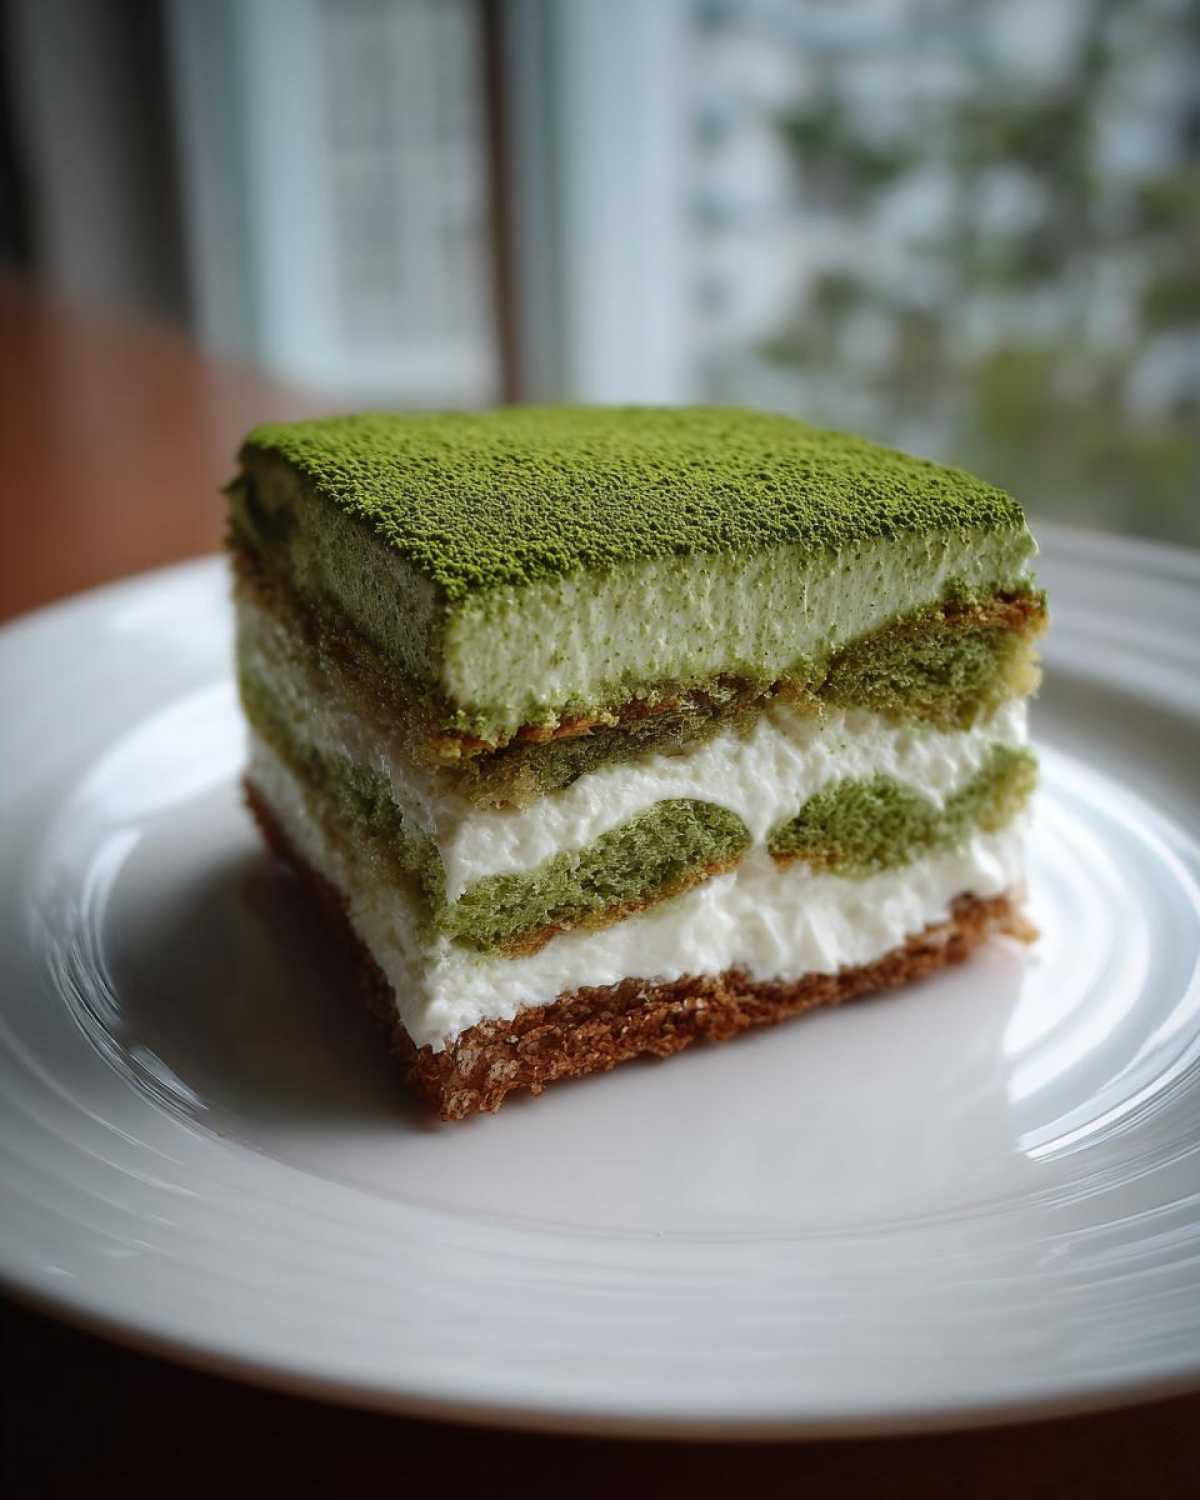
Chilling and Finishing the **Japanese Tiramisu with Ladyfingers**
Now comes the hardest part: waiting. You need to cover the dish tightly with plastic wrap and move it to the fridge. It needs a minimum of six hours to set up properly, but I always tell people: make it the night before! It tastes so much better when all those flavors marry overnight.
When you are ready to serve this showstopper, pull out your fine-mesh sieve. Dust the entire top generously with that last 2 tablespoons of matcha powder. The dark green contrast against the pale cream is your final presentation flourish. Slice it up, and enjoy the best Japanese Tiramisu with Ladyfingers you’ve ever had!
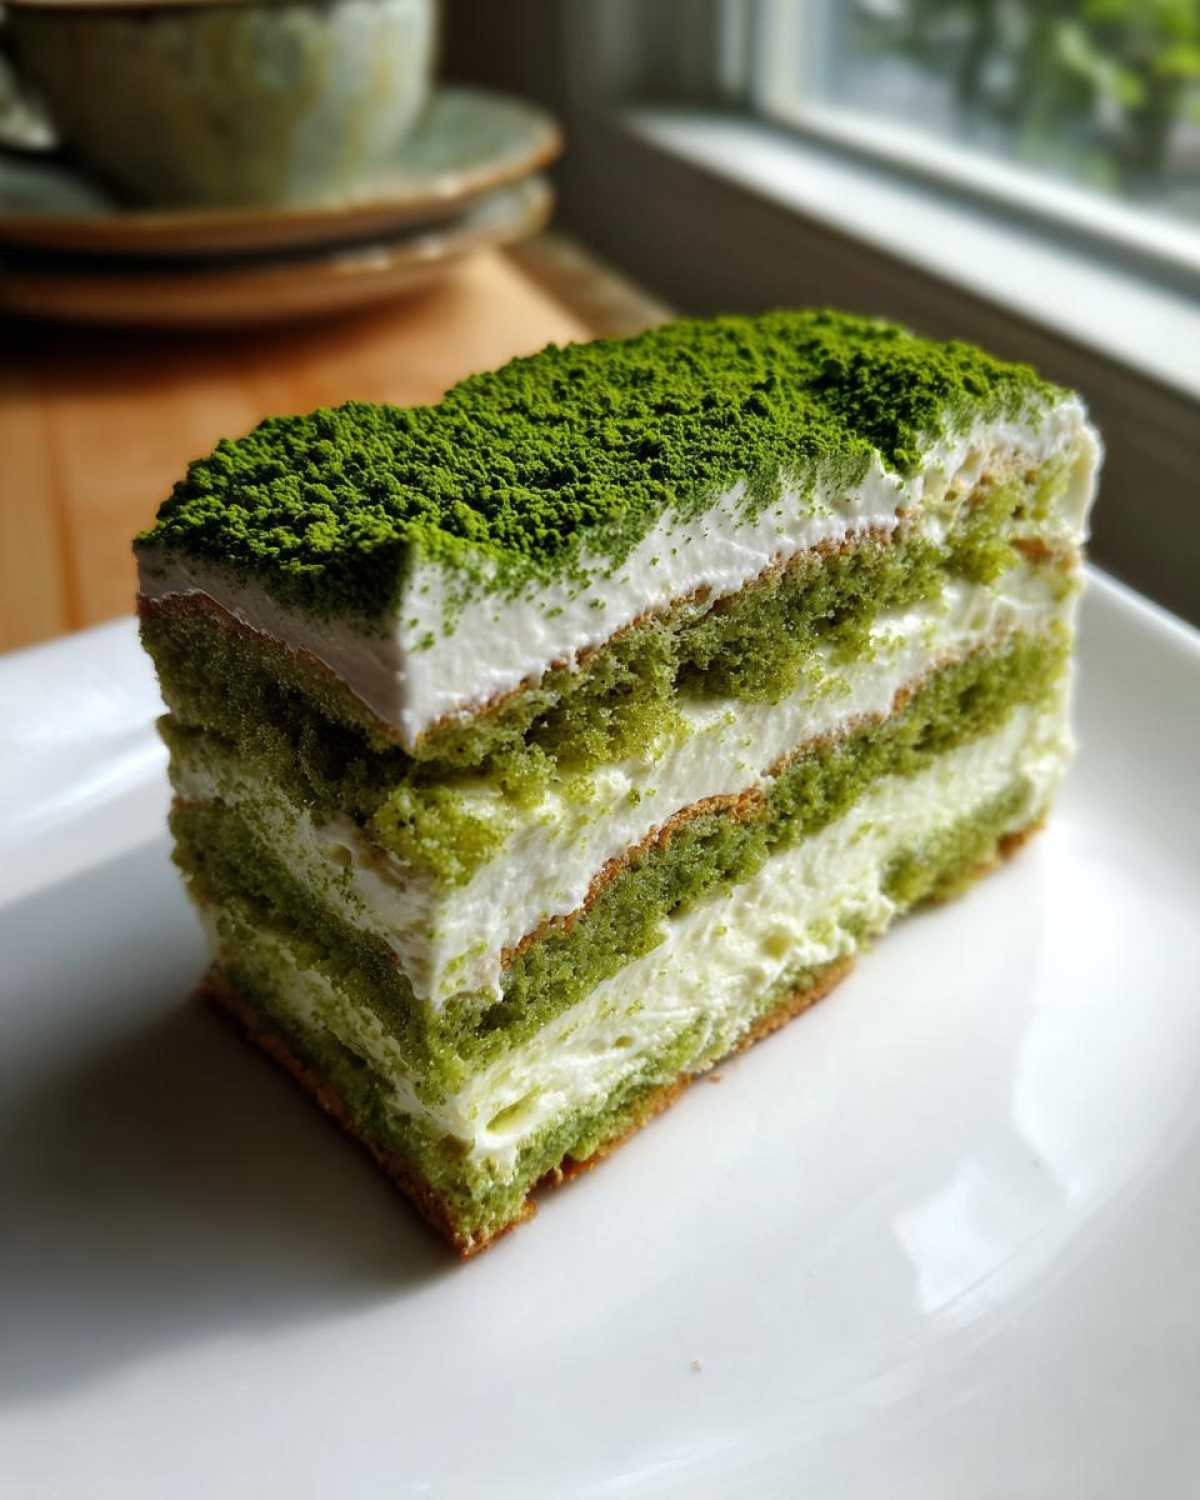
Tips for the Best Authentic Matcha Tiramisu Results
If you want this to taste like something you’d pay top dollar for at a fancy parlor, you have to respect the ingredients, plain and simple. My biggest piece of advice for any matcha green tea ice cream recipe or layered dessert is the quality of the powder—use ceremonial grade if you can swing it. It’s less chalky and the green is way brighter!
Also, temperature matters so much here. Keep that mascarpone and heavy cream as cold as possible right up until you start mixing, especially when folding in the whipped cream. If things start getting warm, the cream won’t hold the air, and you end up with a flat dessert instead of a lofty one.
And seriously, take my advice on the dipping! I know it seems fast, but those ladyfingers soak up liquid like little sponges. A quick flash dunk for maybe one second on each side prevents that watery texture that ruins a Tiramisu after it chills overnight. It’s those little details that make the difference between good and amazing!
Ladyfinger Tiramisu Variations and Substitutions
You know me, I love to stick to the original, but sometimes life happens, or maybe you just need to bake for someone with specific dietary needs! The great news is that this Matcha Tiramisu with Ladyfingers is surprisingly versatile. We talked about the traditional method using cooked egg yolks, which gives us that incredible richness, but if you’re hesitant about using raw or even gently cooked eggs, we have a perfect workaround.
If you need an egg-free approach for this Creamy Matcha Mascarpone dessert, don’t even worry! You can absolutely skip the yolk and sugar cooking stage. Just take one cup of sweetened condensed milk—yes, the canned stuff!—and whisk that right into your cold mascarpone cheese instead of the egg mixture. Then fold in your whipped cream as usual. It makes the cream a little sweeter and definitely denser, but it still sets up beautifully in the fridge for a fantastic result.
What about the cookies themselves? Since the primary request here is for the real deal using Savoiardi, I haven’t tested many swaps, but I know there are gluten-free ladyfingers available now. If you use those, just be even *more* careful with the dipping time, because I bet they crumble way easier than the traditional Italian ones! You definitely want to test one batch before serving a crowd. This recipe is all about that beautiful layered structure, so just make sure whatever sponge you use can handle that quick soak!
Storing and Reheating Your Homemade Matcha Tiramisu
This Homemade Matcha Tiramisu is truly a dessert that gets better with age—well, up to a point, anyway! Once you’ve finished assembling that beautiful layered dessert, cover it tightly with plastic wrap. I mean really seal that container or press the wrap right against the top layer so it doesn’t pick up any fridge smells. You absolutely must keep it refrigerated because of the mascarpone and eggs.
The big question is storage time. It needs that 6-hour chill minimum, but honestly, it’s spectacular on Day Two. It will keep beautifully for three to four days in the fridge. Now, about reheating? Absolutely not! This is a creamy, chilled, no-bake cake, and heat would turn that gorgeous mascarpone filling into a soupy disaster almost instantly. Enjoy it cold, straight from the fridge!
Serving Suggestions for This Layered Matcha Dessert
When you finally pull this stunning Layered Matcha Dessert out of the fridge after its long nap, you want to serve it right! Presentation is everything, especially when you’ve worked hard on getting that vibrant green color, so handle it gently. Before you even think about cutting, grab a large, sharp knife and quickly run it under hot water. Wipe the blade bone-dry before making your first slice. This simple trick warms the knife just enough so it glides right through the creamy layers without dragging the filling up messy.
Wipe the knife clean again between major cuts. This keeps your layers looking sharp, like beautiful little ribbons of green and white. If you’re trying to serve a crowd, I usually aim for a square cut, nice and tidy, aiming for about 8 servings depending on how rich everyone is feeling!
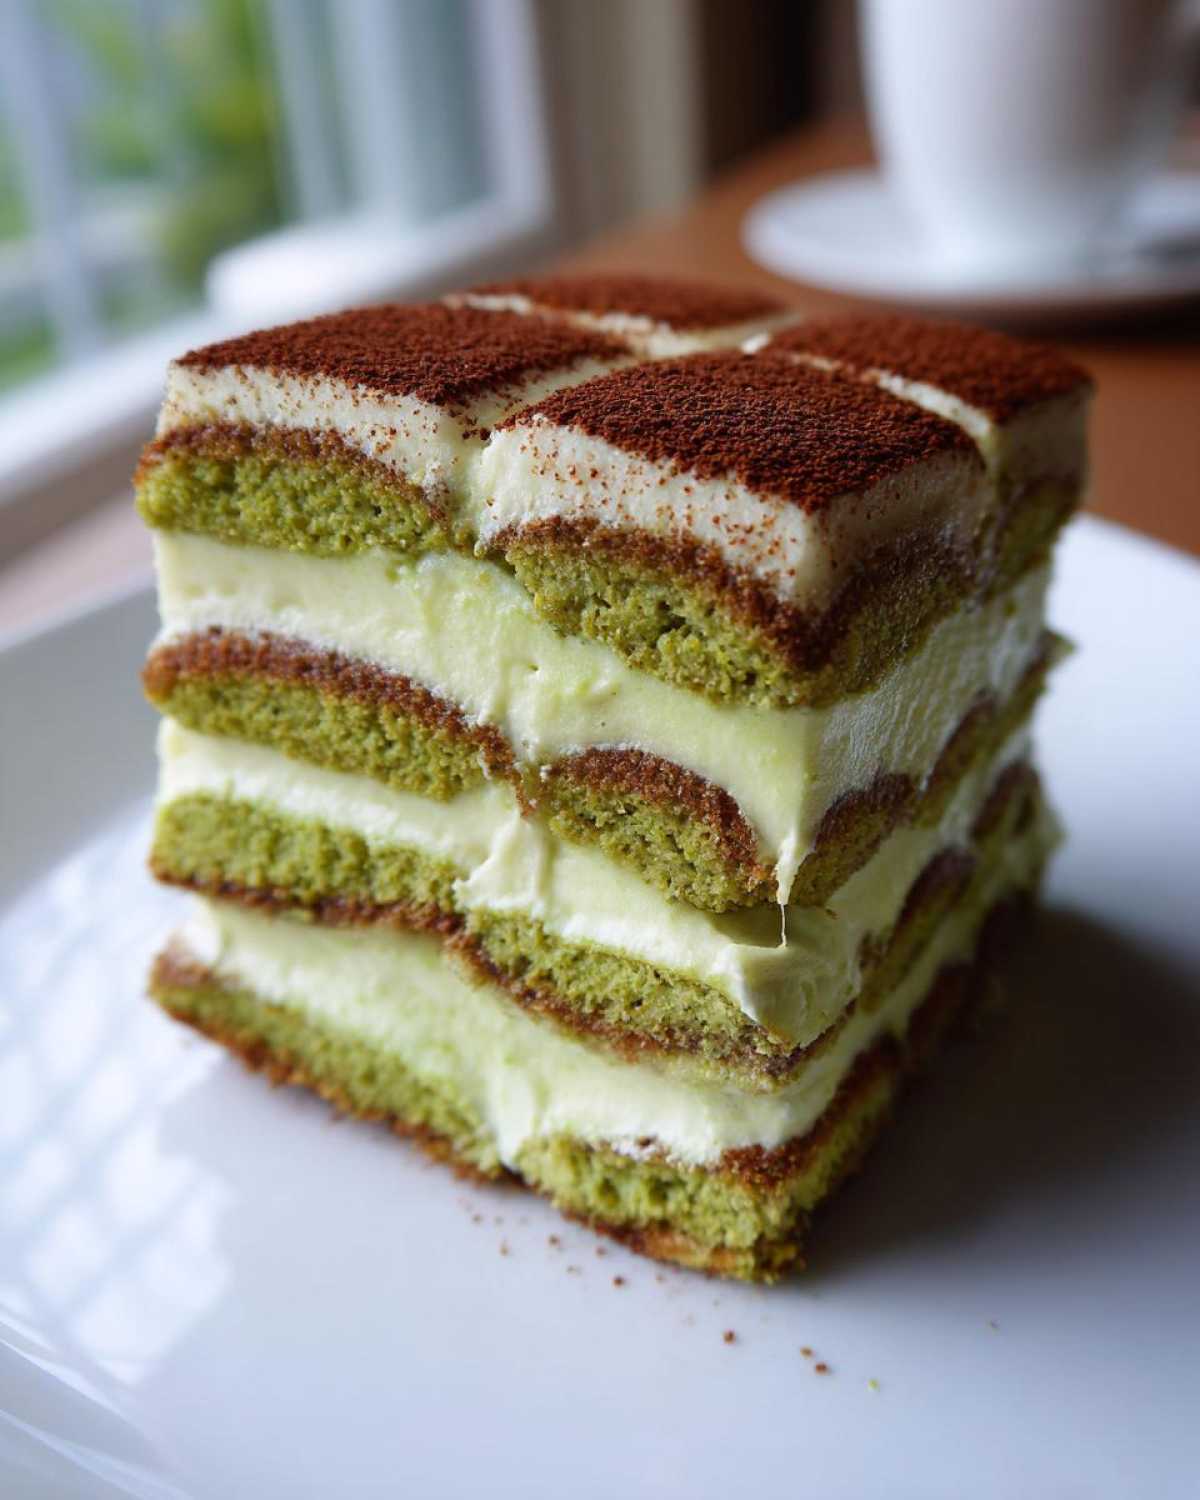
For pairings, since matcha has that slightly bitter, earthy base, you want something that complements it without overwhelming that delicate tea flavor. Forget heavy chocolate sauce here; we want lightness!
- Fresh fruit is my absolute favorite partner. Think strawberries or raspberries—the slight tartness from the berries plays so nicely against the creamy sweetness.
- You could dust the plate itself with just a tiny ring of extra matcha powder for a professional look, or maybe a few slivers of white chocolate!
- To drink? Honestly, this Green Tea Tiramisu Dessert is incredible with a strong, black iced coffee, or if you’re feeling fancy and want another layer of flavor in your drink, try making my Iced Brown Sugar Latte—the caramel notes are divine alongside the tea!
The key is letting the Tiramisu shine. It’s already rich and complex, so keep the accompaniments minimal and fresh!
Frequently Asked Questions About Matcha Tiramisu with Ladyfingers
I knew you’d have questions! When you’re messing with a classic like Tiramisu and merging it with something as distinct as matcha, people always want to make sure they get the texture and color just right. Don’t stress! These little details are what turn a good dessert into an amazing one, and I want you to succeed!
Can I make this Green Tea Tiramisu Dessert without alcohol?
Absolutely, yes! If you’re not a fan, or if you are serving this beautiful Green Tea Tiramisu Dessert to anyone who avoids alcohol, you can totally skip the white rum. It really is just there to add a tiny bit of aromatic depth, which is nice when paired with the coffee in a traditional recipe. For this version, which already has so much flavor from the tea, feel free to just substitute the rum with an equal amount of pure vanilla extract. Or, honestly, you can skip it altogether! The matcha flavor will still shine through brilliantly.
What is the best way to prevent my Ladyfinger Tiramisu from getting watery?
This is the #1 fear when making any Tiramisu with Ladyfingers, and I cannot stress this enough: the dip must be lightning fast! Remember, we’re using tea, which is water-based, so those cookies will dissolve if you let them sit. I literally dip one side down, flip immediately for maybe half a second on the other side, and pull it out. It should still feel slightly dry in the center. If it feels saturated when you lay it down, it’s going to weep later.
Tip number two for keeping your Ladyfinger Tiramisu firm is making sure your mascarpone mixture is rock solid before assembly. If your heavy cream wasn’t whipped stiffly or if your mascarpone softened up while you were cooking the eggs, the whole layer will collapse as it chills. Cold ingredients create a stable, structured layer that holds up beautifully.
Nutritional Overview for This Easy Matcha Dessert
Now, let’s talk fuel! Getting that perfect bite of creamy, sweet, earthy goodness usually means we’re not talking about a spa snack, but that’s okay! We all deserve a treat now and then, especially one this good. Remember, this is an indulgent dessert, so treat it as such. I always tell people that since this is a no-bake dessert using heavy cream and mascarpone, the fat content is what gives you that incredible mouthfeel.
Here are the estimated nutritional details for one slice from an 8-slice serving of this Easy Matcha Dessert. Please keep in mind these numbers are just averages. I use different brands of mascarpone and sugar substitutes sometimes, so the final count can change quite a bit!
- Serving Size: 1 slice
- Calories: 450
- Sugar: 35g
- Fat: 30g
- Saturated Fat: 18g
- Carbohydrates: 38g
- Protein: 9g
If you’re tweaking the recipe—hey, I get it! Maybe you cut back on sugar or used yogurt instead of all that heavy cream—your final count will be different. For official dietary tracking, you might want to input your specific brands into a tracker. It’s always best practice, and you can read more about why you should always be cautious with estimated nutrition on my disclaimer page. Enjoy it; you absolutely earned this slice of Matcha Tiramisu with Ladyfingers!
PrintMatcha Tiramisu with Ladyfingers
A recipe for a layered Italian dessert featuring the earthy flavor of matcha green tea combined with creamy mascarpone and traditional ladyfingers.
- Prep Time: 30 min
- Cook Time: 0 min
- Total Time: 6 hours 30 min
- Yield: 8 servings
- Category: Dessert
- Method: No Bake
- Cuisine: Italian/Japanese Fusion
- Diet: Vegetarian
Ingredients
- 6 large egg yolks
- 3/4 cup granulated sugar
- 1 1/2 cups heavy cream, cold
- 16 ounces mascarpone cheese, cold
- 1 1/2 cups strong brewed matcha tea, cooled
- 1/4 cup white rum or vanilla extract (optional)
- 1 package (7 ounces) ladyfingers (Savoiardi cookies)
- 2 tablespoons high-quality matcha powder, for dusting
Instructions
- Prepare the matcha soak: Whisk the cooled brewed matcha tea with the rum or vanilla extract, if using, in a shallow bowl. Set aside.
- Make the cream base: In a heatproof bowl set over a saucepan of simmering water (do not let the water touch the bowl), whisk the egg yolks and sugar constantly until the mixture is pale, thick, and reaches 160°F (about 8-10 minutes). Remove from heat and let cool slightly.
- Whip the cream: In a separate large bowl, whip the cold heavy cream until stiff peaks form. Set aside.
- Combine mascarpone: Gently whisk the cooled egg mixture into the cold mascarpone cheese until just smooth. Do not overmix.
- Fold together: Gently fold the whipped cream into the mascarpone mixture in two additions until fully combined and smooth.
- Assemble the first layer: Quickly dip each ladyfinger into the matcha liquid, turning once. Do not soak them too long or they will become soggy. Arrange the dipped ladyfingers in a single layer in the bottom of an 8×8 inch baking dish.
- Layer the cream: Spread half of the matcha mascarpone cream evenly over the ladyfingers.
- Repeat layers: Dip and arrange a second layer of matcha-soaked ladyfingers over the cream. Top with the remaining mascarpone cream, spreading it evenly.
- Chill: Cover the dish tightly with plastic wrap and refrigerate for at least 6 hours, or preferably overnight, to allow the dessert to set.
- Serve: Before serving, use a fine-mesh sieve to dust the top generously with the remaining matcha powder. Slice and serve cold.
Notes
- Use ceremonial grade matcha for the best color and flavor in the soaking liquid.
- To prevent sogginess, dip the ladyfingers for only 1-2 seconds per side.
- If you prefer an egg-free version, you can substitute the egg yolks with 1 cup of sweetened condensed milk mixed into the mascarpone and heavy cream.
Nutrition
- Serving Size: 1 slice
- Calories: 450
- Sugar: 35g
- Sodium: 120mg
- Fat: 30g
- Saturated Fat: 18g
- Unsaturated Fat: 12g
- Trans Fat: 0g
- Carbohydrates: 38g
- Fiber: 1g
- Protein: 9g
- Cholesterol: 250mg



Comments are closed.