


Hello, dear bakers! If your sourdough journey has been full of gorgeous, crusty boules that look amazing but are impossible to slice for a simple lunchtime sandwich, then trust me, I totally get it. I spent years chasing that perfect rustic loaf while my corporate brain craved something soft and reliable for my toast! That’s why I developed this recipe here at Sunday Flavor: it’s the blueprint for truly **sourdough sandwich bread** that is wonderfully soft, fluffy, and guaranteed sliceable. We’re ditching the heavy rustic texture for something you can eat every single day. If you’re ready to bring that beautiful Sunday joy into your busy weekdays, you’re in the right place! You can read a little more about my shift from spreadsheets to baking right here.
Why This is the Best Sourdough Sandwich Bread Recipe for You
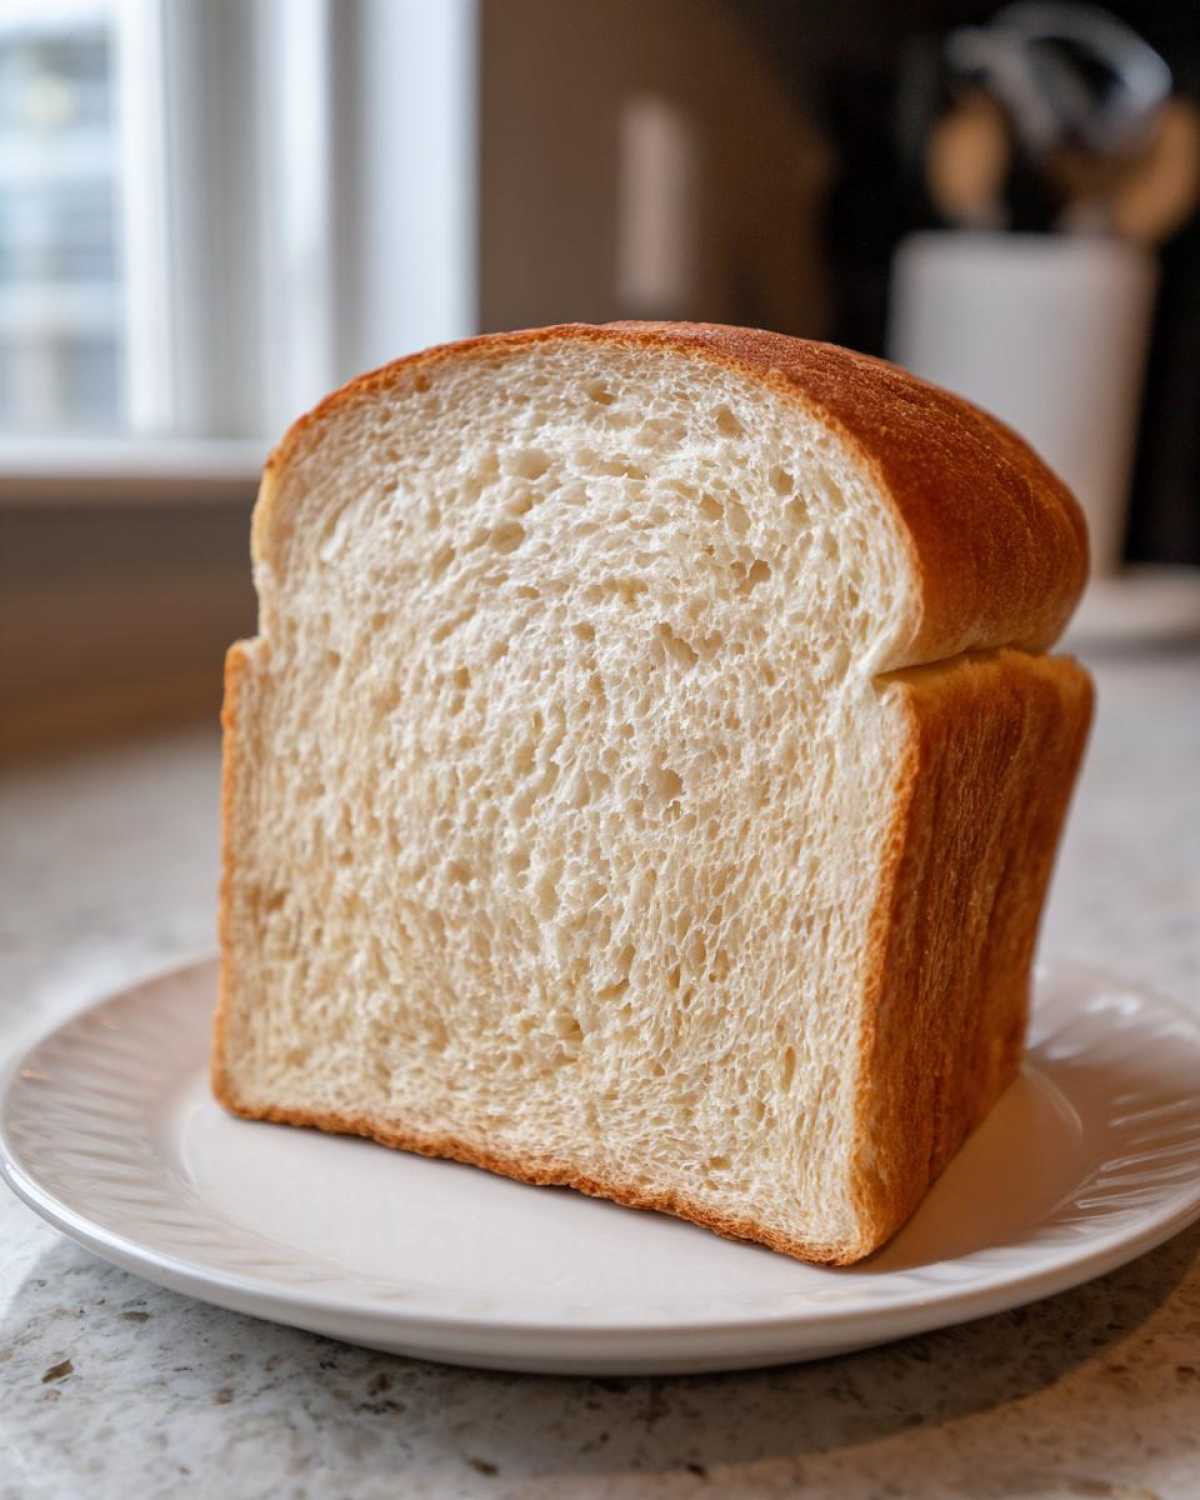
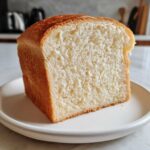
I spent so long wrestling with sourdough that felt like a rock! You know the drill—it looks beautiful, but when you try to get a slice thin enough for a grilled cheese, it just crumbles or tears. That frustration is exactly what inspired this recipe. This isn’t about a rustic boule; this is about incredible, **fluffy sourdough bread** that holds together beautifully for lunchboxes.
We are firmly focused on achieving a **soft sandwich bread homemade** result. That means the crumb is tender, never dense, and it has that wonderful, subtle buttery finish, especially if you include the butter!
When you’re done, you’ll have a loaf strong enough for heavy fillings, but soft enough for crunchy toast. If you ever want sandwich inspiration after you bake this, check out my ultimate party sub recipe!
Achieving a Tall Sourdough Sandwich Bread Shape
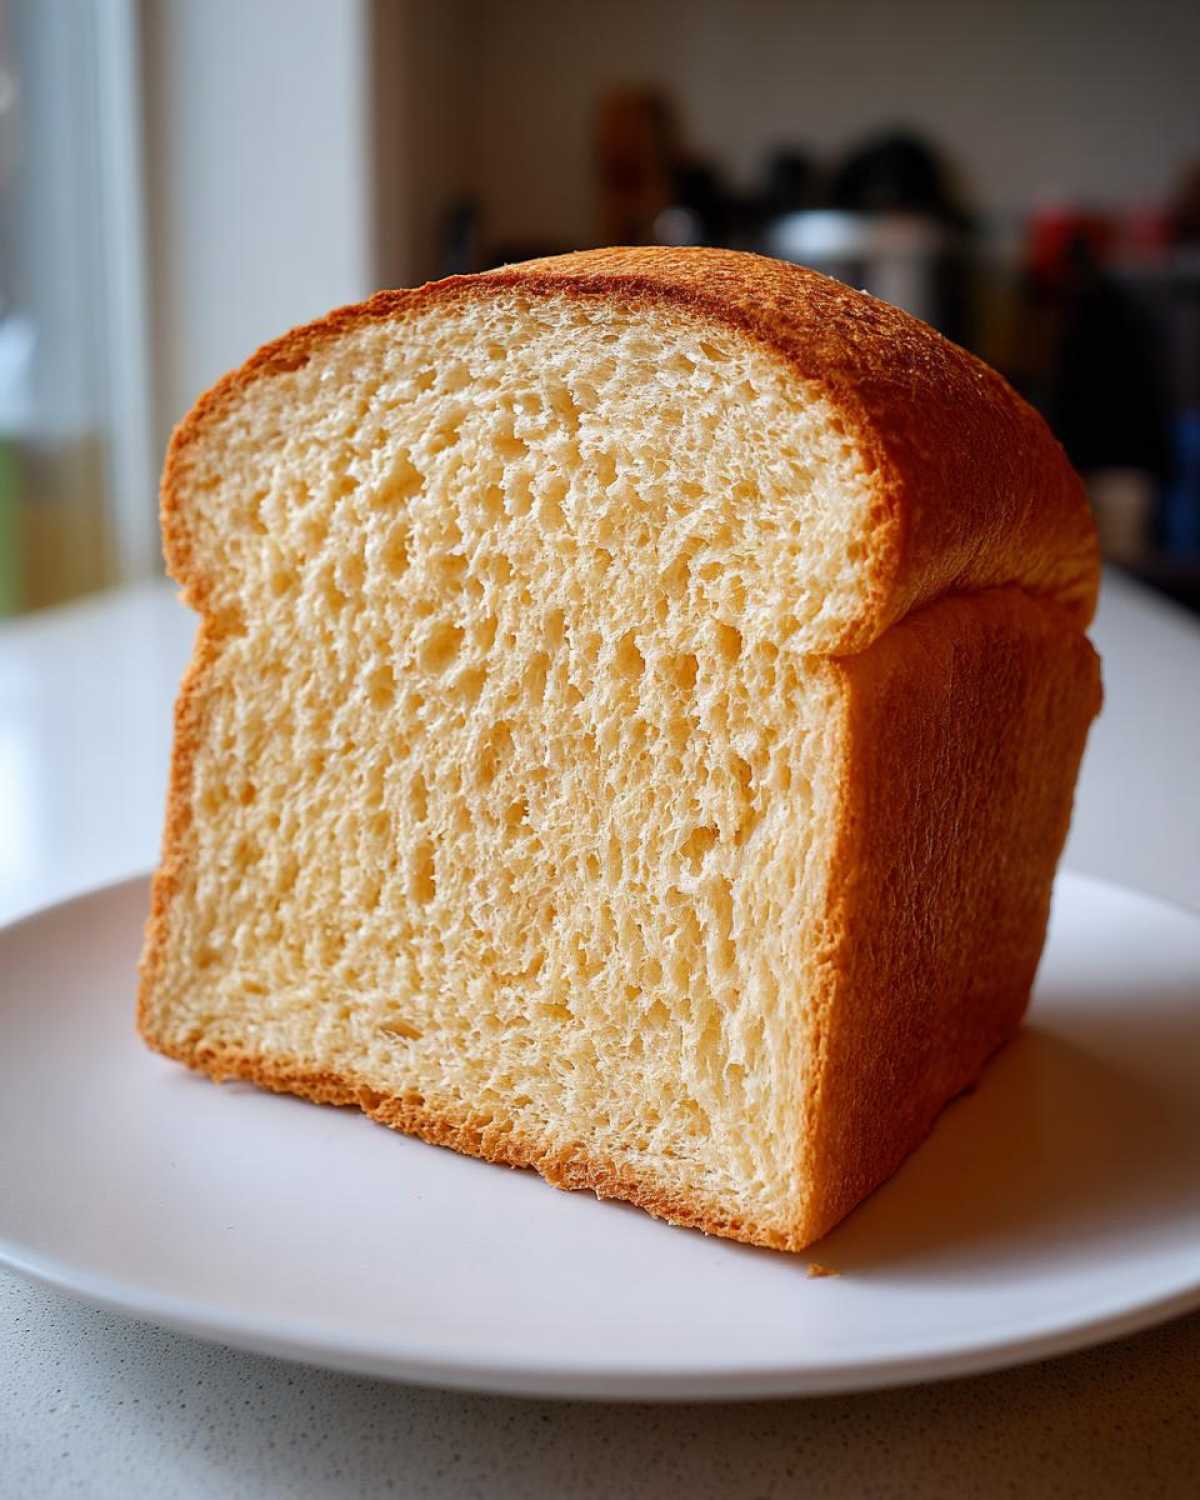
The secret to getting those perfect, tall slices is the pan. You absolutely must bake this in a standard loaf pan. We aren’t free-form baking here because we need that structure to guide the dough upward, resulting in that **tall sourdough sandwich bread** we all crave for a proper sandwich. The pan keeps the sides straight and square—exactly what you need for even toast!
Ingredients for Your Soft & Fluffy Sourdough Sandwich Bread
Alright, let’s grab what we need! For this bake, we’re keeping the ingredient list super simple so you can focus on that perfect, soft texture. Forget 15 different specialty flours; we’re sticking to the basics that let the sourdough shine.
- 100g active sourdough starter (it needs to be ripe!)
- 350g warm water
- 500g all-purpose flour (or bread flour if you have it)
- 10g fine sea salt
- 20g unsalted butter, softened (this is optional, but wow, it adds so much!)
See? That’s it! Five components, maximum flavor potential. Make sure your starter is happy and active before you even think about mixing!
Ingredient Notes and Substitutions for Sourdough Sandwich Bread
Let’s talk flour for a second. All-purpose flour works beautifully here and keeps this an **easy sourdough bread recipe**, but if you want a little more chew, bread flour is a great swap. Just remember, the star is that ripe starter—if it’s sluggish, your loaf won’t rise in the pan.
That 20g of butter? It’s my little trick for that ultra-tender interior. It really pushes this into **buttery crumb sourdough** territory, making it feel truly homemade. Use salted butter only if you cut back slightly on the added sea salt. Otherwise, stick to unsalted butter, soft and ready to incorporate!
Step-by-Step Instructions for Easy Sourdough Sandwich Bread
This process is seriously simple, which is why I call this an **easy sourdough bread recipe**. We skip the elbow grease of kneading; instead, we use stretching and folding to develop the gluten structure. This gentle approach keeps the crumb airy and light, which is exactly what we need for a soft slice!
Remember to have patience here. Sourdough is all about time, not brute force. Don’t worry if your dough feels sloppy at first—it’s totally normal for this style!
Mixing and Building Structure in Your Sourdough Sandwich Loaf Recipe
First things first: mix your ripe starter and warm water in a big bowl—just whisk them until they look milky. Now, dump in the flour and salt. Mix it by hand until you have a shaggy mess. If you’re using that optional butter, squish it in now and work it until it disappears. Cover the bowl and let it chill out for 30 minutes; this is called the autolyse, and it lets the flour start doing the work for us.
Time for structure! Wet your hands. Gently grab one side of the dough, stretch it way up high, and fold it over the middle. Rotate the bowl and do that three more times—four folds total. Cover it, rest 30 minutes, and then repeat that stretching and folding routine two more times, resting 30 minutes in between each set. That completes the build for your **sourdough sandwich loaf recipe**!
Shaping and Proofing for a Square Sourdough Loaf Tutorial
After that final fold, let the dough rest, covered, for about an hour. You’ll see it start to look puffy, but don’t push it too far! Lightly flour your counter. Gently coax the dough into a tight log or short rectangle—think about the size of your loaf pan. You want it snug, but please, don’t press all the air out when you do this shaping!
Grease up your 9×5 inch loaf pan like crazy. Place that snugly shaped dough inside, seam-side down. Cover it loosely so it doesn’t dry out. Now it proofs on the counter for 3 to 5 hours. You want it to peek about 1 inch over the rim. If your kitchen is warm, this might be closer to **quick sourdough sandwich bread** time—just watch the rise, not the clock!
If you need inspiration on great things to do with your finished loaf, you should definitely check out my recipe for easy five-ingredient corn soup; it’s perfect for dipping!
Baking Tips for Perfect Sourdough Sandwich Bread
Okay, the shaping is done and the dough is puffed up perfectly over the rim—time for the magic to happen in the oven! I always preheat my oven for a good 30 minutes before I even think about putting the bread in. This ensures we have consistent heat right from the start. We are aiming for a temperature of 375°F (190°C) for this loaf.
Bake time usually runs between 35 to 45 minutes, but here’s where you need to listen to your bread. Since we want a nice golden color but don’t want the crust to get too hard—remember, this is for soft sandwiches!—if you notice the top getting dark around the 25-minute mark, loosely tent the loaf pan with some aluminum foil.
The real checkpoint, though, is temperature. Never trust the clock alone! Stick your thermometer right into the center of the bread. We need that internal temperature to hit 205°F (96°C). That tells me the structure is set and the crumb is baked through. This precise temperature check is how we guarantee it’s ready for slicing later, which is essential if you want perfect **sourdough for toast**!
Once it hits temp, pull it out immediately and, this is crucial, get it out of the pan right away! Place it on a wire rack and you must let it cool completely. Patience here is key; slicing it warm guarantees a gummy inside, and nobody wants that sticky texture!
If you’re looking for a great pairing for this bread once it’s cooled, you have to try my recipe for homemade classic Caesar dressing to toss over a big salad on the side!
Troubleshooting Common Issues with Your Beginner Sourdough Loaf
Baking is fun, but sometimes your dough throws you a curveball! Don’t panic if things don’t look textbook perfect the first few times, especially when trying to nail that soft crumb. Every baker, myself included, has made a few frisbees instead of loaves. Let’s troubleshoot the main issues that pop up when aiming for that perfect **beginner sourdough loaf**.
The biggest struggle is usually texture—we want soft and tall, not sad and flat. Here are the things I look for when my loaf doesn’t behave.
If your dough isn’t rising enough during the bulk fermentation:
- Did you use active, ripe starter? If your starter was sluggish or cold, it won’t have the power to lift all that flour for your **sourdough sandwich bread**. Next time, make sure it’s doubled in size reliably before you mix.
- Was your kitchen too chilly? Sourdough loves warmth! If it’s cold, everything slows down way too much. Try putting the bowl in a slightly warm oven (turned OFF!) with the light on.
If your loaf collapses when you try to shape it or put it in the pan:
Oops! This usually means you’ve let it go too long—it’s officially over-proofed. That structure you built during those gentle folds gave up the ghost. When handling it, it might feel super jiggly and tear easily. For a tall loaf, it’s better to catch the proofing just before it looks *too* puffy.
If your final bread is dense or gummy:
A dense interior usually points to two things: being under-proofed (not long enough in the pan) or slicing it too soon! I know waiting is the hardest part, but if you slice it hot, the steam rushes out and messes up the interior structure, leaving you with that gummy layer. Remember what I said—let it cool *completely* on that wire rack for the best results!
Flavor Control: Achieving a No Tang Sourdough Bread
This is one question I get asked all the time when people are trying to switch from their fancy country loaves to everyday bread: “Chloe, how do I make it taste less… sour?” I know, I love that strong tang sometimes, but for a classic sandwich, you want something milder, something that tastes richly of wheat and a little butter.
The secret to this **no tang sourdough bread** flavor is all about the timing of your starter. You actually want to use starter that isn’t at its absolute, super-bubbly, peak moment. Those super active starters have spent more time developing lactic and acetic acids, which equals more tang!
For this **sourdough sandwich bread**, I advise feeding your starter about 6 to 8 hours before you plan to mix your dough, depending on how warm your kitchen is. You want the starter to be very active, maybe doubled or a little more, but not yet falling in on itself. It should look pillowy and smell pleasantly yeasty, not overwhelmingly sharp.
When you use the starter when it’s just reaching its maturity, like that perfect moment before it completely collapses, you are getting maximum lift power but minimal sourness conversion. This ensures your final loaf tastes exactly like lovely, soft **homemade sandwich bread from scratch**—perfectly balanced for ham and cheese without overpowering it!
Storage and Reheating Instructions for Sourdough Sandwich Bread
You’ve baked the perfect, tall, soft loaf, and now you’re wondering how to keep it exactly that way so every slice has that amazing, buttery texture! My biggest piece of advice here is simple: keep it away from the refrigerator. I know, I know, it seems counterintuitive, but the cold temps turn this beautiful **soft sandwich bread homemade** into something stiff and nearly stale in hours.
Instead, for the first couple of days, just wrap your cooled loaf tightly in plastic wrap or put it in a sealed zip-top bag. Keep it right there on your counter at room temperature. This preserves that beautiful moisture we fought so hard to keep locked in. Since the flavor profile here is milder, it holds up really well on the counter for about three days.
If you know you can’t get through the whole masterpiece in three days—which is rarely my issue, ha!—your best bet is slicing it first. Once sliced, you can store those slices in an air-tight container in the freezer. Freezing stops staling dead in its tracks.
And when you want to use those frozen slices? Don’t thaw them! Pop them straight into the toaster or under the broiler. This technique instantly revives the fluffy texture and makes it the star of your breakfast—it’s fantastic **sourdough for toast** this way. Seriously, toast made from this loaf is just next level!
If you’re looking for another easy treat to bake without spending all day in the kitchen, you absolutely must try my Cinnamon Crunch Quick Bread next. It’s perfect for those lazy mornings!
Serving Suggestions for Your Buttery Crumb Sourdough Sandwich Bread
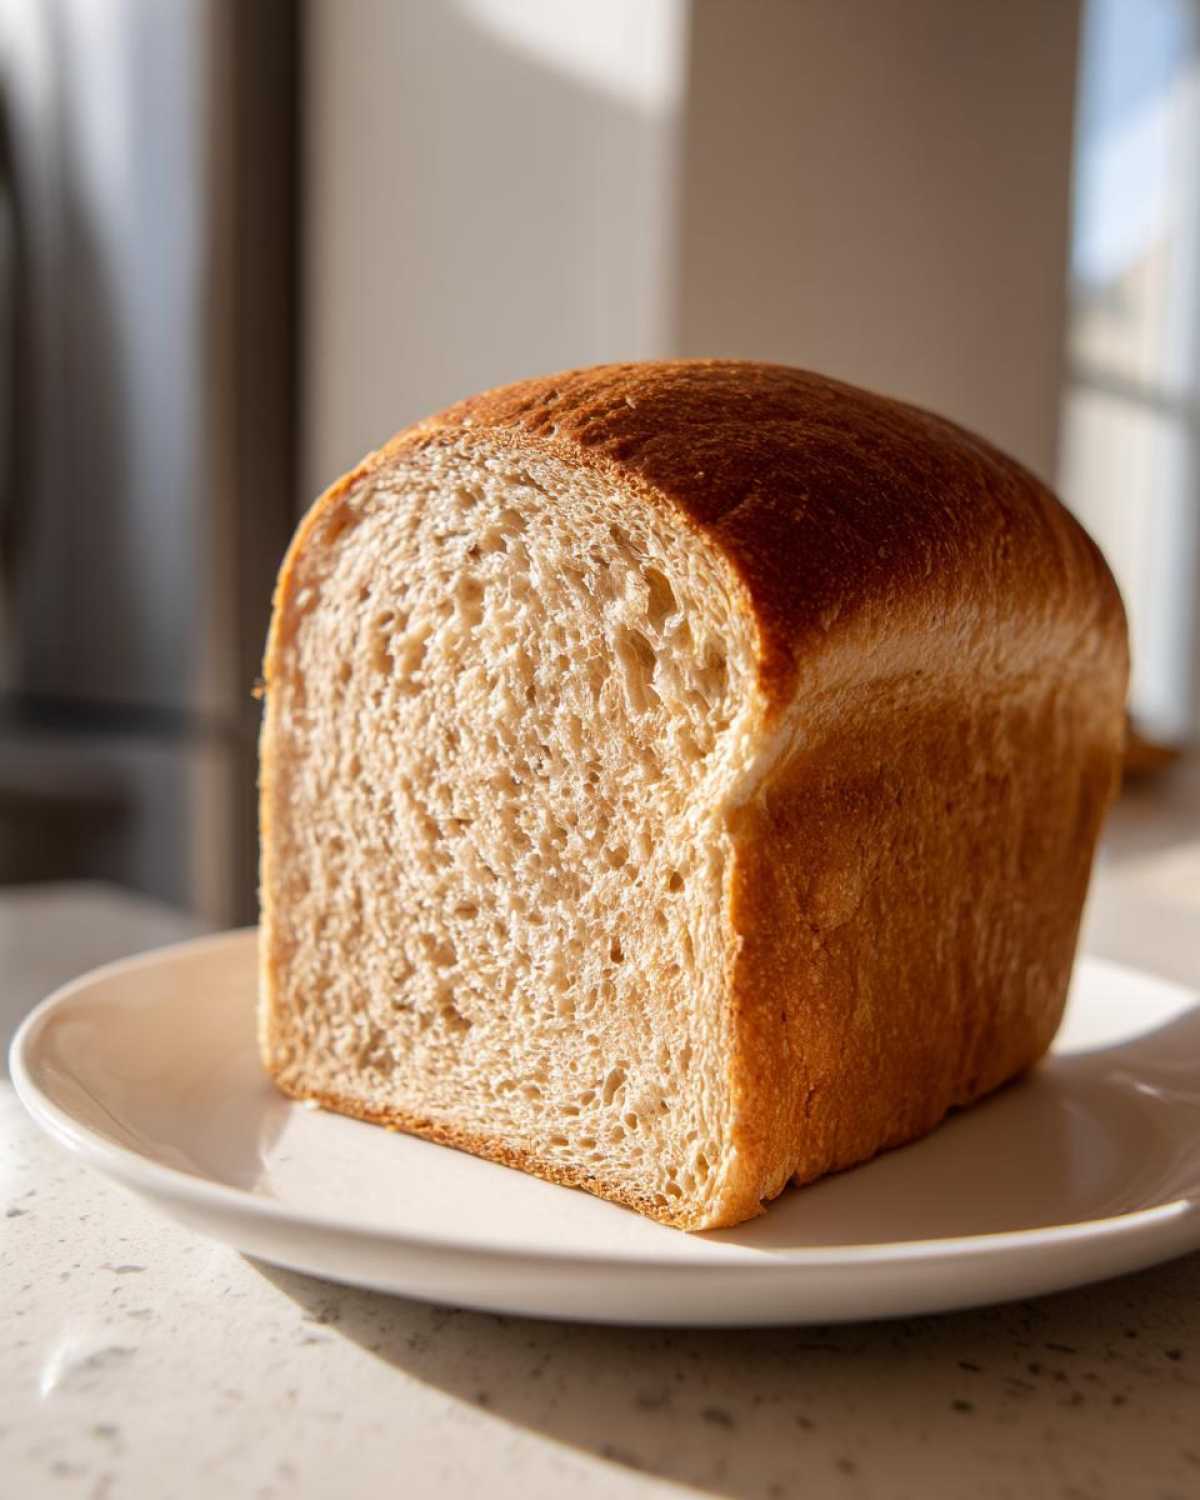
Now that you’ve baked a loaf that rivals any bakery—soft, fluffy, and beautifully square—it’s time to put that incredible texture to good use! Because this **buttery crumb sourdough** is so tender, it deserves to be the star of the show. Forget those flimsy, pre-sliced white loaves; this bread deserves better!
Of course, it makes the ultimate sandwich foundation. Ham and cheese, turkey and mustard, even just a layer of good quality butter—it all sings on this slightly tangy, soft base. But why stop at lunch? This loaf is amazing when you lean into that softness.
I’m telling you, turn this into thick slices of French toast! Soak it in cinnamon custard and pan-fry it until golden. The slight tang from the starter balances the sweetness of the syrup perfectly. It holds together so much better than standard bread because of our structure-building folds.
And for the ultimate comfort food combo? A grilled cheese made with this **sourdough sandwich bread** is unmatched. Seriously, use a mixture of cheddar and Gruyère, butter the outside of the bread really well, and watch it turn into crispy, gooey perfection. If you want something to pair with that cheesy goodness, you have to try my recipe for homemade roasted tomato basil soup; it’s pure Sunday flavor in a bowl!
If you’re looking for other people’s thoughts on how they use their amazing loaves, you can check out some inspiration over at Unfold Recipes’ take on this style of bread cutting!
Frequently Asked Questions About Homemade Sandwich Bread From Scratch
I know you’ve probably still got questions buzzing around, especially if this is your first foray into baking a square loaf. That’s totally normal! When I was first figuring out the science of a **soft sandwich bread homemade**, I had a dozen questions about every single step. Here are the things I get asked most often about making your **homemade sandwich bread from scratch**!
Can I use discard in this Sourdough Sandwich Loaf Recipe?
You can! However, I strongly advise against it if you are new to this. Remember how I mentioned using ripe starter? Discard is generally less acidic, but it also has lower yeast activity. Using discard means you have to treat this more like a very long overnight bulk fermentation rather than a **quick sourdough sandwich bread**. For the best, most reliable results where you can expect that nice tall rise, stick to using starter that you’ve recently fed and confirmed is active and bubbly. If you must use discard, you will likely need to extend your bulk fermentation time significantly!
Can I skip the loaf pan and bake this free-form?
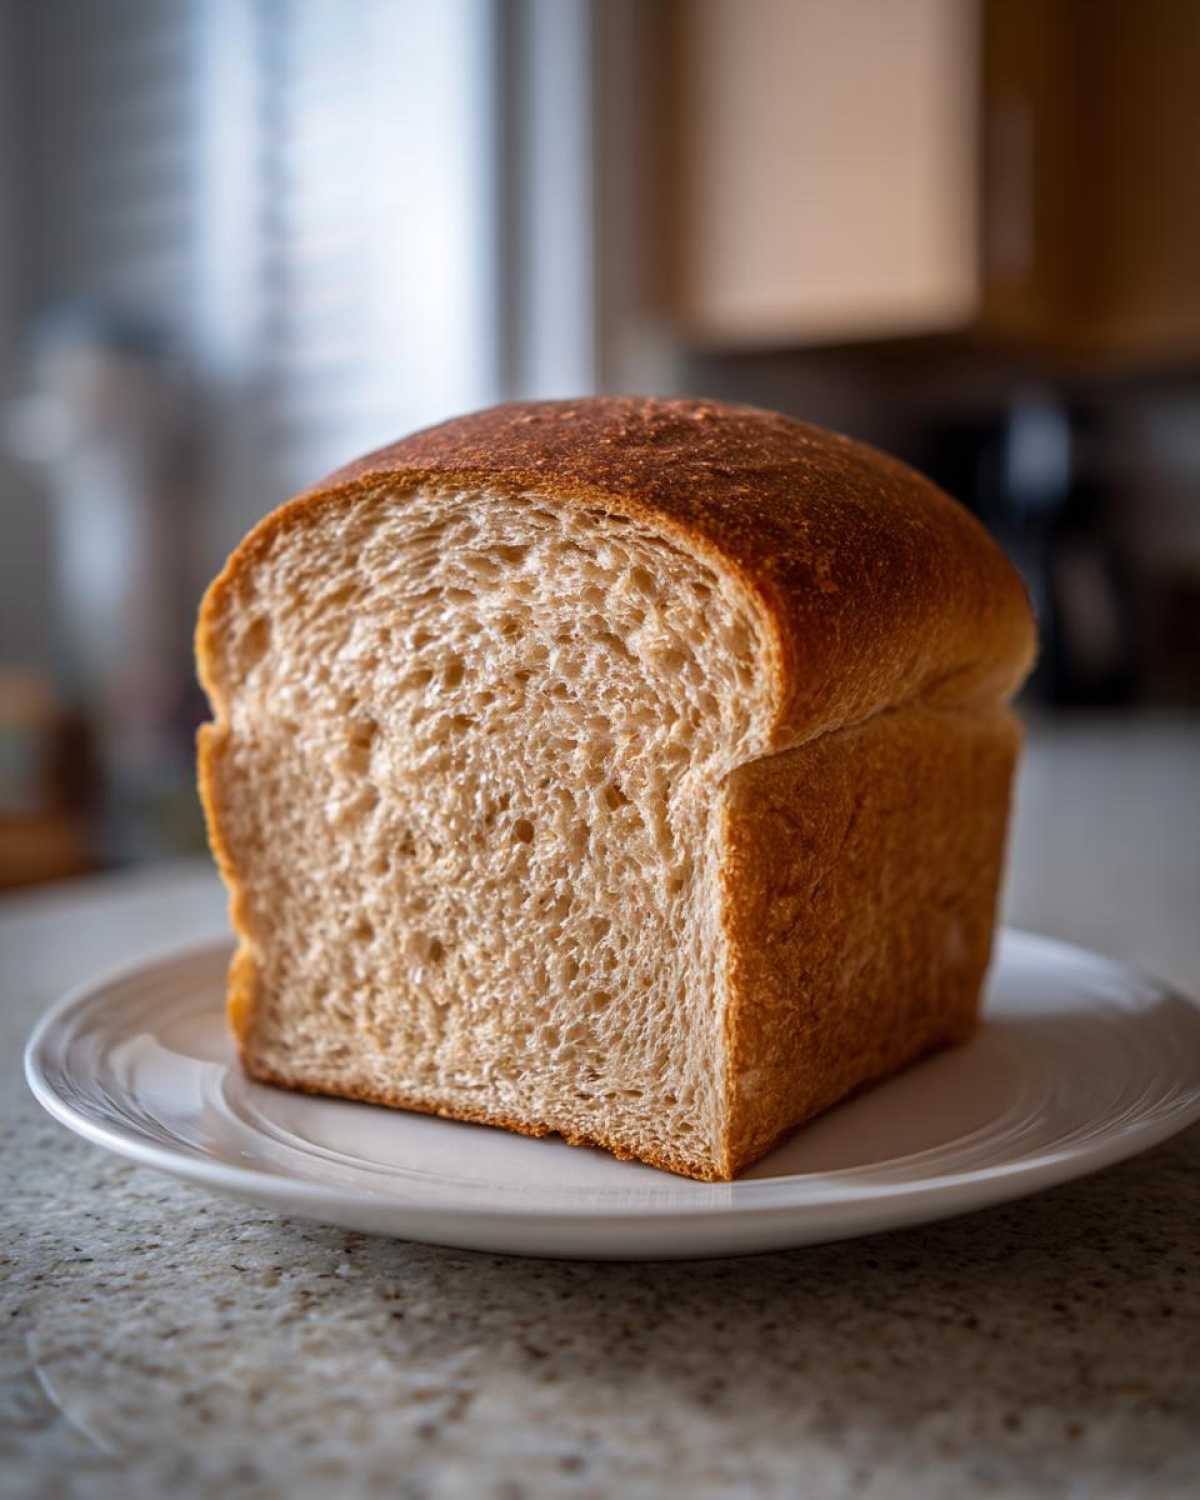
If you skip the pan, you are no longer making a **sourdough sandwich loaf recipe**; you are making a rustic round loaf, or a boule, which is totally different! This whole recipe is designed around the structure provided by the 9×5 pan. The gentle folds are meant to build enough strength, but not *too* much, so the dough can relax vertically in the pan. If you bake it free-form, it will spread out wide and flat instead of achieving that lovely **tall sourdough sandwich bread** shape we are aiming for. Stick to the pan for this one!
How long does the proofing really take for a beginner sourdough loaf?
This is the trickiest part because temperature truly rules the roost here. The instructions say 3 to 5 hours, but that’s just a guideline for a roughly 70°F kitchen. If your kitchen is warm, it might only take 3 hours, making it feel like a **quick sourdough sandwich bread** bake. If your kitchen is drafty or cool, it could easily stretch to 6 hours or more. My best advice for a great **beginner sourdough loaf**? Ignore the clock and watch the dough. You want it to rise about 1 inch over the rim, and when you gently poke it, the indentation should slowly spring back halfway. If it springs back immediately, it needs more time!
Speaking of preserving fresh flavors, if you ever find yourself with extra herbs or veggies you need to keep fresh after baking, make sure to check out my recipe for refrigerator dill pickles—they’re so crisp!
Can I make this a no knead sourdough sandwich loaf?
That is such a great question, and it gets right to the heart of what makes this specific recipe so approachable! You are correct that we are avoiding traditional, intense kneading. However, I wouldn’t technically call this a pure **no knead sourdough sandwich loaf**. Technically, *all* sourdough needs structure developed somehow. In this recipe, we are substituting heavy kneading with those gentle stretch and folds—we do three full sets! You still need that gentle manipulation to organize the dough strands and build the gluten needed to hold those beautiful, soft air bubbles in place. No kneading? Yes. No handling? Nope! Sticking to those gentle folds ensures that **fluffy sourdough bread** texture!
PrintSoft & Fluffy Sourdough Sandwich Bread: Beginner Loaf Recipe
Learn how to bake a truly soft, sliceable sourdough sandwich bread loaf with a buttery crumb. This beginner sourdough recipe uses simple steps, like gentle folds instead of intense kneading, to achieve a tall, square loaf perfect for everyday sandwiches and toast.
- Prep Time: 30 min
- Cook Time: 45 min
- Total Time: 5 hr 50 min
- Yield: 1 loaf
- Category: Baking
- Method: Pan Baking
- Cuisine: American
- Diet: Vegetarian
Ingredients
- 100g active sourdough starter (ripe)
- 350g warm water
- 500g all-purpose flour (or bread flour)
- 10g fine sea salt
- 20g unsalted butter, softened (optional, for extra softness)
Instructions
- Mix the active sourdough starter and warm water in a large bowl until combined.
- Add the flour and salt to the wet ingredients. Mix by hand until just combined into a shaggy dough. If using butter, add it now and mix until incorporated.
- Cover the bowl and let the dough rest for 30 minutes (autolyse).
- Perform the first set of gentle stretch and folds. Wet your hands, grab one side of the dough, stretch it up gently, and fold it over the center. Rotate the bowl and repeat three more times (four folds total). Cover and rest for 30 minutes.
- Repeat the stretch and fold process two more times, resting 30 minutes between each set. This builds structure without heavy kneading.
- After the final fold, let the dough rest, covered, for 1 hour at room temperature until it shows some visible puffiness.
- Lightly flour your work surface. Gently shape the dough into a tight log or rectangle, aiming for a shape that fits your loaf pan. Be careful not to deflate the air you built up.
- Grease a standard 9×5 inch loaf pan well. Place the shaped dough seam-side down into the prepared pan.
- Cover the pan loosely with plastic wrap or a damp towel. Allow the dough to proof at room temperature for 3 to 5 hours, or until the dough has risen about 1 inch above the rim of the pan. (For a quicker bake, proofing time may be shorter.)
- Preheat your oven to 375°F (190°C) about 30 minutes before baking.
- Bake the loaf for 35 to 45 minutes. If the top browns too quickly, loosely tent it with aluminum foil for the remainder of the bake time. The internal temperature should reach 205°F (96°C).
- Remove the bread from the pan immediately after baking and cool completely on a wire rack before slicing. This prevents a gummy texture.
Notes
- Using ripe, active starter is key for a quick, successful loaf. If your starter is sluggish, you may need a longer bulk fermentation.
- For a less tangy flavor, use starter that was fed 6-8 hours before mixing, rather than one that is extremely bubbly and past its peak.
- This recipe is designed for a tall, square sourdough loaf ideal for sandwiches. Avoid baking it free-form like a rustic boule.
Nutrition
- Serving Size: 1 slice
- Calories: 150
- Sugar: 0.5
- Sodium: 250
- Fat: 1.5
- Saturated Fat: 0.9
- Unsaturated Fat: 0.6
- Trans Fat: 0
- Carbohydrates: 30
- Fiber: 1.5
- Protein: 5
- Cholesterol: 5


Comments are closed.