


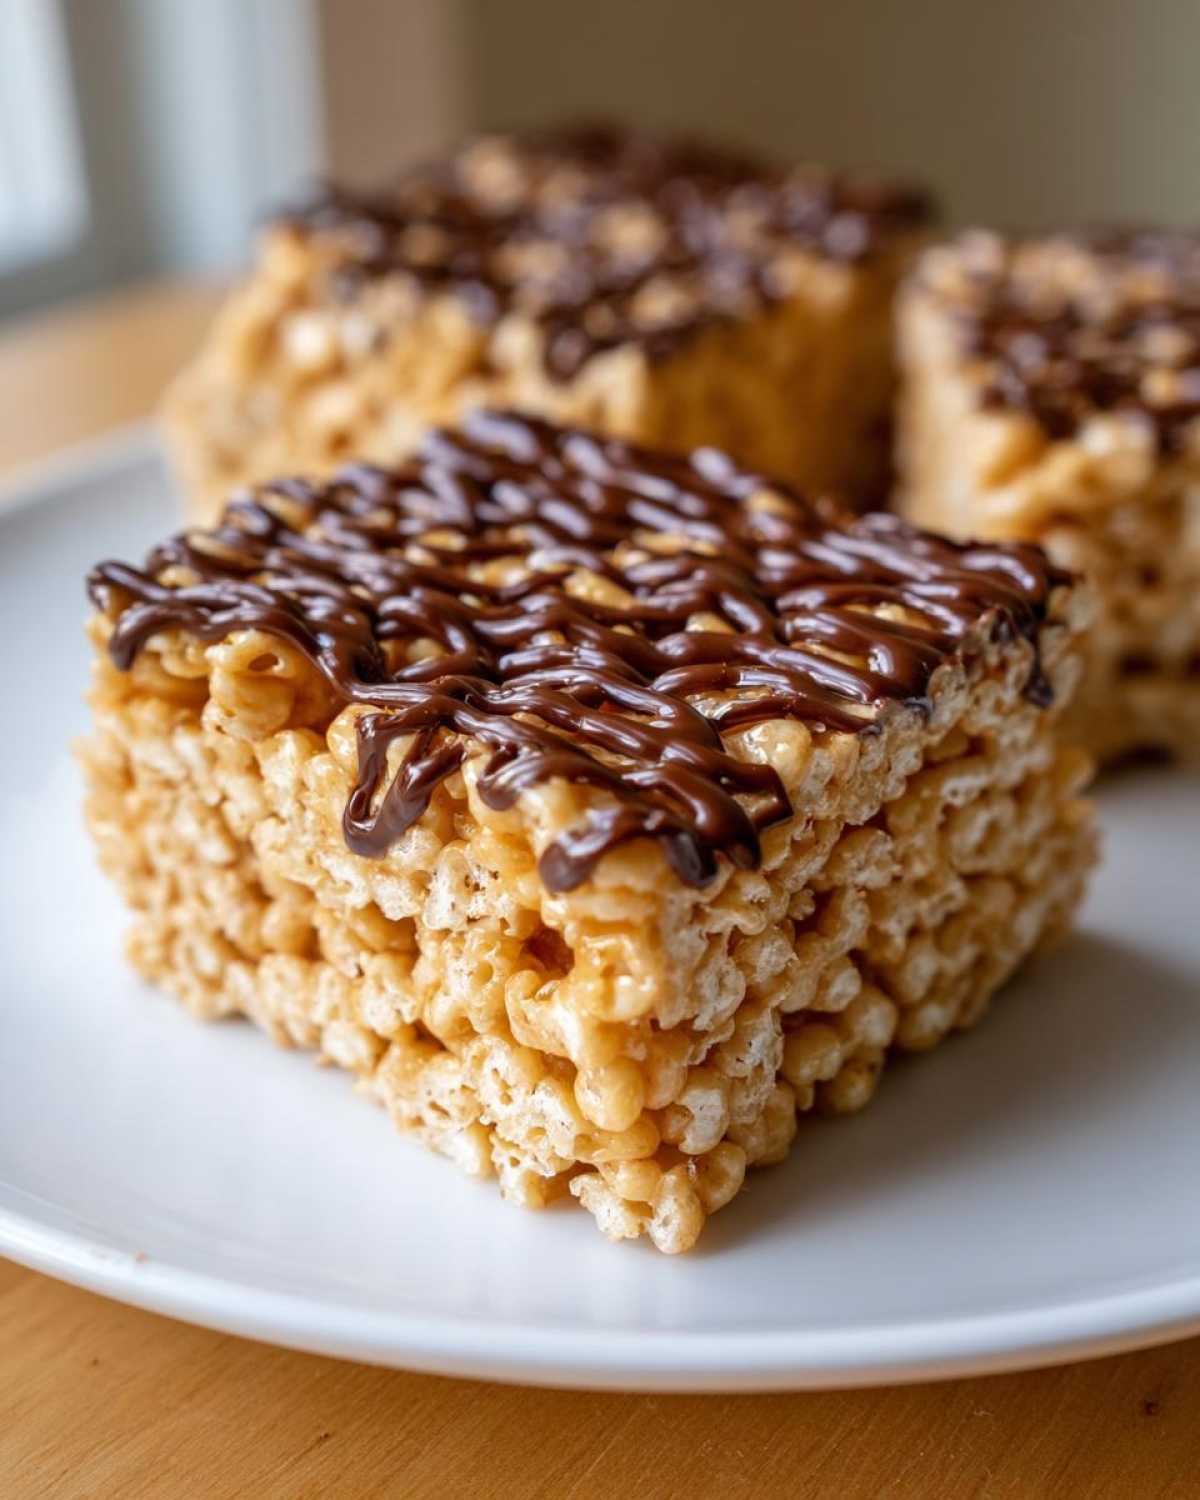
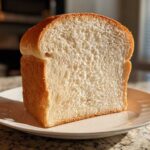
Oh my goodness, friends, let’s talk nostalgia! You know those moments when you just crave something so simple, so ridiculously easy, and absolutely delicious? That was me last week, trading in my hectic marketing deadlines for the pure, unadulterated joy of dessert making. And honestly, nothing hits that spot better than a fantastic twist on a childhood classic. Forget the fussy oven; we are diving headfirst into my recipe for The Ultimate Chewy No-Bake Peanut Butter Rice Krispie Treats. These aren’t just sugary squares; they are the absolute best peanut butter rice krispie treats you will ever make. They are gooey, packed with flavor, and prove that you don’t need a whole Sunday afternoon to create something magical!
Why These peanut butter rice krispie treats Are Your New Favorite No Bake Peanut Butter Desserts
Honestly, these bars are my go-to when that sweet craving hits on, say, a Tuesday afternoon. They are ridiculously fast, which is perfect for my busy schedule, even though I left the office life behind. You get the ultimate gooey texture without ever touching your oven—hello, no oven desserts!
- They are ready faster than waiting for takeout.
- They offer that amazing salty-sweet balance we all crave.
- They hold their shape beautifully for parties.
Achieving the Perfect Gooey Texture
The secret to stopping these from turning into crunchy bricks is all about the heat management. You absolutely *must* keep your stove on medium-low when melting the butter and peanut butter. More importantly, once the marshmallows are smooth, you take the whole pan right off the burner! Adding the cereal when the mixture is slightly cooler lets the marshmallows stretch out perfectly as they cool, giving you those super chewy marshmallow squares every single time. Trust me on this step!
Ingredients Needed for Ultimate Chewy peanut butter rice krispie treats
When you are whipping up a batch of these simple peanut butter sweets, having everything prepped and ready is key—since these come together so fast, you won’t have time to run around looking for things! These are perfect examples of those 6 ingredient desserts when you skip that lovely chocolate topping, but I always recommend having it on hand!
Here’s exactly what you need for this family favorite:
- 6 tablespoons unsalted butter (we want that pure flavor!)
- 1 cup creamy peanut butter (this is where the smooth texture comes from)
- 1 (10 ounce) package marshmallows (pay attention to the note below!)
- 6 cups crispy rice cereal
- 1 teaspoon vanilla extract
- 1/2 teaspoon salt (optional, but trust me, it wakes up the peanut butter flavor)
And if you’re making the optional topping for those gorgeous chocolate peanut butter bars:
- 1 cup semi-sweet chocolate chips
- 1 tablespoon coconut oil or butter (this helps it drizzle nicely)
Ingredient Notes and Substitutions for peanut butter rice krispie treats
I’ve learned a few things over the years since I started turning this into my favorite no bake peanut butter dessert. First, the marshmallows! If your marshmallows are stale or old, your bars will be hard, not chewy. I always buy mine specifically for treats. If you can’t find the 10-ounce bag, just use about 4 cups of fresh mini marshmallows.
When it comes to peanut butter, commercial creamy works best for stability and that classic taste. If you use natural, unsweetened peanut butter, know that it’s a bit looser, so you might need to stir it into the butter a moment longer to get it fully incorporated. Don’t let that discourage you, though—it tastes amazing!
For the chocolate topping, using a tiny bit of coconut oil or butter with the chips is my trick. It keeps the topping from seizing up when it cools, making it easy to spread into a pretty swirl or just pour right over the top for those easy dessert bars.
Step-by-Step Instructions for peanut butter rice krispie treats
Okay, let’s get to the fun part! These instructions look like a lot, but honestly, this whole process flies by. The most important thing you need to remember is that this recipe is all about managing the heat so you get those lovely, soft, chewy marshmallow squares and not hard bricks. Keep your eyes on the pan, and use low heat! You’ll be amazed how quickly these come together.
Preparing the Pan and Melting the Base for peanut butter rice krispie treats
First things first, get that 9×13 pan ready. I always use parchment paper with a nice little overhang—it makes lifting these babies out later so much easier. Think of it as your built-in handle! Next, melt your six tablespoons of butter over medium-low heat in a large stovetop pot. Once that’s liquid gold, stir in your full cup of creamy peanut butter. You have to keep stirring until it’s completely blended and smooth. This creates the flavor base we need!
Crucial moment alert! Once that butter and peanut butter mixture is gorgeous and uniform, you must take the entire pan off the heat. This lowers the temperature just enough so the marshmallows don’t burn or seize up into rubber bands.
Mixing Cereal and Pressing the peanut butter rice krispie treats
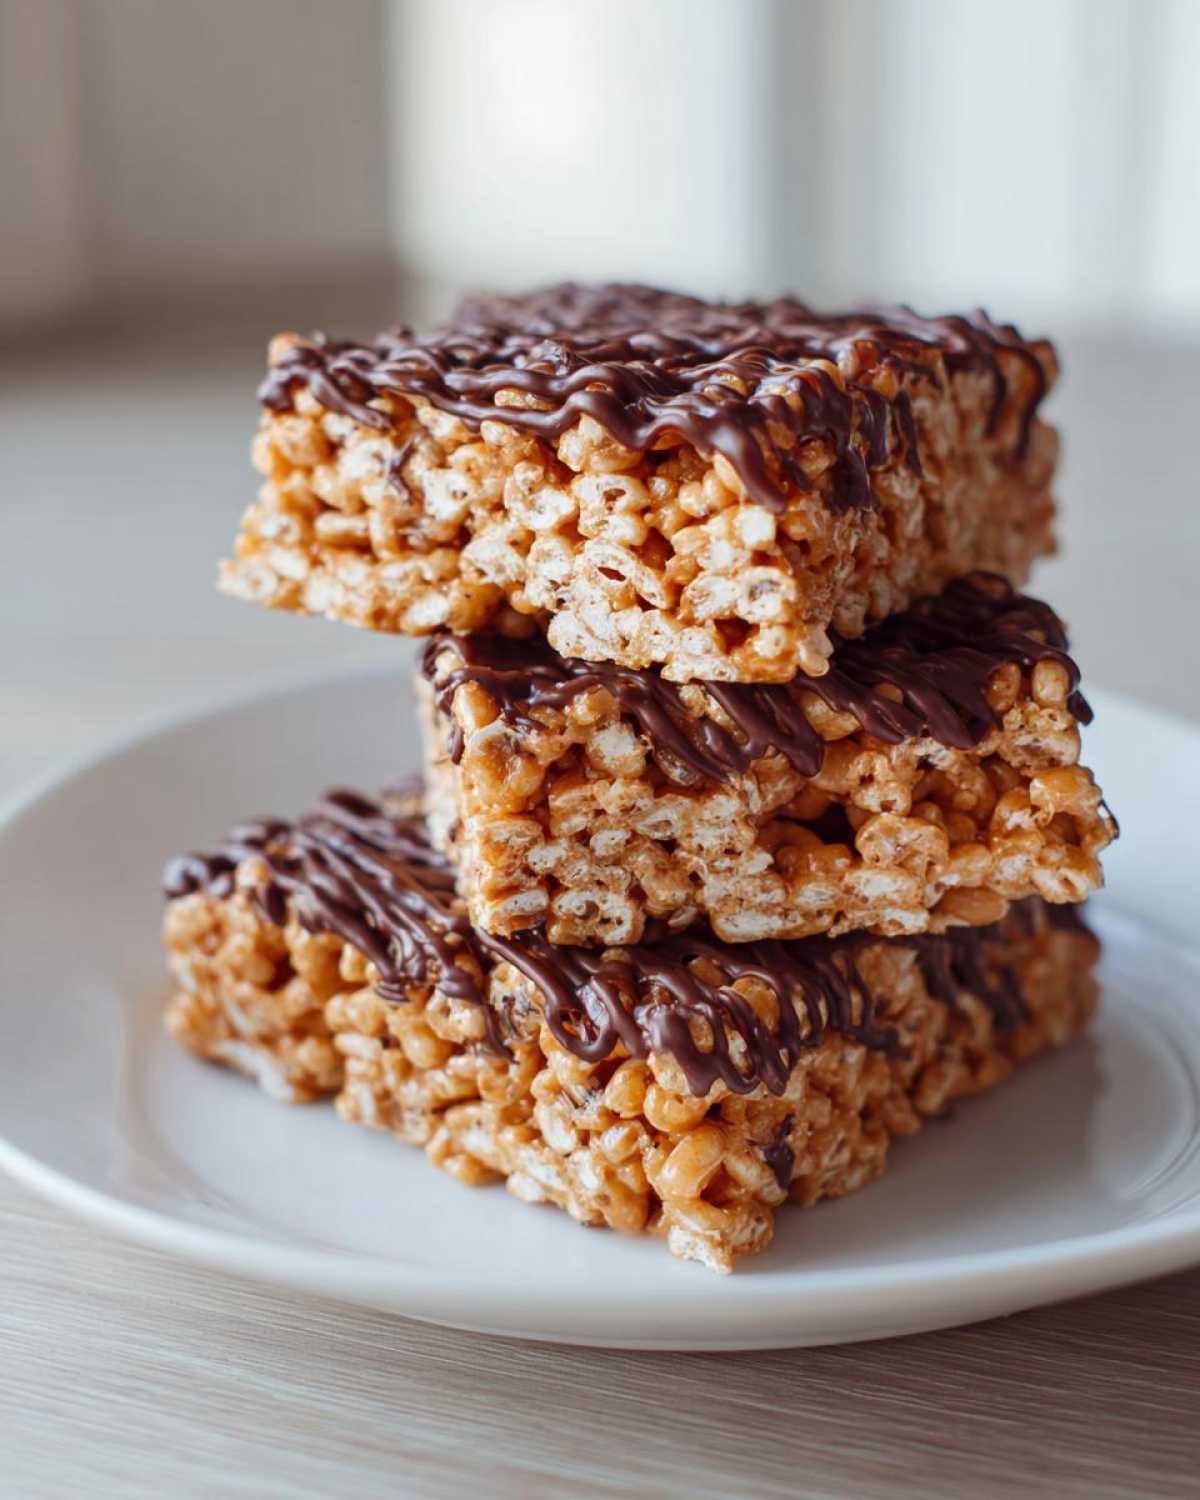
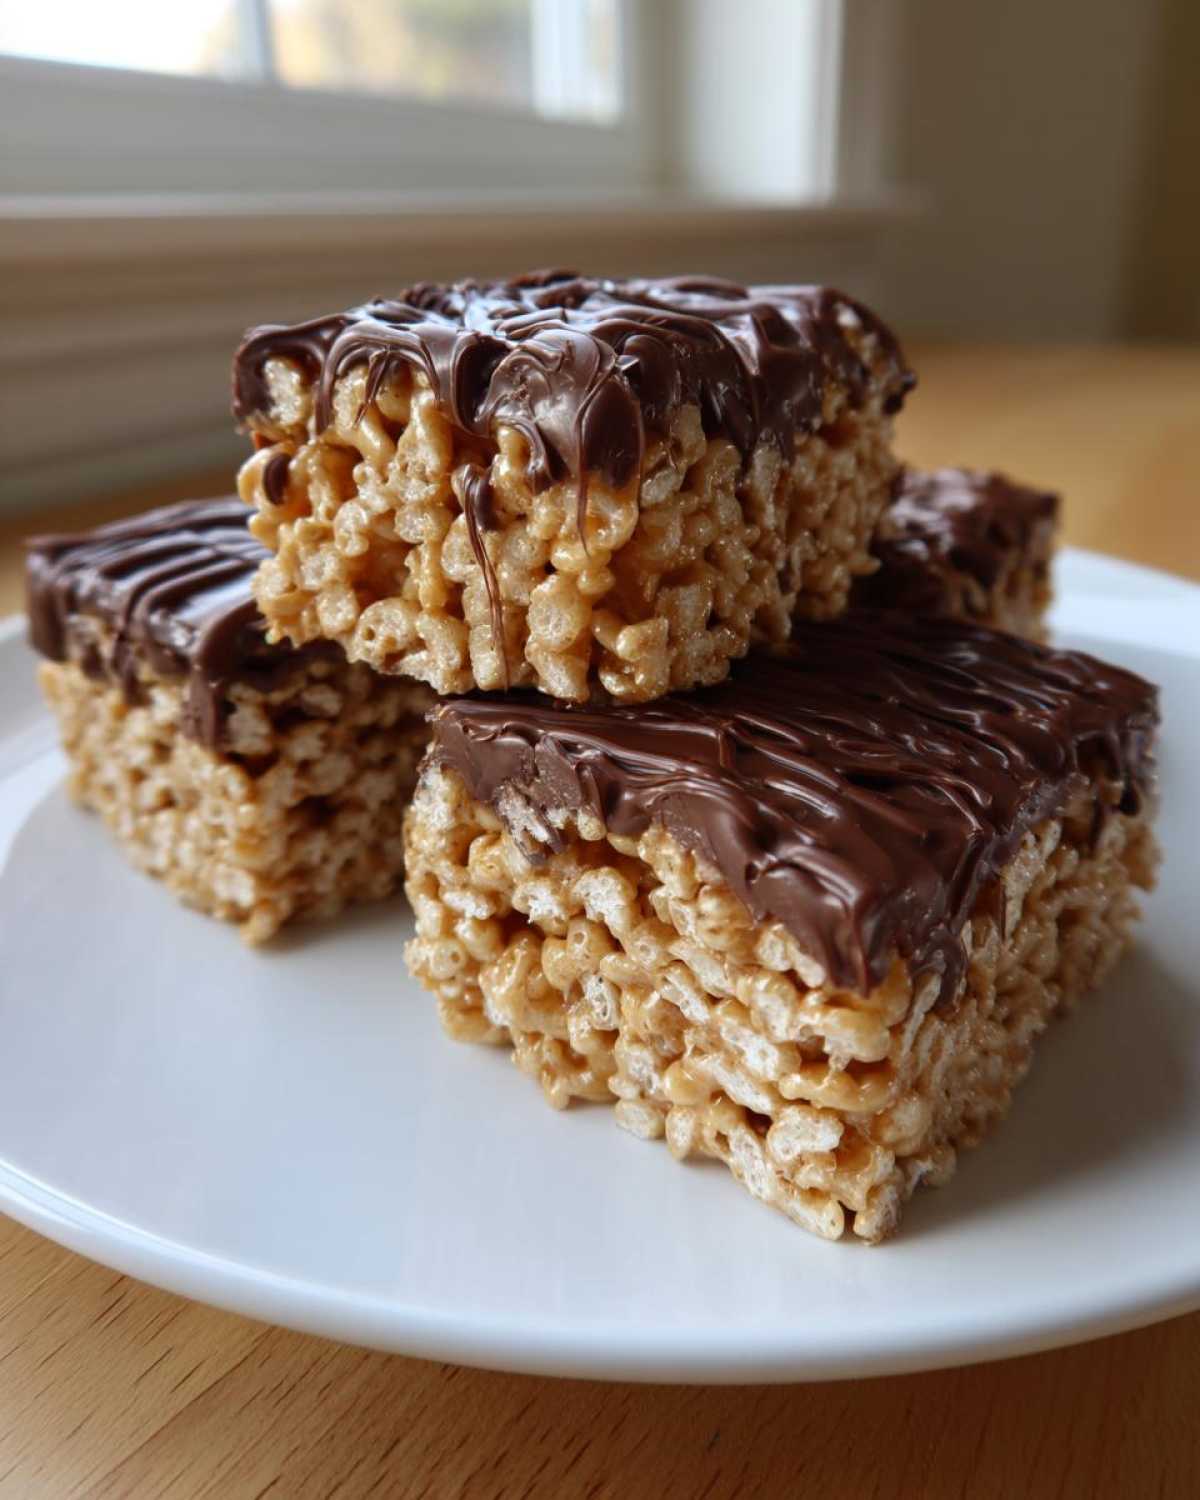
Toss in your marshmallows and stir them constantly until they melt down into a thick, glossy sauce, then stir in that vanilla and optional salt. Now, gently fold in all six cups of cereal. I mean gentle—we don’t want to crush the air out of the cereal! Once everything is just coated, dump it all into your prepared pan. Don’t just dump and run, though. Press it down firmly and evenly. I either grab a piece of wax paper coated in butter or use a lightly greased spatula and press hard to get those dense, perfect squares. That firmness is key for chewiness!
Creating the Optional Chocolate Peanut Butter Bars Topping
If you’re going for the decadent look that turns these into fantastic chocolate peanut butter bars, now is the time. Put your chocolate chips and the tablespoon of coconut oil (or butter) in a microwave-safe bowl. Microwave in short 30-second bursts, stirring well between each one. Seriously, don’t just stand there staring at it, or it will scorch! Once silky smooth, pour it right over your pressed treats. You can spread it evenly or use a toothpick to make a fun, rustic swirl pattern. Let them sit on the counter for an hour or pop them in the fridge for 20 minutes until they are set, and then slice!
Tips for Success Making peanut butter rice krispie treats
You know, even though these are so simple, there are just a few little things that elevate them from fine to absolutely phenomenal. I picked these up over the years, practicing when I needed a quick fix for a work potluck—we used to sneak these into the office on dreary Monday mornings! If you follow these tricks, you’ll never have a disappointing batch of these simple peanut butter sweets again.
First, I already mentioned it, but I’m going to shout it again: FRESH marshmallow marshmallows! Older ones dry out quickly, and when they dry, they melt harder, resulting in a brittle, less-than-ideal square. If you’re buying them just for this recipe, grab those bags from the center aisle, not the ones that look like they’ve been sitting there since last Christmas.
When you are pressing the mixture into your pan, don’t press it down with your bare, wet spatula. Oops! That’s how you get a sticky mess, and it still doesn’t compress well. You really need something to help spread the mixture evenly without sticking.
- Lightly grease your hands with coconut oil or butter before patting the mixture down. That fat protects your skin and helps you get really nice, even compression.
- If you’re having trouble getting the top level, lay a piece of wax paper over the top and use a rolling pin to gently press down. It keeps everything smooth and flat!
Also, a little note on peanut butter: I usually stick with the classic creamy kind because it melts beautifully, but if you are using a natural, unsweetened peanut butter, just stir it a little longer with the butter until you see no oil separation. It takes a tiny bit more patience on the stovetop, but the flavor is just incredible.
Finally, if you make a double batch (and trust me, you should, because these disappear!), these quick dessert recipes freeze like a dream. Layer them between pieces of parchment paper in a sturdy, airtight container. They defrost perfectly on the counter in about 30 minutes, and they taste just as fudgy as the day you made them. Perfect for stocking up on those after school snack ideas!
Serving Suggestions for these Quick Dessert Recipes
Sometimes, even the simplest treat deserves a little extra fanfare. Since these bars are such amazing party snack ideas no bake, I love mixing up how I present them. Cut them into neat little squares, sure, but don’t stop there!
If you’re serving a big crowd, try using a small cookie cutter once they are fully set. Hearts or stars make them look instantly more festive, especially if you already added that gorgeous chocolate swirl on top. It makes them feel way fancier than the 15 minutes of effort they required!
When it comes to pairing, these salty-sweet bites love complementing sides. If you’re serving them for an afternoon gathering, they go perfectly alongside my iced brown sugar latte—the earthy coffee cuts through the richness beautifully. If you’re making them for the kids as an after-school treat, a simple glass of cold milk is always the reigning champion.
Another fun presentation idea: if you’re serving them right after they set, stick a small pretzel stick gently into the side of each square. It gives people an easy, clean way to pick them up, and it adds a welcome little extra crunch!
Storage and Reheating peanut butter rice krispie treats
One of the best things about making these incredible peanut butter rice krispie treats is that you almost never have to worry about leftovers, because they disappear so fast! But for those rare occasions when you do have extras—or if you’re making a massive batch for a party later in the week—storage is super simple.
The main thing to remember is that because these are no-bake and rely on the soft, gooey texture of the marshmallows and peanut butter, you want to keep them away from excessive heat or extreme cold if possible. For keeping them fresh on the counter for immediate snacking, an airtight container works wonders. They will happily stay soft and chewy at room temperature for about three to four days, provided your kitchen isn’t super hot and humid.
If you need them to last longer, move them to the fridge. Storing them in the refrigerator will definitely extend their life up to a week, but be warned: cold temperatures make them much firmer. They won’t be as soft and floppy as when they first set. If you chill them, I always suggest letting them sit on the counter for about 20 minutes before serving so they can warm up and regain some of that glorious chewiness we worked so hard to achieve.
Now, about reheating? Honestly, I rarely reheat these! They are meant to be eaten at room temperature or slightly cool. If you *must* revive a very cold bar, warm it in short 10-second bursts in the microwave. Just be careful; they heat up fast, and you don’t want to accidentally melt that perfect chocolate swirl right off the top!
Frequently Asked Questions about peanut butter rice krispie treats
I totally get it; everyone has little questions before diving into a new recipe, especially when you’re aiming for that perfect texture. Making these easy Rice Krispie treats recipe variation is simple, but sometimes the details matter! Here are the things I get asked most often about achieving the ultimate bar.
Can I substitute crunchy peanut butter in this Easy Rice Krispie Treats Recipe?
Oh, you absolutely can! If you prefer a bit of textural contrast in your homemade peanut butter squares, crunchy peanut butter works just fine. Just keep in mind that the nuts will add a slight crunch that breaks up the gooeyness a little bit. If you are chasing the softest, fudgiest bar possible, stick with creamy. But honestly, either way, they end up being fantastic quick sweet snacks!
Are peanut butter rice krispie treats considered No Oven Desserts?
Yes, 100%! That’s one of the biggest reasons I adore these so much. They are true no oven desserts—the entire process happens on the stovetop, melting the butter and marshmallows, and then the waiting is just for setting time. No preheating, no baking, no stress! It’s pure stovetop magic, making them perfect for summer when you don’t want to heat up the kitchen.
People often ask if these are similar to Scotcharoos. They are in spirit! Scotcharoos typically use a butterscotch chip swirl, whereas this recipe is built around a straight peanut butter base that’s often topped with chocolate chips. They scratch the same itch for that wonderful, chewy, quick-fix dessert bar, though!
Estimated Nutritional Data for Homemade Peanut Butter Squares
Now, I’m going to be super honest with you all. When I’m cooking for joy, like making these peanut butter bars, I rarely look at the labels. We are making these for the sheer joy of that salty-sweet rush! However, since I know many of you are tracking things, I did run the numbers based on the recipe details provided. This helps if you are planning these for a party menu or just trying to keep track of your simple peanut butter sweets.
Keep in mind these values are estimates, and they can shift a bit depending on the exact brand of cereal or peanut butter you use. I calculated these based on an 18-bar yield, assuming you do the delicious optional chocolate swirl!
- Serving Size: 1 bar
- Calories: about 180
- Fat: 9g (with about 3g being saturated fat—hello, butter!)
- Carbohydrates: 24g
- Sugar: 15g (Marshmallows and peanut butter!)
- Protein: 4g
- Sodium: 110mg
If you skip the chocolate layer, you can knock those sugar numbers down a notch, which is a good trick if you’re making these as a lighter after school snack idea! But for me? That chocolate swirl is worth every sprinkle of those numbers!
Share Your peanut butter rice krispie treats Creations!
Alright, my lovely kitchen comrades, now it’s your turn! I’ve shared all my secrets—the low heat, the fresh marshmallow mandate, the importance of pressing firmly—to make sure your batch of peanut butter rice krispie treats turns out absolutely perfect and gloriously chewy.
I genuinely can’t wait to see what you create, especially if you opted for that rich chocolate drizzle! When you pull those beautiful, gooey bars out of the pan, please take a snapshot! Snap a picture of them cooling on the rack, or maybe even one of the kids (or you!) sneaking a corner piece. Tag me on social media; I absolutely live for seeing your kitchen joy.
If this recipe brought a little bit of that lovely Sunday Flavor into your hectic weekday, please do me a huge favor and leave a comment and a star rating right here on the page. It truly helps other home cooks find these simple, delicious recipes. If you want to know more about my journey of leaving the corporate world behind to focus on food like this, you can always pop over to my About Me page!
Happy baking—or, well, no-baking! Let me know how much you love these no bake peanut butter desserts!
PrintThe Ultimate Chewy No-Bake Peanut Butter Rice Krispie Treats with Optional Chocolate Drizzle
Make these incredibly chewy peanut butter Rice Krispie treats. This easy, no-bake dessert combines classic cereal with creamy peanut butter for a quick sweet snack perfect for parties or after-school cravings. You can add a simple chocolate swirl for extra flavor.
- Prep Time: 10 min
- Cook Time: 5 min
- Total Time: 15 min
- Yield: 18 bars
- Category: Dessert
- Method: Stovetop
- Cuisine: American
- Diet: Vegetarian
Ingredients
- 6 tablespoons unsalted butter
- 1 cup creamy peanut butter
- 1 (10 ounce) package marshmallows
- 6 cups crispy rice cereal
- 1 teaspoon vanilla extract
- 1/2 teaspoon salt (optional, for flavor balance)
- 1 cup semi-sweet chocolate chips (for optional topping)
- 1 tablespoon coconut oil or butter (for optional topping)
Instructions
- Lightly grease a 9×13 inch baking pan or line it with parchment paper, leaving an overhang for easy removal.
- In a large saucepan over medium-low heat, melt the 6 tablespoons of butter.
- Once the butter is melted, stir in the creamy peanut butter until it is smooth and fully combined with the butter. Remove the pan from the heat.
- Add the marshmallows to the peanut butter mixture. Stir constantly until the marshmallows are completely melted and smooth. This step requires patience to keep the heat low.
- Stir in the vanilla extract and salt, if using.
- Add the crispy rice cereal to the marshmallow mixture. Fold gently until the cereal is evenly coated. Do not overmix.
- Press the mixture evenly into your prepared baking pan. Use a piece of wax paper or lightly buttered spatula to press it down firmly to achieve those perfect chewy squares.
- If you want a chocolate topping, combine the chocolate chips and coconut oil (or butter) in a microwave-safe bowl. Microwave in 30-second intervals, stirring between each, until smooth.
- Pour or drizzle the melted chocolate over the peanut butter bars. Spread evenly or create a swirl pattern.
- Let the treats set completely at room temperature for about 1 hour, or chill in the refrigerator for 20 minutes for faster setting.
- Once set, lift the bars out using the parchment paper overhang and cut them into squares. Enjoy your quick sweet snacks!
Notes
- For the chewiest treats, use fresh marshmallows. Older marshmallows tend to result in a harder bar.
- If you prefer a richer peanut butter flavor, use a natural, unsweetened peanut butter, but be aware it may require slightly more stirring to incorporate.
- To prevent sticking when pressing the mixture into the pan, lightly grease your hands or the spatula you use.
- These peanut butter bars freeze well for up to one month if stored in an airtight container.
Nutrition
- Serving Size: 1 bar
- Calories: 180
- Sugar: 15
- Sodium: 110
- Fat: 9
- Saturated Fat: 3
- Unsaturated Fat: 6
- Trans Fat: 0
- Carbohydrates: 24
- Fiber: 1
- Protein: 4
- Cholesterol: 5

Comments are closed.