


Listen, sometimes you just don’t want a cake. You want something that feels like it should have a velvet rope around it, right? You want pure, unadulterated chocolate indulgence. That’s why I’m sharing my absolute best flourless chocolate torte recipe today. Forget crumb worries—this is dense, deeply fudgy, and naturally gluten-free, which makes it fancy enough for any big announcement!
I’ve made this for anniversaries and those nights when the kids are finally asleep and I need true dark chocolate therapy. It tastes like something you’d pay way too much for in a fancy city restaurant, but honestly? It’s one of the easiest decadent chocolate desserts you’ll ever whip up. Trust me, once you master this method, you’ll never look back.
Why This Flourless Chocolate Torte is Your New Go-To Decadent Chocolate Dessert
This recipe isn’t just another chocolate hit; it’s the perfect solution when you need something rich but don’t want the fuss of sifting flour and worrying about complex layers. It’s pure chocolate magic in a single pan, honestly.
- It delivers the most intense chocolate flavor imaginable—we aren’t messing around with milk chocolate here!
- It’s naturally gluten-free, which is a huge bonus for everyone, whether you need it or just want to cut out the gluten for a day.
- Cleaning up is ridiculously easy. Seriously, you barely dirty a mixing bowl.
If you’re thinking about another chocolate treat, go check out my dark chocolate avocado mousse for an even lighter, brighter chocolate fix!
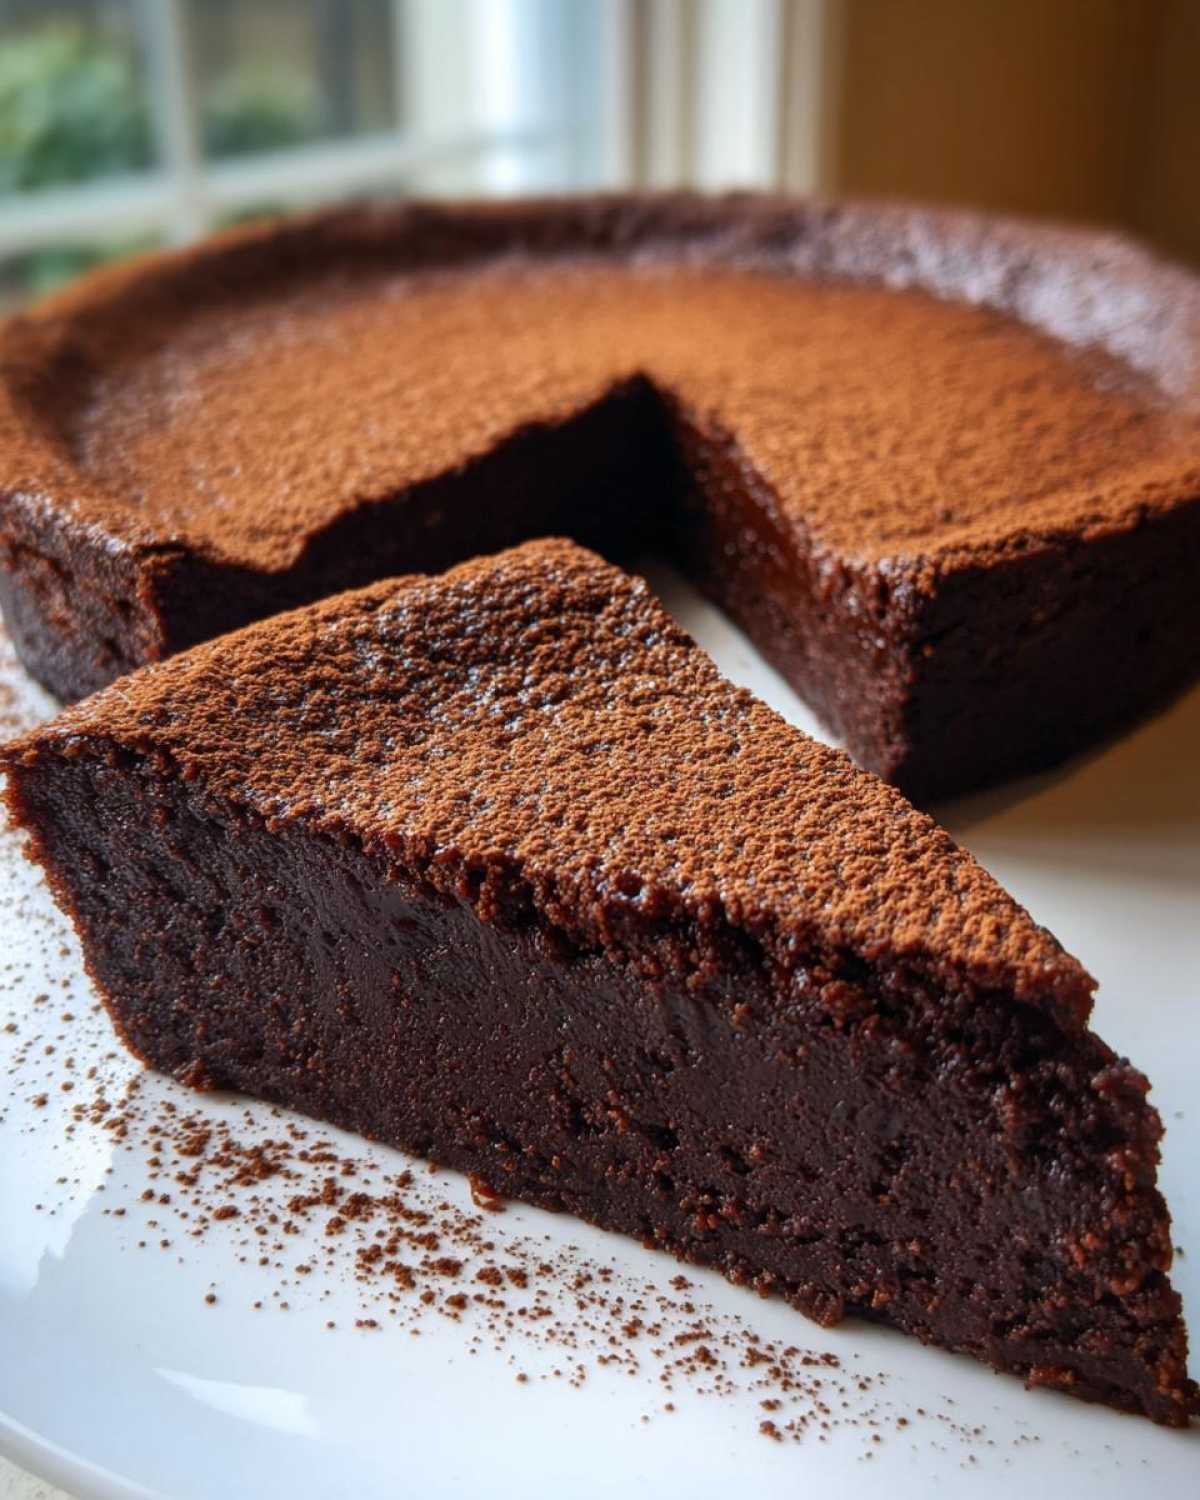
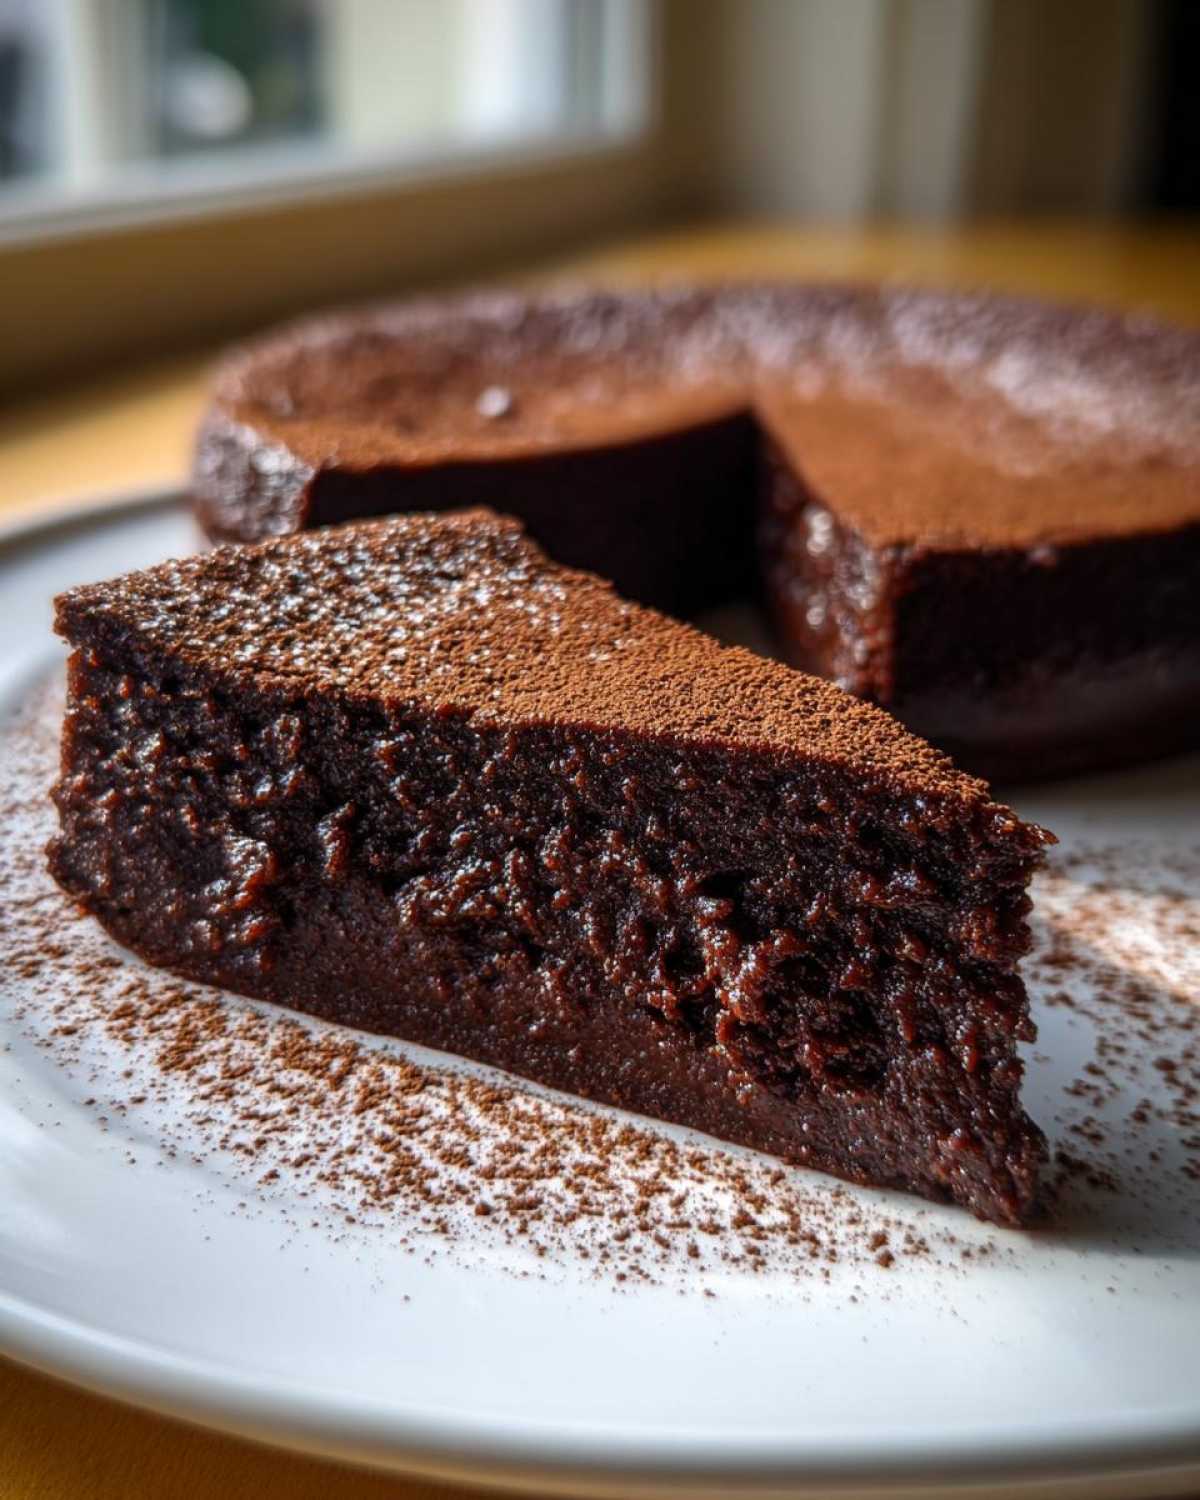
The Texture of a Perfect Flourless Chocolate Torte
When you cut into this, you aren’t going to find the airy structure of a sponge cake. Nope! We are aiming for that wonderfully dense, almost creamy interior that melts in your mouth the second it hits your tongue. It sets up beautifully firm, but it never tastes dry. That velvety texture is what makes it so incredibly decadent.
Making an Elegant Gluten Free Chocolate Torte
It looks like you spent hours fiddling with complicated techniques, but the secret is the eggs being whipped separately! That little bit of technique gives you height and lightness while keeping everything grounded in pure chocolate goodness. It’s such an elegant gluten free chocolate torte that anyone can present it at a dinner party with total confidence.
Essential Ingredients for Your Flourless Chocolate Torte
The absolute beauty of this rich fudgy cake recipe is that it relies on just a handful of quality ingredients. When you’re working with so few things, you simply have to make sure every single component is working its hardest! I always lay everything out before I even think about turning on the oven so I know I’m ready to rock.
Here’s what you’ll need for this intense chocolate flavor experience:
- 8 ounces bittersweet or semisweet chocolate, chopped
- 8 ounces (2 sticks) unsalted butter, cut into pieces
- 1 cup granulated sugar
- 1/4 cup unsweetened cocoa powder, plus more for dusting
- 1/2 teaspoon salt
- 4 large eggs, separated
- 1 teaspoon vanilla extract
- Powdered sugar, for dusting (optional)
If you skip out on good chocolate, you’ll taste it immediately, I promise! Since this is a dark chocolate indulgence, I really urge you to go for the highest quality bittersweet chocolate you can find—at least 65% cacao, if you can handle it. That’s how you guarantee that deep, rich profile that screams “Special Occasion Chocolate.”
Ingredient Notes and Substitutions for the Flourless Chocolate Torte
Okay, let’s talk specifics because temperature matters here more than you think. Make sure those four eggs have been sitting out for at least 30 minutes before you start. Room temperature eggs incorporate air much, much better, and that air is literally holding up the entire structure of this dessert since there’s no flour to give it a backbone.
When it comes to the chocolate itself, you can usually get away with good quality semisweet, but bittersweet truly transforms this into something spectacular. If you happen to only have salted butter on hand, just cut the added salt in the recipe down to 1/4 teaspoon. And please, don’t try to swap the butter for coconut oil or anything weird—the fat content and flavor of butter are essential for getting that signature melt-in-your-mouth feel.
Step-by-Step Instructions for the Rich Fudgy Cake Recipe
Alright, deep breaths! This is where we turn those beautiful ingredients into that incredible, intense chocolate flavor we talked about. I know the folding part might sound scary, but stick with me; it’s actually really calming once you get into the rhythm of it. First things first, let’s get the oven happy and ready for this masterpiece.
You need to Preheat your oven to 350°F (175°C). Don’t skip this! While that’s happening, grease an 8-inch springform pan really well—I mean it, grease it, then line the bottom with parchment paper. This pan is your best friend because it lets the cake come out whole later, which is essential for presentation!
If you happen to be looking for a different kind of chocolate fix while this bakes, my chocolate lava cake recipe is wonderfully speedy too!
Melting and Mixing the Base of the Flourless Chocolate Torte
This is where the richness starts! Set up a double boiler—basically, a heatproof bowl sitting over a saucepan with just a little simmering water, not touching the water. Toss in your chopped chocolate and those chunks of butter. Stir it gently until it’s completely liquid and perfectly smooth. Don’t walk away—keep an eye on it!
Once it’s all melted and glossy, take that bowl right off the heat. That’s key! We don’t want scrabbled eggs. Whisk in your granulated sugar, the cocoa powder, and the salt until everything looks uniform. Then, beat in those four egg yolks one at a time—really mix it well after each one. Finish this base layer by stirring in the vanilla extract.
Folding Technique for the Best Flourless Chocolate Torte Batter
Now for the magic step that keeps this from turning into a flat hockey puck! In a separate, totally clean bowl, beat those four egg whites. You want them to reach stiff peaks—when you lift the whisk, the peaks should hold their shape firmly and not flop over. This is all the lift we have!
Take about a third of those fluffy egg whites and vigorously mix them into your thick chocolate base. Yes, mix it in! This loosens up that heavy chocolate mixture so it won’t knock all the air out of the rest of the whites. Then, add the remaining egg whites in two additions after that first lightening step. You need to fold them in gently using a rubber spatula, cutting down the middle and sweeping up the sides. Stop folding the second you don’t see any more white streaks. Seriously, overmixing is the enemy here; we need that air locked in for that velvety chocolate torte texture!
Baking and Cooling Your Decadent Chocolate Dessert
Okay, now we slide this baby into that preheated oven, 350°F, for about 30 to 35 minutes. This is delicate timing, so keep an eye on it! You want to see the edges looking set and firm—like they are holding themselves up nicely. But listen to me carefully: the very center should still look a bit soft, maybe even slightly jiggly when you gently nudge the pan.
If you bake it until the middle is completely firm, you’re going to end up with something closer to a fudge brownie, and we want velvety torte, remember? Because we’ve got all that air from the egg whites that needs to settle, the cooling process is just as important as the baking. When you pull this decadent chocolate dessert out, set the springform pan right on a wire rack.
It will look gorgeous and puffed up for about five minutes, and then, inevitably, the center is going to sink down a little bit. Don’t panic and don’t poke it! That sinking is totally normal because of the massive amount—eight ounces!—of melted chocolate and butter holding everything together. It means you did it right and you trapped all that glorious denseness inside.
Leave it completely alone to cool down inside that pan on that wire rack. If you want an even cleaner presentation, sometimes I just let mine cool to room temperature, and then I pop the whole thing into the fridge for at least four hours, or even overnight. Chilling makes slicing so much easier. If you’re curious about what happens when you bake two things at once, check out my tips for chocoflan impossible cake—it’s totally different, but temperature control is similar!
Tips for Success When Making a Flourless Chocolate Torte
Even though this is a wonderfully simple recipe, there are just a few tiny things that can make the difference between a good torte and an absolutely unforgettable one. Getting that perfect, smooth, dense finish takes a little bit of finesse, but I promise it’s all about paying attention in those last few minutes of baking and cooling.
My number one tip, which I mentioned before, is being patient with the cooling! If you try to run a knife around the edge or take it out of the pan while it’s even slightly warm, you’ll end up with a chocolate puddle instead of that gorgeous, sturdy slice you’re aiming for. Chilling is non-negotiable if you want clean lines for your guests.
Achieving a Smooth Finish on Your Flourless Chocolate Torte
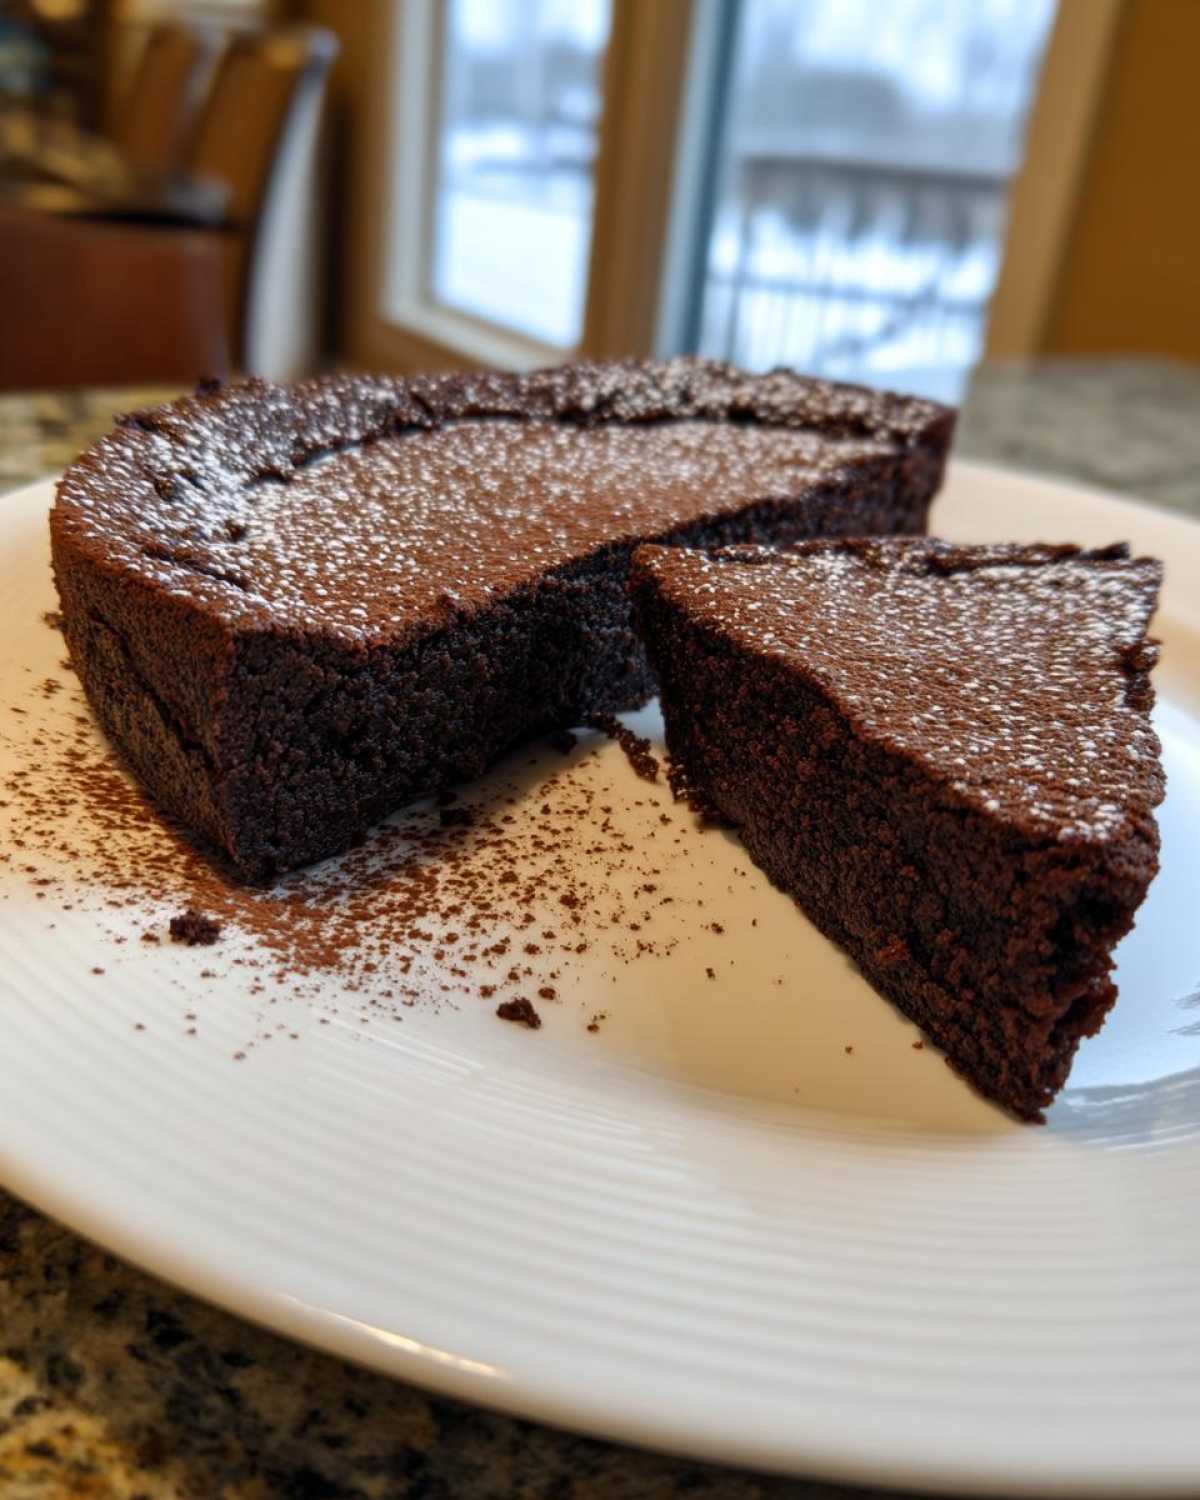
Once that torte is completely cool and has shrunk down perfectly, it’s time to make it beautiful for the table. Because the top surface is so dark and dense, almost like silk, you have a choice for presentation. You can use a very fine-mesh sieve and lightly dust the top with unsweetened cocoa powder for a deep, dramatic look. This keeps the chocolate flavor intense.

However, if you’re serving this in the daytime, or just want that classic bakery contrast, then go for powdered sugar! Sift it lightly over the top. If you wait until the very last minute to dust it, the sugar will look bright white and crisp against the dark surface. Remember, the surface of this no flour cake recipe is naturally going to look a bit craggy or slightly sunken—that’s your proof it’s rich and fudgy! Embrace it, dust it beautifully, and serve away.
Serving Suggestions for Your Velvety Chocolate Torte
This rich fudgy cake recipe is unbelievably satisfying all on its own, but honestly, serving it with the right accompaniments just takes you from “great dessert” to “I may never eat anything else.” You want to pair that intense chocolate flavor with something that cuts through the richness, or something that enhances the darkness.
My absolute favorite thing to do is serve a small slice alongside a very strong, piping hot cup of espresso. The bitterness of the coffee really wakes up the sweetness and the depth of the dark chocolate. It feels so sophisticated!
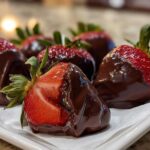
But if you’re serving this for a special occasion like a birthday, you have to pull out the beautiful toppings. Fresh berries are perfection. Think about deep red raspberries or sliced strawberries—their tartness is the perfect foil for this decadent chocolate dessert. I also love just a big, unsweetened dollop of freshly whipped cream. When I say unsweetened, I mean it—the torte is plenty sweet already!
If you need something cold and refreshing for a hot evening, maybe skip the coffee and try one of my fruit-based drinks instead! You might love this frozen peach rose slushy served alongside it; the floral notes are surprisingly lovely with serious chocolate.
The most important takeaway here is balance. Don’t overcomplicate it with too many heavy syrups or sauces. Let the velvety chocolate torte be the star; the accompaniments are just there to shine a spotlight on how amazing it already is!
Storage and Make-Ahead Tips for Your Flourless Chocolate Torte
The best part about making something this incredibly rich is that you absolutely do not have to eat it all right away! Unlike delicate layer cakes, this dense treat actually improves after a day or two in the fridge. That’s wonderful news when you’re planning a big gathering and need to get ahead of the game.
If you’ve successfully chilled the torte completely—which I really, really recommend for getting those clean slices—wrap it tightly in plastic wrap before putting it back in the refrigerator. It keeps beautifully this way for up to four days. Honestly, I think the flavors of the dark chocolate and cocoa powder deepen overnight, so making it the day before your party is perfect timing!
Now, for serving, you can’t just yank it straight from the fridge and slice it open; it will be too hard, and you’ll chip your knife! Before you dust it with powdered sugar or cocoa (save that for serving time!), take the torte out of the fridge about 30 to 45 minutes before you plan to serve it. Let it sit on the counter at room temperature for that little while.
That brief warming time softens the texture just enough so it goes back to that perfect, melt-in-your-mouth dense consistency we love. Trust me, the wait is worth it! If you’re looking for more make-ahead chocolate ideas, you have to check out my recipe for no-bake chocolate peppermint truffles—those are amazing to keep tucked away when a sudden chocolate craving hits!
Don’t worry about the powdered sugar melting if it gets a little warm. If you dust it too early, the moisture in the air will eventually dissolve it, making it look a little patchy. So, only garnish right before you bring this beautiful gluten free chocolate torte to the table. It’s a beautiful final flourish to your decadent chocolate dessert!
Frequently Asked Questions About Making a Flourless Chocolate Torte
You’ve made it all the way through, and I bet you’re feeling confident! But sometimes, even with the best recipe in the world, little questions pop up when you’re standing there with melted chocolate running around. That’s totally normal! Here are a few things people ask me all the time about achieving that perfect, rich fudge factor.
Is this truly a flourless chocolate torte, or is it a simple flourless cake?
That is a great question, because the terms get tossed around all the time! For me, this is definitely a torte, and I’m very specific about that. A simple flourless cake might still have a slightly lighter, spongier texture, sometimes using a tiny bit of nut flour to keep it up. But this recipe? This flourless chocolate torte relies 100% on the eggs and the quality melted chocolate/butter base for its structure. That’s why it sinks in the middle and ends up being so dense and decadent—it’s meant to be that way! It’s heavier, richer, and truly a slice of pure dark chocolate indulgence.
Can I substitute the dark chocolate in this recipe?
You absolutely *can* change up the chocolate, but you have to know you are changing the result. If you use milk chocolate instead of the recommended bittersweet, your torte is going to be much sweeter and won’t have that intense, sophisticated, grown-up chocolate flavor we were aiming for. It will also likely bake up a little softer because milk chocolate has a lower cocoa content and often more sugar. I really advise sticking to 60% cacao or higher! If you are looking for something using alternative flours like almond meal, I’ve got a wonderful almond flour chocolate cake gluten-free recipe you might adore instead!
Also, if you’re ever looking for other gluten-free ideas besides this torte, let me know! Sometimes you just need a change of pace!
Estimated Nutritional Data for This Flourless Chocolate Torte
Now, let’s talk numbers for a second because this is a rich dessert, and it’s good to know what you’re diving into! As you might expect when you’re dealing with a whole stick and a half of butter and 8 ounces of good quality dark chocolate, this isn’t exactly a light snack. But hey, that’s why we only serve it on special occasions, right?
Remember, since this is a homemade chocolate torte, these figures are just estimates based on the core ingredients listed above. How much you dust it with powdered sugar or what you serve it alongside can change things fast! I try not to stress too much about it when I’m baking something this truly decadent.
Here’s a rough breakdown per serving (we got 8 servings out of the batch):
- Calories: 450
- Fat: 32g (Watch out for that saturated fat, that’s the butter and chocolate doing their job!)
- Carbohydrates: 38g
- Sugar: 35g (Mostly from the good chocolate itself and the sugar we added!)
- Protein: 8g
It might look high in fat and sugar, but look at that protein! That comes straight from the eggs doing all the heavy lifting. Even though this is a richer treat, if you’re skipping the wheat for the gluten free chocolate torte, you’re still getting some great density and richness that fills you up fast!
If you want a dessert that hits the sweet spot but packs way more protein powder into those calories, you should really check out my recipe for protein-packed chocolate cottage cheese mousse. It scratches the same dark chocolate itch but is way lighter for an everyday fix!
PrintThe Ultimate Decadent & Fudgy Flourless Chocolate Torte
Make a deeply rich, dense, and velvety chocolate torte that is naturally gluten-free. This recipe delivers intense chocolate flavor perfect for special occasions.
- Prep Time: 20 min
- Cook Time: 35 min
- Total Time: 55 min
- Yield: 8 servings
- Category: Dessert
- Method: Baking
- Cuisine: American
- Diet: Gluten Free
Ingredients
- 8 ounces bittersweet or semisweet chocolate, chopped
- 8 ounces (2 sticks) unsalted butter, cut into pieces
- 1 cup granulated sugar
- 1/4 cup unsweetened cocoa powder, plus more for dusting
- 1/2 teaspoon salt
- 4 large eggs, separated
- 1 teaspoon vanilla extract
- Powdered sugar, for dusting (optional)
Instructions
- Preheat your oven to 350°F (175°C). Grease an 8-inch springform pan and line the bottom with parchment paper.
- Place the chopped chocolate and butter in a heatproof bowl set over a saucepan of simmering water (or use a microwave in short bursts). Stir until completely melted and smooth. Remove from heat.
- Whisk the granulated sugar, cocoa powder, and salt into the melted chocolate mixture until combined.
- Beat in the egg yolks one at a time, mixing well after each addition. Stir in the vanilla extract.
- In a separate clean bowl, beat the egg whites with an electric mixer until stiff peaks form.
- Gently fold one-third of the beaten egg whites into the chocolate mixture to lighten it. Then, carefully fold in the remaining egg whites until just combined. Do not overmix.
- Pour the batter into the prepared springform pan.
- Bake for 30 to 35 minutes. The edges should look set, but the center will still look slightly soft.
- Let the torte cool completely in the pan on a wire rack. The center will sink slightly as it cools.
- Once cool, carefully remove the sides of the springform pan. Dust the top with powdered sugar or cocoa powder before slicing and serving.
Notes
- For a cleaner slice, chill the torte for at least 4 hours or overnight before cutting.
- Use high-quality dark chocolate for the best flavor outcome.
- You can serve this torte with fresh raspberries or a dollop of unsweetened whipped cream.
Nutrition
- Serving Size: 1 slice
- Calories: 450
- Sugar: 35
- Sodium: 150
- Fat: 32
- Saturated Fat: 19
- Unsaturated Fat: 13
- Trans Fat: 0.5
- Carbohydrates: 38
- Fiber: 4
- Protein: 8
- Cholesterol: 140
Comments are closed.