


Indulge in the Perfect Chocolate Lava Cake
Oh, the magic of a perfect chocolate lava cake! There’s just something so special about cutting into a warm, individual chocolate cake and seeing that river of molten chocolate flow out. It feels luxurious, doesn’t it? As Chloe Thompson from Sunday Flavor, I’ve spent countless Sundays perfecting recipes that bring joy, and this gooey chocolate wonder is a true winner. It’s the kind of dessert that makes any day feel like a celebration. Get ready to impress yourself and everyone around you with this incredible treat.
Why You’ll Love This Chocolate Lava Cake
* Pure chocolate bliss.
* Incredibly gooey, molten center.
* Surprisingly easy to make.
* Ready in under 30 minutes.
* Impresses guests every time.
* A perfect, decadent end to any meal.
Gather Your Ingredients for Chocolate Lava Cake
Let’s get our mise en place ready for these delightful chocolate lava cakes. Having everything measured and prepped makes the cooking process a breeze. You’ll need good quality ingredients for the best flavor.
First, grab about half a cup of unsalted butter. That’s one stick, softened. Next, you’ll need six ounces of bittersweet or semisweet chocolate. Chop it up finely for easier melting. We’ll also need two large eggs and two extra egg yolks. Make sure they’re at room temperature for better batter consistency.
For sweetness, we’ll use a quarter cup of granulated sugar. Just a tiny pinch of salt will really make the chocolate flavors pop. And finally, we need just a quarter cup of all-purpose flour. That’s all there is to it! Oh, and don’t forget a little powdered sugar for dusting, plus some fresh berries or whipped cream if you fancy a pretty finish. These simple items create pure chocolate magic.
Mastering the Art of Chocolate Lava Cake: Step-by-Step
Now for the fun part – bringing our chocolate lava cakes to life! It’s a straightforward process. Let’s get started.
Preparing the Ramekins for Your Chocolate Lava Cake
First, we need to prep our ramekins. This step is crucial. Generously butter the inside of four 6-ounce ramekins. Make sure you get into all the nooks and crannies. Then, lightly dust them with flour. Tap out any excess flour. This ensures our beautiful chocolate lava cakes will slide out perfectly later.
Melting and Combining for the Perfect Chocolate Lava Cake Batter
Next, let’s create our luscious batter. In a double boiler or a microwave-safe bowl, gently melt the butter and chopped chocolate together. Stir until it’s completely smooth and glossy. Let this rich mixture cool just a bit. Meanwhile, in a separate bowl, whisk together your eggs, egg yolks, granulated sugar, and that pinch of salt. Whisk until it’s well combined and slightly lighter in color. Now, slowly whisk the cooled chocolate mixture into the egg mixture. Stir until everything is beautifully incorporated. Finally, gently fold in the flour. Be careful not to overmix here; we want a tender cake.
Baking Your Chocolate Lava Cake to Molten Perfection
It’s time to bake! Preheat your oven to 425°F (220°C). Place the prepared ramekins on a baking sheet. Divide the batter evenly among the ramekins. Bake for 12 to 14 minutes. Keep a close eye on them! The edges should look set, but the centers must still be soft and jiggly. This is the secret to that amazing molten core. Don’t overbake, or you’ll lose the lava! Let them rest in the ramekins for just one minute before inverting.
Essential Equipment for Making Chocolate Lava Cake
To whip up these delightful chocolate lava cakes, you’ll need a few key kitchen tools. Having the right equipment makes the process so much smoother.
You’ll definitely need four 6-ounce ramekins. These little pots are perfect for individual cakes. Grab a couple of mixing bowls for your ingredients. A whisk is essential for combining the wet ingredients. You’ll also want a baking sheet to place the ramekins on. A rubber spatula is handy for folding in the flour and scraping the bowls clean. These simple tools ensure your chocolate lava cake journey is a success.
Tips for Unforgettable Chocolate Lava Cake Success
Achieving that perfect molten center for your chocolate lava cake is all about a few key details. I always recommend using good quality chocolate; it truly makes a difference in flavor. Remember, the magic is in the timing! Don’t overbake your cakes. A slightly wiggly center is exactly what you want. I learned this the hard way, ending up with delicious but solid chocolate cakes!
If you’re short on time, you can prepare the batter ahead of time and chill the ramekins. Just add a minute or two to the baking time if they’re going in cold from the fridge. Trust your eyes more than the clock for that ideal bake. Your gorgeous chocolate lava cake awaits!
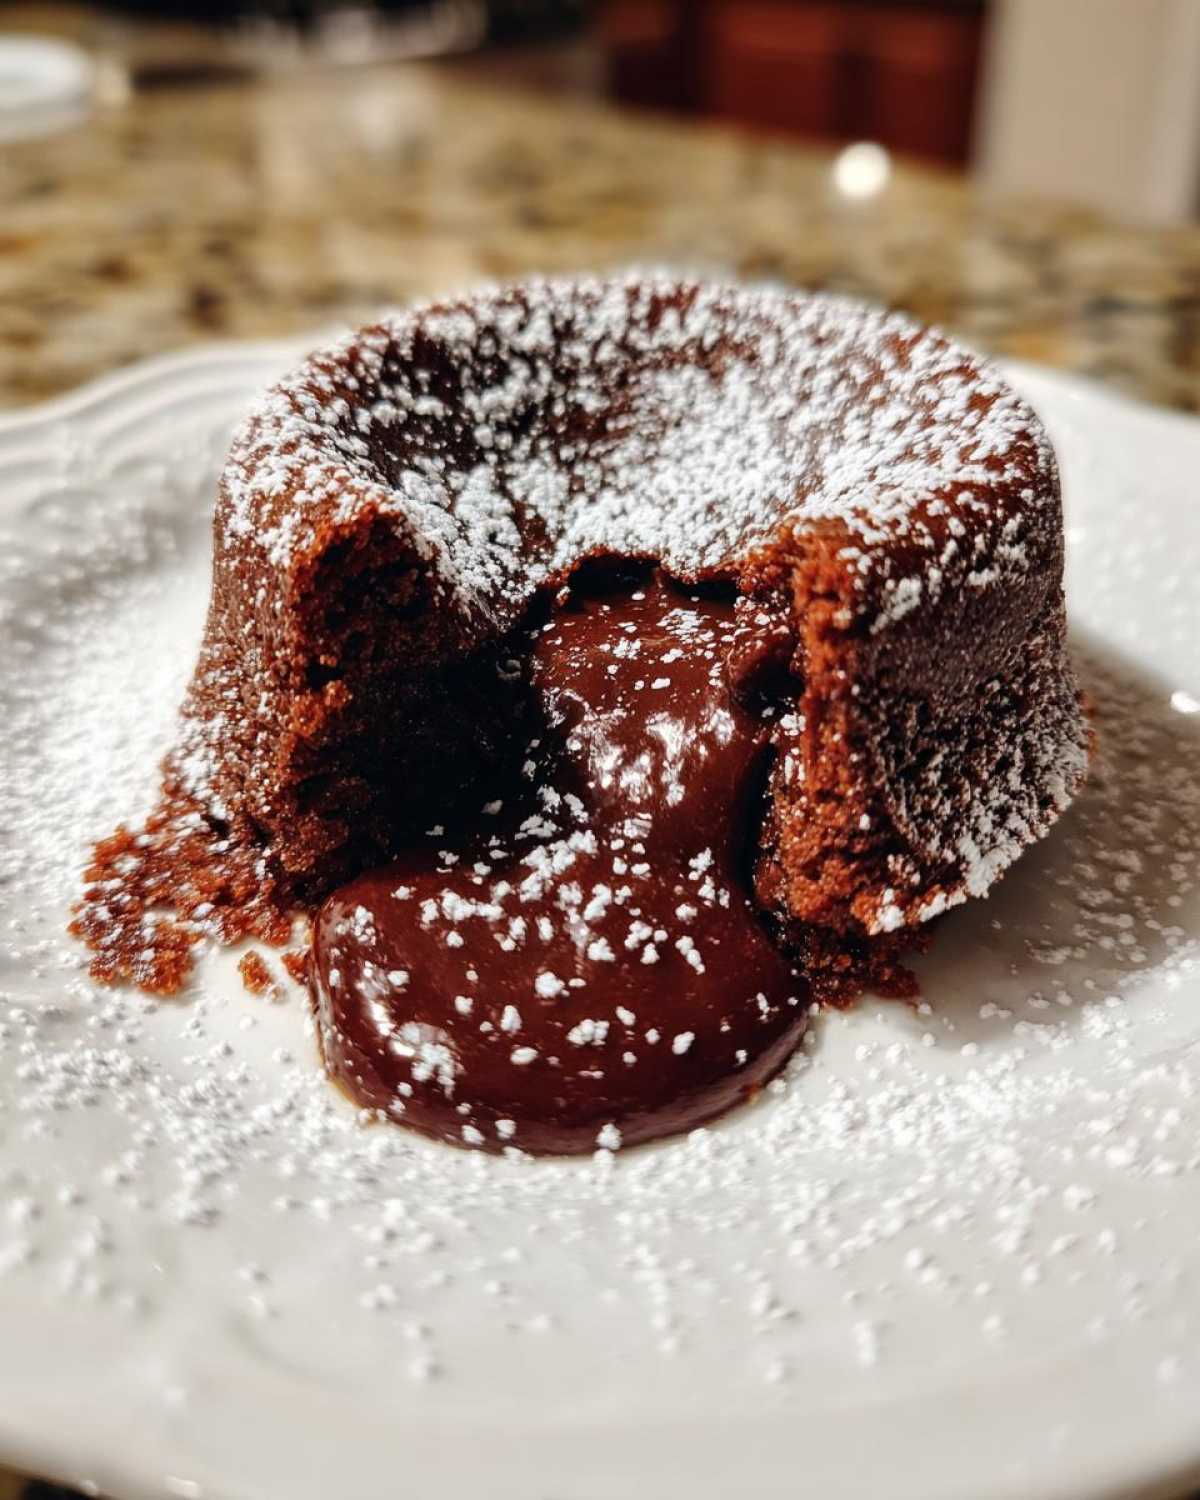
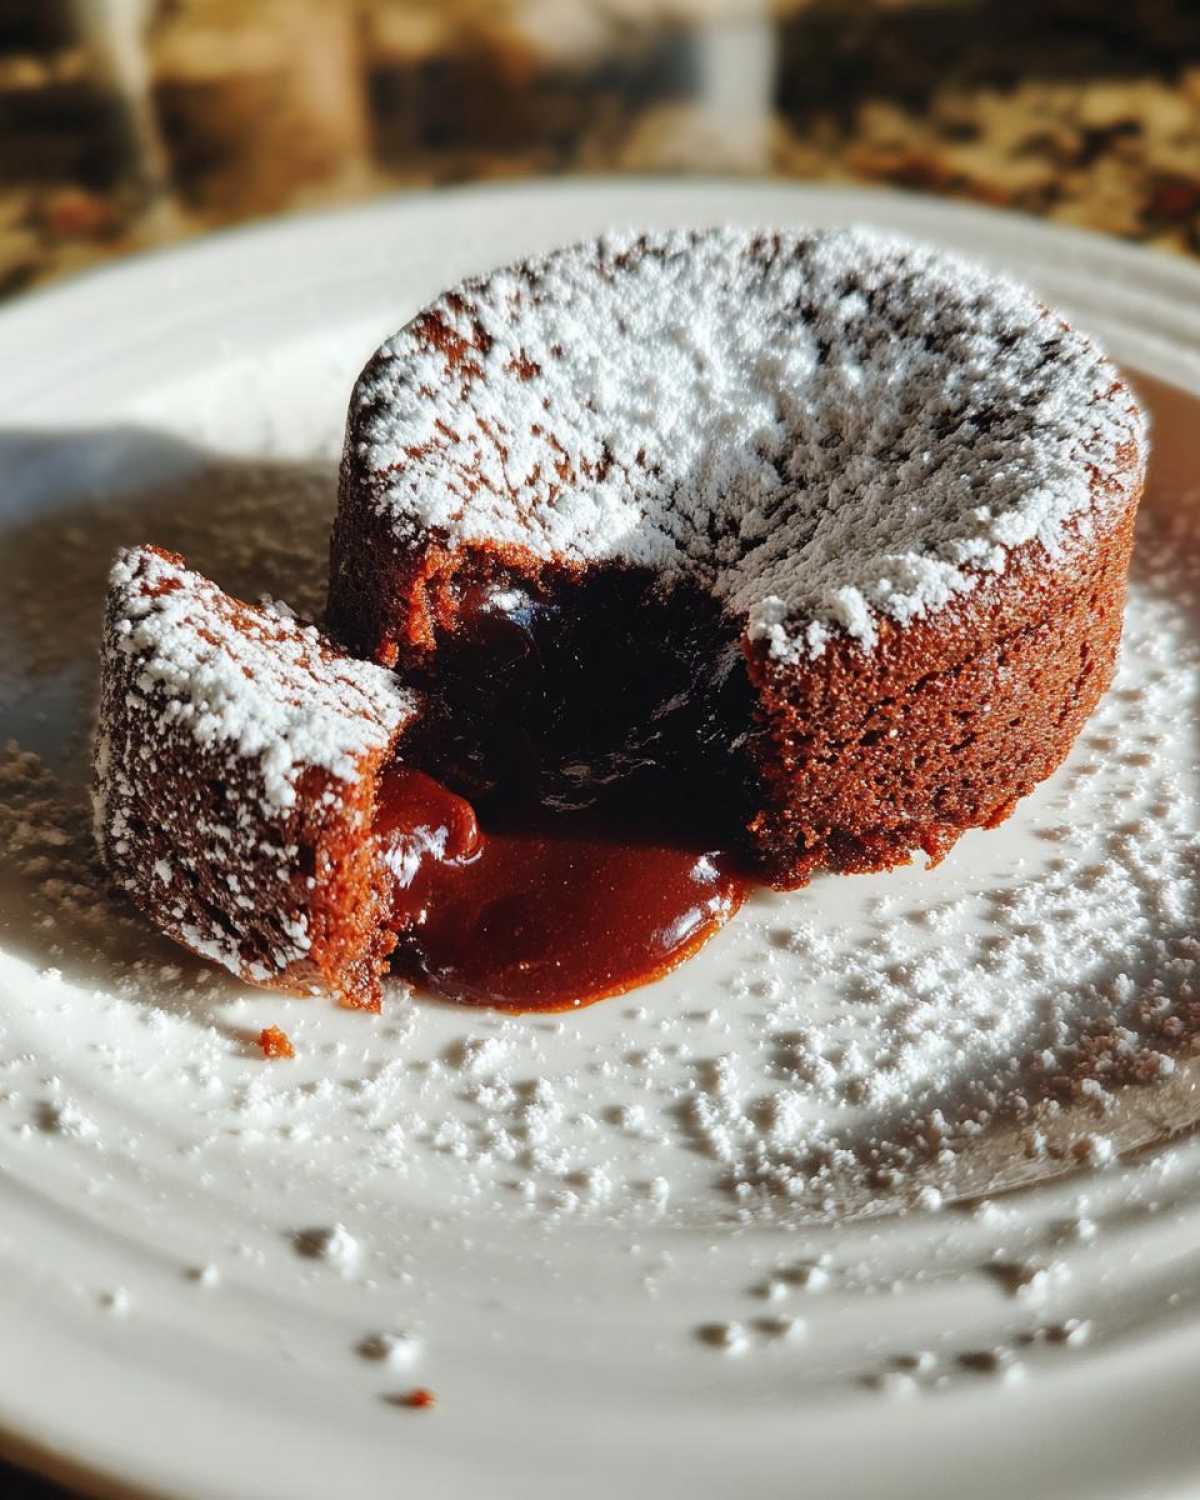
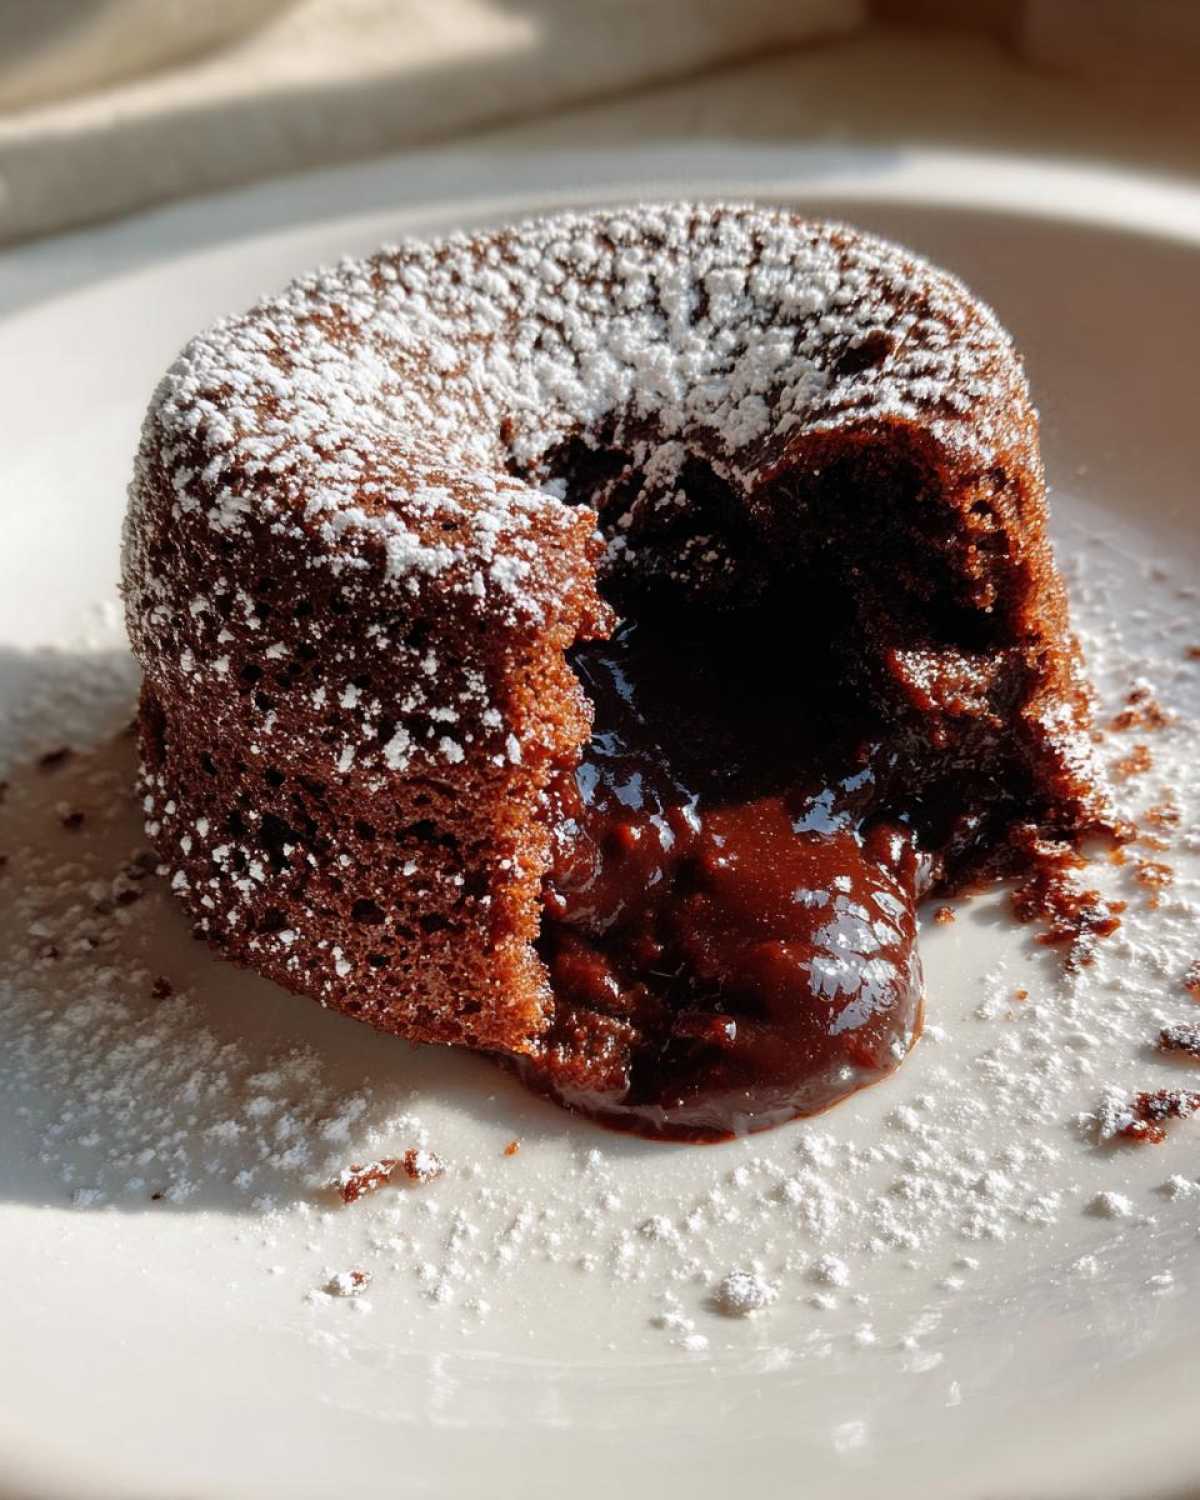
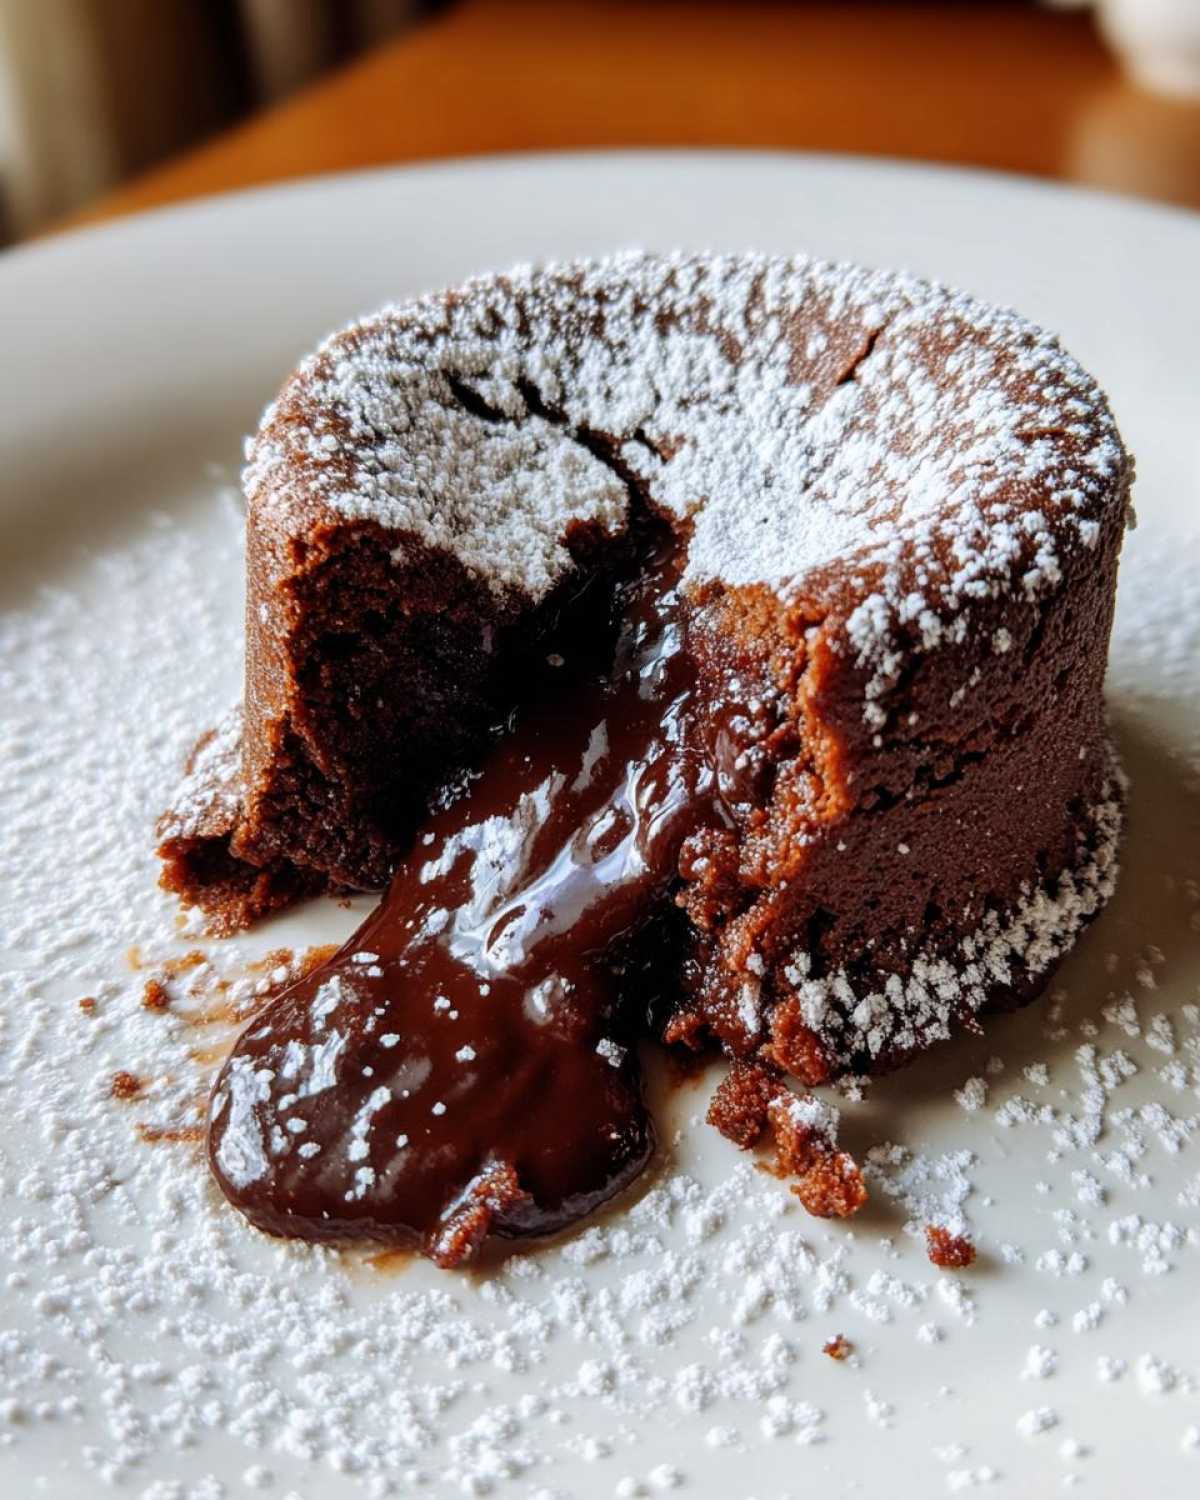
Serving and Enjoying Your Chocolate Lava Cake
Now for the best part: savoring your homemade chocolate lava cake! Once inverted onto a plate, these beauties are ready to be adored. A light dusting of powdered sugar adds a touch of elegance. You can also add fresh berries, like raspberries or strawberries, for a pop of color and freshness. A dollop of whipped cream or a scoop of vanilla ice cream is also divine. Serve them immediately. That warm, gooey molten center is at its absolute peak right after baking. Dive in and enjoy every decadent bite!
Frequently Asked Questions About Chocolate Lava Cake
Got questions about crafting the perfect chocolate lava cake? I’ve got you covered! It’s a common query: “Can I make chocolate lava cake ahead of time?” Absolutely! You can prepare the batter and chill the prepared ramekins for up to a few hours. Just remember to bake them a little longer, maybe an extra minute or two, if they’re going in cold.
What if your chocolate lava cake doesn’t have that signature molten center? Don’t fret! This usually means it was slightly overbaked. Next time, trust your eyes. The edges should be set, but the center should still be a bit soft and jiggly. A minute or two less in the oven can make all the difference.
Another great question is about chocolate: “Can I use different types of chocolate?” Yes, you can! While bittersweet or semisweet chocolate is classic, you can experiment with milk chocolate for a sweeter result, or even dark chocolate for a more intense flavor. Just ensure you use good quality chocolate for the best molten experience. These little tips help ensure your gooey chocolate cake is always a triumph.
Understanding the Nutrition of Your Chocolate Lava Cake
It’s important to remember that the nutritional information for this delicious chocolate lava cake is an estimate. Factors like the specific brands of ingredients you use and any optional additions can change these values. Think of it as a general guide! Enjoy your decadent treat knowing it’s made with love.
PrintFlawless Chocolate Lava Cake: 12-Minute Decadence

Create a decadent chocolate lava cake with a gooey molten center. This recipe is perfect for impressing guests or treating yourself to a special dessert.
- Prep Time: 15 minutes
- Cook Time: 14 minutes
- Total Time: 29 minutes
- Yield: 4 servings
- Category: Dessert
- Method: Baking
- Cuisine: American
- Diet: Vegetarian
Ingredients
- 1/2 cup (1 stick) unsalted butter, plus more for greasing
- 6 ounces bittersweet or semisweet chocolate, chopped
- 2 large eggs
- 2 large egg yolks
- 1/4 cup granulated sugar
- Pinch of salt
- 1/4 cup all-purpose flour
- Powdered sugar, for dusting (optional)
- Fresh berries or whipped cream, for serving (optional)
Instructions
- Preheat your oven to 425°F (220°C). Generously butter and lightly flour four 6-ounce ramekins.
- In a double boiler or microwave-safe bowl, melt the butter and chopped chocolate together. Stir until smooth. Let it cool slightly.
- In a separate bowl, whisk together the eggs, egg yolks, granulated sugar, and salt until well combined and slightly lighter in color.
- Gradually whisk the cooled chocolate mixture into the egg mixture until fully incorporated.
- Gently fold in the flour until just combined. Do not overmix.
- Divide the batter evenly among the prepared ramekins.
- Place the ramekins on a baking sheet and bake for 12-14 minutes, or until the edges are set and the centers are still soft.
- Let the cakes cool in the ramekins for 1 minute.
- Carefully invert each ramekin onto a serving plate. The cakes should slide out easily.
- Dust with powdered sugar, if desired, and serve immediately with fresh berries or whipped cream.
Notes
- For best results, use good quality chocolate.
- Do not overbake, or you will not have a molten center.
- The cakes can be assembled a few hours ahead and refrigerated. Bake them for a few minutes longer if baking from chilled.
Nutrition
- Serving Size: 1 cake
- Calories: 450
- Sugar: 30g
- Sodium: 100mg
- Fat: 30g
- Saturated Fat: 18g
- Unsaturated Fat: 12g
- Trans Fat: 0.5g
- Carbohydrates: 45g
- Fiber: 5g
- Protein: 8g
- Cholesterol: 150mg


Comments are closed.