


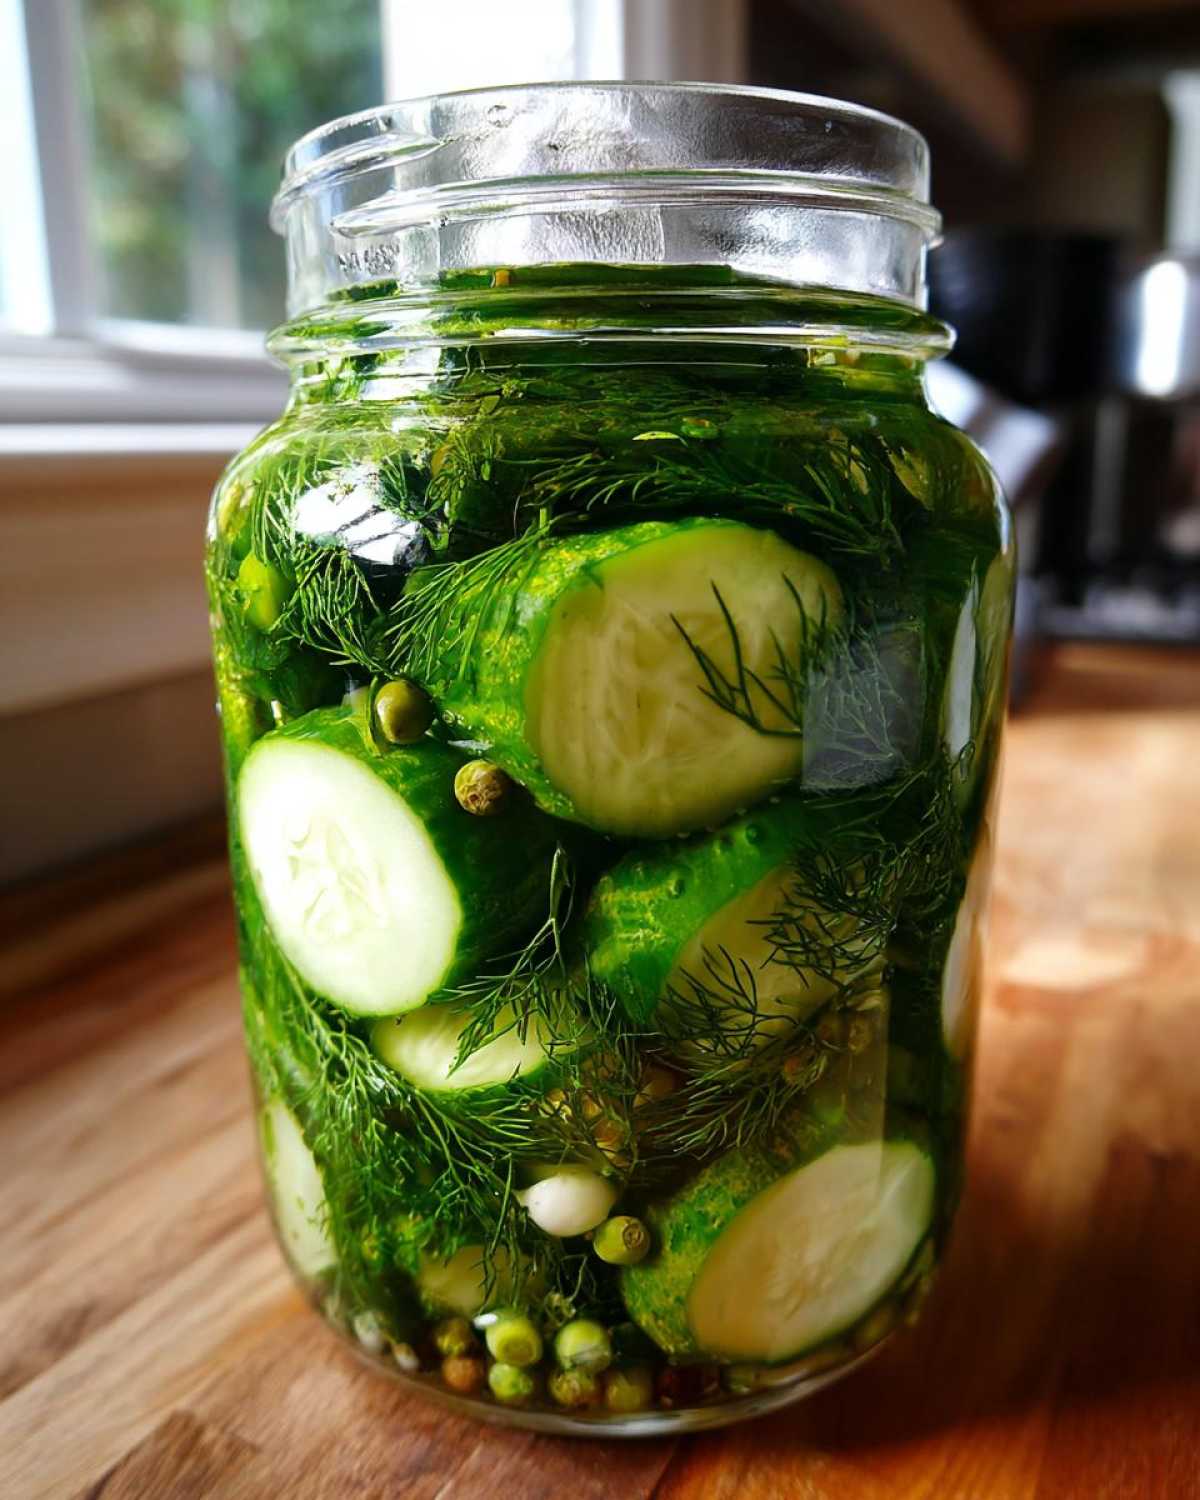
Oh, how I remember that craving! You know the one—that intense need for a pickle that snaps when you bite it, bursting with tangy, fresh dill flavor. Forget those sad, soggy jars sitting on the supermarket shelf; those don’t even come close to the vibrant snap you get from homemade. That’s why I’m so thrilled to share my absolute favourite shortcut: these $\text{5-Minute No-Cook Crispy Refrigerator Pickles}$. Seriously, they take about five minutes of prep, and boom—you’ve got the best $\text{refrigerator pickles}$ that easily trump anything store-bought. When I left my crazy corporate job a while back, I promised myself I’d infuse joy into every single day, and trust me, these quick pickles are pure, tangy joy! They perfectly capture the spirit of Sunday Flavor, proving that incredible flavor doesn’t need complicated canning rituals. If you want to know a bit more about my journey from spreadsheets to spices, you can always check out the About Me page!
Why You Will Love These Crispy Refrigerator Pickles
- You’re eating ridiculously $\text{crispy refrigerator pickles}$ in under 24 hours. That speed is unmatched!
- It’s a true $\text{No Cook Pickling Method}$—no balancing pots of boiling water needed, which is perfect for beginners.
- They offer that satisfying, loud crunch that makes them the best $\text{snackable pickled vegetables}$ imaginable.
- The flavor is intensely fresh; it’s that bright, $\text{tangy cucumber pickle}$ taste you rarely find commercially.
- These are the perfect $\text{easy homemade pickles}$ for topping burgers or just eating straight from the jar.
- They give you complete control over the salt and sugar levels, making them a wonderfully healthier snack alternative.
Why You Will Love These Crispy Refrigerator Pickles
I’m so glad you asked! Why bother with complicated canning jars when you can have this incredible flavor boost happening in your fridge almost instantly? These $\text{refrigerator pickles}$ are my secret weapon when I need a quick fix. They are lightning-fast and deliver serious crunch. Check out why this recipe has earned a permanent spot in my kitchen:
- You’re eating ridiculously $\text{crispy refrigerator pickles}$ in under 24 hours. That speed is unmatched!
- It’s a true $\text{No Cook Pickling Method}$—no balancing pots of boiling water needed, which is perfect for beginners or anyone needing a $\text{Beginner Canning Alternative}$.
- They offer that satisfying, loud crunch that makes them the best $\text{snackable pickled vegetables}$ imaginable.
- The flavor is intensely fresh; it’s that bright, $\text{tangy cucumber pickle}$ taste you rarely find commercially.
- These are the perfect $\text{easy homemade pickles}$ for topping burgers or just eating straight from the jar as a $\text{snackable pickle}$.
- They give you complete control over the salt and sugar levels, making them a wonderfully $\text{fresh pickle snack idea}$ compared to store-bought options.
Essential Ingredients for Perfect Refrigerator Pickles
Making fantastic $\text{refrigerator pickles}$ is really tough to mess up since there’s no actual cooking involved! But you do need the right players in the game, especially when it comes to the brine. You’ll need about two pounds of pickling cucumbers—and make sure you slice them uniformly, aiming for 1/4 inch thick rounds. That thickness is key to getting that beautiful, long-lasting crunch we’re looking for!
The brine itself requires white vinegar, water, sugar, and most importantly, pickling salt. Please, don’t swap the pickling salt for regular table salt! The anti-caking agents in table salt can turn your beautiful cucumbers cloudy and kind of soft. We need that pure salt for a crisp result.
Ingredient Notes and Substitution Tips for Your Vinegar Brine Pickles
When picking out your cucumbers, look for small, firm varieties like Kirby or Persian cucumbers; they hold up so much better than the giants you usually find for slicing. If you want that truly next-level, hard-as-a-rock texture, you can look up pickling lime to add to the brine, but you must rinse those cucumbers like crazy afterwards. If you’re thinking ahead and want to try a different flavor profile, remember those $\text{quick pickle recipes}$?
For instance, if you wanted to pivot to making $\text{Bread and Butter Pickles No Canning}$ instead, just bump that granulated sugar way up to a half cup and toss in some mustard seed with your dill. It’s exciting how customizable these $\text{vinegar brine pickles}$ are!
The 5-Minute No Cook Pickling Method for Refrigerator Pickles
Okay, this is my favorite part! This is where the magic happens in about five minutes of active time. Since we are skipping the canning process, this $\text{No Cook Pickling Method}$ is honestly almost laughably easy. The whole trick to success with these $\text{refrigerator pickles}$ is making sure every single cucumber slice gets intimately acquainted with the brine. For a deeper dive into the general process later on, you can check out my dedicated refrigerator dill pickles recipe guide!
Preparing the Cucumbers and Flavor Base
First things first: wash those cukes well and slice them evenly to about 1/4 inch. Uniformity matters for texture, remember? While you’re doing that, grab your clean pint jars. You need four jars for this batch. Divide your flavour heroes amongst them: pop in the smashed garlic cloves, your fresh dill heads (or the seed if you’re using that), and those little black peppercorns. Think of this as building the flavour foundation at the bottom of the jar.
Creating the Vinegar Brine for Your Quick Pickle Recipes
Next up is my simple $\text{vinegar brine pickles}$ mixture. In a separate bowl—just a regular mixing bowl—whisk together the white vinegar, water, pickling salt, and sugar. Whisk it hard! You absolutely need to dissolve all that salt and sugar before you pour it over the cucumbers. If they settle on the bottom, you end up with oddly salty spots in your pickles. We want that tang distributed evenly throughout these $\text{quick pickle recipes}$!
Packing, Brining, and Chilling Your 24 Hour Pickles
Now, carefully pack those sliced cucumbers into the jars, pressing them down nice and tight, but leave about half an inch empty space at the top. Pour that brine right over the top until every single slice is covered. Seriously, submerge them! Tap the jars gently to coax out any air bubbles hiding underneath. Let them sit on the counter for just one hour—that helps them get acquainted. After that hour, seal them up tight and into the fridge they go. My usual rule for developing the best flavor in these $\text{24 hour pickles}$ is to wait until the next day. Patience yields the crunchiest results!
Tips for Guaranteed Crunchy Refrigerator Pickles
Look, there’s nothing sadder than putting in the effort for $\text{refrigerator pickles}$ only to end up with mush. If crunch is what you’re after—and I know it is—you have to treat the cucumbers right! My biggest tip, which I learned through many slightly soft batches, is using the freshest, smallest cucumbers you can find, usually Kirby or Persian types. They just have denser flesh that resists getting soggy.
Also, I mentioned it before, but I’ll scream it from the rooftops: use pickling salt only! But if you really, really want to ensure textbook crispness, adding just 1/4 teaspoon of pickling lime to the brine mixture—before you pour it, of course—works wonders for texture. Just remember if you go that route, rinse those slices thoroughly afterwards! And finally, don’t jam-pack those jars! Overcrowding traps air and prevents the brine from circulating properly. Give those cucumber coins some room to breathe so you can enjoy these fantastic homemade condiments easy, which are perfect as a $\text{crunchy salad topping}$!
Serving Suggestions for Your Homemade Condiments Easy
Now that you have jars bursting with tangy, crisp goodness—the ultimate $\text{homemade condiments easy}$—the real fun begins: eating them! Honestly, once you have these $\text{refrigerator pickles}$ ready, you’ll find yourself grabbing them way more often than you used to. They are perfect straight out of the cold jar if you just need a quick, low-calorie, savory snack. They satisfy that craving better than chips, I promise!
Of course, their true calling is elevating comfort food. If you are whipping up a classic burger, these are non-negotiable. A thick-cut slice of this $\text{dill pickle recipe fridge}$ on a juicy patty just cuts through the richness perfectly. They are also phenomenal on a grilled cheese sandwich—the tanginess wakes up the cheddar beautifully. I even chop them up small and toss them into tuna or chicken salad to give that mayonnaise-based dish a lovely, bright kick!
If you are looking for something super crunchy to add to your weekly meal prep, these work great over rice bowls or tucked into wraps. They really shine as a $\text{crunchy salad topping}$! I sometimes throw them into my grain salads just to give the whole meal a little zing. If you are planning a big party spread, you absolutely have to try making a gigantic layered sub using these pickles; I detailed my process for the ultimate sandwich build on my ultimate party sub recipe post. It’s a total game-changer!
Storage and Shelf Life of Refrigerator Pickles
This is where the beauty of $\text{refrigerator pickles}$ truly shines, especially compared to the whole canning process. Since we aren’t sterilizing these in boiling water baths, they need to stay cold, which also keeps their texture absolutely perfect. Once they’ve chilled out in the fridge for those crucial 24 hours, you can enjoy them for up to three weeks!
It’s important to remember that because these are $\text{easy homemade pickles}$ relying on refrigeration, they won’t last for months and months like shelf-stable canned goods, but honestly, they never last that long anyway! Trust me, the intense flavor and crunch disappear fast because everyone in the house will be snacking on them constantly.
When you serve them up, always eat them cold. Don’t let them sit out on the counter for long stretches, either. Just scoop out what you need for your burger or your snack, keep the rest tucked away in the cold, and enjoy that bright, $\text{tangy cucumber pickle}$ flavor straight from the jar. It’s super simple food preservation that fits right into a busy life!
Frequently Asked Questions About Refrigerator Pickles
Can I make these refrigerator pickles spicy?
Oh yes, totally! If you want to take these $\text{refrigerator pickles}$ from perfectly dill-y to dialled-up spicy, it’s incredibly easy to customise the heat level during assembly. Right when you are dropping your garlic and peppercorns into the jar, just toss in about half a teaspoon of red pepper flakes. If you really love the burn, slice up a few thin rounds of jalapeño—seed them if you want less heat, leave the seeds in if you dare! That heat infuses right into that delicious $\text{vinegar brine}$ as it chills. It’s another great reason why these $\text{quick pickle recipes}$ are so much better than store-bought!
How long must I wait before eating these refrigerator pickles?
I know, trust me, waiting is the hardest part! While the $\text{garlic dill pickles recipe}$ is safe to eat after about 8 to 10 hours, I really, truly, beg you to hold out for the full 24 hours. Why? Because the vinegar and dill need time to fully penetrate the cucumber slices. If you eat them too soon, they taste mostly like salted, cold cucumber rather than a fully realized, $\text{tangy cucumber pickle}$. If you absolutely can’t wait, taste one at hour 12, then again at 24, and tell me I wasn’t right! You want those $\text{24 hour pickles}$ for the best flavor profile. If you ever run into trouble or have a question about keeping your recipes safe, please don’t hesitate to reach out via the contact page!
What is the difference between these and canned pickles?
That’s a fantastic question, and it gets right to the core of why I love this method so much! The main difference is shelf stability. These $\text{refrigerator pickles}$ use a simple brine meant only to flavor and preserve them within the cold environment of your fridge. Think of it as a super-fast, $\text{Beginner Canning Alternative}$—you just mix, pack, and chill. Traditional canned pickles have to go through a hot water bath process which kills off bacteria and air, allowing them to sit on a shelf for years at room temperature. Canned pickles are safer for long-term storage, but honestly, they usually lose that amazing, crisp texture that these fresh $\text{easy homemade pickles}$ keep intact!
Estimated Nutritional Data for Tangy Cucumber Pickle
While these $\text{refrigerator pickles}$ are such a phenomenal, fresh addition to your plate, I always think it’s helpful to have a general idea of what’s in them, especially since they’re such a wildly $\text{snackable pickled vegetable}$! Since this is a simple recipe relying on cucumbers, salt, vinegar, and a tiny bit of sugar, the numbers are pretty fantastic—especially compared to those heavily processed store-bought versions.
Keep in mind that this data is based on the exact recipe amounts provided above, serving four jars. Your actual sodium levels might change slightly depending on the brand of pickling salt you use, but overall, these are a great low-calorie choice.
- Serving Size: 4 slices
- Calories: 10
- Sugar: 1 gram
- Sodium: 290 mg
- Fat: 0 grams
- Protein: 0 grams
See? Super low in sugar and calories—perfect for enjoying as a $\text{fresh pickle snack idea}$ anytime you need something zesty! Just a little note from one home cook to another: these are just estimates, which is standard for homemade recipes. The exact numbers can swing a little depending on the specific size of your cucumbers or the brand labels on your vinegar. But you can trust that these $\text{tangy cucumber pickle}$ results are far better for you than grabbing a jar off the shelf!
Share Your Sunday Flavor Creations
Now that you know how incredibly easy it is to make these $\text{refrigerator pickles}$—literally five minutes and you’re done—I absolutely want to see what you whip up! Bringing that bright, tangy crunch into your kitchen should make every day feel a little more like a Sunday, right?
If you give this $\text{No Cook Pickling Method}$ a try, please drop a comment below and let me know how they turned out. Did you wait the full 24 hours, or did you sneak a bite sooner? Were they piled high on your burgers, or did you keep them strictly for snacking? I adore seeing your kitchen adventures!
If you snap a photo of your beautiful jars or your perfectly pickled sandwich creation, please share it on Instagram and tag me! Seeing your food inspire someone else is truly the biggest compliment for me here at Sunday Flavor. Happy pickling, friends, and remember to check out the site disclaimer if you have any specific questions about food safety or recipe guarantees. Cheers to that perfect crunch!
Print5-Minute No-Cook Crispy Refrigerator Dill Pickles
Make these easy refrigerator pickles in just five minutes of prep time. You get crunchy, tangy dill pickles that are better than store-bought, ready to eat in 24 hours. This no cook pickling method is perfect for beginners.
- Prep Time: 15 min
- Cook Time: 0 min
- Total Time: 1 hour 15 min (plus 24 hours chilling)
- Yield: 4 pints
- Category: Side Dish
- Method: No Cook Pickling
- Cuisine: American
- Diet: Vegetarian
Ingredients
- 2 pounds pickling cucumbers, sliced 1/4 inch thick
- 1/2 cup white vinegar
- 1/2 cup water
- 1 tablespoon pickling salt
- 1 teaspoon granulated sugar
- 4 cloves garlic, smashed
- 2 heads fresh dill (or 2 teaspoons dried dill seed)
- 1 teaspoon whole black peppercorns
Instructions
- Wash your cucumbers well. Slice them into uniform 1/4-inch thick rounds.
- In a medium bowl, whisk together the white vinegar, water, pickling salt, and sugar until the salt and sugar dissolve completely. This is your vinegar brine.
- Gather four clean, pint-sized glass jars with lids. Divide the garlic cloves, fresh dill (or dill seed), and black peppercorns evenly among the four jars.
- Pack the sliced cucumbers tightly into the jars, leaving about 1/2 inch of headspace at the top.
- Pour the vinegar brine over the cucumbers in each jar, making sure all the cucumber slices are submerged. Tap the jars gently to release any trapped air bubbles.
- Wipe the rims clean, seal the jars tightly with the lids, and let them sit on the counter at room temperature for about 1 hour.
- Transfer the jars to the refrigerator. For the best flavor and crunch, wait at least 24 hours before eating your crispy refrigerator pickles. They keep well in the fridge for up to three weeks.
Notes
- For extra crunch, you can add 1/4 teaspoon of pickling lime to the brine, but rinse the cucumbers thoroughly before brining if you use lime.
- If you prefer Bread and Butter Pickles No Canning, increase the sugar in the brine to 1/2 cup and add 1/2 teaspoon of mustard seed.
- These pickles are excellent as sandwich condiments homemade or as a crunchy salad topping.
Nutrition
- Serving Size: 4 slices
- Calories: 10
- Sugar: 1
- Sodium: 290
- Fat: 0
- Saturated Fat: 0
- Unsaturated Fat: 0
- Trans Fat: 0
- Carbohydrates: 2
- Fiber: 0
- Protein: 0
- Cholesterol: 0


Comments are closed.