


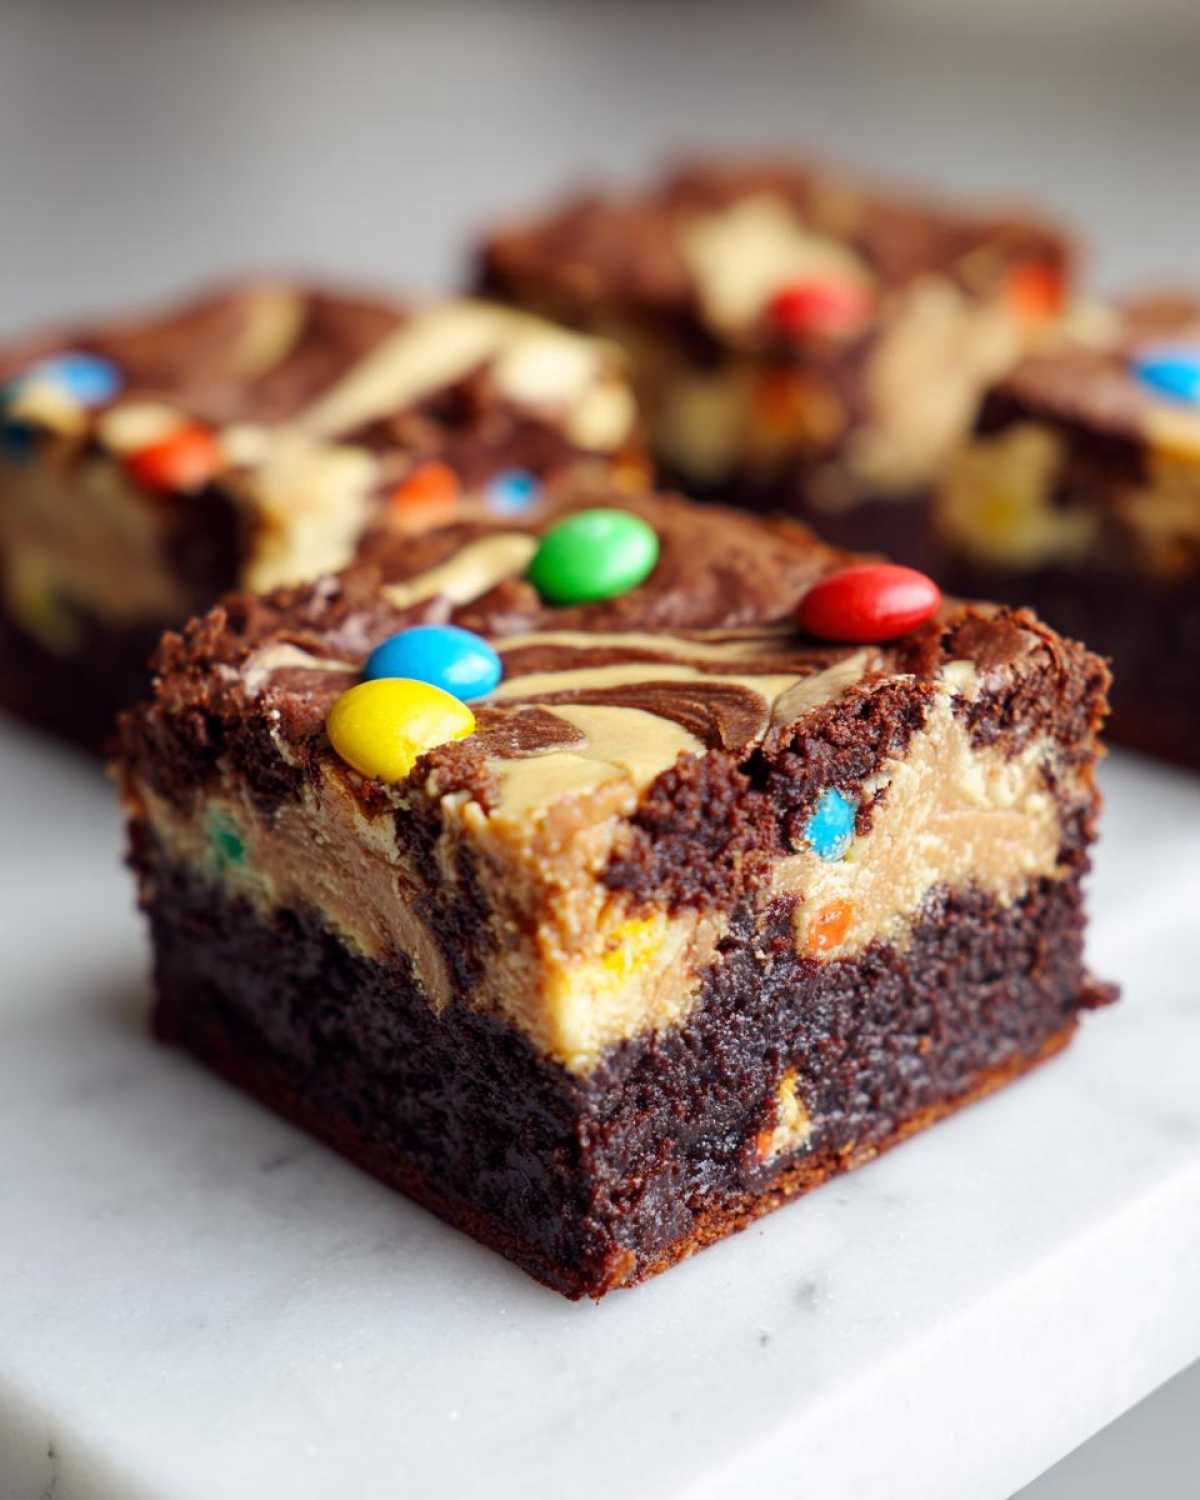
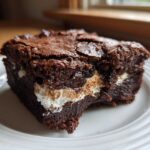
Oh my gosh, are you ready for spring baking? Because I’ve cracked the code on the most decadent, chocolatey, and totally festive treat you will make all season! Forget plain old brownies; we’re taking things up about a hundred notches with these incredible Easter Egg Brownies with Peanut Butter. Seriously, these fudgy squares combine my two favorite things: the rich, melt-in-your-mouth texture of a true fudgy brownie and that salty, creamy ribbon of peanut butter goodness.
I’ve tested so many holiday candy mix-ins over the years, and most of them turn into sad, overly-baked little pebbles in the oven, but I figured out the trick to keeping them vibrant and slightly gooey! The key here is the swirl—you need just enough peanut butter to marble through the chocolate without turning the whole thing into a dense brick. Trust me, once you’ve tried these, they’ll be the must-have thing on your Easter dessert table. It’s the ultimate easy chocolate peanut butter treat for celebrating!
Why You Will Love These Easter Egg Brownies with Peanut Butter
I’m telling you, these aren’t your average slightly cakey brownies; these are the real deal. They hit every single requirement for a perfect holiday baked good, and they always disappear first at any gathering. They’re just so satisfying!
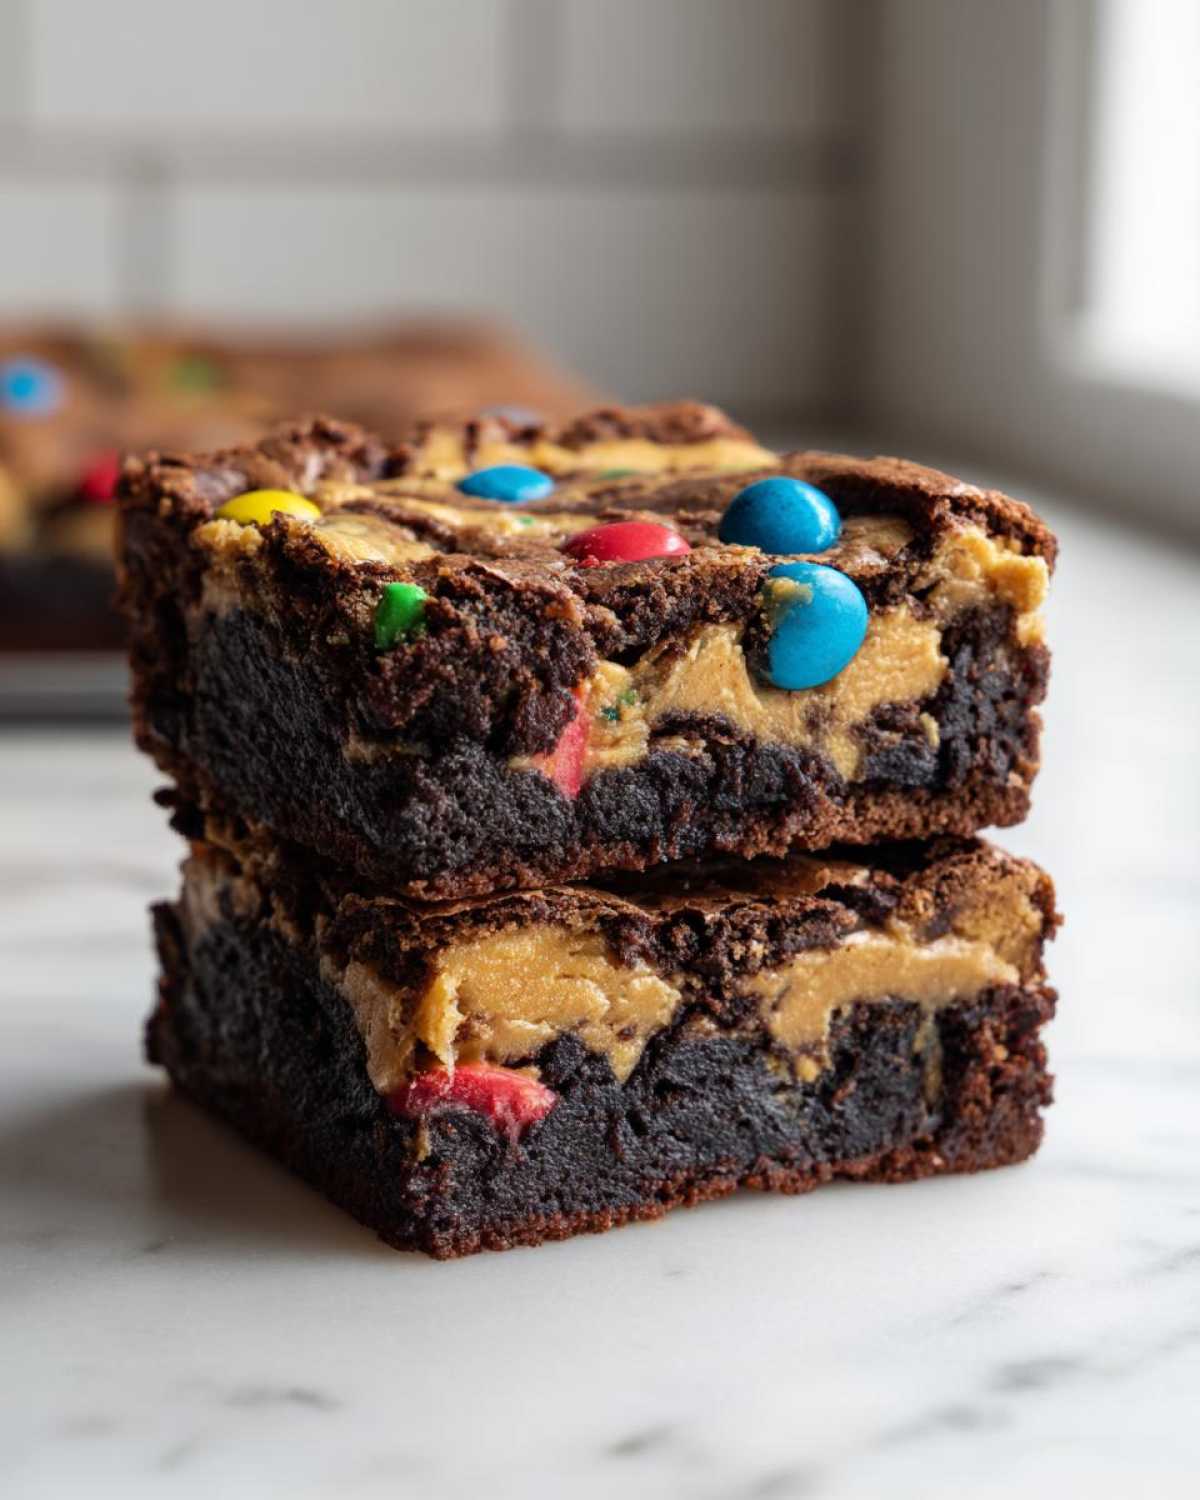
- Unbelievably Fudgy Texture: We’re talking that perfect dense, chewy bite that sticks to your fingers just a little bit. They are pure chocolate comfort! If you love a truly fudgy result, you need to make sure you don’t overbake them—it’s worth checking out my tips later on for that.
- The Ultimate Flavor Combo: Chocolate and peanut butter are natural soulmates, right? The rich, dark cocoa powder base balances perfectly against that salty swirl of peanut butter. It’s so much better than just plain chocolate.
- Festive and Fun Appearance: Using those colorful Easter egg candies on top instantly screams springtime! They add tiny pops of color that make these perfect for Easter dessert recipes or just brightening up your kitchen. They look fancy but take almost no extra effort.
- Sturdy Enough for Parties: Because of the way the peanut butter helps set the center, these brownies are surprisingly sturdy. They hold their shape beautifully when cut, which means they are one of the best brownies for kids parties or potlucks. Unlike delicate cookies, these travel well!
- Easy Candy Mix-Ins: My favorite part of making any layered dessert is adding mix-ins. You get little bursts of crunch and sweetness throughout the whole brownie thanks to those crushed eggs. It really elevates the whole experience.
Essential Ingredients for Perfect Easter Egg Brownies with Peanut Butter
You know me, I always say the success of the bake starts right here, with what you pull out of your pantry! For these ultimate peanut butter swirl brownies, we aren’t messing around with any weird substitutes, especially when dealing with that beautiful chocolate base. Here’s the exact lineup you’ll need to get that perfect fudgy consistency.
If you need a great reference for balancing fat and sugar in baked goods, you should definitely check out my recipe for those delicious chocolate peanut butter bars; they follow a similar philosophy!
- 1 cup (2 sticks) unsalted butter, melted. (Yes, melted! This is crucial for the fudgy factor.)
- 2 cups granulated sugar.
- 4 large eggs, used straight from the fridge—no need to bring these to room temperature.
- 1 teaspoon vanilla extract.
- 3/4 cup unsweetened cocoa powder. Make sure this is good quality, it makes a difference!
- 1 cup all-purpose flour. We call for less flour than usual to keep them thick and fudgy brownies, not cakey!
- 1/2 teaspoon salt.
- 1 cup peanut butter chips OR creamy peanut butter for that gorgeous swirl.
- 1 cup chopped Easter egg candies (like Mini Eggs or M&M’s). You’ll chop these roughly—don’t make them dust!
- 1/2 cup extra Easter egg candies for topping. These stay whole for decorating later.
Step-by-Step Instructions for Peanut Butter Brownie Baking
Okay, let’s get our hands dirty! Remember, these are Easter Egg Brownies with Peanut Butter, not muffins, so we are aiming for thick and fudgy. That means taking our time during the mixing phases, but not *too* much time—we don’t want to develop gluten. This recipe moves fast once you get going, so have everything measured out first!
Preparing the Pan and Oven
First things first, go ahead and crank that oven up to 350°F (175°C). Now, for the pan—and this is a lifesaver—grab yourself a 9×13 inch pan and line it with parchment paper. Make sure you leave a good overhang on both the long sides. This is your built-in handle later so you can lift the whole thing out neatly once they are cool. No broken edges allowed!
Mixing the Chocolate Brownie Batter
In a big bowl, whisk that melted butter and the sugar together until they are happy and combined. Then, beat in your four eggs, one at a time—don’t rush this part—and stir in the vanilla. Once that’s looking smooth, it’s time for the dry stuff: the cocoa powder, flour, and salt. Add the dry ingredients slowly, mixing only until you see no more white streaks of flour. Stop mixing right there! Seriously, overmixing is the enemy of fudgy texture. If you want to see how texture changes based on mixing, definitely look at the difference in my brown butter cookies!
Creating the Peanut Butter Swirl and Adding Candy Mix-ins
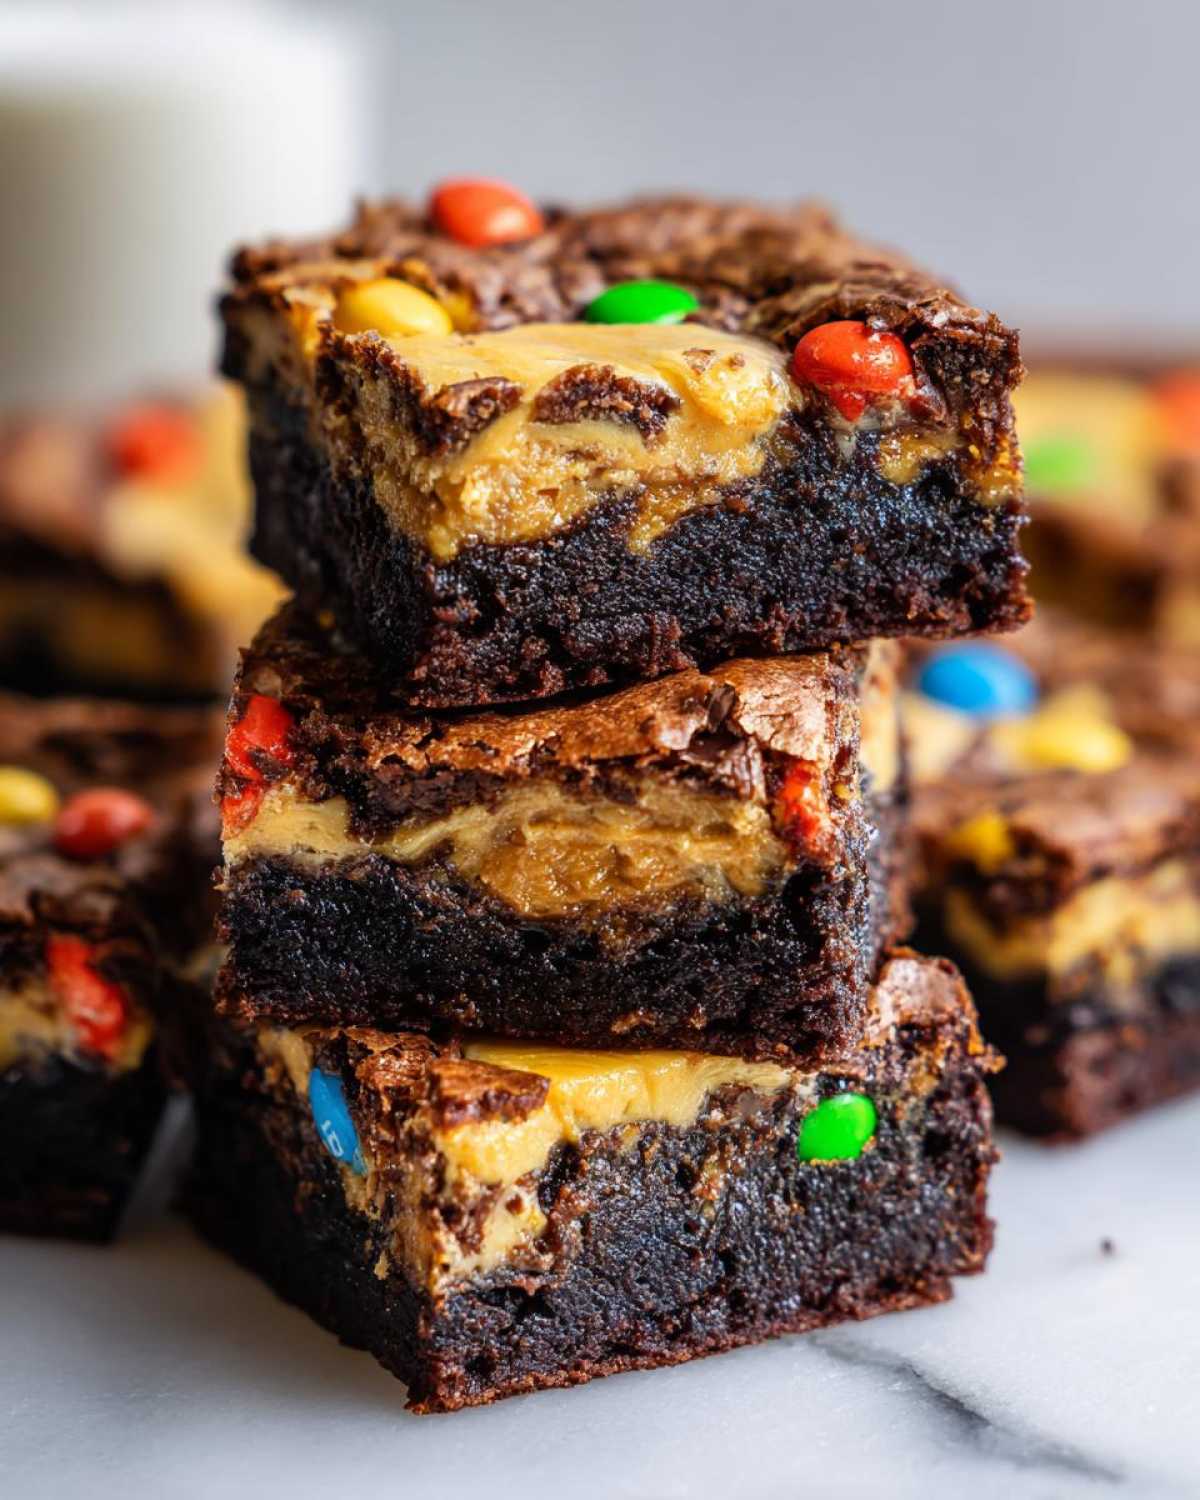
Okay, this is where the magic happens. Pour about half of that gorgeous chocolate batter into your prepared pan and smooth it out gently. Now, scatter your cup of chopped Easter egg candies over that layer. Pour the rest of the chocolate batter right over the top. If you used creamy peanut butter instead of chips, dollop those spoonfuls all over now.

Grab a butter knife or a small skewer. Gently—and I mean *gently*—run it through the batter in figure-eights to create that marbled, beautiful swirl effect. You just want streaks of peanut butter, not a uniform color. That’s your key to getting that **peanut butter swirl brownies** look.
Baking and Finishing Touches for Your Easter Egg Brownies
Slide that pan into the oven. You’re looking for 25 to 30 minutes. For a perfect, fudgy bake, you’re aiming for moist crumbs on a toothpick inserted near the center—if it comes out totally clean, you’ve gone too far and you have a cake! When you pull them out, they should look set around the edges. This next step is critical: immediately press that final 1/2 cup of whole Easter egg candies right onto the hot surface. The residual heat softens them just enough so they sink in nicely without totally melting away. Then, let them cool completely before you even *think* about cutting them!
Expert Tips for Perfect Easter Egg Brownies with Peanut Butter
Even though this recipe is pretty foolproof—especially if you follow the mixing rule—sometimes you just have a few little baking hurdles, right? Since we are mixing chocolate, peanut butter, *and* delicate spring candies, we need to talk pro techniques! We want those thick and fudgy brownies and we want those candies to look gorgeous, not weep chocolate syrup everywhere.
If you’re looking for the guaranteed way to get that dense center even when you’re worried about underbaking, you should peek at my notes on my ultimate fudge brownies; the science is similar!
Choosing the Right Candy for Brownies with Candy Mix ins
This is the biggest question for any **brownies with candy mix ins** recipe! What you choose matters for presentation. If you use those classic Cadbury Mini Eggs, you’ll notice that the thin, crisp candy shell can sometimes crack and bleed color into the batter as they bake. That’s okay! It gives you a subtle, pretty pastel marbling in the top layer, but they won’t stay perfectly intact. If you want that super vibrant look, use peanut butter M&M’s instead, or save the most colorful Mini Eggs for sprinkling right on top *after* the brownies come out of the oven—that’s what I did!
Another thing: avoid anything with gooey caramel centers if you let them bake the whole time. That caramel gets super thin and spreads out too much, thinning out your peanut butter swirl unnecessarily!
Achieving the Best Peanut Butter Swirl Brownies
When people ask about the swirl, it usually comes down to texture control. If you use peanut butter chips, you’re set—they melt beautifully on their own. But if you’re using regular creamy peanut butter, I have a little trick for you to nail the best **peanut butter swirl brownies**.
Don’t just plop it in cold! Take your scoop of creamy peanut butter and microwave it for about 15 seconds. You want it warm and runny—almost the consistency of thick maple syrup. When you dollop it over that first layer of batter, it sinks in just the right amount before you pour the second batter layer on top. This makes it much easier to draw those dramatic ribbons with your knife without digging down too deep and smearing the whole pan.
Storage and Make-Ahead Instructions for Seasonal Comfort Food Baking
One of the best things about a fantastic, fudgy recipe like these Easter Egg Brownies is that they always taste even better the next day! This is such a relief when you’re planning a big Easter brunch or dinner, because you can totally make them ahead of time. Honestly, these are definitely on my list of favorite no bake chocolate recipes because they simplify holiday baking!
The crucial first step, which I know is the hardest part, is letting them cool completely. Seriously, you mustn’t cut into them warm if you want neat squares. If you try to slice warm brownies, that gooey peanut butter swirl turns into a sticky mess, and your beautiful colorful candy topping slides right off. Patience, my friends!
Once they are totally cool (I usually let mine sit on the counter for at least two hours), use the parchment overhang to lift the whole slab out onto a cutting board. Since this recipe is so rich, I usually cut them into 16 squares, but if you’re serving adults at a party, you can easily get 20 smaller bites out of it.
For storage, wrap the cut squares tightly in plastic wrap, and then place them into an airtight container. They stay perfectly fresh at room temperature for about four days. The moisture from the peanut butter and the chocolate coating on the eggs keeps them soft!
And if you are planning way ahead? Good for you! These freeze like a dream. Wrap your cut brownies tightly in plastic wrap, then wrap that whole package again in aluminum foil to keep out any freezer smells. They freeze beautifully for up to three months. When you want one, just pull it out the night before and let it thaw in the fridge. It comes back to life tasting like it just came out of the oven!
Serving Suggestions for Festive Brownie Ideas
Now that you have these amazing, fudgy, candy-topped delights, we have to talk about how to serve them up! These aren’t just great for dessert; they can anchor your entire presentation for an easy Easter dessert recipe spread. Since the chocolate and peanut butter combination is so rich, you usually want something light, bright, or creamy to go alongside it.
For that full, comforting, seasonal feel, try serving a warm brownie square topped with a scoop of vanilla bean ice cream. The contrast between the warm, rich chocolate and the cold cream is just heaven. If you want to lean into the brighter springtime flavors, a scoop of strawberry or maybe even coffee ice cream works wonders to cut through the richness!
If you’re having people over for brunch or just need a lighter option than ice cream, consider these pairings:
- A dollop of fresh, lightly sweetened whipped cream sprinkled with a tiny bit of lemon zest. That little bit of citrus really sings next to the dark chocolate and peanut butter.
- A glass of cold milk, obviously! Sometimes simple is best, especially when serving these to the kids.
- For the grown-ups, these go amazingly well with a strong cup of iced coffee or perhaps something a little bubbly. You absolutely have to try one with my frozen peach rose slushy—the floral notes are surprisingly good with peanut butter!
Remember, because these are such great **festive brownie ideas**, presentation counts. Use little pastel cupcake liners, or serve them on a tiered stand so all those colorful candy tops really shine through. Enjoy the spring celebration!
Frequently Asked Questions About How to Make Easter Egg Brownies
It’s totally normal to have questions when you’re mixing delicate candies into something as rich as a fudgy brownie! I get asked these things all the time, especially when it comes to managing textures and making sure the peanut butter plays nicely with the chocolate. Here are a few things I’ve learned over the years that have helped me make the very best **Easter egg brownies with peanut butter** batches.
If the idea of making perfect peanut butter treats appeals to you, then you absolutely have to check out my recipe for those peanut butter energy balls; they are effortless and crowd-pleasing!
Can I use different types of Easter candy in these brownies?
Oh, definitely! This entire concept works great for all sorts of brownies with candy mix ins, but you just need to be mindful of what you’re mixing in versus what you’re using for topping. Remember how I mentioned the Cadbury shells can sometimes crack? If you use those chocolate bunnies or shaped eggs, the same thing might happen because the shells aren’t as robust as the M&M-style coating.
My real rule of thumb is this: use the candy you *don’t* mind getting a little melty or fractured inside the batter, and save the prettiest candy for sprinkling right on top after the brownies come out of the oven. That way, you get color throughout *and* decoration on top, and you won’t have huge pockets of melted filling spreading everywhere.
How do I get the fudgiest texture in my Easter Egg Brownies with Peanut Butter?
This is the secret sauce to these fudgy brownies! It all comes down to two things we covered in the main steps. First, you need less flour relative to your fat and sugar. We aren’t trying to build a skyscraper here; we are building a decadent, dense slab! Don’t try to sneak an extra scoop of flour in there to make it easier to handle—it will ruin the fudgy texture.
Second, and this might scare some of you, but you have to underbake them slightly. Remember when I said the toothpick should come out with *moist crumbs*? That’s the magic phrase. If the toothpick comes out clean, the residual heat from the pan will continue cooking the center after you pull it out, and you’ll end up with a delicious, but slightly drier finish. For the best sliceable, chewy, **thick and fudgy brownies**, pull them when the center still looks just a tiny bit soft!
Estimated Nutritional Data for Your Holiday Candy Baked Goods
Okay, so I’m not gonna lie, these are not going on my weekly meal plan—they are a celebratory treat! Because we are dealing with melted butter, sugar, cocoa, and those delicious, beautiful Easter egg candies, these brownies are rich, and that’s okay! We only bake these special things a few times a year, right?
I ran the ingredients through my standard calculator to give you a baseline, but I need to stress this: the final numbers will change based on what kind of peanut butter you use (creamy vs. chips) and, most importantly, which candy you decide to throw on top. If you opt for chocolate-covered eggs versus fruity ones, that sugar and fat content will shift! Treat this as an estimate for your seasonal comfort food baking!
Here is what the estimate looks like when dividing the recipe into 16 squares based on the recipe details provided:
- Serving Size: 1 square
- Calories: Around 280 (This jumps up if you use extra rich peanut butter!)
- Sugar: Approximately 28g
- Fat: Roughly 16g total fat
- Saturated Fat: About 7g
- Carbohydrates: Around 33g
- Protein: About 5g
See? Pure indulgence! That’s why we only make these fudgy treats for special occasions like Easter. Knowing what’s in your holiday candy baked goods lets you enjoy every single, glorious, chocolate-peanut butter-candy-filled bite without guilt. Just enjoy them with a big glass of milk!
Share Your Best Brownies for Kids Parties
Wow, we made it! I hope you’re already excited to get into your kitchen and whip up a batch of these decadent Easter Egg Brownies with Peanut Butter. I seriously cannot wait to hear how yours turn out. Did the peanut butter swirl look dramatic? Did you manage to keep those colorful candies looking perfect on top?
Please, please, please leave me a comment down below telling me how this recipe worked for you! Hearing your feedback—whether it’s about achieving that perfect fudgy texture or substituting a type of milk chocolate—helps me so much, and it helps other bakers know this recipe is a keeper for their own family celebrations. If you made these amazing squares for a spring gathering or even just a random Tuesday, snap a photo!
I absolutely love seeing my recipes out in the real world, especially when they get covered in bright spring colors. Tag me on social media when you share your pictures of these best brownies for kids parties or holiday tables. You can find me right here on Instagram, or you can check out all my favorite party go-to’s by visiting my guide on the best brownies for kids parties page. Until next time, happy baking!
PrintEaster Egg Peanut Butter Swirl Brownies
Bake fudgy brownies with a rich peanut butter swirl and top them with festive Easter egg candies.
- Prep Time: 15 min
- Cook Time: 30 min
- Total Time: 45 min
- Yield: 16 servings
- Category: Dessert
- Method: Baking
- Cuisine: American
- Diet: Vegetarian
Ingredients
- 1 cup (2 sticks) unsalted butter, melted
- 2 cups granulated sugar
- 4 large eggs
- 1 teaspoon vanilla extract
- 3/4 cup unsweetened cocoa powder
- 1 cup all-purpose flour
- 1/2 teaspoon salt
- 1 cup peanut butter chips or creamy peanut butter for swirl
- 1 cup chopped Easter egg candies (like Mini Eggs or M&M’s)
- 1/2 cup extra Easter egg candies for topping
Instructions
- Preheat your oven to 350°F (175°C). Line a 9×13 inch baking pan with parchment paper, leaving an overhang for easy removal.
- In a large bowl, whisk the melted butter and sugar together until combined.
- Beat in the eggs one at a time, then stir in the vanilla extract.
- In a separate bowl, whisk together the cocoa powder, flour, and salt. Gradually add the dry ingredients to the wet ingredients, mixing until just combined. Do not overmix.
- Pour half of the batter into the prepared pan and spread evenly.
- If using peanut butter chips, scatter them over the batter. If using creamy peanut butter, dollop spoonfuls over the batter.
- Pour the remaining batter over the top.
- Take a knife or skewer and gently swirl the peanut butter layer into the chocolate batter to create a marbled effect.
- Gently press half of the chopped Easter egg candies into the top of the batter.
- Bake for 25 to 30 minutes. The edges should look set, and a toothpick inserted near the center should come out with moist crumbs attached, not wet batter.
- Remove from the oven and immediately sprinkle the remaining whole Easter egg candies over the hot brownies. The residual heat will slightly soften them.
- Let the brownies cool completely in the pan before lifting them out using the parchment paper overhang. Cut into squares.
Notes
- For a fudgier texture, slightly underbake the brownies by about 2 minutes.
- If you use candy-coated chocolate eggs, the shells may crack slightly during baking, which adds color to the top layer.
- If you want a thicker peanut butter layer, warm the peanut butter slightly before swirling it into the batter.
Nutrition
- Serving Size: 1 square
- Calories: 280
- Sugar: 28
- Sodium: 110
- Fat: 16
- Saturated Fat: 7
- Unsaturated Fat: 9
- Trans Fat: 0
- Carbohydrates: 33
- Fiber: 2
- Protein: 5
- Cholesterol: 65
Comments are closed.