


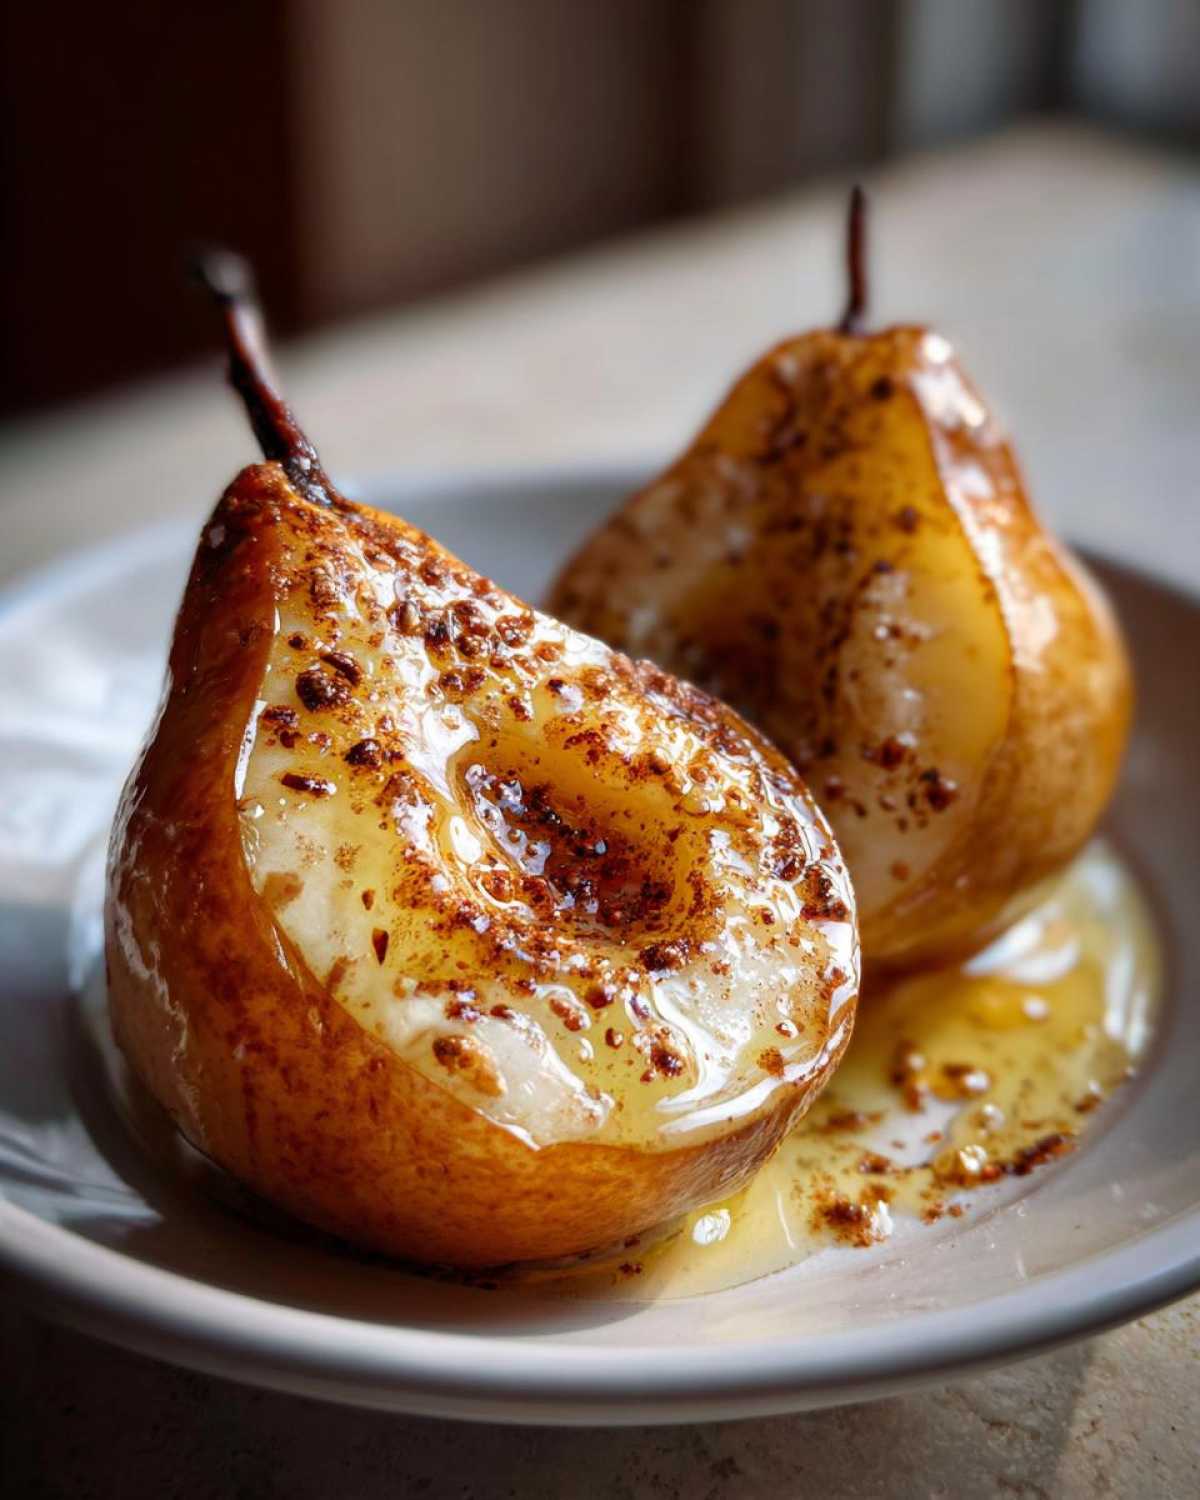
When the air gets that first hint of crispness, you know what I crave? Something unbelievably warm, deeply fragrant, and cozy—but without spending an hour fussing in the kitchen. Forget those complicated pies, because I’m here to tell you that the ultimate comfort food dessert involves just four simple ingredients: pears. Seriously! I’ve messed around with tons of baked fruit recipes over the years, but this one for **baked pears** is my absolute gold standard. It reminds me of those crisp autumn evenings when you just want a bit of natural sweetness. These pears bake up so tender you could eat them with a spoon, draped in melted honey and spiced cinnamon. They look elegant enough for company but take practically zero effort. Trust me, once you try this simple pear dessert, it’ll be your go-to!
Why You Will Love This Classic Cinnamon Honey Baked Pears Recipe
Honestly, these baked pears are my secret weapon for low-effort elegance. When you pull these out of the oven, the smell alone will tell you you’ve done something right. They hit that perfect sweet spot between being intensely flavorful and incredibly good for you.
- They are the definition of a warm fruit dessert—just pure comfort in a bowl!
- They look gourmet but are truly one of the simplest things you’ll ever make.
- We get those perfectly tender baked pears thanks to the gentle baking process.
Quick Prep Time for Easy Baked Pears
You read that right—prep takes about 10 minutes, tops. That’s why I call them my cheat code. You can have these ingredients ready to go before the kettle even finishes boiling. They are truly quick baked pears!
Perfectly Tender Baked Pears Every Time
Because we’re baking them slowly with that little pool of water in the dish, the fruit steams just enough to become melt-in-your-mouth soft. No more finding hard centers! We are aiming for perfectly tender baked pears that yield immediately to a fork.
Gathering Ingredients for Your Cinnamon Honey Pears
Okay, let’s talk about the lineup for these amazing **baked pears**. The beauty of this recipe is how few things you need! You’re looking for four firm pears—don’t grab something mushy, or they’ll turn to soup! You’ll need four tablespoons of lovely honey, four little pats of good unsalted butter (cut them up ahead of time, it saves time later!), one teaspoon of warm cinnamon, just a quarter cup of water to keep things steamy in the oven, and then the optional crunch: a quarter cup of chopped walnuts. I feel like even listing them sounds simple, right?
Now, if you’re feeling adventurous or maybe you’re serving someone who doesn’t love the sweet stuff, remember those savory notes I mentioned before? You can totally ditch the cinnamon and walnuts and use a teaspoon of soft goat cheese and a few dried cranberries instead. That little burst of tang elevates the whole experience and makes these roasted pears feel super gourmet!
Selecting the Best Pears for Baking
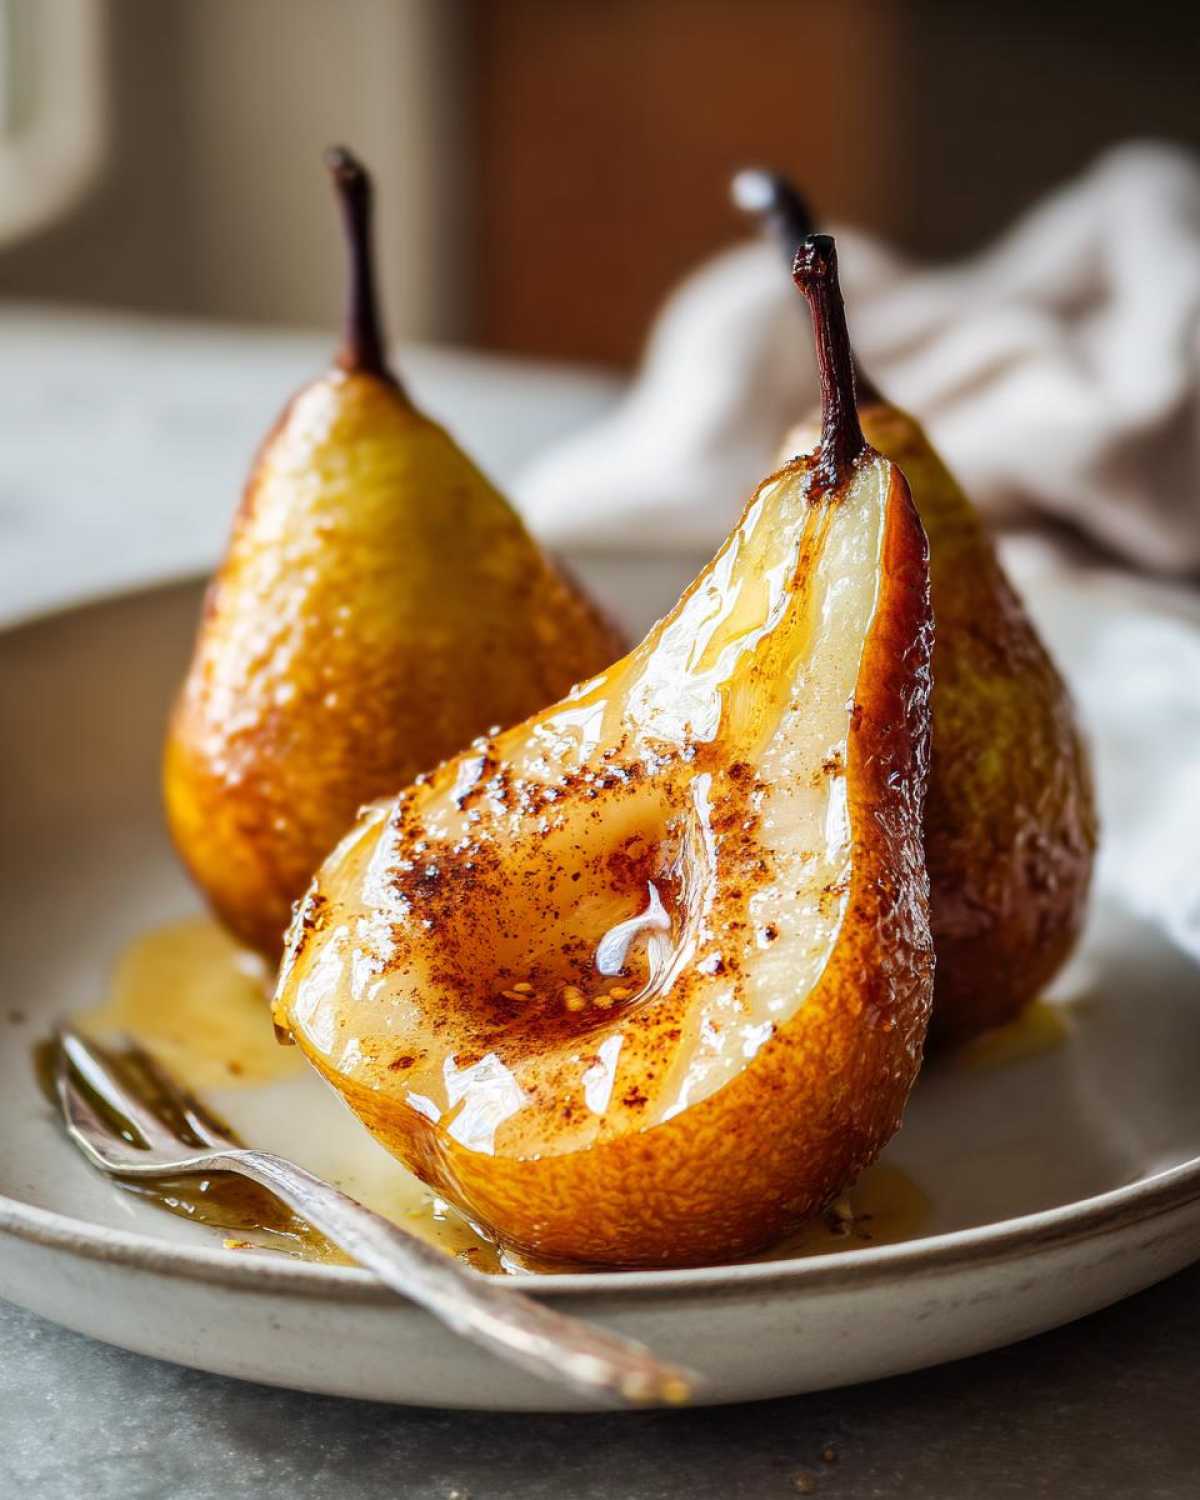
This is where we build in that fantastic texture! You absolutely need a pear that holds up to heat. I’m always reaching for Bosc or Anjou pears. They stay nice and firm and don’t get mealy when they bake. If you grab a pear that’s already soft in the produce aisle, it won’t give you the structure we need for those perfect boat shapes. Trust me on this one; the type of pear makes such a difference in the final bite of your sweet baked fruit!
Step-by-Step Instructions for Perfect Baked Pears
Alright, this is the fun part! Making these **baked pears** happen is genuinely easier than making toast. It’s just a few simple actions, and then the oven does all the heavy lifting for us. We are building layers of flavor step-by-step, so pay attention when we’re prepping those fruit halves because that’s where all the magic gets tucked inside! I always make sure I have all my little ingredients measured out before I even touch the fruit—it prevents that frantic scrambling later!
Preparing the Pear Halves and Filling
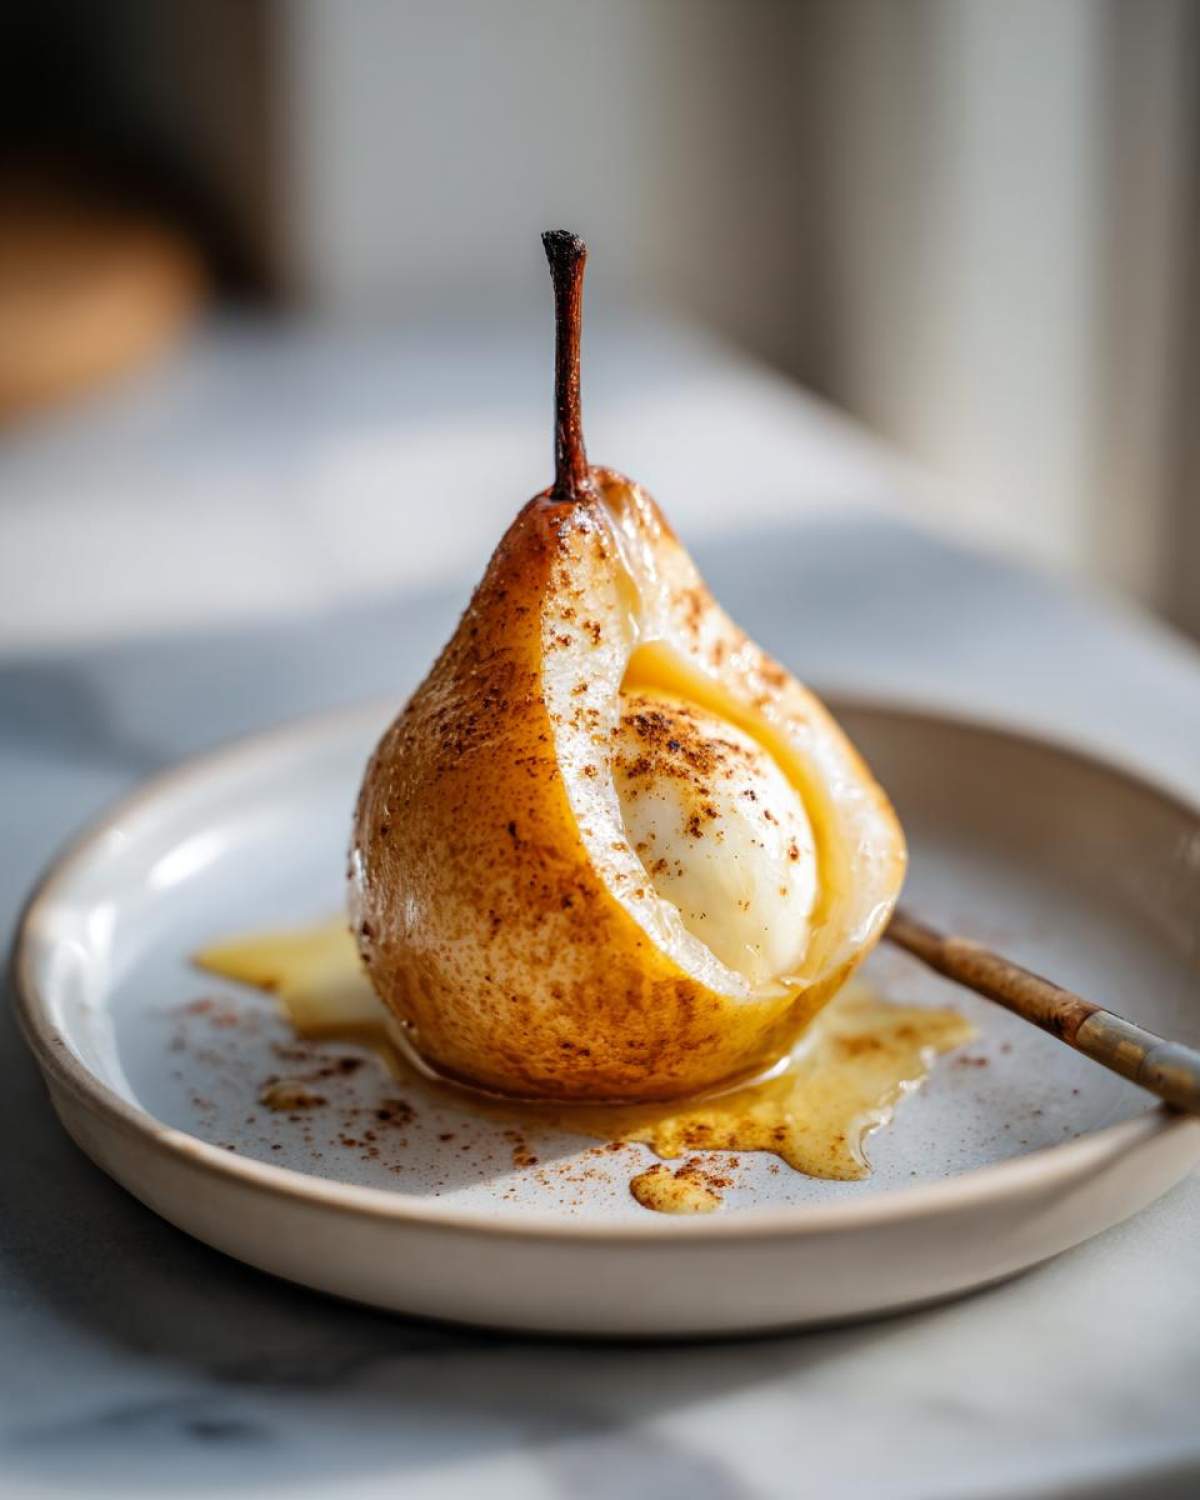
First things first, get that oven hot! You need to preheat it to 375 degrees Fahrenheit, or about 190 Celsius. Don’t skip this; we want them cooking right away. Next, take your pears, give them a good scrub, and slice them right down the middle, lengthwise. Now comes the part everyone worries about: coring. I use a tiny melon baller, but honestly, even a small spoon works if you’re careful. You want to gently scoop out the core and all those tiny seeds. Don’t worry if the hole isn’t perfectly round; we aren’t aiming for symmetry here, just removing the tough bits!
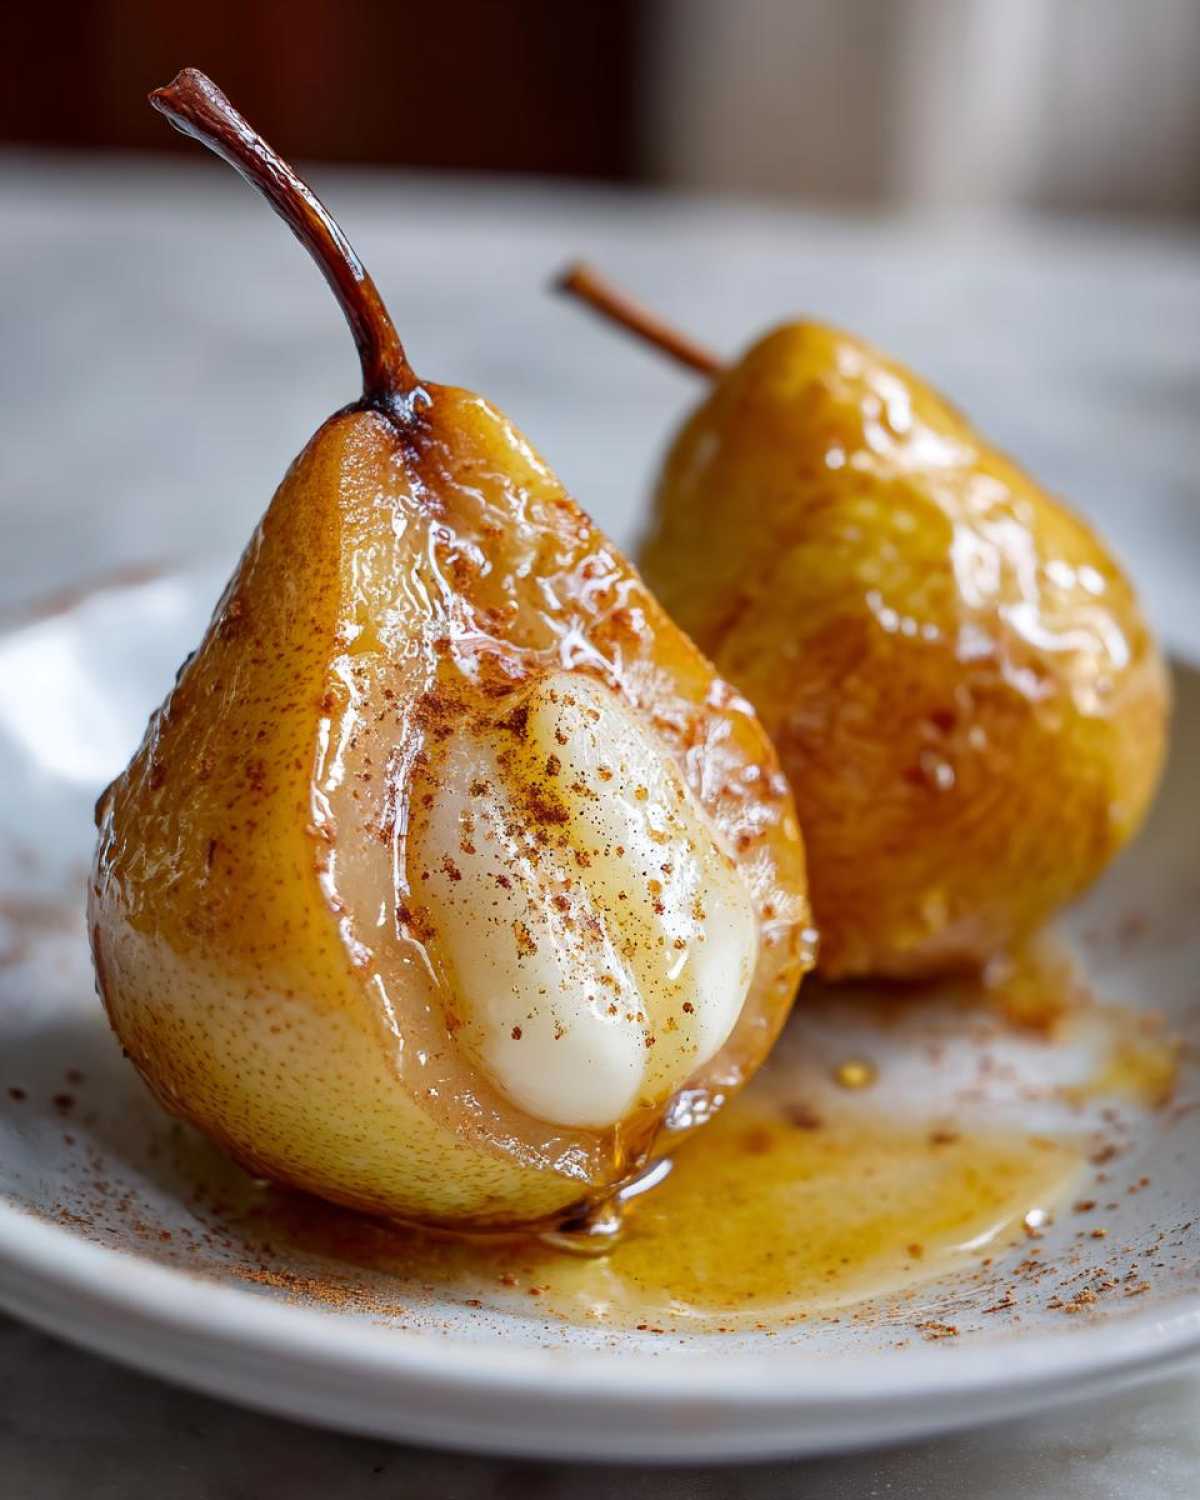
Once you have your little pear boats ready, tuck one small piece of butter right into the center cavity of each half—that’s going to melt down into deliciousness. Then, grab your honey. Drizzle about one tablespoon over each pear half. You want that lovely, thick honey draping over the sides. Finally, dust everything generously with that ground cinnamon. This is the classic combination, and it smells heavenly already!
Baking Time and Checking for Tenderness in Baked Pears
Before we seal these up for their bake, we need a bit of steam action! Pour a quarter cup of plain water right into the bottom of your baking dish. This liquid keeps the bottom from scorching and creates a moist environment, which is key to amazing **baked pears**. If you’re adding those walnuts, sprinkle them right over the top now. If you decide later you want to try something like honey-baked nectarines sometime, just know the principle of the water bath is the same!
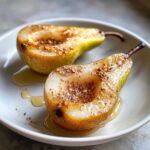
Pop the whole dish into that preheated oven. They need about 30 to 40 minutes in there. Now, you must check them! Don’t just trust the clock. Start checking for tenderness right around the 30-minute mark. You know they are ready when you poke them gently with the sharp end of a fork, and it slides in without any resistance. That’s the signal! They should feel soft and yielding. If you get resistance, give them five more minutes. This tenderness check is the most important part to ensure you don’t end up with hard, undercooked spots. When they are done, pull them out, and serve them warm; they are just the best comfort food desserts that way!
Tips for Making the Best Cinnamon Honey Pears
So, you’ve mastered the basics of making our lovely **baked pears**, but how do we take them from good to absolutely unforgettable? It’s all in the little tweaks! I keep showing up for my family with these because they are so customizable, and they satisfy that craving for a rich, **warm fruit dessert** without being too heavy. We need to talk about potential swaps, especially if you’re swapping out honey because maybe you ran out or just want to change the flavor profile.
If you find yourself out of honey, don’t panic! You can absolutely swap it out for maple syrup. Maple syrup has this slightly earthier, deeper caramel note that works beautifully with the cinnamon, so you get a slightly different, but equally amazing, result. You might want to use just a tiny bit less, though, since maple can sometimes taste a touch sweeter than honey, depending on the bottle you have open.
The best place to see this recipe shine, though, is when you play around with the toppings. I shared the walnut option earlier, but if you want to really wow someone—maybe you need a quick gourmet pear treat for somebody you really like—you have to try the savory swap. It takes these baked pears in a whole new direction!
Savory Variation for Elegant Pear Dessert
This is the trick I pull out when I want something that feels grown-up and wonderfully different. Remember how I mentioned ditching the cinnamon and honey? Do that! Instead of filling that little cavity with sweetener, gently spoon about a teaspoon of soft goat cheese right into the center. If you have some, toss in a few dried cranberries beside it—they hydrate beautifully in the oven.
The goat cheese melts slightly, getting creamy and tangy, which cuts through the sweetness of the pear perfectly. It turns this simple dessert into something genuinely **elegant pear dessert** worthy. It’s shocking how well the tang of the goat cheese complements the soft, sweet baked fruit. I usually serve this savory version with maybe just a light dusting of salt instead of sugar on the plate, and people rave about it!
Serving Suggestions for Your Cozy Baked Fruit
Okay, so your **cozy baked fruit** is out of the oven, it smells like heaven, and it’s still piping hot. What do we serve with it? Honestly, it’s divine all by itself, but if you want to dress it up a little, I have a few favorite pairings that just complete the experience. You want something that contrasts just a little with that warm, yielding sweetness, right? A little bit of cold or something creamy is always a winner!
My absolute favorite, the one I default to ninety percent of the time, is simple vanilla bean ice cream. That contrast between the hot, caramelized pear and the cold, melting ice cream? It’s pure magic, I’m telling you. The vanilla works so well with the cinnamon and honey sauce that forms in the bottom of the pan.
If you’re not an ice cream fan, whipping up some lightly sweetened crème fraîche is an excellent alternative. It’s slightly tangy, super light, and drizzling it over the top just feels decadent. If you happen to be enjoying this after brunch, it’s wonderful alongside something strong, like a freshly brewed coffee or maybe one of my favorite iced brown sugar lattes if you need a little cooling counterpoint!
For a textural boost, especially if you skipped the walnuts on top, a little sprinkle of toasted pecans or even slivered almonds right before serving makes a huge difference. It gives your spoon something to crunch into before hitting that incredibly soft baked pear center. Enjoy every spoonful; you earned it!
Storage and Reheating Instructions for Baked Pears
Unless you’re baking these for a massive crowd, you’ll definitely end up with some glorious leftovers, and you should absolutely save them! These **baked pears** store surprisingly well, though they are definitely at their absolute peak the moment they come out of the oven. Don’t worry about them going bad; they stick around just long enough for you to enjoy them the next day too!
The best way to keep your leftovers fresh is to let them cool down completely on the counter first. Once they are room temperature, pop them into any airtight container. You don’t need to worry about saving that little bit of cinnamon-honey liquid in the pan—scoop that right in with the pears! That sauce is gold; it keeps the fruit moist and doesn’t let it dry out. You can keep these refrigerated for about three to four days. Don’t push it past that timeframe, though; while they are durable, they are best fresh.
Now, reheating is where you need to use a little care so you don’t ruin that perfect tenderness we worked so hard to achieve. If you try to blast them in the microwave for too long, they’ll get rubbery, which is the worst for **baked pears**. I always use the oven or toaster oven. Set it to a low temperature, maybe 300 degrees Fahrenheit, and just warm them through for about 8 to 10 minutes. Warming them slowly keeps them nice and soft. If you are in a huge rush, you can microwave one half for about 15 to 20 seconds on 50% power. That gentle zap warms them without cooking them into oblivion. Either way, they’re so worth saving!
Frequently Asked Questions About Baked Pears Recipe
I know when you see a great recipe like this for **baked pears**, you always have a few lingering questions. That’s totally normal! I want you to feel confident, so let’s talk through some of the things readers ask me most often about getting this dessert just right. It’s all about knowing the little nuances that turn a good fruit dessert into a flawless one.
Can I use different fruits instead of pears in this recipe?
You absolutely can experiment! The general method of adding a little liquid and basting with honey works wonderfully for many firm fruits. If you want to try apples, that’s a safe bet—just know that apples tend to be a bit firmer, so you might need to add an extra 5 to 10 minutes onto your baking time to get them completely soft. Quince is another beautiful option, though it takes longer to soften than pears do. When using different **fall fruit recipes**, just keep checking for that fork tenderness rather than relying strictly on the clock!
How do I make this a healthy baked pears option?
That’s a great question, and since this recipe relies on natural sweetness, it’s already starting in a great place! If you want to lean into the **healthy baked pears** angle even more, you have two main levers to pull. First, you can reduce the honey just slightly—maybe use 3 tablespoons instead of 4, or if you’re feeling brave, try swapping out half of the honey for a pure sugar substitute like stevia or monk fruit blend, although it won’t give you that lovely, thick caramelization liquid we get from the honey. Secondly, skip the optional walnuts entirely if you are watching your calorie density. Either way, you’re getting plenty of fiber and natural fruit sugars, which is always a win. If you are looking for other ways to sneak goodness into your baking, check out my tips for healthy zucchini bread; it’s amazing!
Do I have to use butter in this simple pear dessert?
You really shouldn’t skip the butter completely if possible! It serves a few jobs here: it adds richness, prevents the pear from drying out too much during the bake, and helps carry that cinnamon flavor right into the fruit. If you avoid dairy, you can substitute it with coconut oil—just make sure it’s solid at room temperature so you can cut it into those nice little squares, which is essential for even melting in the center cavity of the pear.
Estimated Nutritional Data for Simple Pear Dessert
I always get asked about the numbers, and while you know I’m not a nutritionist, I do have estimates based on the core ingredients we used for this **simple pear dessert**—that means we’re leaving out the optional walnuts and any toppings you might add later!
Remember, these numbers are a ballpark figure, mostly coming from the natural sugars in the pear and the honey we used. If you skip the optional nuts, this comes out to be a wonderfully light ending to any meal. It’s a beautiful way to satisfy that sweet craving while keeping things reasonably in check!
- Serving Size: 1 pear half
- Calories: 250
- Sugar: 35g (mostly natural fruit sugar and honey)
- Fat: 10g
- Saturated Fat: 6g
- Protein: 2g
- Carbohydrates: 40g
- Fiber: 6g
See? Pretty reasonable for something that tastes like it took hours of effort! It’s a lovely, light ending, especially if you’re serving it after a big holiday meal and just want something warmly spiced instead of heavy and creamy.
Share Your Experience Making Baked Pears
Now that you have the secrets to making truly amazing **baked pears**, I need to hear all about it! Honestly, sharing these recipes is one of my favorite things to do, but the real joy comes when I see how you all make them your own. When you try this recipe, don’t just make it and forget it—I want the details!
Were you a devoted honey-and-cinnamon fan, or did you jump straight into that savory goat cheese variation? Did you add a different nut, like pecans, maybe? Tell me what toppings you served alongside it. Did you go for the simple ice cream scoop, or did you whip up some fancy yogurt?
Please, leave a rating right here on the recipe card after you try it. Knowing what works for you helps me when I’m testing things in my own kitchen. If you snapped a picture of your beautifully caramelized fruit, please share it! You can tag me over on social media or just send a message through my contact page—I absolutely love seeing those gorgeous, tender baked pears sitting on your tables!
I can’t wait to hear how this simple pear dessert brought a bit of warmth and comfort to your home. Happy baking, my friends!
PrintClassic Cinnamon Honey Baked Pears
Make tender, warm baked pears sweetened with honey and spiced with cinnamon. This is a simple, comforting dessert.
- Prep Time: 10 min
- Cook Time: 40 min
- Total Time: 50 min
- Yield: 4 servings
- Category: Dessert
- Method: Baking
- Cuisine: American
- Diet: Vegetarian
Ingredients
- 4 firm pears (such as Bosc or Anjou)
- 4 tablespoons honey
- 2 tablespoons unsalted butter, cut into 4 pieces
- 1 teaspoon ground cinnamon
- 1/4 cup water
- 1/4 cup chopped walnuts (optional)
Instructions
- Preheat your oven to 375 degrees Fahrenheit (190 degrees Celsius).
- Wash the pears and slice them in half lengthwise. Use a melon baller or small spoon to carefully scoop out the core and seeds from each half.
- Place the pear halves cut-side up in a small baking dish.
- Place one piece of butter into the center cavity of each pear half.
- Drizzle 1 tablespoon of honey over each pear half.
- Sprinkle the ground cinnamon evenly over the pears.
- Pour the 1/4 cup of water into the bottom of the baking dish.
- If using, sprinkle the chopped walnuts over the top of the pears.
- Bake for 30 to 40 minutes, or until the pears are tender when pierced with a fork.
- Serve warm.
Notes
- For a richer flavor, substitute maple syrup for honey.
- If you prefer a savory twist, omit the cinnamon and walnuts. Instead, fill the cavity with a teaspoon of soft goat cheese and a few dried cranberries before baking.
- Bake time varies based on the ripeness and size of your pears. Check for tenderness starting at the 30-minute mark.
Nutrition
- Serving Size: 1 pear half
- Calories: 250
- Sugar: 35
- Sodium: 5
- Fat: 10
- Saturated Fat: 6
- Unsaturated Fat: 4
- Trans Fat: 0
- Carbohydrates: 40
- Fiber: 6
- Protein: 2
- Cholesterol: 25


Comments are closed.