


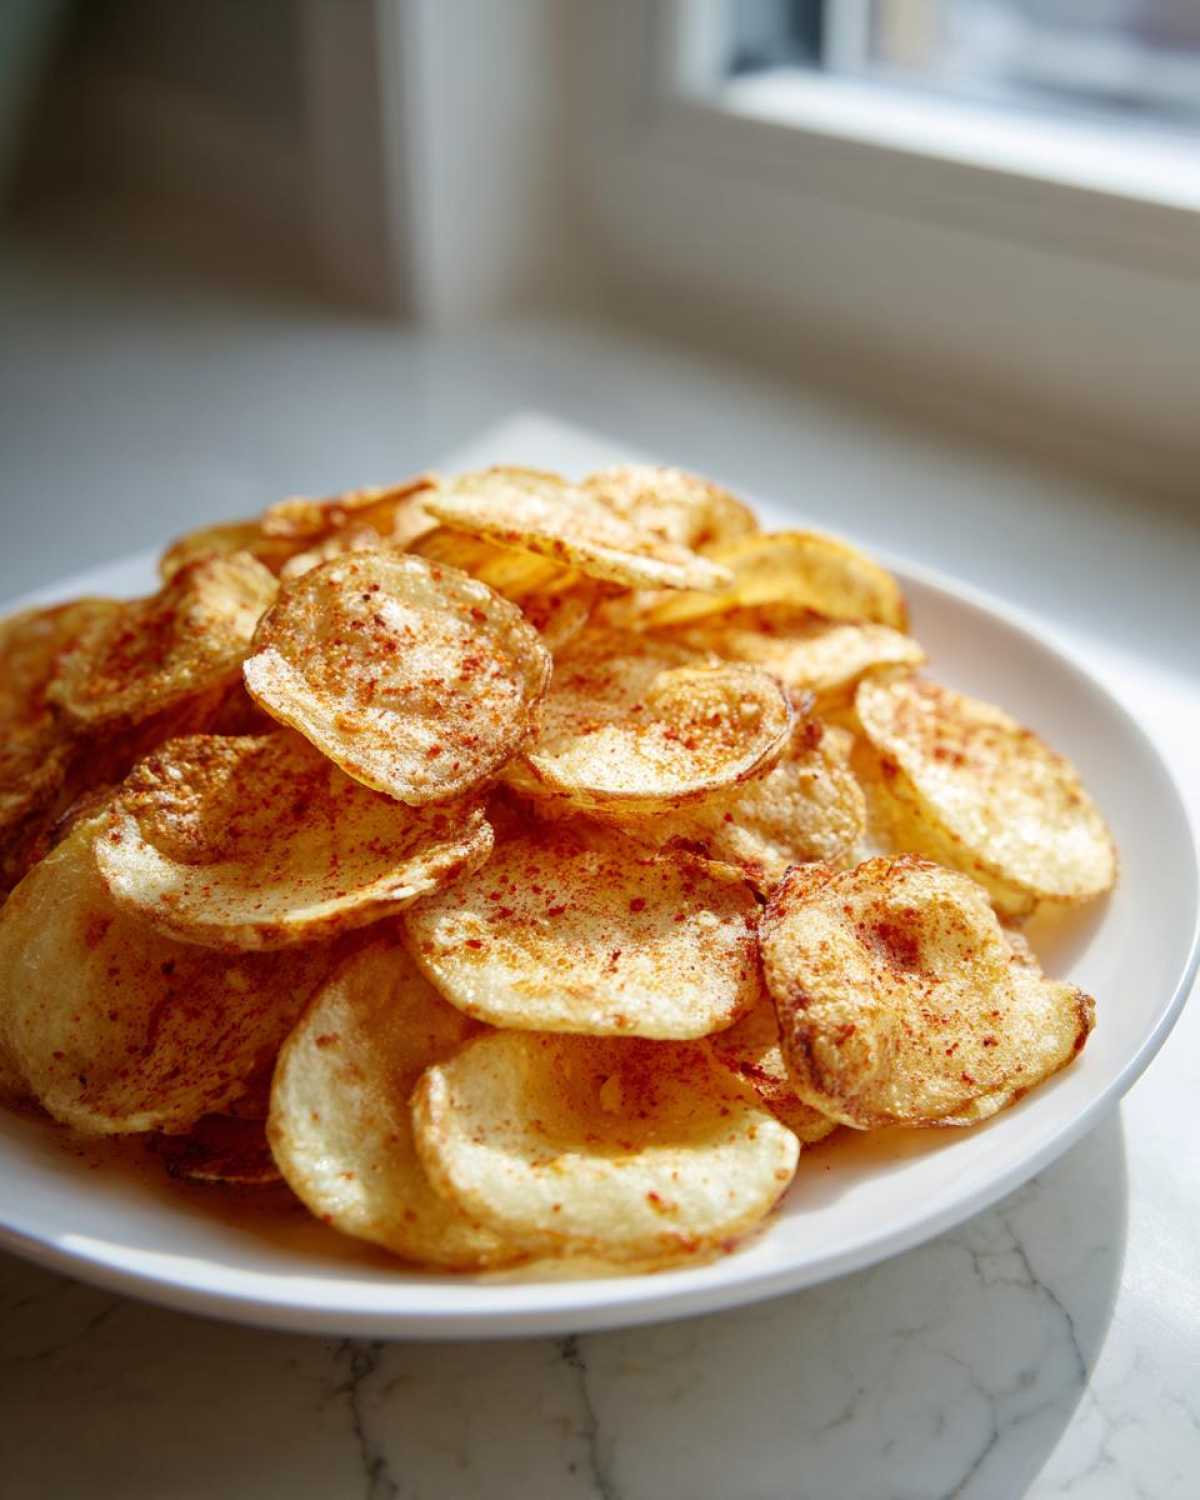
G’day, friend, and welcome to Sunday Flavor! I’m Chloe, and I am so thrilled you dropped by today because we are tackling one of my absolute favorite kitchen projects for that perfect moment of snack indulgence. If you’ve ever dreamed of ditching those store-bought bags for something infinitely better, you are in the right place! We are diving spoon-first into making the absolute best crispy potato chips right here in your own home. Forget complicated deep-frying; my joy comes from making simple food taste incredible, so I’m showing you two paths to perfection: the steady heat of the oven or the speedy magic of the air fryer. Get ready for a truly satisfying, crunchy snack!
Why This is the Best Crispy Potato Chips Recipe (EEAT Focus)
I truly believe that once you try these homemade potato chips, you’ll never look back at the greasy bags in the grocery aisle. Why are they the best? It all comes down to controlling the starch and the moisture. Store-bought chips often use less-than-ideal oils, but we get to use a light coat of good olive oil, which makes such a difference in flavor and texture. This recipe is about delivering that irresistible crackle that defines a great crunchy snack recipe, whether you serve them up as game day snacks or just for yourself!
The combination of the right preparation, a little healthy fat, and a quick blast of heat—whether oven or air fryer—guarantees success. Follow my steps exactly, especially those first two, and you nail that perfect, thin, golden chip every single time.
The Secret to Truly Crunchy Potato Chips
Okay, listen closely because this is where most people mess up their crispy potato chips recipe. You need to wash away the enemy: starch! If you skip the soaking stage, that surface starch turns into gummy glue when heated, and suddenly your chips are chewy, not crunchy. I usually soak mine for a solid 30 minutes, sometimes longer if I’m being lazy on a Sunday.
But soaking is only half the battle! You must, must, *must* dry those slices completely after draining them. I take my time here, patting them down between two thick, clean kitchen towels until I feel no lingering moisture. If they are damp when they hit the oil, they steam instead of crisp. Trust me, that intense drying effort is the difference between a perfect chip and a floppy one!
Gathering Ingredients for Your Homemade Potato Chips
Alright, let’s get our haul ready! Making these potato chips is so satisfying because you only need a handful of real, good ingredients. No mysterious stabilizers or preservatives here, just simple goodness. I’ve listed exactly what you need below to get started on the best snack you’ve made all week. Keep everything handy, and we’ll be ready for prep in a flash.
- 3 large Russet or Yukon Gold potatoes
- 2 tablespoons olive oil
- 1 teaspoon fine sea salt (or to taste)
- 1/2 teaspoon garlic powder
- 1/4 teaspoon paprika
Ingredient Notes and Potato Selection
Choosing the right potato is half the battle when you’re aiming for that classic, salty, addictive crunch. For the absolute best results—the kind that makes store-bought versions look sad—you want high-starch potatoes. That means either Russets or Yukon Golds are your go-to friends here.
Starch is what gets crispy! Lower-starch potatoes, like red potatoes, tend to hold onto moisture and get chewy, which is the exact opposite of what we want for these simple potato snacks.
Now, about the slicing—this is the part where you absolutely cannot eyeball it if you want perfection. Remember how we talked about even cooking? We need uniformity, my friend. If you can, grab a mandoline slicer because it is a lifesaver for achieving that glass-thin cut, around 1/16 of an inch. If you nail this part, you’ve basically mastered the thinly sliced potatoes recipe aspect, and the rest is easy sailing. Don’t skip the thin slicing; it’s non-negotiable for true crispiness!
How to Make Potato Chips From Scratch: Step-by-Step Instructions
This is the magic part, where plain old potatoes transform into the ultimate party snack! Since we’ve got our ingredients ready and our slicing skills polished, we need to tackle the prep work before we even think about applying heat. Remember, these steps aren’t suggestions; they are the foundation for getting those unbelievably crunchy potato chips. Slow down here, and fast cooking later will pay off beautifully!
Preparing the Potatoes for Maximum Crispiness
First things first: give those beautiful slices a good bath. Pop them into a big bowl of cold water—I mean totally submerged—and let them hang out for at least half an hour. Seriously, don’t rush this; we are coaxing out all that surface starch that wants to make our chips chewy. After they’ve had their soak, drain that milky water off completely.
Now comes the part that separates the good chips from the *great* chips: drying! I spread mine out on a couple of thick, clean dish towels. You need to blot and press them until they feel bone dry. If you’re using a mandoline for slicing, use it carefully and try to keep those slices uniform around 1/16th of an inch. Once they’re dry, it’s time for flavor! Toss them ever so gently in that olive oil until they just barely gleam, and then sprinkle on that salt, paprika, and garlic powder. Don’t dump the seasoning on all at once; lightly toss them until everything clings.
Cooking Method 1: Perfect Oven Baked Potato Chips
If you’re making a giant batch for a crowd, the oven is your best friend because you can use multiple baking sheets at once. Preheat your oven to a fairly high heat—we want 400°F (200°C). Line those baking sheets with parchment paper; this is a must for easy lifting later. Lay your seasoned slices out in a single layer. I can’t stress this enough: do not overlap them, or they will steam and go floppy!
Pop them in the oven for 15 to 20 minutes. Around the 10-minute mark, pull them out and flip every single chip. Watch them like a hawk after that first flip! They go from golden perfection to burnt real fast. When they are golden brown at the edges and feel firm when you tap them, pull them out. They’ll crisp up more as they cool on a wire rack.
Cooking Method 2: Quick Air Fryer Potato Chips
If you’re just whipping up a small portion, the air fryer is fantastic because it gets screaming hot fast and the circulating air is brilliant for crisping. Preheat your air fryer to 350°F (175°C). Because these need space to breathe, you absolutely must work in batches—no piling them in! If you crowd the basket, you get soggy air fryer potato chips, and nobody wants that!
Lay a single layer of seasoned chips in the basket. Fry them for about 10 to 15 minutes total. The trick here is shaking the basket every five minutes, just like you would with French fries. This redistributes the heat and ensures everything cooks evenly. You’ll smell when they’re done—that lovely, warm, salty aroma! Scoop them out immediately and let that residual heat finish crisping them up on the rack.
Flavor Variations for Your Homemade Potato Chips
You’ve mastered the crunch, so now for the fun part—making these potato chips truly yours! The garlic powder and paprika combo we used is classic, but the world of flavor is your oyster once you have that perfect texture locked down. This is where you can get seriously creative with your own custom potato chip seasoning ideas. Don’t be shy!
Want something a little smoky? Try adding a pinch of smoked paprika and a dash of chili powder for a real kick. For a zingy, tangy twist, mix a little finely ground dehydrated onion with some dried dill. If you’re having friends over who love bold flavors, tossing them with a little nutritional yeast can give you a delicious, cheesy coating that screams “gourmet snack.” Whip up your favorite blend while your chips are cooling, and toss everything together right away while the little bit of leftover oil is still tacky. That’s how you elevate a simple snack!
Tips for the Ultimate Crunchy Snack Recipes
Even with the best recipe, sometimes things go a little sideways in the kitchen, right? Don’t you worry one bit! I’ve made enough batches of these to know exactly what to look out for when things aren’t reaching peak crunch levels. Since you’ve already done the hard work of soaking and drying those potatoes, we want to make sure that effort pays off. These aren’t just recipes; they are tricks I’ve learned over many, many Sunday cooking sessions to guarantee an amazing result every time you’re craving a homemade savory snack.
Troubleshooting Common Issues
If you pulled your chips out of the oven or air fryer and they felt… well, floppy, there’s usually one culprit: moisture we missed. Either the starch wasn’t fully rinsed out, or honestly, they just weren’t dried enough. When they steam instead of bake, you get chewiness. If this happens, don’t toss them! Put those floppy slices immediately back onto a clean, parchment-lined sheet or in the air fryer basket (again, single layer!) and cook them for another 5 minutes. They usually catch up and crisp right then.
On the flip side, if some of your chips burnt while others were still pale, that’s almost always an uneven layer issue. Remember what I said about the oven? If you’re making a truly large batch, trying to jam too many slices onto one sheet pan means the ones in the center (where the oven heat is less direct) will lag behind, and the ones on the edges will scorch while you wait. It’s tempting to save time, but if you are baking, better to use three pans with a spacious layer than two overcrowded ones. It keeps everything cooking evenly!
Storage and Keeping Potato Chips Fresh
Now that your kitchen is probably smelling wonderfully salty and savory, I genuinely can’t wait to hear how your first batch of homemade potato chips turned out! Did you choose the oven or the air fryer? Let me know in the comments below if you dared to try a wild seasoning blend, or if you stuck to the classic garlic and paprika. If you snapped a photo of your crunchy snack, share it with me! If you have questions or just want to say hello, you can always reach out over on my contact page. Happy snacking, friend!
Okay, real talk: these potato chips are so unbelievably good that you might struggle to have any leftovers! But just in case you manage to save some of them for your afternoon snack attack tomorrow, we need to store them correctly. Because these are made fresh without the preservatives found in the store-bought bags, maintaining that incredible crunch is crucial.
The biggest enemy of a freshly crisped chip is air humidity. If you leave them out on the counter in a bowl, they will definitely start to soften up within a few hours, and we can’t have that sabotage!
The best way to keep your homemade potato chips crunchy is to seal them up tight. Transfer any leftover chips to an airtight container as soon as they are completely cool—and I mean cool to room temperature, not even slightly warm!
A glass jar with a clamp lid works wonderfully for this, or even a zipper-top bag where you try to press out every last bit of air before sealing it. Keep that container in a cool, dry pantry. If they start to taste a little less snappy the next day, don’t panic! You can often revive them quickly! Just spread them back on a baking sheet and pop them into a 300°F (150°C) oven for just 4 or 5 minutes. That little reheating blast usually dries out any absorbed moisture and brings that crunch right back!
Serving Suggestions for Game Day Snacks
Honestly, I think the ultimate sign of a successful party snack recipe is when it disappears first, and these homemade chips always win that race! Since we’ve spent the time getting that perfect, light crunch, they need dips and treats that complement rather than overpower them. This is definitely the recipe I rely on whenever my friends swing by for a big game.
My first suggestion, naturally, is a really good, creamy dip. Forget the powdered packet stuff! A thick onion dip made with sour cream and caramelized onions is heavenly with the simple saltiness of these chips. If you’re feeling slightly tropical, a fresh mango salsa is phenomenal—the sweet tang cuts right through the savory flavor.
And if you are looking for something more substantial to serve alongside the bowl of chips, I always pair them with something hearty nearby. Think about pairing them next to my easy party subs or maybe piling them high on top of a big bowl of chili! They add that necessary textural crunch to any spread. Truly, any savory dip under the sun works beautifully with these, so don’t be shy when setting out your spread for all your game day snacks!
Frequently Asked Questions About Making Potato Chips
I know you might have a few lingering thoughts now that you see how simple it is to whip up these amazing snacks! That’s totally normal. When I first started making my own potato chips, I had questions about the potatoes, the slicing, and definitely the oil situation. Here are some of the most common things folks ask me when they are ready to try this recipe for the first time.
Can I make these potato chips without oil?
Oh, absolutely you can! If you are after a truly healthy chip recipe or just trying to cut back on your fat intake, this method plays really well with that goal. While the olive oil helps the seasoning stick beautifully and aids in browning, you can easily swap it out for a good coating of cooking spray—I often use avocado oil spray myself. That keeps them light enough to qualify as guilt-free chips, but remember you might need to bake them for a minute or two longer so they can dry out sufficiently and start to brown. A light spritz is usually all you need for low oil potato chips!
What is the best potato variety for homemade potato chips?
This is such an important question for achieving that perfect snap! You want high-starch potatoes, plain and simple. I always reach for Russets, which are the classic choice for frying for a reason, or Yukon Golds if I can’t find good Russets. These varieties have lower moisture content overall and higher starch, and the starch is what turns delightfully crunchy when exposed to heat. If you use, say, a waxy new potato, you’ll likely end up with something chewy or even gummy, which is the opposite of the satisfying crunch we are aiming for in these simple potato snacks!
Speaking of starch, always do that soaking step I mentioned, no matter which potato you pick! It pulls the excess starch right off the surface, which guarantees that beautiful, even crispiness whether you’re baking them or using your air fryer. It’s one of the secrets I learned when trying to figure out how to make potato chips from scratch!
If you want to see the recipe in action again, don’t forget you can always hop back to the main instructions right here, and I’ve also got a great guide on making Greek-style chips if you’re feeling adventurous!
Sharing Your Perfect Potato Chips Experience
Now that your kitchen is probably smelling wonderfully salty and savory, I genuinely can’t wait to hear how your first batch of homemade potato chips turned out! Did you choose the oven or the air fryer? Let me know in the comments below if you dared to try a wild seasoning blend, or if you stuck to the classic garlic and paprika. If you snapped a photo of your crunchy snack, share it with me! If you have questions or just want to say hello, you can always reach out over on my contact page. Happy snacking, friend!
PrintCrispy Homemade Potato Chips: Oven Baked or Air Fryer

Make the best crispy potato chips right at home! This recipe gives you perfectly thin, crunchy chips using either your oven or an air fryer for a healthier, guilt-free snack.
- Prep Time: 20 min
- Cook Time: 20 min
- Total Time: 40 min
- Yield: 4 servings
- Category: Snack
- Method: Baking/Air Frying
- Cuisine: American
- Diet: Vegetarian
Ingredients
- 3 large Russet or Yukon Gold potatoes
- 2 tablespoons olive oil
- 1 teaspoon fine sea salt (or to taste)
- 1/2 teaspoon garlic powder
- 1/4 teaspoon paprika
Instructions
- Prepare the potatoes: Wash and dry the potatoes completely. You do not need to peel them if you prefer the skin on.
- Slice the potatoes very thinly, aiming for 1/16 inch thickness. Use a mandoline slicer for the best, most uniform results.
- Soak the slices: Place the potato slices in a large bowl of cold water for at least 30 minutes. This removes excess starch, which helps them crisp up.
- Dry thoroughly: Drain the potatoes and rinse them under cold water. Spread them out on clean kitchen towels or paper towels and pat them completely dry. This step is crucial for crispiness.
- Toss with oil and seasoning: In a clean bowl, toss the dry potato slices with the olive oil until lightly coated. Sprinkle evenly with salt, garlic powder, and paprika.
- For Oven Baking: Preheat your oven to 400°F (200°C). Arrange the seasoned slices in a single layer on baking sheets lined with parchment paper. Do not overlap them. Bake for 15 to 20 minutes, flipping halfway through, until golden brown and crisp. Watch closely near the end to prevent burning.
- For Air Frying: Preheat your air fryer to 350°F (175°C). Place the seasoned slices in the air fryer basket in a single layer (you will need to work in batches). Air fry for 10 to 15 minutes, shaking the basket every 5 minutes, until golden and crunchy.
- Cool and serve: Remove the chips from the oven or air fryer and let them cool completely on a wire rack. They will crisp up further as they cool. Taste and add more salt if needed. Serve immediately for the best crunch.
Notes
- For extra flavor, try seasoning ideas like onion powder, black pepper, or a dash of dried rosemary.
- If you want a low oil potato chips option, use cooking spray instead of drizzling the oil.
- If you are making a large batch, the oven method is faster as you can use multiple sheets at once.
Nutrition
- Serving Size: 1 serving (about 1 oz)
- Calories: 150
- Sugar: 0.5
- Sodium: 250
- Fat: 8
- Saturated Fat: 1.2
- Unsaturated Fat: 6.8
- Trans Fat: 0
- Carbohydrates: 18
- Fiber: 2
- Protein: 2
- Cholesterol: 0
Comments are closed.