


Oh, welcome back to the kitchen! If you’re anything like me, there’s a certain type of cookie—the kind that just screams ‘comfort’ and ‘celebration’—that you absolutely need on your baking sheet, especially when you’re dialing up that wonderful Sunday Flavor. Today, we aren’t just making cookies; we are making *history* in the oven. I’m sharing my absolute favorite, the quintessential holiday hug: the classic Peanut Butter Blossoms! Yes, those iconic beauties topped with a Hershey’s Kiss. After weeks of experimenting to get that perfect melt, I can proudly share my go-to Peanut Butter Blossoms Recipe with you. Trading my spreadsheets for an apron on Sunday was all about baking joy like this, and I’m so excited for you to taste why this recipe means so much to me.
Why This Classic Kiss Cookies Recipe is Your New Favorite
Look, I know there are a million cookie recipes out there, but these Kiss Cookies? They are the real deal. They’re my shortcut to instant happiness, and seriously, they come together so fast that you can whip up a batch even on a busy weeknight. Forget those stiff, crumbly bakery versions; we are aiming for nostalgia and pure, buttery goodness here.
- They bake up perfectly soft right out of the oven, making them true Soft and Chewy Kiss Cookies.
- The dough is incredibly forgiving—you can’t really mess it up, making them wonderfully Easy Kiss Cookies for beginners.
- That classic peanut butter base paired with the melty chocolate top is unbeatable, trust me!
Achieving the Perfect Soft and Chewy Kiss Cookies Texture
The secret to the chewiness is all about avoiding gluten development. You need to cream your butter and sugars properly, but then—and this is vital—you stop mixing right when the flour disappears. Overmixing the dough after adding the dry elements makes them tough. We want soft butter, not melted butter, to keep that beautiful airy structure!
Essential Ingredients for Perfect Peanut Butter Kiss Cookies
When you are making something as iconic as the classic Peanut Butter Kiss Cookies, you really need to pay attention to what you bring into the bowl. This isn’t the time for guesswork; these ingredients are the backbone of that perfect crinkle top and chewy interior. We’re keeping things simple, pure, and straightforward here, just like the best recipes always are. You’ll notice I list three types of sugar—that’s intentional because each one brings a slightly different moisture level and texture to the dough. Don’t skip the prep steps for the peanut butter and those lovely little chocolate toppers!
- 1 ½ cups all-purpose flour
- ¾ teaspoon baking soda
- ½ teaspoon salt
- ¾ cup creamy peanut butter (I swear by JIF for the right consistency!)
- ½ cup unsalted butter, very soft
- ⅓ cup granulated sugar
- ½ cup granulated sugar (this is for the coating, set it aside!)
- ⅓ cup light brown sugar, packed
- 1 large egg, room temperature
- 2 teaspoons vanilla extract
- 28 Hershey’s Kiss candies, unwrapped and frozen
Ingredient Notes and Substitutions for Your Kiss Cookies
A few quick notes on these components! For the peanut butter, I strongly recommend creamy; crunchy changes the texture too much for this specific Blossom recipe. Also, make sure your butter is truly soft—not melted—and your egg is at room temperature so everything incorporates smoothly. And please, don’t look for substitutes for the actual chocolate! If it’s not a Hershey’s Kiss, it’s not truly a classic Kiss Cookie, and you won’t get that signature look.
Step-by-Step Instructions for Making Classic Kiss Cookies
Alright, this is where the magic happens, but we need to move with a little bit of purpose so these turn out truly soft! Preheat your oven to 375°F right away and make sure you line those baking sheets with parchment paper—it saves so much cleanup time later. Start by whisking your flour, baking soda, and salt together in a smaller bowl. This dry blend gets set aside while we work on the main dough.
In your big mixing bowl, cream that soft butter, peanut butter, the smaller amount of sugar, and the brown sugar until it looks fluffy and pale. Then, you’ll beat in your room-temperature egg and the vanilla. Now, add those dry ingredients back in, but mix on LOW speed! Seriously, just until you see a soft dough just start to come together. Stop before it’s totally uniform, or you risk losing that beautiful chewiness we are after in these Kiss Cookies!
Once the dough is ready, pour the remaining half-cup of granulated sugar onto a shallow plate. I always find that getting all my other components ready first helps! I learned this trick when I was trying to nail down my brown butter raspberry chocolate chip cookies—mise en place saves the day! It’s time for my favorite pre-bake step!
The Trick to Rolling Perfect Peanut Butter Blossoms
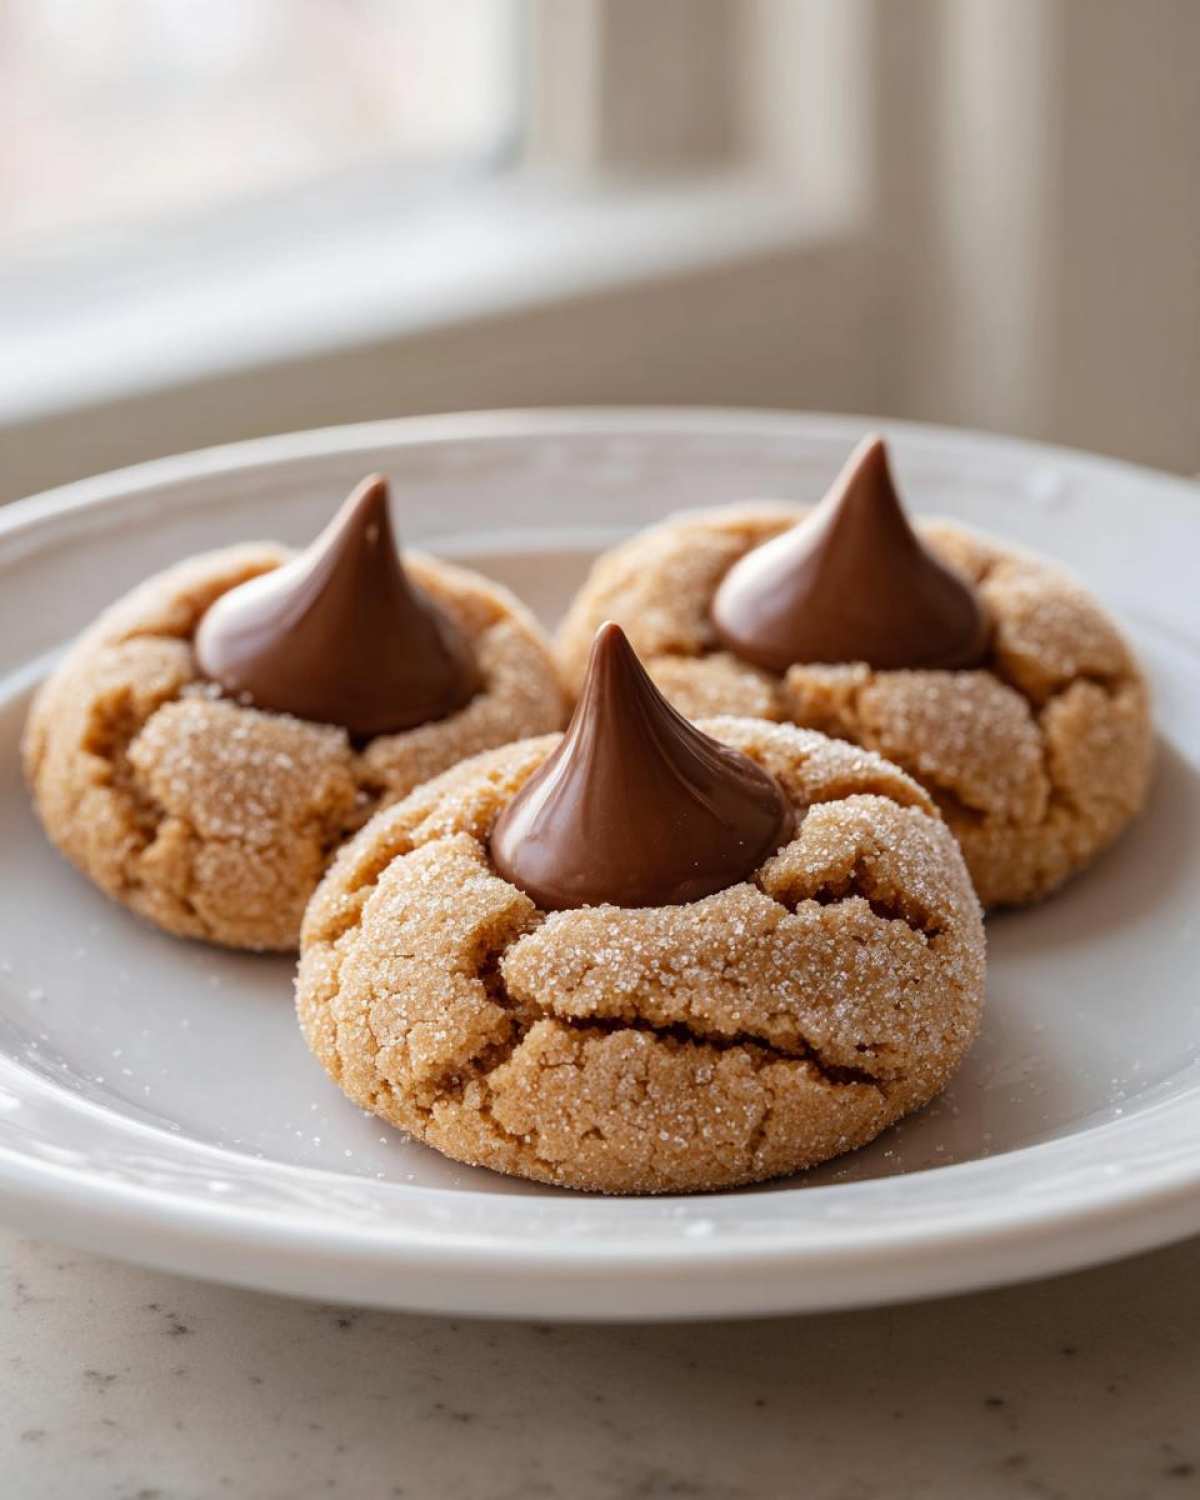
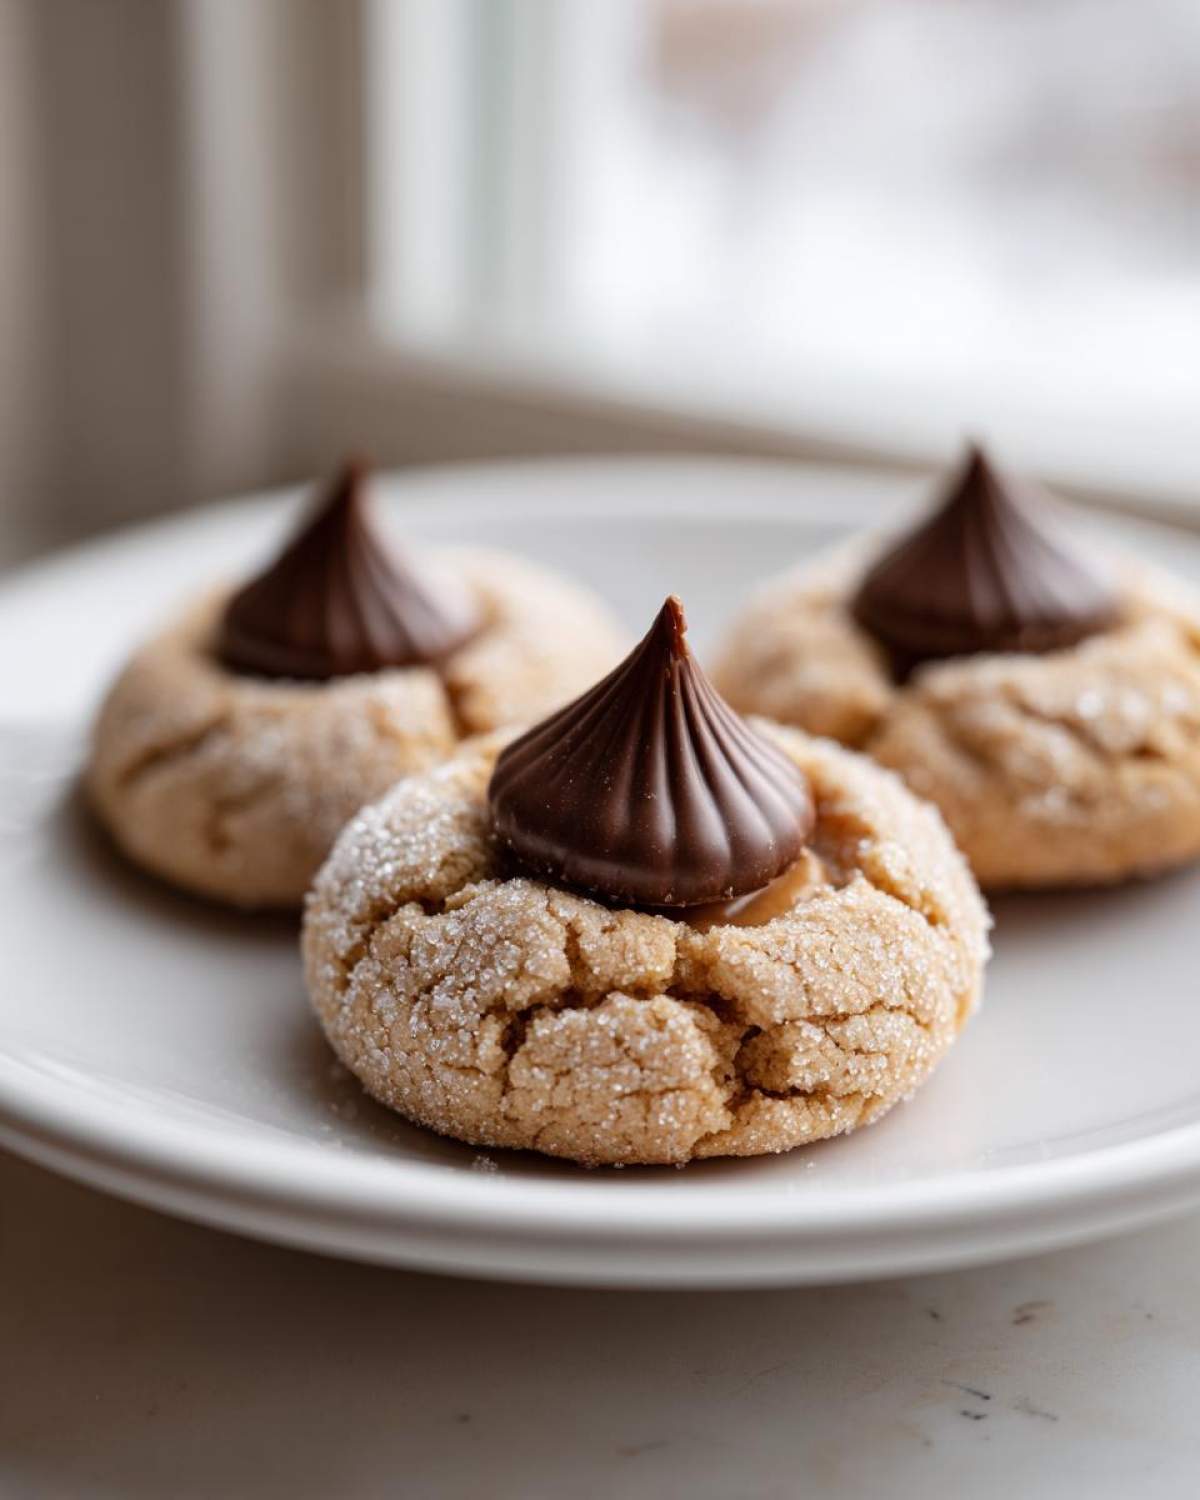
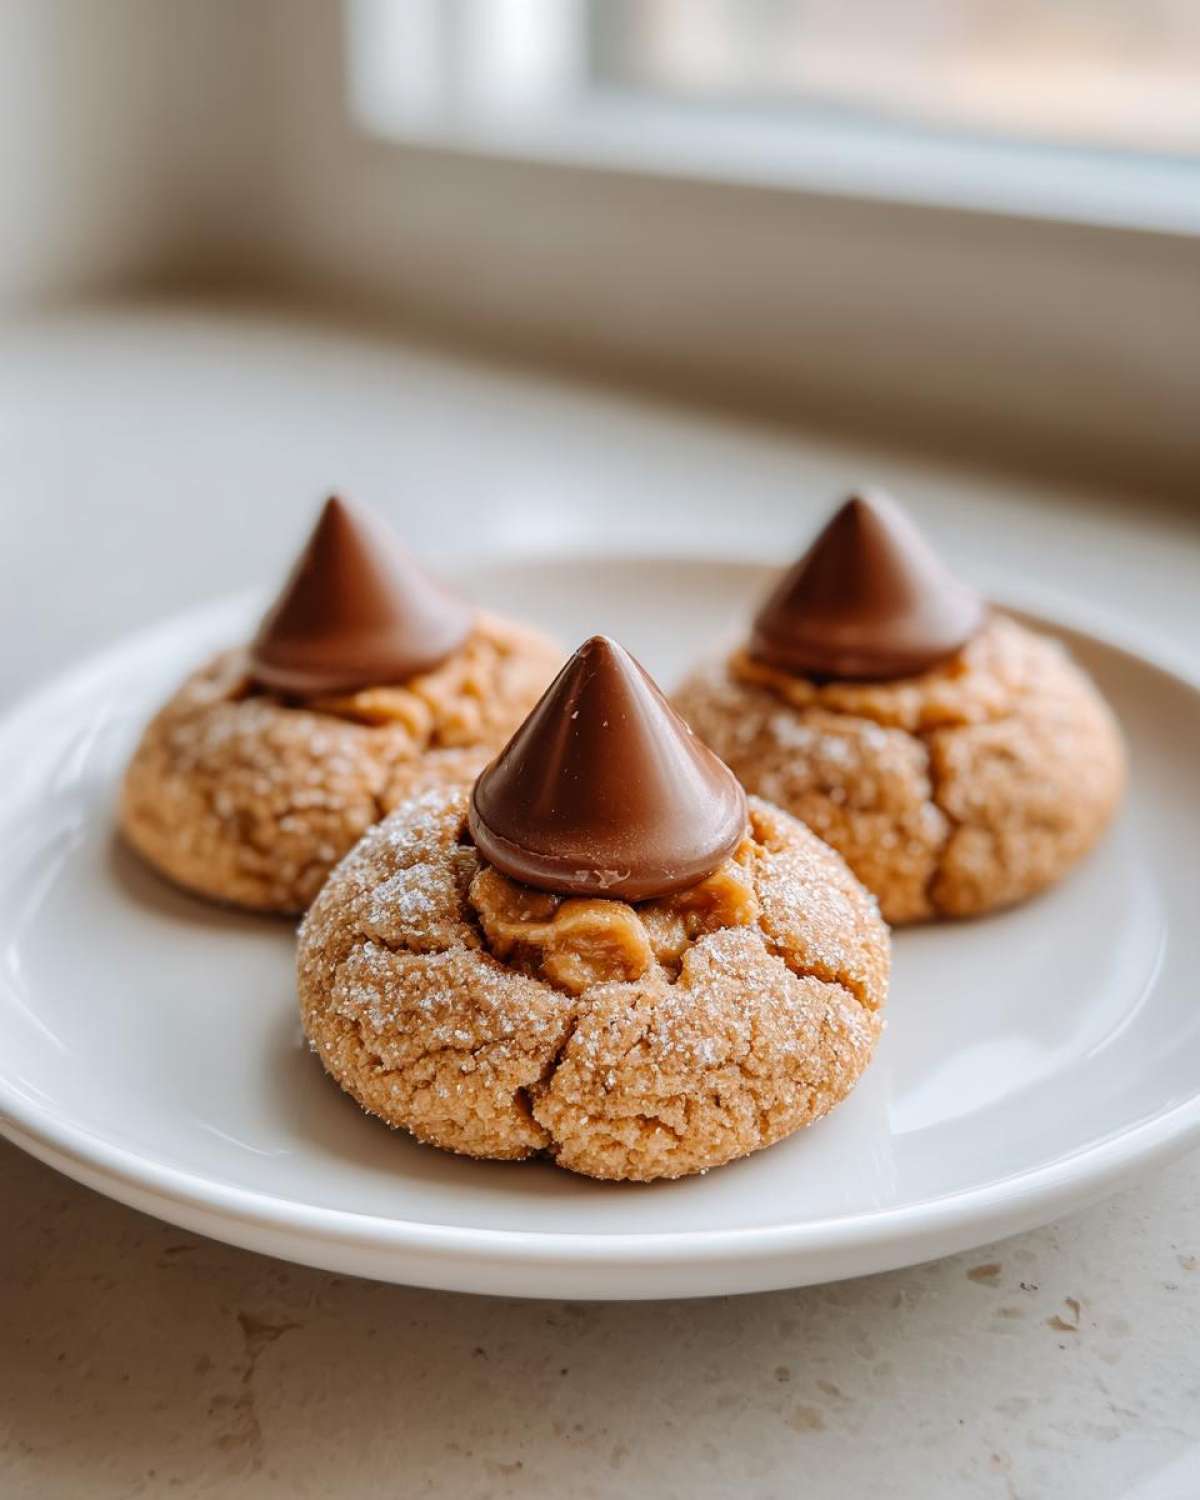
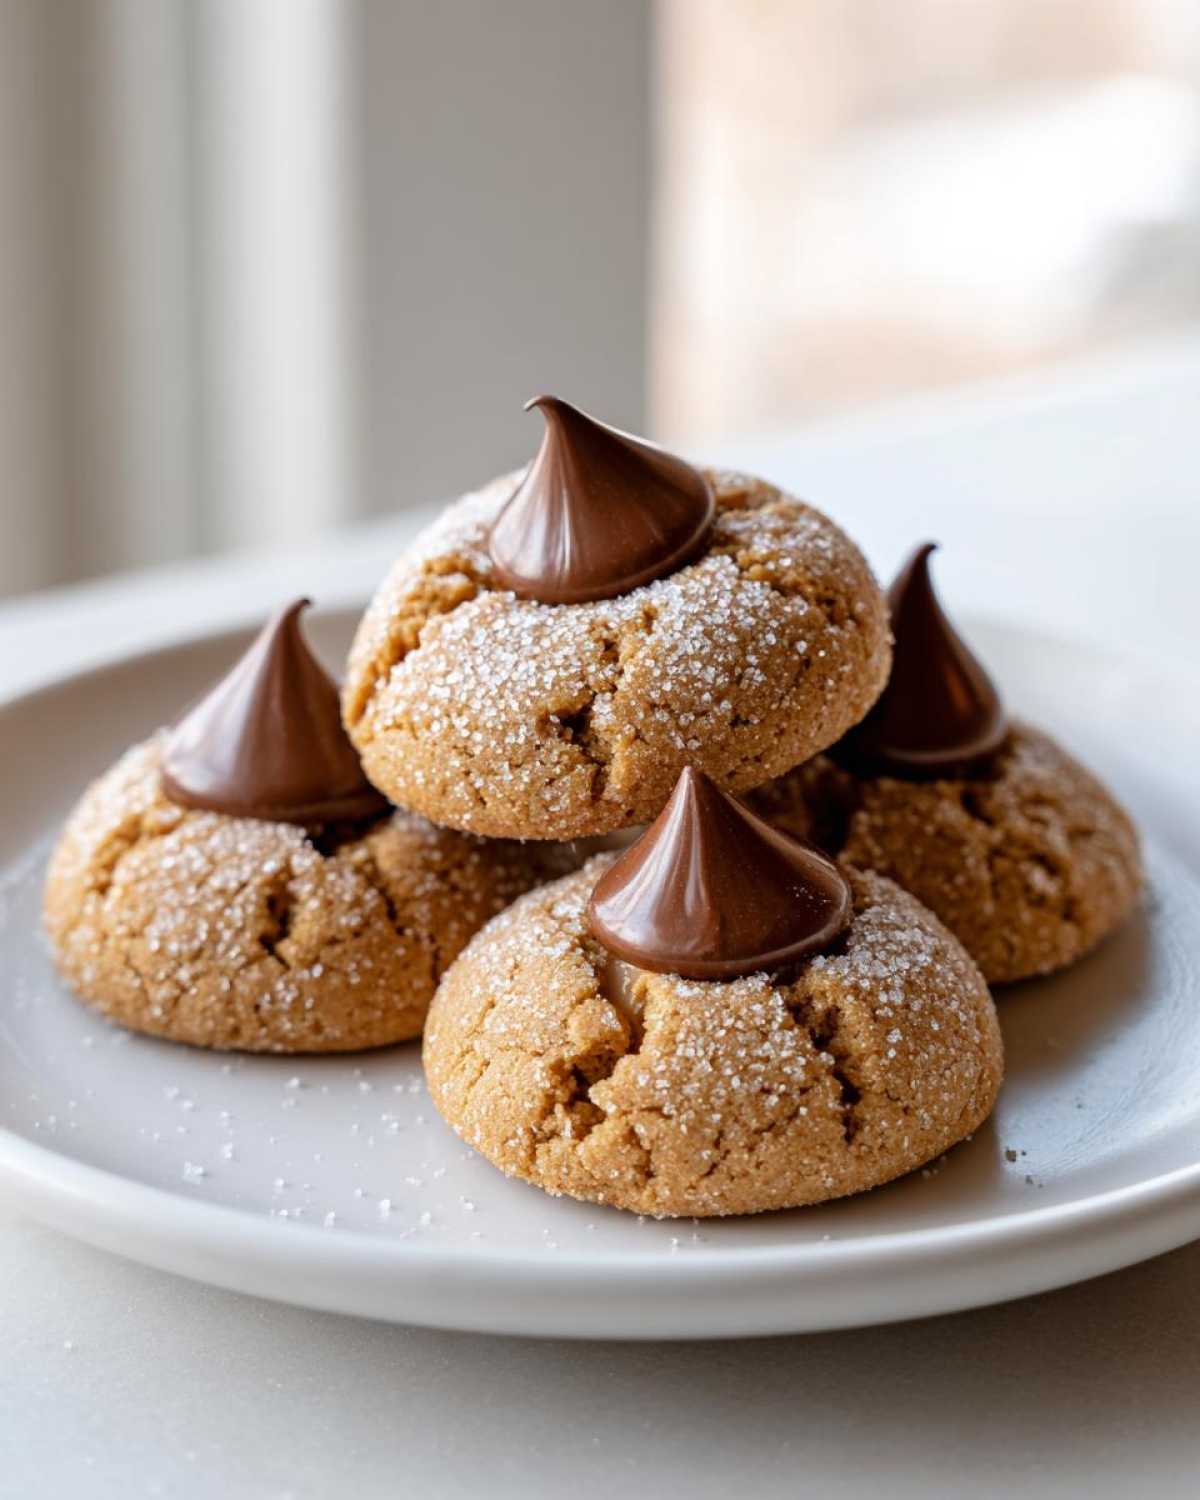
We need one-inch dough balls. Scooping them uniformly helps them bake evenly, so try to be consistent! Once you have that nice round ball, roll it *aggressively* in the extra sugar until it’s totally coated. This coating is what gives those beautiful, crackled wings around the base of your Blossom Cookies. They should look like they’re wearing a little coat of snow!
Pressing the Hershey Kiss into Your Warm Kiss Cookies
This timing is everything! Bake them for 8 to 10 minutes—seriously, pull them out when they look *just* set in the middle. As soon as they hit the cooling rack, gently push one of those frozen, unwrapped Kisses right into the center. If you wait even a minute too long, the cookie cracks will be deeper and the chocolate might sink too far down. I find if you press quickly but firmly right when they come out, you get that perfect little melt around the edges, which is the defining feature of all Chocolate Kiss Topped Cookies.
After five minutes sitting on the hot pan, move them carefully to a wire rack to finish cooling down. If you try moving them too soon, that beautiful peanut butter base might stick right to the pan. It’s worth the wait!
Tips for Success with Holiday Kiss Cookies
Even the best recipes can have little hiccups, right? That’s why I always keep a few tricks up my sleeve, especially when baking batches of these precious Holiday Kiss Cookies for busy entertaining schedules. Don’t let little things derail your baking confidence!
Here are my favorite things to watch out for:
- If your dough seems crumbly when you try to roll it, just let it sit on the counter for about 10 minutes. That little bit of warmth helps the fats soften just enough so they bind better when you roll them in the sugar.
- If your Kisses seem determined to slide off after cooling, try giving them a quick 5-second dab in the freezer again before pressing them in. A colder chocolate cap resists melting too much!
- Don’t reuse the same rolling sugar bowl if you bake more than two sheets. The peanut butter residue contaminates the coating, and you want that bright white look for the final presentation.
- If you’re worried about cracks, check out how I use brown butter techniques in other recipes; sometimes swapping just a tiny bit of the fat element can change the surface tension beautifully.
Storage and Keeping Your Kiss Cookies Fresh
These cookies are best devoured the day they are made, of course! But if you need to save some, we have to think about the chocolate. Don’t stack them right away, or the Kisses will smudge or stick to the cookie above them. Store them in a single layer in an airtight container for up to four days. If you must stack them (I know how it is when you bake a big batch!), place a square of parchment paper between each layer.
Yes, they freeze beautifully! Pop them onto a tray without touching, flash freeze for an hour, and then transfer them to a freezer bag. Just thaw slightly on the counter before serving. That soft texture holds up really well!
Beyond Peanut Butter: Variations of Festive Kiss Cookies
While the Peanut Butter Blossom owns the number one spot in my heart, I absolutely love exploring how this concept extends across different flavor profiles. It’s amazing how just changing the base cookie can turn these into something entirely new! If you’re looking to build a massive holiday cookie platter or just want a break from peanut butter, you have so many fun options for creating fantastic Kiss Cookies. Sometimes I call these my flavor adventures!
For instance, the Snickerdoodle Kiss Cookies are a huge hit. That cinnamon-sugar coating wrapped around a soft center, then crowned with chocolate? Perfection. You can find a fantastic recipe for those over at Rachel’s site! Or, if you want something dramatic and rich, try making Red Velvet Blossoms. They give you that lovely subtle cocoa flavor with vibrant color, and they look so elegant.
It’s all about taking the basic idea—a soft cookie base, a sprinkle of sugar, and that creamy chocolate topper—and just having fun with it. You could even swap out your fat source, maybe using browned butter like I do in this recipe, to give your sugar cookie base a nutty depth before you press that Kiss in. There are endless possibilities when you start playing!
Frequently Asked Questions About Making Kiss Cookies
I totally get it! When you’re diving into one of those core recipes, you always have a few little nagging questions before you start mixing. Don’t worry, that’s just a sign you want them to turn out perfect—and they totally will! Here are the things everyone asks me about pulling off these perfect Kiss Cookies.
Can I use crunchy peanut butter in my Kiss Cookies?
You definitely *can*, but you’re going to change the texture significantly. The classic look of the Peanut Butter Blossoms relies on that super tight, smooth dough so it can crack into those beautiful, distinct fissures when it bakes. Crunchy peanut butter adds chunks which interrupt that structure. If you love texture, go right ahead, but know they won’t look exactly the same as the ones pictured here. For the *classic* presentation, stick to creamy!
What is the best way to store leftover Peanut Butter Blossoms?
This is key for keeping them soft! Remember how we aimed for soft and chewy? If you just toss them in a container, the chocolate top will stick to the cookie above it. You have to use parchment paper! Place a sheet of parchment or wax paper between each layer in an airtight container. This keeps the peanut butter soft and stops the chocolate from smearing. They stay great for about four days this way.
Are these considered Christmas Cookie Recipes or year-round treats?
While they are certainly the absolute star of most Christmas Cookie Recipes I’ve ever made—mostly because they look so festive with that little chocolate hat—they are absolutely amazing any time of year! The peanut butter flavor is so comforting. If you make a small batch in July, trust me, they’ll disappear just as fast as they do in December. They are a year-round joy, just waiting for an excuse to be baked!
Estimated Nutritional Information for Classic Kiss Cookies
Now, before you grab another one of these glorious treats—because who counts calories when the chocolate is perfectly melted, right?—I always like to share the estimated breakdown for these Peanut Butter Blossoms. Remember, I’m not a certified nutritionist, and since we are baking these from scratch, the exact numbers can vary based on the exact brand of peanut butter or butter you use. But this gives you a good ballpark figure for one glorious cookie, based on the recipe here.
When I look at these figures, I just see deliciousness! This section helps me keep my own baking journey balanced, but please know that the joy these cookies bring far outweighs any numbers on a chart. They really are worth enjoying slowly and sweetly.
- Serving Size: 1 cookie
- Calories: Approximately 160
- Fat: About 9g (Remember, much of this is the good fat from the peanuts!)
- Carbohydrates: Around 18g
- Protein: A solid 4g to keep you going!
If you are watching sodium or sugar, that’s where the actual ingredient selection matters most! I always try to balance out my baking days with big, fresh salads during the week so I can fully enjoy moments like these!
Share Your Sunday Flavor Baking Adventures
That’s it, my friends! You have now baked the ultimate, most comforting cookie in the world—the classic Peanut Butter Blossom. I am literally beaming right now just thinking about all those warm, melty Kisses sitting perfectly on top of those peanut butter clouds. Baking shouldn’t be something you do alone; it’s about connecting with people, and I want to see your Sunday Flavor creations!
If you made these cookies, please, please leave a star rating right below this section so other bakers know what a winner this Classic Kiss Cookie Recipe is. Even better, take a quick snap of your finished tray! The way the light catches that shiny Hershey’s Kiss? It’s totally photo-worthy.
Drop a comment and tell me: Did you stick to the classic, or did you try one of those fun flavor variations we talked about? Did you let the cookie cool for exactly five minutes before pressing in the chocolate? I love hearing all your little tweaks and triumphs. Your feedback helps me make my recipes even better for the next time you stop by my kitchen.
If you enjoyed bringing a little bit of that Sunday feeling into your week, why not learn more about my journey and how I turned this passion into Sunday Flavor? Happy baking, and cheers to making every day a little sweeter!
Cheers,
Chloe
Classic Peanut Butter Blossoms (Soft & Chewy Kiss Cookies)
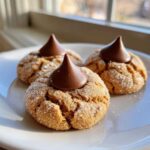
Bake the ultimate holiday classic! These Peanut Butter Blossoms, also known as Kiss Cookies, are soft, chewy, and topped with a melted Hershey’s Kiss. This recipe delivers that perfect, melt-in-your-mouth texture everyone craves.
- Prep Time: 20 min
- Cook Time: 10 min
- Total Time: 30 min
- Yield: 28 cookies
- Category: Dessert
- Method: Baking
- Cuisine: American
- Diet: Vegetarian
Ingredients
- 1 ½ cups all-purpose flour
- ¾ teaspoon baking soda
- ½ teaspoon salt
- ¾ cup creamy peanut butter (JIF brand recommended)
- ½ cup unsalted butter, very soft
- ⅓ cup granulated sugar
- ½ cup granulated sugar (for rolling)
- ⅓ cup light brown sugar, packed
- 1 large egg, room temperature
- 2 teaspoons vanilla extract
- 28 Hershey’s Kiss candies, unwrapped and frozen
Instructions
- Preheat your oven to 375°F (190°C). Line baking sheets with parchment paper.
- In a medium bowl, whisk together the flour, baking soda, and salt. Set aside.
- In a large bowl, use an electric mixer to cream together the soft butter, peanut butter, ⅓ cup granulated sugar, and brown sugar until light and fluffy.
- Beat in the egg and vanilla extract until just combined.
- Gradually add the dry ingredients to the wet ingredients, mixing on low speed until a soft dough forms. Do not overmix.
- Place the remaining ½ cup of granulated sugar in a shallow dish.
- Roll the cookie dough into 1-inch balls. Roll each ball thoroughly in the granulated sugar to coat completely.
- Place the sugared dough balls about 2 inches apart on the prepared baking sheets.
- Bake for 8 to 10 minutes, or until the edges are lightly set. The centers will still look slightly soft.
- Immediately upon removing the cookies from the oven, gently press one frozen, unwrapped Hershey’s Kiss into the center of each warm cookie.
- Let the cookies cool on the baking sheet for 5 minutes before transferring them to a wire rack to cool completely. The Kiss will soften slightly as the cookie cools.
Notes
- Freezing the Hershey’s Kisses before pressing them into the warm cookies helps them keep their shape better.
- For the softest cookies, do not overbake. They should look slightly underdone when you pull them out.
- This recipe makes about 28 cookies, perfect for sharing your Sunday Flavor!
Nutrition
- Serving Size: 1 cookie
- Calories: 160
- Sugar: 12g
- Sodium: 110mg
- Fat: 9g
- Saturated Fat: 4g
- Unsaturated Fat: 5g
- Trans Fat: 0g
- Carbohydrates: 18g
- Fiber: 1g
- Protein: 4g
- Cholesterol: 20mg


Comments are closed.