


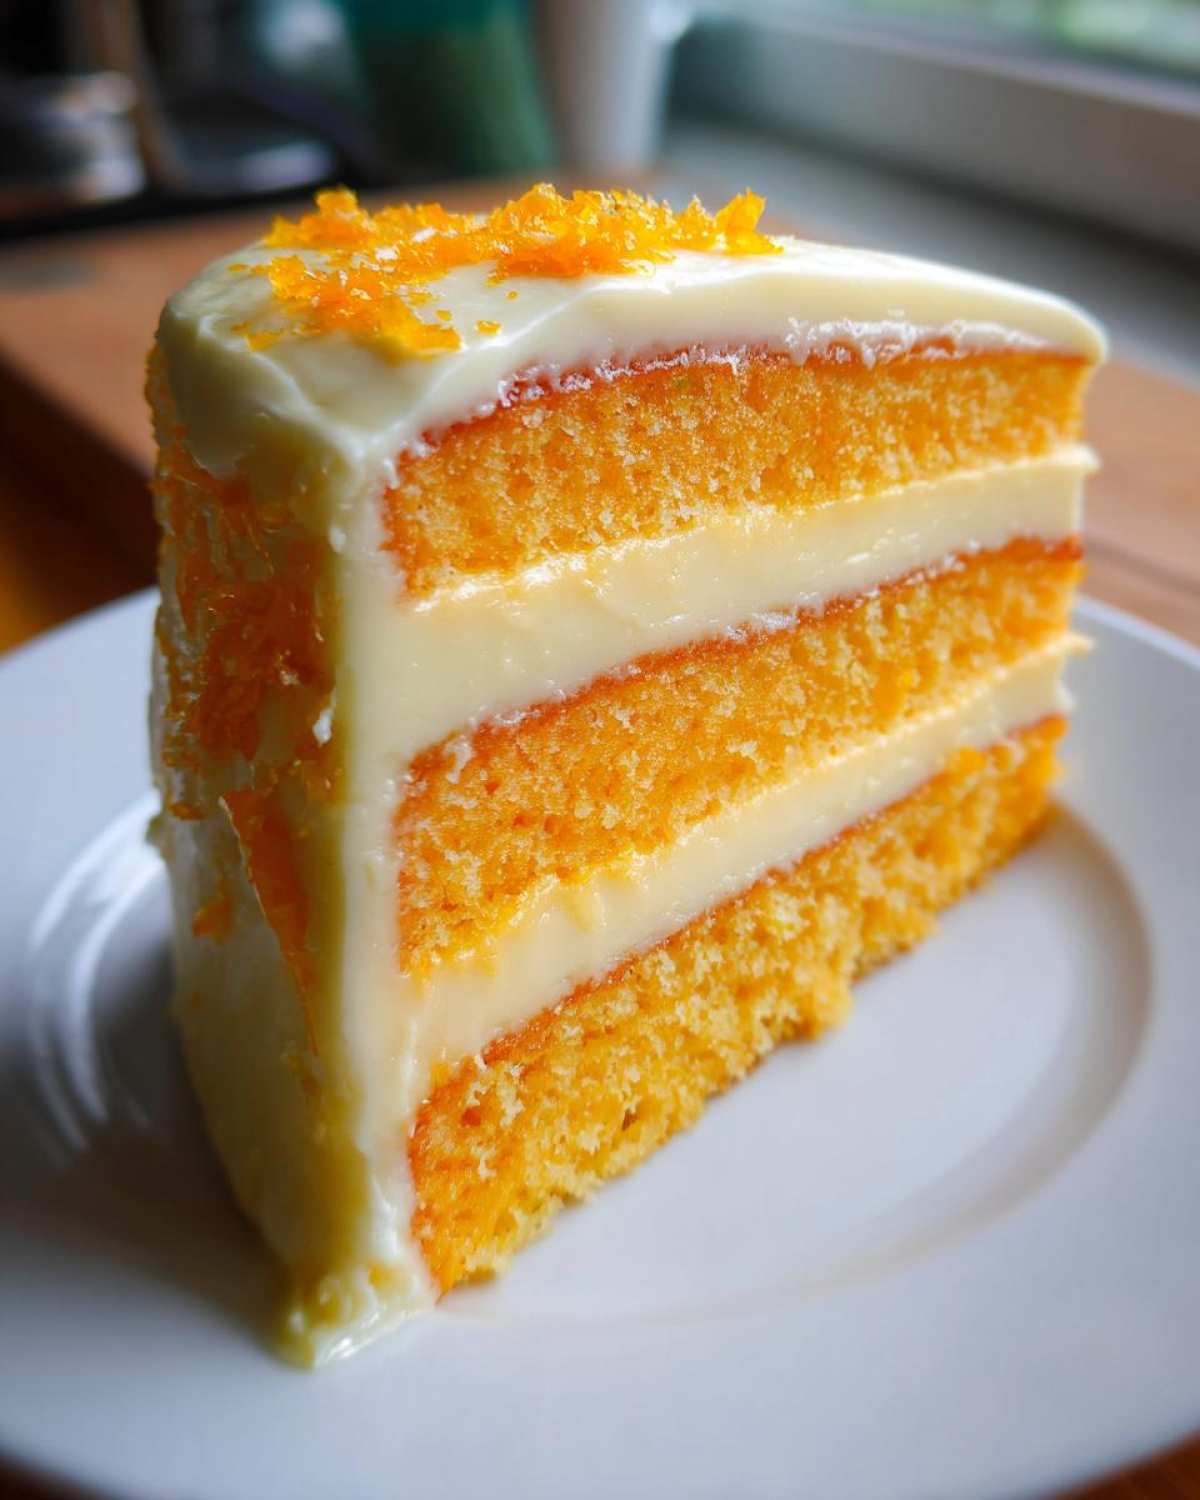
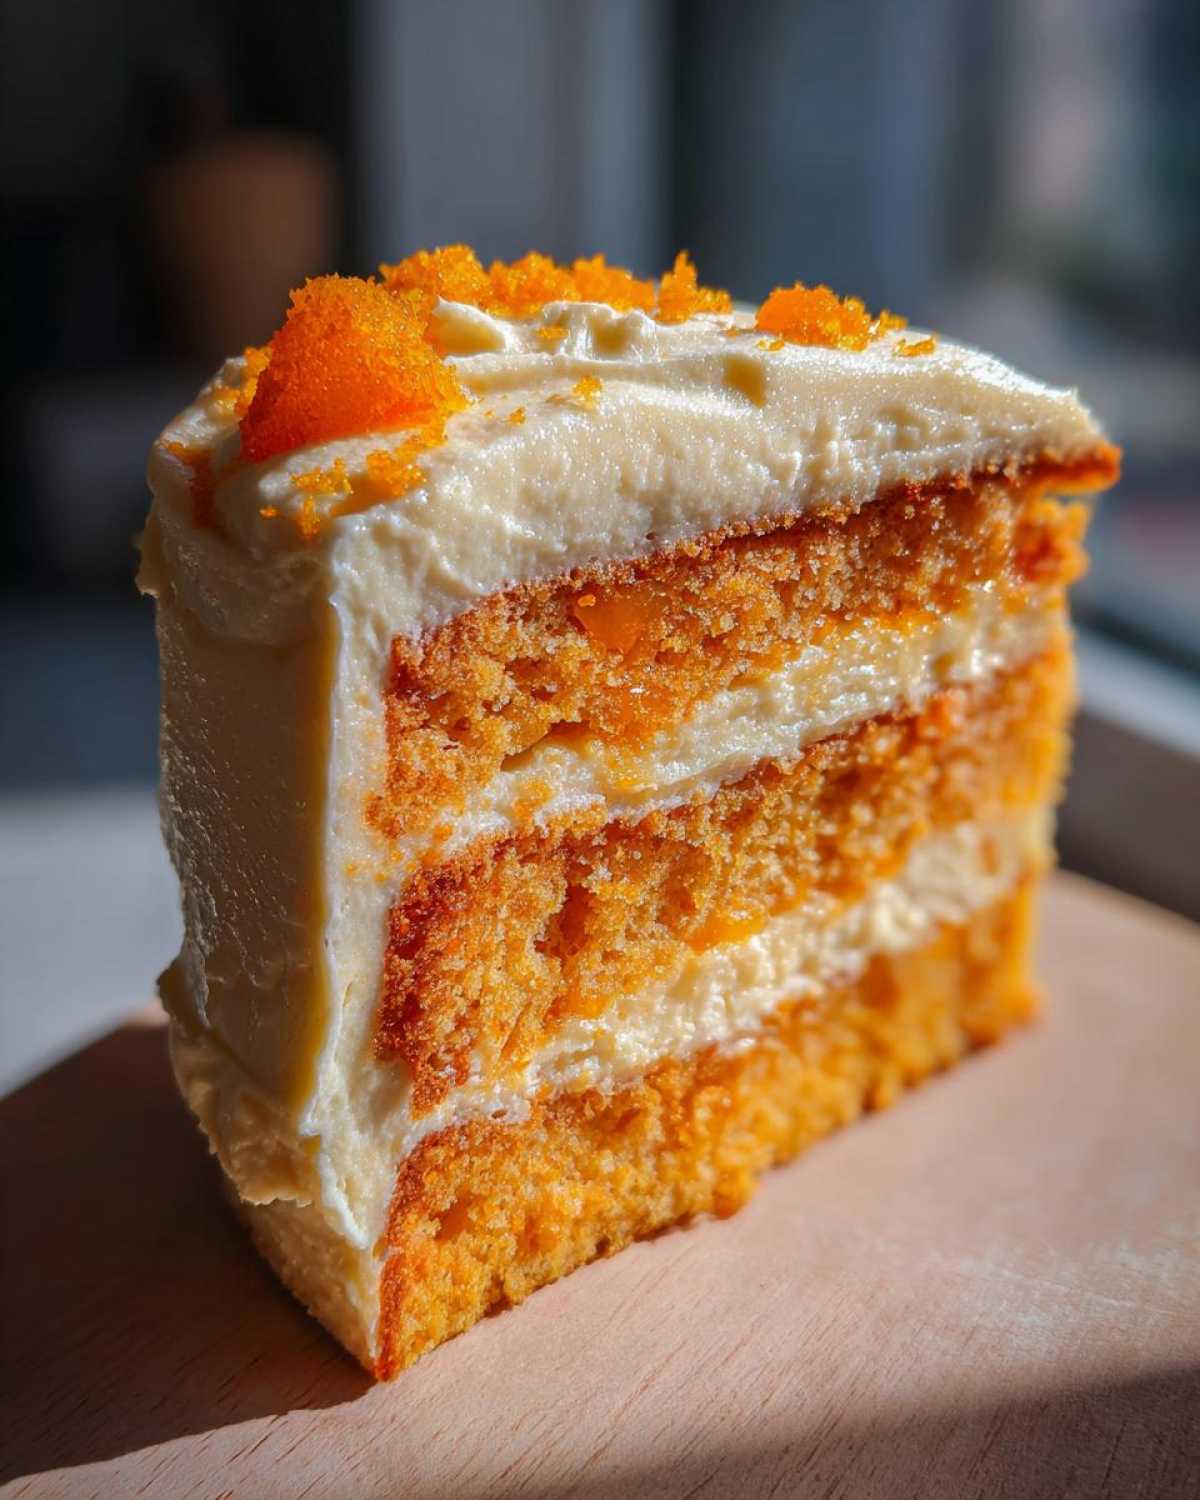
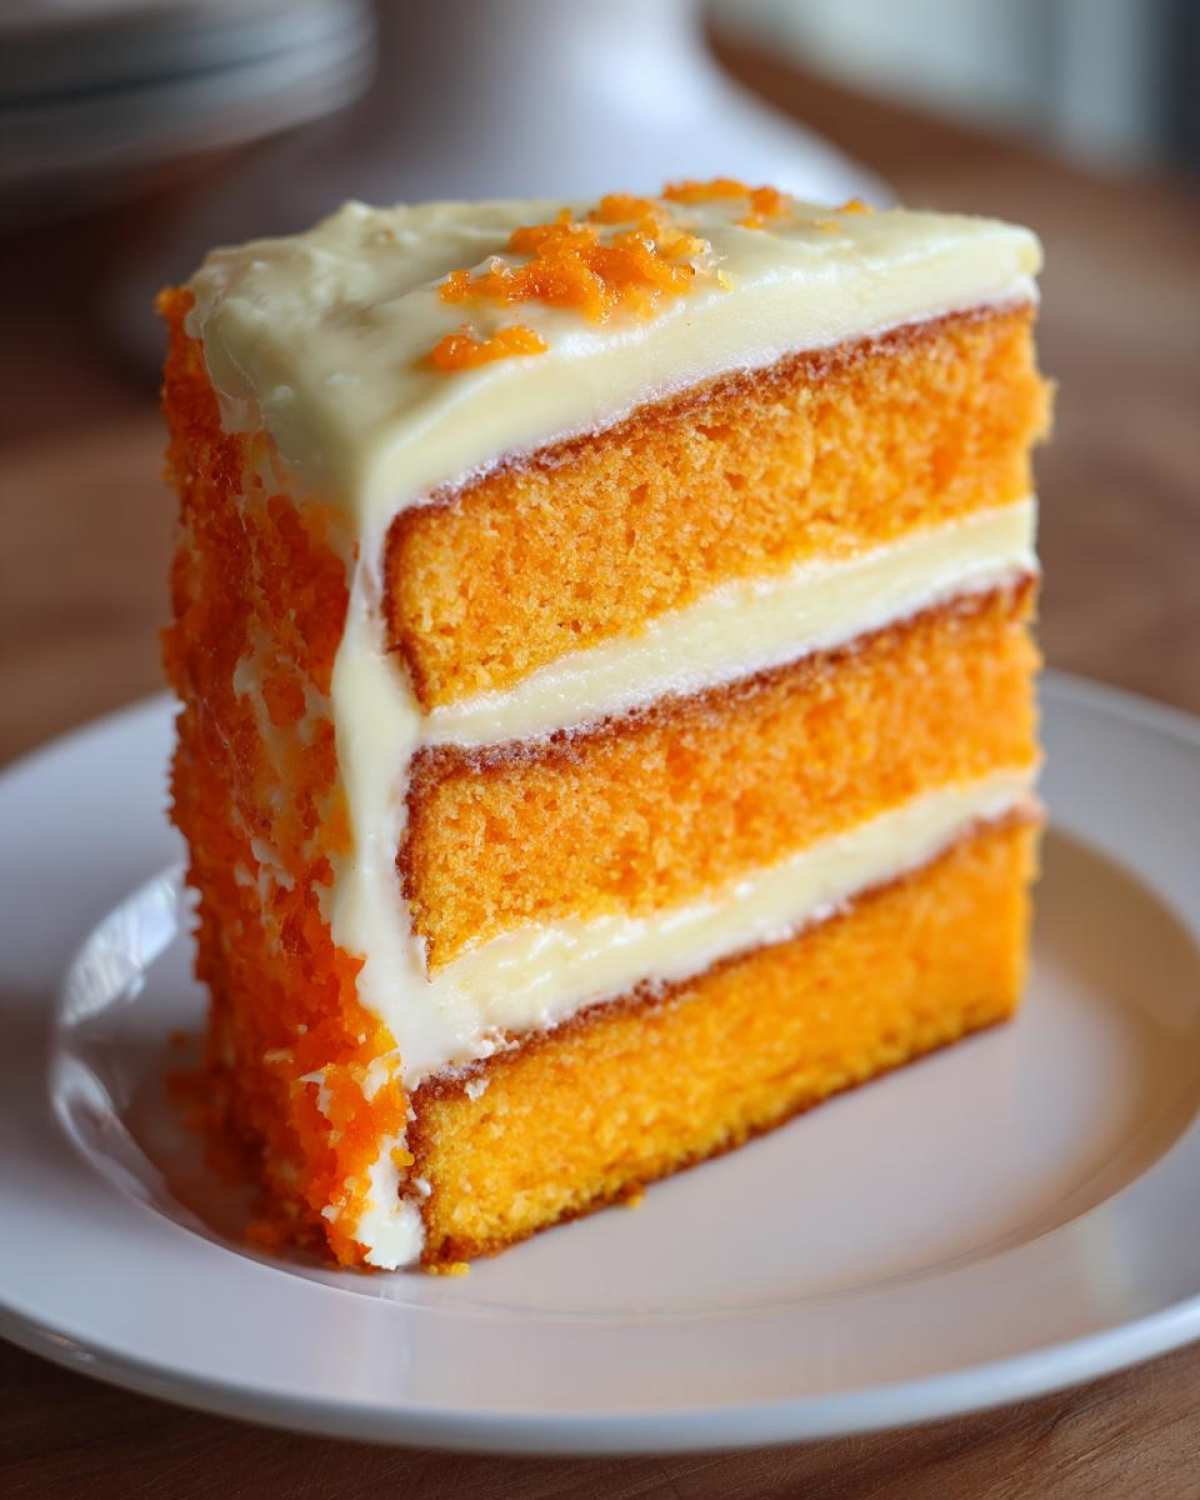
Oh, friends, if you’ve been missing those hazy, perfect summer days spent chasing down the ice cream truck, do I have a slice of pure sunshine for you today! It just warms my heart—literally—thinking about recreating those iconic frozen treats right here in our ovens. Forget complicated baking; we’re diving headfirst into my Easy Orange Creamsicle Cake recipe. This is exactly the kind of vibrant, happy baking I live for here at Sunday Flavor. As I share in my story, my mission is turning every single day into that joyful, relaxed feeling you only get on a proper Sunday. This moist layer cake, with its bright citrus punch and creamy vanilla hug, helps do just that!
Why This Creamsicle Cake is Your New Family Favorite Cake Recipe
Listen, I know life gets busy. Between photo shoots and chasing down the perfect light, sometimes you need a *quick* win that still tastes like it took all day. That’s why I adore this recipe so much; it delivers that instant wave of nostalgia without demanding hours of your time. It’s truly the masterpiece of refreshing citrus baking!
We’re not just making cake here; we’re tapping into that retro dessert magic of childhood popsicles. This specific method ensures every slice is perfectly moist and has that bright, almost tangy flavor we crave on a hot afternoon. It’s definitely headed straight into my ‘Family Favorite’ collection.
The Secret to a Super Moist Orange Creamsicle Cake
If you want truly *moist* orange cake, you can’t skip what I call the ‘jello bath.’ After baking, we poke holes all over those warm layers and pour on a mixture of orange gelatin that’s just slightly cooled. It seeps right into those little tunnels, infusing the cake from the inside out. It’s absolutely brilliant for keeping things tender!
Creating the Light and Fluffy Orange Creamsicle Dessert Frosting
Now, for the creamy part—this is what makes it an actual Orange Creamsicle Dessert, not just an orange cake. We skip the heavy, overly sweet buttercream. Instead, we blend instant vanilla pudding mix right into whipped topping. Trust me on this: the result is a frosting that is unbelievably light, fluffy, and tastes exactly like the vanilla part of that frozen bar. It feels decadent but it’s actually super simple!
Gathering Ingredients for Your Easy Creamsicle Dessert
Okay, gather ’round because the beauty of an Easy Creamsicle Dessert is that we’re starting with some amazing shortcuts! This recipe is designed for those days when you want maximum flavor payoff with minimal fuss. You might already have half of this stuff in your pantry, which is always a win in my book. I actually have another simple recipe using just five ingredients you might love later, like my easy 5-ingredient corn soup, but for this cake, paying attention to the exact measurements, especially for that gelatin soak, is key!
Cake Base Components
- 1 box (15.25 ounces) white or vanilla cake mix
- Ingredients called for on cake mix box (usually eggs, oil, water)
Orange Gelatin Soak Ingredients
This is where we get that incredible moisture. Don’t skip measuring these out precisely!
- 1 package (3 ounces) orange gelatin (Jello)
- 1 cup boiling water
- 1/2 cup cold water
- 1/4 cup orange juice, fresh or bottled
Creamy Vanilla Pudding Frosting Ingredients
This frosting is what really makes it taste like summer, and it’s so much lighter than heavy buttercreams. Don’t forget to thaw your whipped topping first!
- 1 package (3.4 ounces) instant vanilla pudding mix
- 1 cup cold milk
- 1 container (8 ounces) frozen whipped topping (like Cool Whip), thawed
- Orange zest, for garnish (optional)
Step-by-Step Instructions for the Perfect Creamsicle Cake
Now that we have our bright, beautiful ingredients ready to go, let’s get baking! Because we are making a layer cake, the structure needs to be right before we start soaking it. Trust me, while this recipe is easy, paying attention to the cooling times is how we layer on that gorgeous, refreshing quality it deserves. I always feel like I’m channeling my inner scientist when I’m handling the poke cake stage! If you ever want to see how I tackle quick assembly for bigger crowds, check out my guide on ultimate party sub-recipe—similar concepts of layering!
Baking and Cooling the Fluffy Orange Cake Layers
First things first, get that oven warmed up to 350°F (175°C). Make sure you grease and flour those two 8-inch cake pans really well—we don’t want any sticking! Mix up your cake batter exactly as the box suggests. Pour it evenly into your pans and bake everything for the time listed on the package for 8-inch rounds. The biggest thing here? Don’t rush the cool down! Let the cakes sit right there in the pans for exactly 10 minutes. Then, gently invert them onto a wire rack to finish cooling completely. That initial 10 minutes helps them firm up enough to handle us poking them later.
Applying the Orange Gelatin Soak to the Creamsicle Poke Cake
While the cake is cooling, which is the perfect time to get your soak ready, let’s make that magic happen. In a small bowl, you need to dissolve that 3-ounce package of orange gelatin completely in the boiling water. Once that’s smooth, stir in the cold water and that bit of orange juice. Keep that mixture aside—we want it cool, but not set. When your cake layers are totally cool to the touch, take a skewer or the wooden handle of a spoon and poke holes all over the surface of BOTH layers. Space those holes about half an inch apart, like a neat little grid. Slowly pour that liquid gelatin evenly over both cakes. You need patience here! Let them just sit and soak up all that goodness for about 20 to 30 minutes.
Mixing the Creamy Pudding Frosting
Time to get decadent with the topping! Grab a medium bowl and whisk together your instant vanilla pudding mix and the cup of cold milk. You only need to whisk for about two minutes until it starts thickening up—it will look really lovely and creamy. Then, gently, gently fold in your thawed whipped topping. I mean *gently*! We are trying to keep all the air in there so it stays light and fluffy. Stop folding as soon as it’s just one beautiful, creamy colour.
Assembling Your Bright Orange Flavored Cake
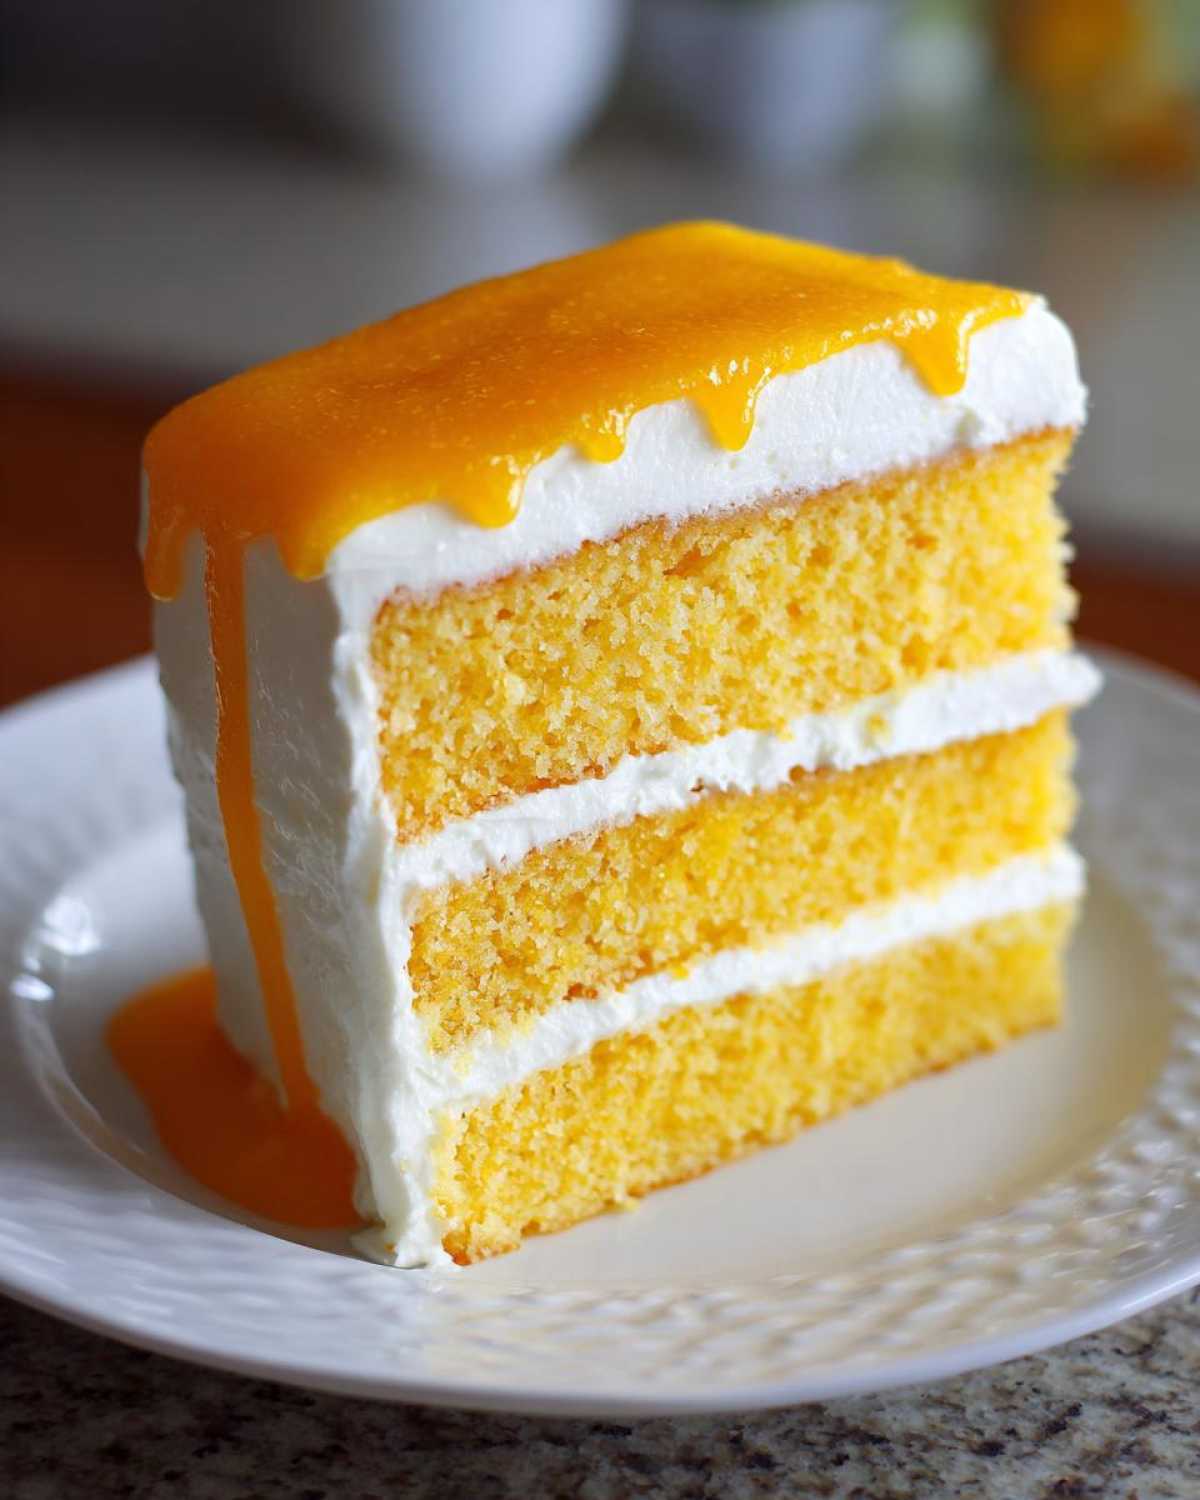
We’re almost there! Place one soaked cake layer on your serving plate. Take about one-third of that amazing frosting and spread it evenly right on top. Place the second layer on top of the frosting. Now, use the rest of the frosting to cover the top and smooth out the sides, making your beautiful Bright Orange Flavored Cake look professional! This cake absolutely needs to chill out, so pop it into the fridge for at least a full hour before you even think about slicing into it. That chilling time helps the gelatin set completely and firms up the pudding frosting perfectly.
Tips for Success Making a Nostalgic Summer Cake
Even though this recipe is truly simple by design, there are a couple of little chef secrets I’ve picked up over the years of making this cake for family gatherings. Think of these as ways to tweak it just a tiny bit to make it truly *yours*. When I bake, it’s always about taking that base recipe and making it sing! If you are looking for other simple but flavourful things to tackle, check out my one-pot lemon basil corn ricotta pasta—sometimes simple is best!
Boosting Citrus Flavor in Your Creamsicle Cake
If you really, really love that bright orange zing, I highly recommend you play around with the gelatin soak. The recipe calls for a bit of orange juice, but feel free to skip some of that plain cold water in the mixture and swap it out for *more* fresh orange juice instead. It amps up the sunshine flavour of your Creamsicle Cake beautifully without adding texture issues.
Frosting Alternatives for a Different Citrus Cream Cake Recipe
The pudding and whipped topping combination is what makes this cake light, but I get it—sometimes you want structure! If you prefer a thicker, richer top layer for your Citrus Cream Cake Recipe, you can absolutely ditch the pudding mix and use your favourite homemade vanilla buttercream recipe instead. You’ll get a much firmer coating, perfect if you need to transport the cake somewhere warm, though you definitely lose that specific light, airy texture of the original.
Serving Suggestions for Your Refreshing Citrus Baking
Since this Creamsicle Cake is already so bright and satisfying on its own, we don’t want heavy sides dragging it down. This cake is pure sunshine, so we keep the accompaniments light! When I serve this during summer gatherings, I often pair it with something really simple, maybe just a few fresh raspberries scattered around the plate for contrast. A light scoop of high-quality vanilla bean ice cream works beautifully too, doubling down on that vanilla flavor profile without overwhelming the citrus.
If you’re looking for a lovely, light beverage to go alongside it, I highly recommend trying out my frozen peach rose slushy—the floral notes are unexpected but absolutely perfect with the orange.
Storage and Reheating Instructions for Your Creamsicle Cake
Because this cake relies on that lovely, light pudding and whipped topping frosting—which, let’s be honest, is the best part—chilling is absolutely mandatory, not optional! Cover your finished Creamsicle Cake tightly with plastic wrap or pop it into an airtight container. It must stay cold to keep that frosting happy and stable. I find it tastes best within the first two days, but it holds up well in the fridge for about four if sealed properly.
If you’re making this ahead, I suggest frosting it the morning you plan to serve it, even if you made the layers the day before. If you need to warm it up at all (which rarely happens since it’s served chilled!), just let a slice sit on the counter for about 15 minutes before serving. No microwave needed for this beauty!
For more tips on keeping things fresh, check out how I handle my refrigerator dill pickles recipe—storage science applies everywhere!
Frequently Asked Questions About This Orange Creamsicle Dessert
It’s always wonderful when you all have questions about tweaking things! That’s the sign of a truly excellent, adaptable recipe. Since we are aiming for that perfect nostalgic bite, sometimes substitution feels necessary, but I want to make sure you get the best result possible for your Orange Creamsicle Dessert. If you’re looking for other ways to use up your veggies, check out my zucchini mac and cheese recipe—it’s surprisingly good!
Can I use fresh orange juice instead of gelatin for the soak in this Creamsicle Cake?
That’s a great thought for maximizing fresh flavour! Here’s the thing: while fresh juice is always yummy, the dissolved gelatin is what really helps structure our soak. It allows the liquid to carry the intense orange flavour deep down into all those little poke holes and ensures it sets up nicely once chilled. If you only use juice, it might just run right out the bottom, leaving you with a slightly wet cake bottom instead of a moist, infused centre.
Is this Dreamsicle Cake Recipe suitable for making ahead?
Yes, this is a fantastic party cake because you absolutely can make it ahead! If you bake the layers one day, go ahead and apply the gelatin soak that evening, too. However, I strongly recommend waiting until the morning of your party or gathering to mix and apply that lovely creamy pudding frosting, because the whipped topping in it stays fluffiest when it hasn’t been sitting too long. This Dreamsicle Cake Recipe is best enjoyed within two days.
How do I make sure this cake is a true Retro Desserts showstopper?
The trick to getting that authentic, bright colour and flavour is twofold: using that orange gelatin helps provide that classic, vibrant shade, and don’t skip the garnish! A little bit of fresh orange zest sprinkled over the top just before serving really wakes up the senses and instantly signals ‘Creamsicle!’ to everyone coming to the table.
Nutritional Estimates for Your Light and Fluffy Dessert
I always encourage everyone to bake because it brings joy, not because we are tracking calories—that’s my firm belief here at Sunday Flavor! That said, I appreciate that some of you like to know the general facts about what you are serving up. So, based on serving 10 slices, here are the estimated numbers for this delightful, light and fluffy dessert. Remember, these are just estimates based on standard product calculations by the ingredients I listed, so please take them as a helpful guide rather than scientific fact. If you’ve substituted anything, these numbers will definitely change!
Also, if you are looking for ways to incorporate a bit more whole food into your routine, my healthy zucchini bread recipe is a fantastic place to start looking at sneaking veggies into family favourites!
- Serving Size: 1 slice
- Calories: 350
- Sugar: 45g
- Sodium: 300mg
- Fat: 15g
- Saturated Fat: 7g
- Unsaturated Fat: 8g
- Trans Fat: 0g
- Carbohydrates: 55g
- Fiber: 1g
- Protein: 4g
- Cholesterol: 45mg
Enjoying a slice of this Refreshing Citrus Baking is all about balance, and knowing what’s in your food is the first step toward mindful eating!
Share Your Sunday Flavor Creamsicle Cake Creations
Now, here’s the part I look forward to most! I’ve shared all my secrets for achieving that perfect, nostalgic bite of summer with this Creamsicle Cake—but the story doesn’t end with me hitting ‘publish.’ The real magic happens when this recipe lands in *your* kitchen!
I absolutely live to see your sunny creations. Did you manage to get that perfect swirl on your creamy pudding frosting? Did your family devour every last crumb? Please take a quick moment to leave a star rating and a comment below telling me how it went! Your feedback helps me know what recipes to bring you next, and it’s just wonderful connecting with you all.
And if you snapped a picture of your gorgeous slice—and I hope you did!—please share it on Instagram or Pinterest and tag me! Let’s keep spreading that joyful, colorful “Sunday Flavor” feeling every single day of the week. If you need to reach out directly with any specific questions, don’t hesitate to check out my contact page!
Happy baking, everyone! I can’t wait to see your beautiful orange swirls.
PrintEasy Orange Creamsicle Cake with Creamy Pudding Frosting

Capture the nostalgic taste of your favorite frozen treat with this easy, moist Orange Creamsicle Cake. This recipe features a bright orange-infused layer cake soaked with gelatin for extra moisture and topped with a light, creamy vanilla pudding frosting. It is a perfect, refreshing summer dessert for any gathering.
- Prep Time: 20 min
- Cook Time: 30 min
- Total Time: 1 hour 50 min
- Yield: 10 servings
- Category: Dessert
- Method: Baking and Chilling
- Cuisine: American
- Diet: Vegetarian
Ingredients
- 1 box (15.25 ounces) white or vanilla cake mix
- Ingredients called for on cake mix box (usually eggs, oil, water)
- 1 package (3 ounces) orange gelatin (Jello)
- 1 cup boiling water
- 1/2 cup cold water
- 1/4 cup orange juice, fresh or bottled
- 1 package (3.4 ounces) instant vanilla pudding mix
- 1 cup cold milk
- 1 container (8 ounces) frozen whipped topping (like Cool Whip), thawed
- Orange zest, for garnish (optional)
Instructions
- Prepare the cake: Preheat your oven to 350°F (175°C). Grease and flour two 8-inch round cake pans. Prepare the cake mix according to the package directions. Pour the batter evenly into the prepared pans.
- Bake the layers according to the package directions for 8-inch rounds. Let the cakes cool in the pans for 10 minutes before inverting them onto a wire rack to cool completely.
- Prepare the orange gelatin soak: In a small bowl, dissolve the orange gelatin completely in the boiling water. Stir in the cold water and orange juice. Set aside to cool slightly but do not let it set.
- Poke the cake: Once the cakes are completely cool, use a skewer or the handle of a wooden spoon to poke holes all over the surface of both cake layers, spacing the holes about 1/2 inch apart.
- Soak the cake: Slowly pour the liquid orange gelatin mixture evenly over both cake layers, allowing the liquid to soak into the holes. Let the cakes sit until the gelatin is fully absorbed, about 20 to 30 minutes.
- Make the creamy pudding frosting: In a medium bowl, whisk together the instant vanilla pudding mix and cold milk until the mixture thickens, about 2 minutes. Gently fold in the thawed whipped topping until just combined and fluffy.
- Assemble the cake: Place one orange-soaked cake layer on a serving plate. Spread about one-third of the creamy pudding frosting evenly over the top. Place the second cake layer on top. Frost the top and sides of the entire cake with the remaining frosting.
- Chill and serve: Refrigerate the cake for at least 1 hour before slicing. Garnish with fresh orange zest before serving your light and fluffy orange cake.
Notes
- For an extra bright citrus flavor, you can substitute 1/4 cup of the cold water in the gelatin soak with fresh orange juice.
- If you want a firmer frosting, substitute the instant vanilla pudding with a full batch of homemade vanilla buttercream frosting.
- This cake tastes best when served chilled, making it a refreshing citrus cream cake recipe perfect for summer.
Nutrition
- Serving Size: 1 slice
- Calories: 350
- Sugar: 45g
- Sodium: 300mg
- Fat: 15g
- Saturated Fat: 7g
- Unsaturated Fat: 8g
- Trans Fat: 0g
- Carbohydrates: 55g
- Fiber: 1g
- Protein: 4g
- Cholesterol: 45mg


Comments are closed.