


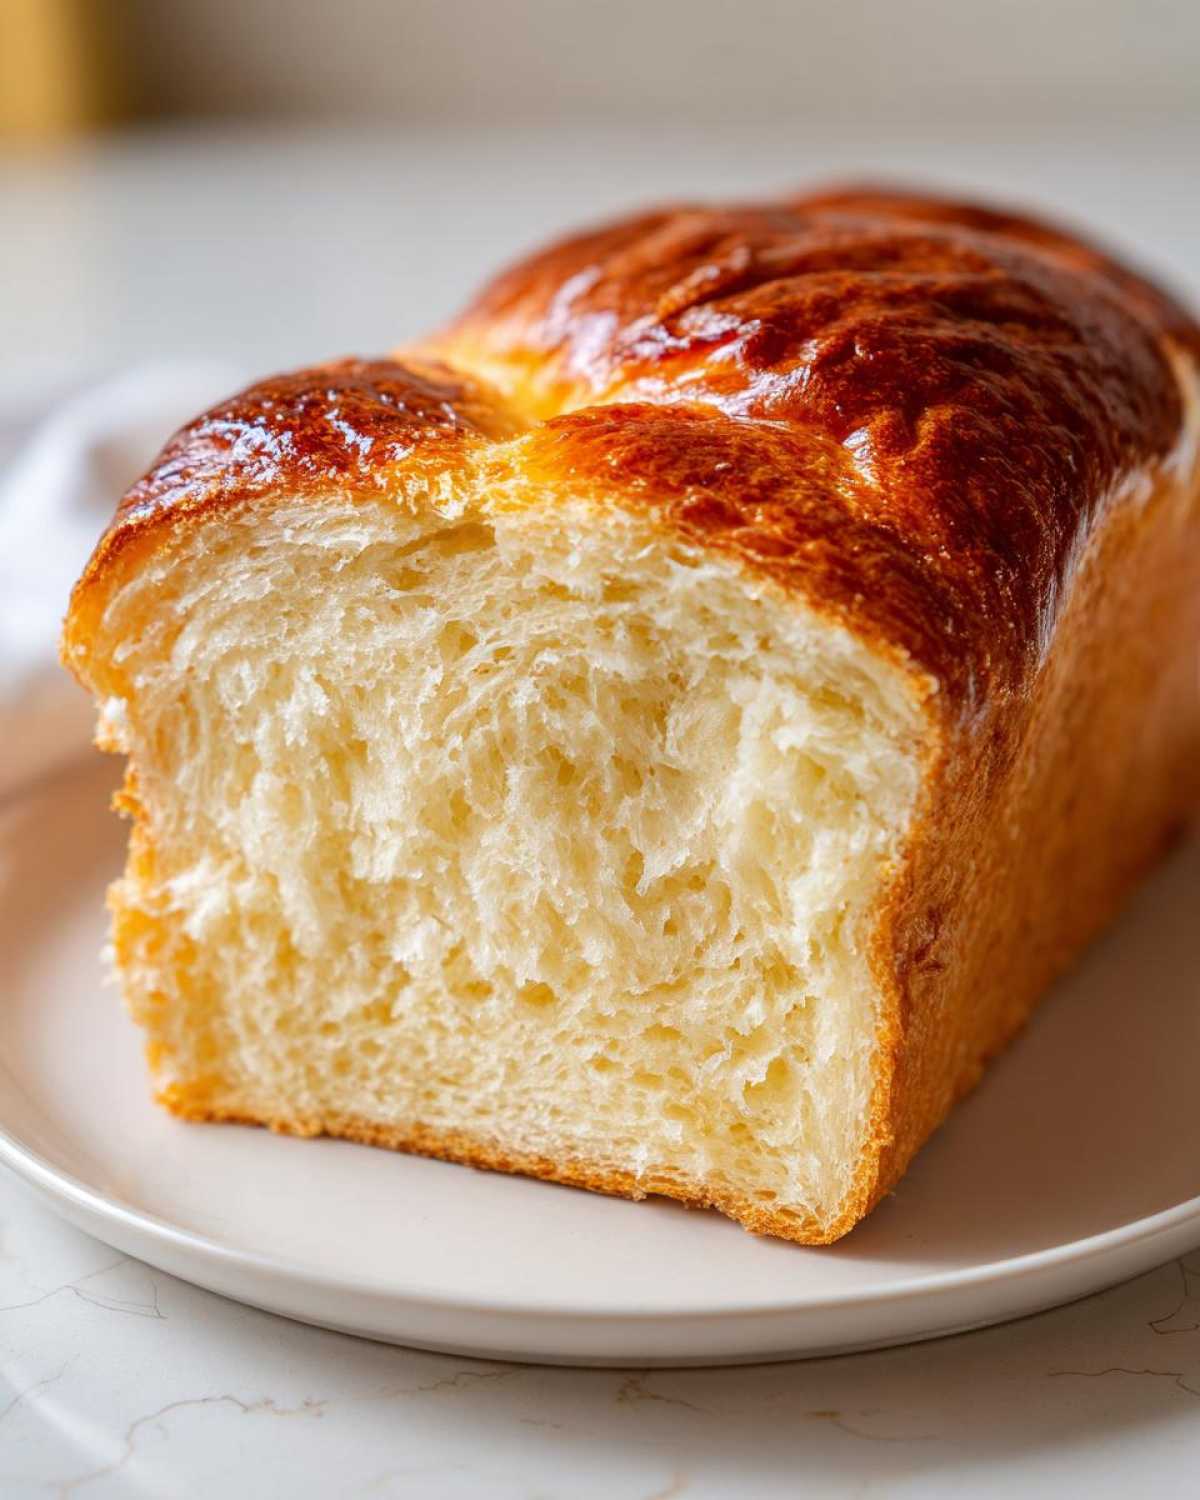
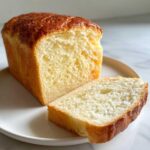
I have a real secret to share with you today, something that completely changed how I think about homemade loaves. Forget stale, thick crusts; we are chasing that pillowy, cloud-like softness you only find in the most expensive Asian bakeries! The keeper of this magic? It’s the one and only condensed milk bread. Seriously, this bread is my go-to when I need something slightly sweet but ridiculously tender.
I remember the first time I tried it—I was skeptical that just adding canned milk could make such a difference. But when I pulled that first golden loaf out of the oven, the entire kitchen smelled like vanilla heaven, and the crumb melted in my mouth. Trust me, once you try this condensed milk bread, you won’t go back to plain sandwich loaves again!
Why This Condensed Milk Bread Recipe Delivers Ultimate Softness
So, what is the big secret that makes this Soft Bread Recipe so reliably amazing? It’s all about the ingredients making friends with the flour! If you want that glorious, pull-apart texture, you have to understand the magic happening inside the dough. This isn’t just about adding sweetness; it’s chemistry, pure and simple. I learned so much about structure from my early baking failures—you can check out some of my messy moments over on my About Me page!
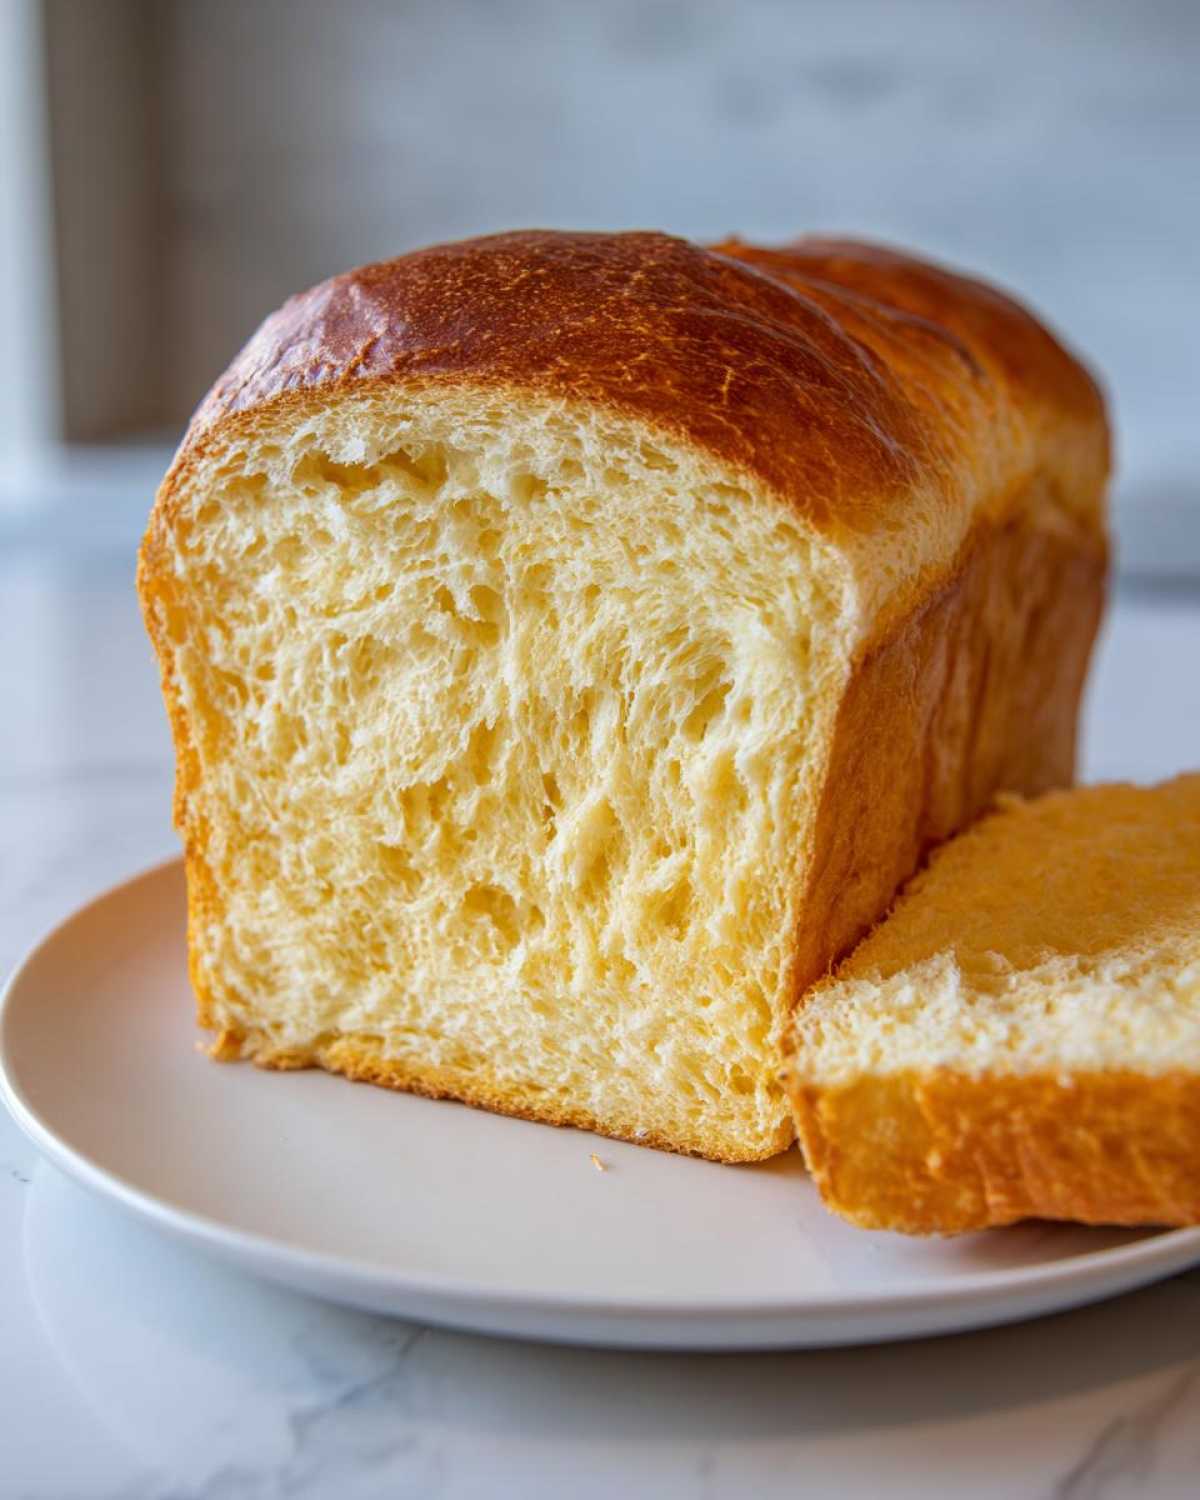
We are aiming for that signature Tender Crumb Bread experience, and this recipe delivers it every single time. When you bake this, you’re not just following steps; you’re creating a richer, finer structure.
The Role of Sweetened Condensed Milk Bread in Texture
The sugar and the milk solids packed inside that can of condensed milk are our texture superheroes! They get in the way of the flour molecules, stopping them from forming long, tough gluten strings. When gluten doesn’t get too strong, what do you end up with? A wonderfully soft, delicate crumb that practically dissolves when you eat it. That’s the genius of this wonderful condensed milk bread.
Achieving Bakery Style Bread at Home
To really pull off that professional look, you have to treat the dough gently. Don’t over-knead it once the butter is in—we want elasticity, not toughness! Gentle kneading followed by letting the yeast do the heavy lifting during those long rises ensures we get a final loaf that truly looks like Bakery Style Bread at Home. Patience here pays off hugely in fluffiness!
Gathering Ingredients for Your Condensed Milk Bread Loaf
Alright, friend, let’s get our ingredients lined up! This is a pretty straightforward pantry list, honestly, but precision is everything when we are aiming for that dreamy, light texture. No random guessing allowed here; the recipe needs exact measurements to create our perfect condensed milk bread.
- 1 cup warm milk (It really needs to be between 105–115F—too hot kills the yeast, too cold makes it sleepy!)
- 2 1/4 teaspoons active dry yeast
- 1/4 cup sweetened condensed milk (This is the star, don’t skimp!)
- 1 large egg
- 3 cups all-purpose flour, plus whatever you need for dusting
- 1/4 cup granulated sugar
- 1/2 teaspoon salt
- 4 tablespoons unsalted butter, softened (Make sure it’s soft, but not melty!)
- 1 large egg, beaten (For that beautiful golden egg wash later)
Ingredient Notes and Substitutions for Condensed Milk Bread
A few quick pointers before you start mixing so we avoid any kitchen drama! For the yeast, this calls for active dry, so remember you *must* proof it in that warm milk until it gets foamy—that’s your guarantee that it’s alive and ready to work. If you only have instant yeast on hand, you can add it directly with the dry ingredients, but I always prefer seeing that foamy confirmation first.
Also, please do not try to swap in evaporated milk or regular milk mixed with sugar for the sweetened condensed stuff. Evaporated milk is thinner and won’t give us the necessary fat and solids content to keep that crumb super tender. We need that rich flavor payoff from the real deal!
Step-by-Step Instructions for Easy Condensed Milk Bread
Okay, here’s where the magic really happens! Don’t let the steps intimidate you—this is called Easy Milk Bread because once you get the dough going, it mostly rises all by itself. I promise, if you followed the ingredient list correctly, this process is super straightforward. If you make a great soup while you wait for the dough to rise, you can check out my Easy 5-Ingredient Corn Soup for a perfect pairing later!
Activating Yeast and Mixing the Sweet Condensed Milk Bread Dough
First things first: wake up that yeast! Pour your warm milk (remember, 105F to 115F—warm like a cozy bath, not hot!) into a big bowl and sprinkle the yeast over top. Wait about 5 to 10 minutes. You absolutely need that lovely foam cap on top—that’s the foam that tells you your yeast is happy and hungry. Once it’s looking bubbly, whisk in your sweetened condensed milk and that first egg until it’s all blended nicely.
In a separate bowl, whisk your flour, sugar, and salt together really well. Now, start adding those dry ingredients to your wet mixture a bit at a time. Stop mixing when it looks all shaggy, then it’s time to introduce the softened butter. It seems weird to add butter after the flour, but trust me on this for this specific condensed milk bread recipe!
Kneading and First Rise for Fluffy Homemade Bread
This is the fitness hour for your dough! Turn it out onto a lightly floured surface. You need to knead this for a good 8 to 10 minutes. You’re looking for it to transform from messy and sticky to smooth, elastic, and barely tacky. When you poke it gently, it should spring back slowly. That’s how we guarantee truly Fluffy Homemade Bread.
Once it’s perfect, pop it into a lightly oiled bowl, spin it around so it’s coated on all sides, cover it with plastic wrap, and walk away. Let it relax in a warm spot for 1 to 1.5 hours. If your kitchen is chilly, put it in a slightly warm (but turned off!) oven. It needs to double in size!
Shaping and Baking Your Tender Crumb Bread Loaf
Once it’s doubled, gently punch the air out—don’t be shy but don’t beat it up! Shape it into a nice log and nestle it into your greased 9×5 inch loaf pan. Cover it again and let it have one more cozy nap for about 30 to 45 minutes. It should crest about an inch over that pan rim.
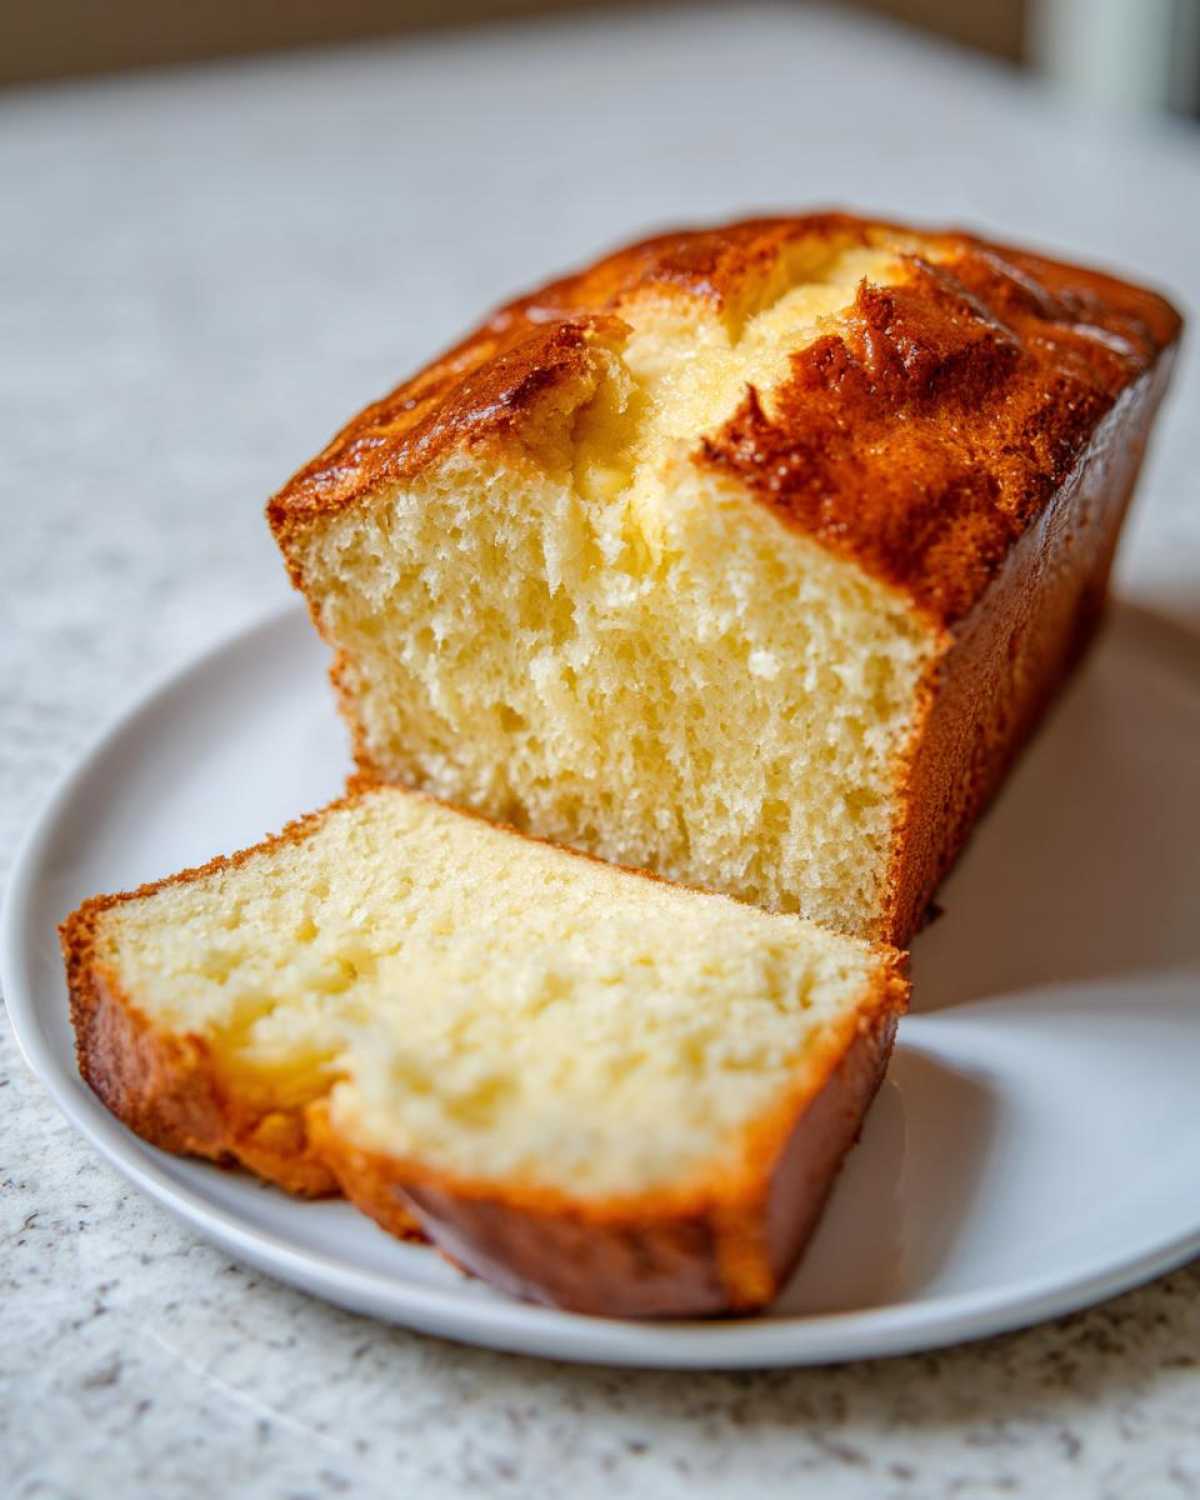
Time to bake! Preheat that oven to 350F (175C). Brush the top with your beaten egg wash so it gets that gorgeous shiny brown color we look for in a perfect Tender Crumb Bread Loaf. Bake for 30 to 35 minutes. My expert tip? Pull it out when the top is golden brown, but check that internal temperature—aim for 200F (93C). Get it out of the pan right away so the sides don’t steam and get soggy while cooling!
Variations: Making Condensed Milk Rolls
One of the best parts about using a versatile dough like this condensed milk bread is that you don’t just have to stick to loaves! If you’re looking for something perfect for a weekend brunch or just want individual servings that are just as soft and sweet, turning this into rolls is incredibly easy. You won’t even need to adjust the main dough recipe at all!
After that first big rise (Step 6 in our main instructions), you just handle the dough differently. Instead of shaping it into one loaf, gently punch it down and then divide that lovely, elastic dough into exactly 12 equal pieces. I recommend weighing them just to be sure they all bake evenly, especially since we are aiming for that soft texture!
Roll each piece quickly between your hands to form a neat little ball. Place these sweet little spheres into a well-greased 9×13 inch pan. They should be touching slightly when you put them in—this helps them rise up tall and stay soft against each other! Then, you cover the pan loosely and let them have their final rest for that second rise.
The only major change after the final rise is the oven time. Because they are small and separated, they bake much faster than the big loaf. You’ll bake them at the same 350F, but check them after about 18 to 20 minutes. You want that gorgeous golden color, just like the loaf. If you’re feeling really ambitious for next time, you can use this base dough for my Homemade Cinnamon Rolls—they come out heavenly soft!
Tips for Perfect Condensed Milk Bread Every Time
Even though this recipe is designed to be super easy for anyone starting off—perfect for Beginner Bread Baking—there are a couple of little things that can trip you up if you’re not careful. The number one culprit? Temperature! Seriously, if your milk is too cold when you mix in the yeast, you’ll wait forever and end up with a dense brick instead of a fluffy cloud.
If your dough feels way too sticky after you’ve kneaded for the full 10 minutes, don’t panic and dump in a cup of extra flour! That will ruin the tenderness we worked so hard for. Instead, add just one tablespoon of flour at a time until it’s manageable. Remember, this dough is richer than standard bread dough because of all that condensed milk goodness, so it should feel softer.
Also, be honest with your rise times. If your kitchen is chilly, you must give it more time to double. Don’t rush the second proofing either; that final puff over the rim of the pan is non-negotiable for a high-rising loaf. For more troubleshooting tips on yeast work, check out my general info on Easy Yeast Bread—it covers all the basics!
Serving Suggestions for Your Sweet Bread Loaf
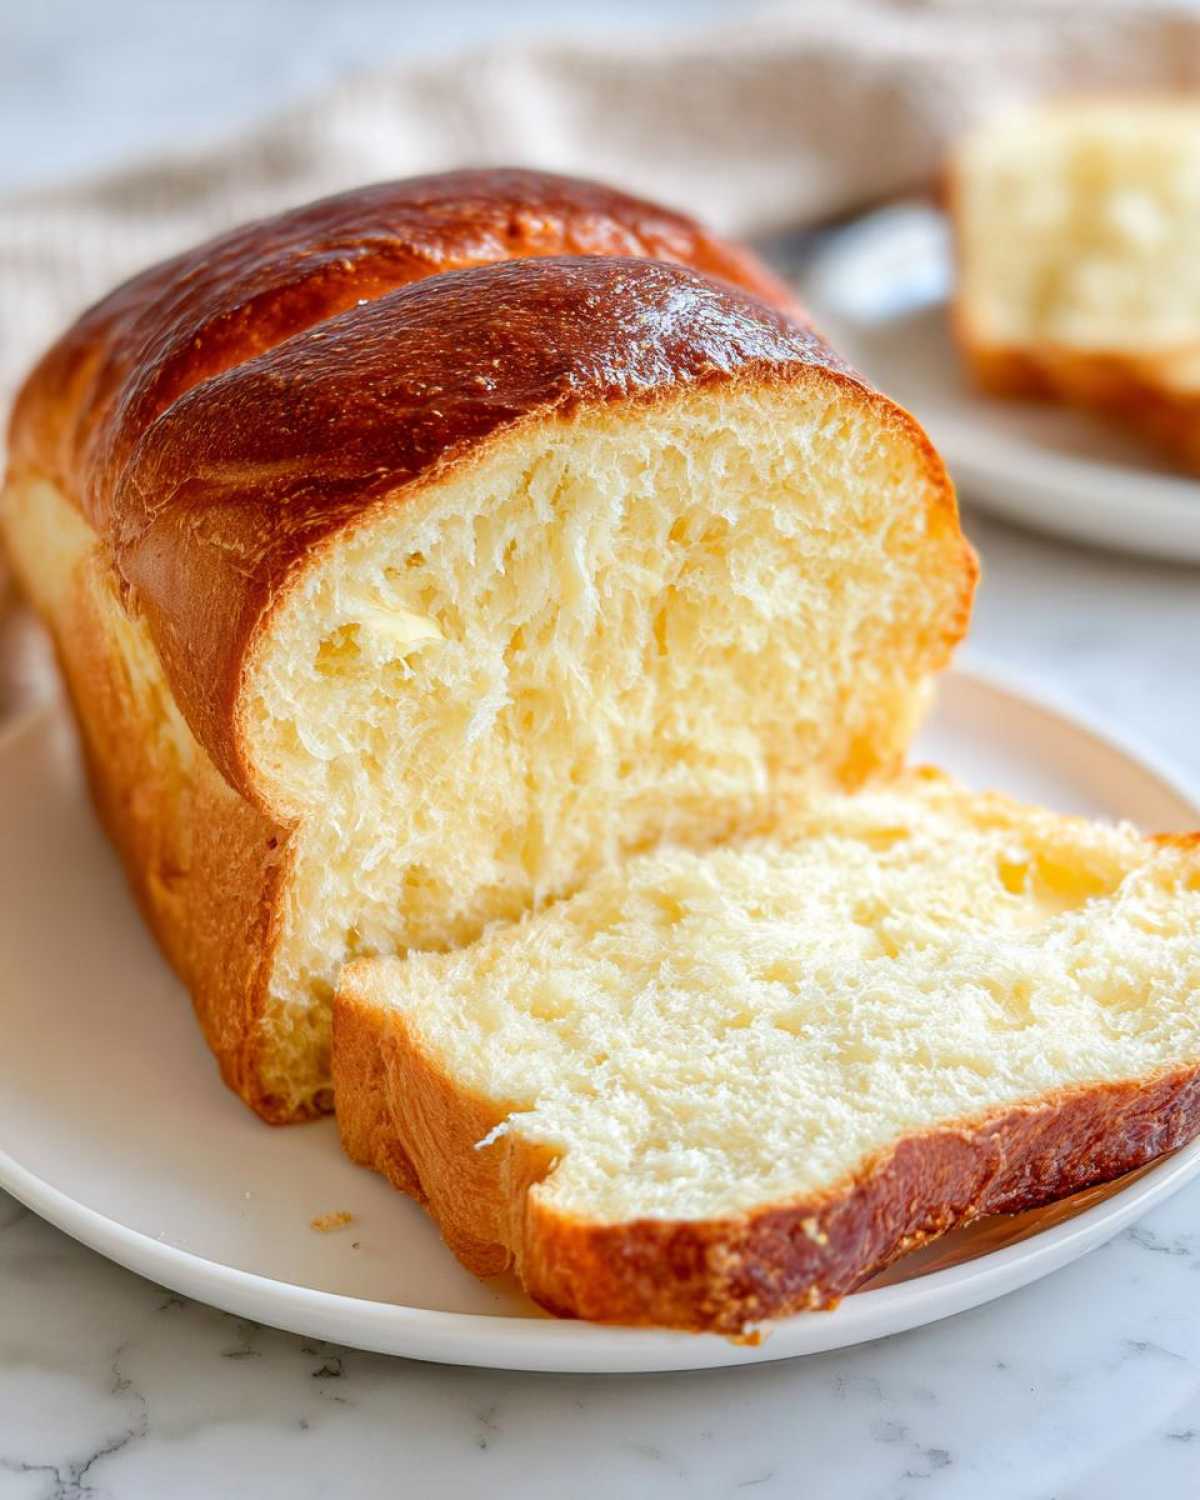
Now that you’ve successfully pulled off this gorgeous, fluffy masterpiece—the ultimate sweet bread loaf—the real fun begins: eating it! Honestly, this bread is so flavorful and slightly sweet on its own that sometimes I just eat it plain standing over the cooling rack! But if you want to elevate your experience, I have a few favorite ways we serve this bread at my house.
First, the absolute classic: slicing it thick, popping it in the toaster until it’s golden brown, and slathering it with good salted butter. Because the crumb is so rich and tender, toasting it makes the outside perfectly crisp while the inside stays luxuriously soft. It’s the easiest, most comforting breakfast ever.
For a truly decadent treat, you have to try it as French toast! Because this condensed milk bread is already wonderfully sweet and full of milk solids, it soaks up the custard mixture beautifully without getting soggy. I use my standard recipe for easy homemade French toast, and it turns out absolutely amazing. Thick slices are best here!
If you’re somehow making a savory dinner and have some leftover loaf slices (very impressive!), don’t leave them naked! These slices are fantastic alongside a creamy, hearty soup. Think of it: the slight sweetness of the bread cuts right through the richness of a heavy chowder. It’s much better than using plain old sourdough, trust me on this one!
Finally, if you let it go slightly stale (which is hard to do with this recipe!), it makes the very best bread pudding. Just cube it up and soak it overnight. It absorbs all that sweet custard and turns into the most luscious dessert imaginable.
Storage and Reheating Instructions for Condensed Milk Bread
This is the million-dollar question, isn’t it? You bake the most perfect, softest loaf of condensed milk bread, and now you have to stop eating it all in one sitting! Luckily, because this recipe is so rich thanks to those beautiful milk solids, it actually keeps its softness really well compared to other white breads.
For short-term storage—say, the next couple of days—you definitely should *not* store it in the refrigerator! The cold temperature actually makes bread go stale faster. Instead, make sure it’s completely cooled down first, then wrap it up tightly in plastic wrap, or better yet, put it inside a good quality zip-top bag, squeezing out as much air as possible. Storing it on the counter like this usually keeps it wonderfully soft for about three days.
If you know you aren’t going to finish the entire soft bread recipe loaf within 72 hours, you absolutely need to utilize the freezer. Freezing is the secret weapon for keeping bread soft for months!
Freezing Your Fluffy Homemade Bread
Honestly, freezing is the best way to preserve that fresh-baked tenderness. Once the bread is totally cool—and I mean completely cool, even the very center—you need to slice it. Freezing it whole means you’ll have to defrost the entire thing just to have one slice later, and nobody wants that!
Wrap each individual slice or small stack of two or three slices tightly in plastic wrap first. I always wrap them twice. Then, slide those wrapped portions into a heavy-duty freezer bag. Seal it up, and label it with the date. This bread freezes beautifully for up to three months. It locks in all the moisture and that lovely sweet flavor.
How to Reheat and Bring Back the Fluff
Reheating is so easy, whether you’re thawing a whole loaf or just a couple of slices. If you’re warming up a slice or two, I go straight to the toaster oven or bake it gently. Pop the slices into a 300F (150C) oven for about 5 minutes. This warms it through and slightly crisps the outside, making it taste straight out of the oven!
If you’re defrosting a whole loaf, let it sit on the counter for a few hours first while still wrapped. Once thawed, you can lightly brush the top with a little water or milk and pop the whole thing on a baking sheet in the oven at 325F (160C) for about 10 minutes. This little blast of humidity and low heat wakes up the structure beautifully. It truly brings back that satisfying, melt-in-your-mouth texture of our Fluffy Homemade Bread!
Frequently Asked Questions About Sweetened Condensed Milk Bread
I always get so many wonderful questions after readers try this recipe for the first time! People want to know how to customize it or if they’ve messed up if they see something unexpected. It means so much that you’re giving this Easy Milk Bread a try. Here are the most common things I hear:
How sweet is this bread, really?
That’s a great question! Since we are using sweetened condensed milk *and* added granulated sugar, I’d say this is definitely a sweet bread loaf, but it’s not overpoweringly sugary like a dessert cake. The sweetness is perfectly balanced by the yeast fermentation and the slight saltiness we added. It’s ideal as a Sweet Breakfast Bread. If you prefer it less sweet, you can pull back on the granulated sugar by about 1 tablespoon, but definitely don’t cut the condensed milk—that’s our key to softness!
I don’t have sweetened condensed milk. Can I use regular milk?
Oh, honey, if you only use regular milk, you are making standard white bread, not this specific, super-soft bread! The magic of this recipe comes from the high concentration of sugar solids and fat in the condensed milk, which tenderizes the crumb and keeps it fresh for days. You can’t substitute the condensed milk directly with just regular milk; you’d need to add quite a bit more sugar and fat to even come close, and frankly, it just won’t have the same signature texture. Stick to the recipe for the best result in this Easier Yeast Bread!
My dough didn’t double the first time. What went wrong?
Don’t stress! This happens to everyone, especially when we are making this richer condensed milk bread. The most common reason is that your rising spot wasn’t quite warm enough for the yeast. If you suspect your kitchen is chilly, try this trick: turn your oven on for just one minute until it’s barely warm, then turn it OFF completely. Place your covered bowl inside that slightly warm (but not hot!) oven. That cozy environment should encourage a good rise.
Can I use bread flour instead of all-purpose?
You certainly can, but I always stick to all-purpose flour for this recipe. Remember, we are aiming for maximum tenderness and a fine, soft crumb, not a chewy texture. Bread flour has higher protein, which develops more gluten, making the bread chewier. For our Tender Crumb Bread, the AP flour works perfectly to keep things light and delicate. If you do use bread flour, monitor your kneading time closely so you don’t overdevelop the gluten!
If you have any other questions while you’re baking, please don’t hesitate to reach out to me through my contact page!
Estimated Nutritional Data for This Condensed Milk Bread
Now, I always feel a little silly posting official-looking nutrition facts because these are highly technical estimates, not lab results! I ran the numbers based on the ingredients list we used for the main recipe results, so please take these figures as a general guide only. We all know that baking methods and exact ingredient quantities can change the final count, but this gives you a ballpark idea for enjoying our condensed milk bread loaf.
Remember, this rich flavor comes from quality ingredients, so be mindful of how much you’re enjoying daily! For the full details on how I calculate this and the limitations of home recipe nutrition, you can always check out my full disclaimer page here.
Here is the approximate breakdown per slice (assuming the loaf yields about 12 regular slices):
- Calories: 180 per slice
- Fat: 4g (with about 2g coming from saturated fat—that’s our butter working hard!)
- Carbohydrates: 30g
- Protein: 5g (that’s why it feels so satisfying!)
- Sugar: 8g (this is the sweetness from the condensed milk and added sugar working together)
- Sodium: 150mg
It’s a wonderfully balanced treat that qualifies as a lovely everyday indulgence, perfect for starting your morning or an afternoon snack. Enjoy responsibly!
PrintFluffy Sweetened Condensed Milk Bread Loaf
This recipe yields an easy, soft, and slightly sweet bread loaf using sweetened condensed milk for a tender crumb.
- Prep Time: 20 min
- Cook Time: 35 min
- Total Time: 140 min
- Yield: 1 loaf (about 12 slices)
- Category: Baking
- Method: Yeast Baking
- Cuisine: American
- Diet: Vegetarian
Ingredients
- 1 cup warm milk (about 105-115F)
- 2 1/4 teaspoons active dry yeast
- 1/4 cup sweetened condensed milk
- 1 large egg
- 3 cups all-purpose flour, plus more for dusting
- 1/4 cup granulated sugar
- 1/2 teaspoon salt
- 4 tablespoons unsalted butter, softened
- 1 large egg, beaten (for egg wash)
Instructions
- Combine the warm milk and yeast in a large bowl. Let it sit for 5 to 10 minutes until foamy.
- Whisk in the sweetened condensed milk and the first egg into the yeast mixture until combined.
- In a separate bowl, whisk together the flour, sugar, and salt.
- Gradually add the dry ingredients to the wet ingredients, mixing until a shaggy dough forms.
- Add the softened butter to the dough. Knead the dough on a lightly floured surface for 8 to 10 minutes until it becomes smooth and elastic.
- Place the dough in a lightly oiled bowl, turning once to coat. Cover the bowl with plastic wrap and let it rise in a warm place for 1 to 1.5 hours, or until doubled in size.
- Gently punch down the risen dough. Shape it into a loaf and place it in a greased 9×5 inch loaf pan.
- Cover the pan loosely and let the dough rise again for 30 to 45 minutes, or until it crests about 1 inch over the rim of the pan.
- Preheat your oven to 350F (175C). Brush the top of the loaf with the beaten egg wash.
- Bake for 30 to 35 minutes, or until the top is golden brown and the internal temperature reaches 200F (93C).
- Remove the bread from the pan immediately and let it cool completely on a wire rack before slicing.
Notes
- For rolls, divide the dough into 12 equal pieces after the first rise, shape into balls, place in a greased 9×13 inch pan, and follow the second rise and baking instructions. Reduce baking time for rolls to 18-20 minutes.
- If the dough feels too sticky during kneading, add flour one tablespoon at a time.
- Use room temperature ingredients for better yeast activation.
Nutrition
- Serving Size: 1 slice
- Calories: 180
- Sugar: 8
- Sodium: 150
- Fat: 4
- Saturated Fat: 2
- Unsaturated Fat: 2
- Trans Fat: 0
- Carbohydrates: 30
- Fiber: 1
- Protein: 5
- Cholesterol: 30

Comments are closed.