

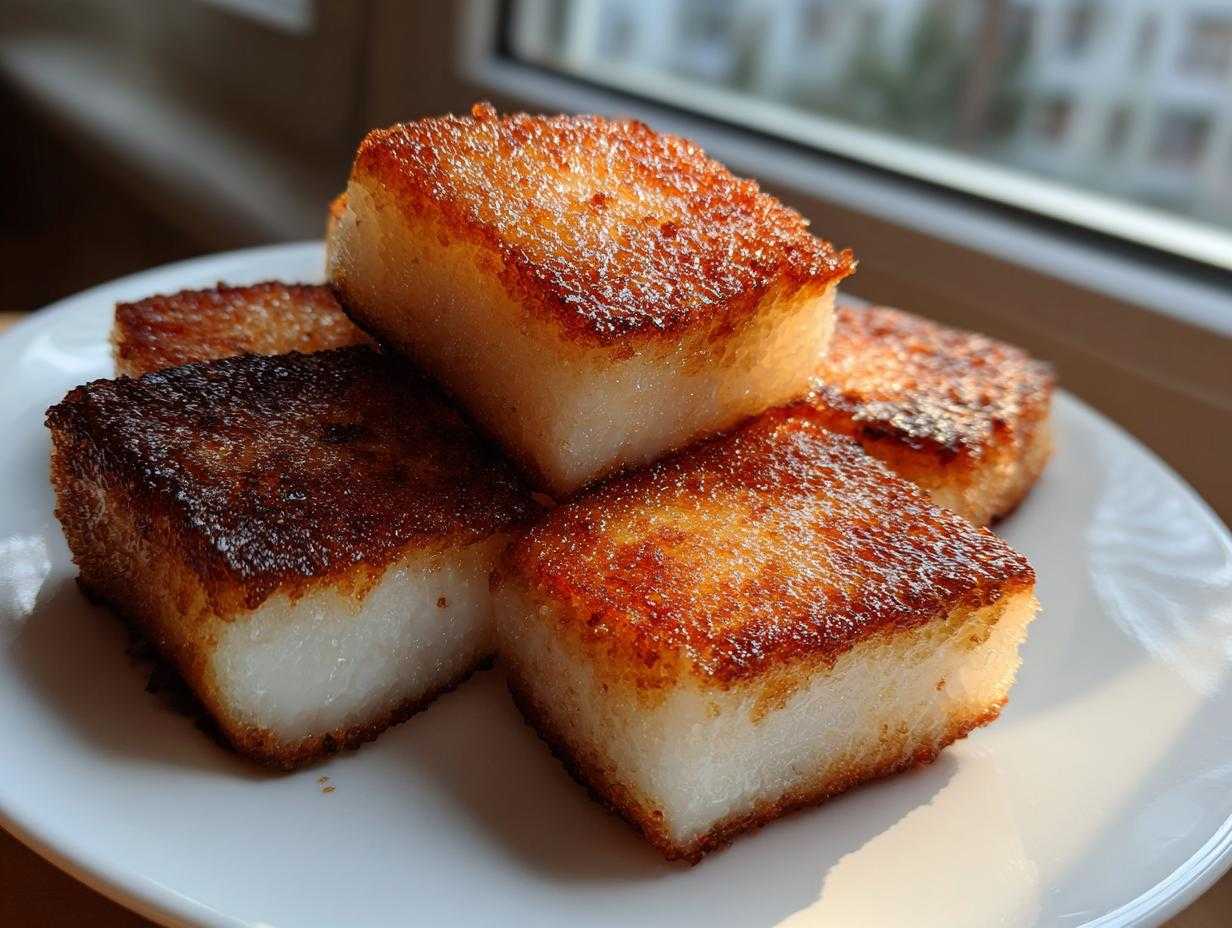
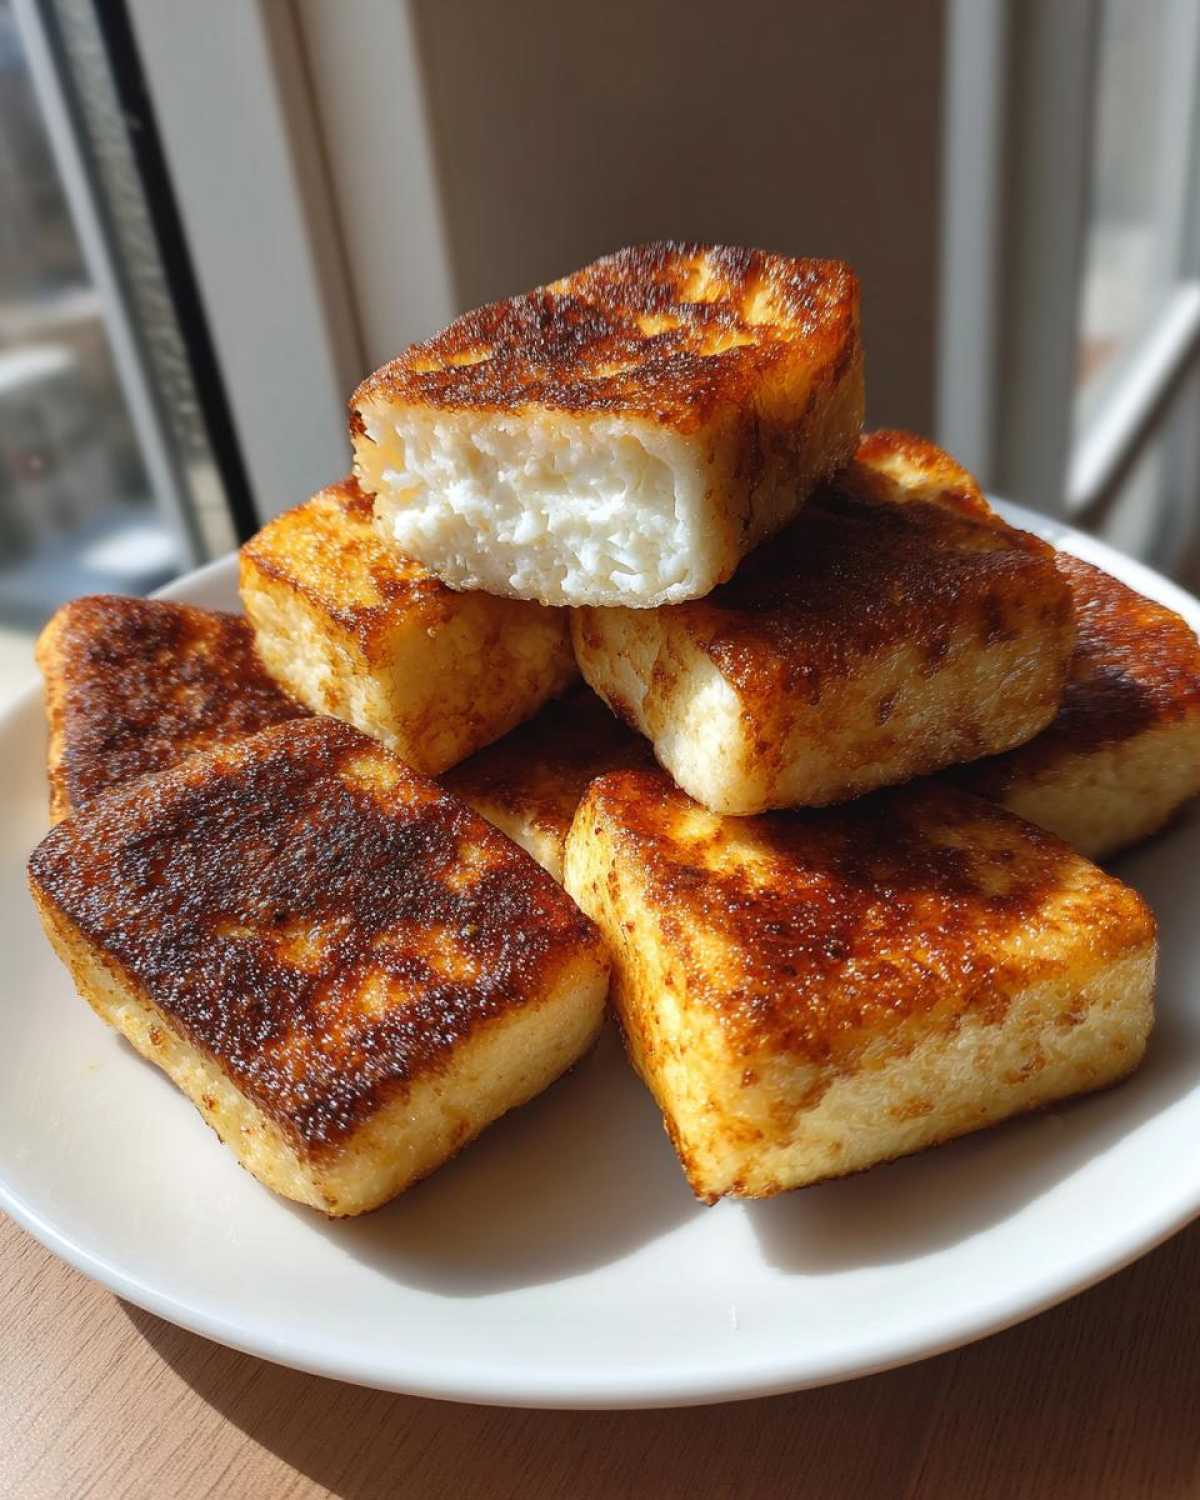
Oh my gosh, if there is one thing in this world that makes me flip out with joy, it’s that perfect texture contrast! You know—the kind of dessert that gives you that satisfying *snap* or *crunch* right before sinking into something absolutely creamy and chewy? Well, I finally cracked the code on one of the toughest textures out there: the Crispy Shanghai Butter Mochi. Forget everything you think you know about soft rice cakes, because this fusion recipe takes the rich flavor of classic butter mochi and marries it with a technique that guarantees a shatteringly crisp crust.
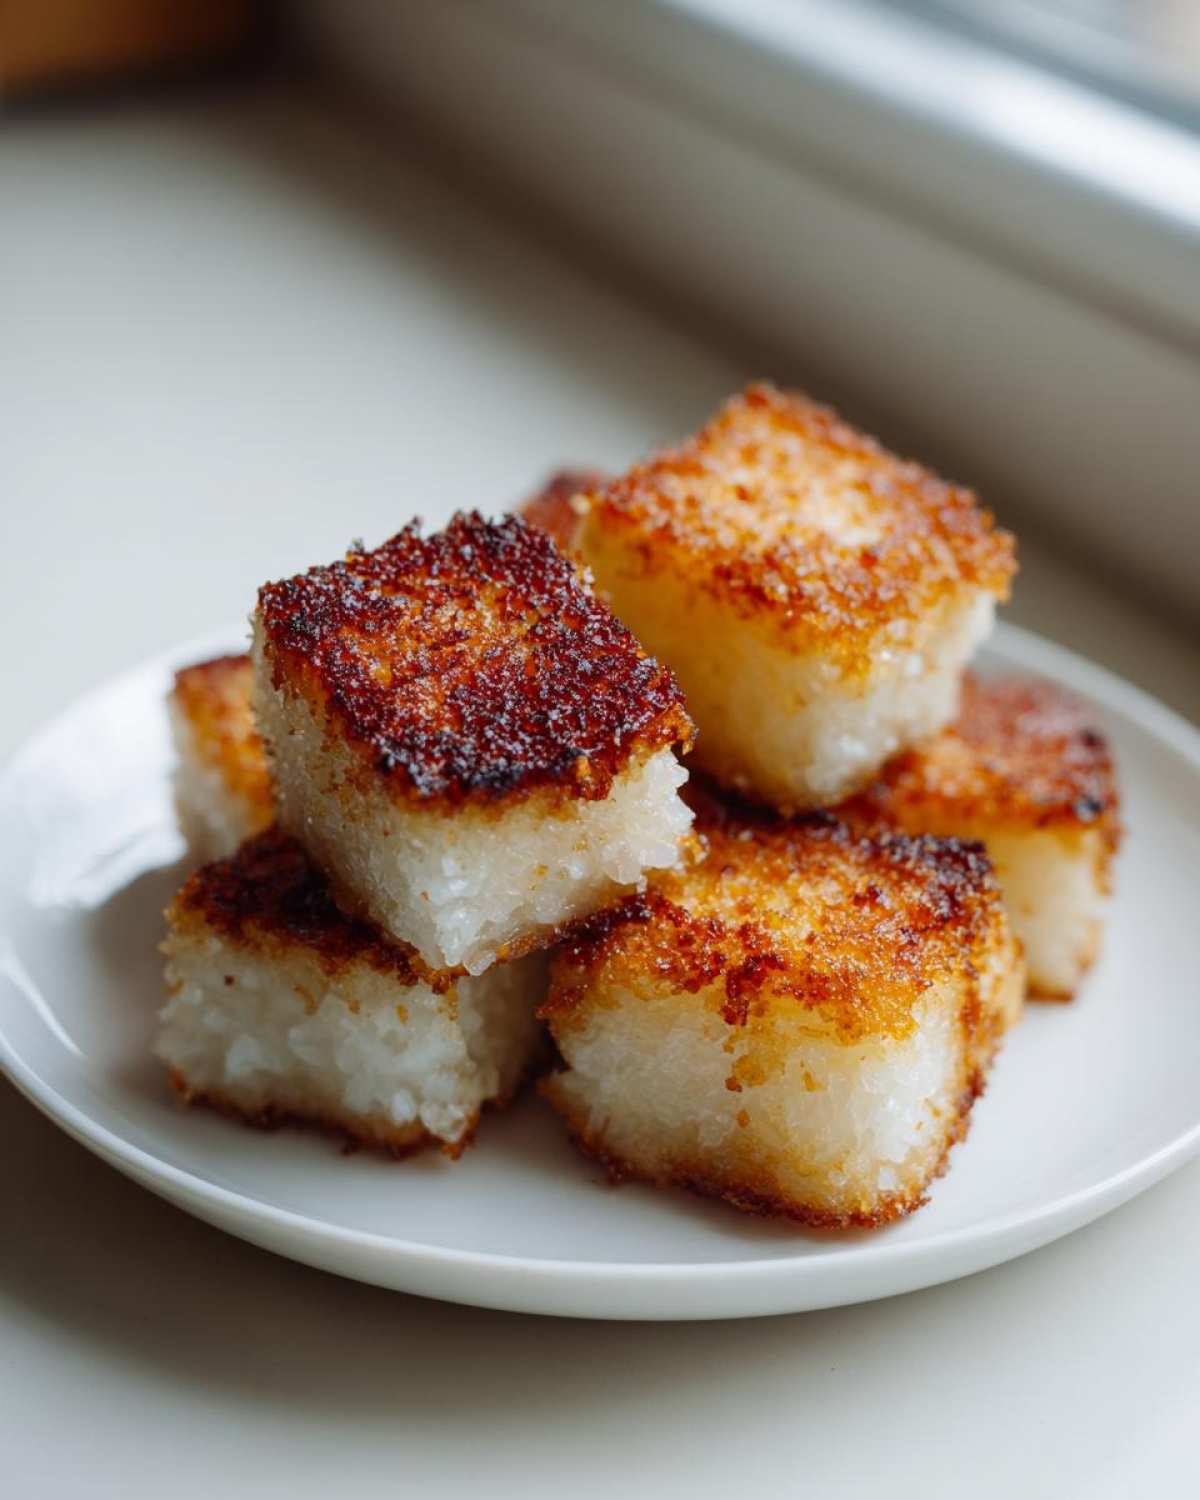
It took me weeks—seriously, weeks of trying different degrees of high heat and sugar coatings—to nail the exterior without burning the inside. I wanted that deep, golden, almost caramelized crunch you sometimes get from street food but with the moist heart of a good Asian butter cake. I think you’ll agree when you try it that we finally got there. The secret to this magnificent Crispy Shanghai Butter Mochi isn’t just in the bake; it’s what happens *after* it cools down. Trust me on this part!
If you’ve ever been intimidated by mochi because it seems fussy, I want you to know this version is surprisingly simple to get right, especially since we handle the main bulk of the cooking in the oven first. We’re using a simple batter, very similar to what you might see in an easy mochi recipe, but the final pan-fry totally transforms it into this unique Chinese butter dessert.
Why This Crispy Shanghai Butter Mochi Recipe Works (The Texture Secret)
So, where is the actual magic that turns this into the Crispy Shanghai Butter Mochi we crave? It’s all about that final, glorious sizzle in the skillet! Baking the base gets us that delightfully soft, rich interior—that classic chewy texture—but it’s the pan-frying in butter and sugar that creates that irresistible, crunchy shell. You want the top of the baked mochi layer to hit the hot, melting sugar just right so it caramelizes instantly.
Here’s a quick pro tip for your bake time that makes a huge difference: make sure your butter is actually melted but not piping hot when you mix it in with the milk and eggs. If it’s too hot, it can mess with the starches once the glutinous rice flour is added. You’re aiming for consistency early on!
The Role of Glutinous Rice Flour in Your Crispy Chewy Dessert
Glutinous rice flour is non-negotiable for any real mochi! It’s what gives this crispy chewy dessert its signature stretch and pull. It doesn’t contain gluten, which allows it to gelatinize beautifully when cooked. This creates that dense, satisfying chew that stands up perfectly to the caramel crunch we add later on.
Essential Ingredients for Authentic Crispy Shanghai Butter Mochi
You absolutely have to handle your ingredients with care if you want that perfect, rich flavor that screams ‘Crispy Shanghai Butter Mochi‘! Since there aren’t a ton of moving parts here, every single ingredient counts. We need the core for chewiness, the enhancers for flavor, and that special second sugar portion for the crunch. Do not worry; I’ve laid out exactly what you need below so you can gather everything before you even start mixing. Don’t substitute the main flour, though!
For the batter, we need one cup of that essential glutinous rice flour, a half cup of regular sugar for sweetness inside, plus your leavening agents. Then comes the richness: one cup of whole milk, a half cup of deeply melted unsalted butter, two eggs, and a splash of vanilla. I always keep a separate quarter cup of sugar ready just for the coating step, which is crucial for the crisp! Do not worry; I’ve laid out exactly what you need below so you can gather everything before you even start mixing. Don’t substitute the main flour, though!
- 1 cup glutinous rice flour
- 1/2 cup granulated sugar (for the batter)
- 1 teaspoon baking powder
- 1/4 teaspoon salt
- 1 cup whole milk
- 1/2 cup unsalted butter, melted
- 2 large eggs
- 1 teaspoon vanilla extract
- 1/4 cup granulated sugar, for coating
- 2 tablespoons unsalted butter, for frying
Ingredient Notes and Substitutions for Shanghai Mochi Recipe
Let’s talk milk for a second. Using whole milk is best here because of the fat content—it helps keep that baked center tender. If you absolutely must use something else, go for a higher-fat alternative, but don’t worry too much about that; the butter really carries the richness in this rich butter dessert ideas.
My biggest piece of advice? Butter quality is EVERYTHING. Because this recipe is a Butter Mochi variation, use the best unsalted butter you can find. You’ll be melting it, and then frying with it, so that pure dairy flavor really comes through. Don’t skimp here; it’s what sets this apart from other sweet rice cake recipes!
Step-by-Step Instructions: How to Make Butter Mochi Crispy
Alright, let’s get baking! This is where the magic starts, but remember, patience is key, especially before we get to the fun frying part. We need a good, sturdy base for our baked base, so don’t rush the cooling stage. I lay everything out clearly, just like I’m showing you how to make my favorite glazed doughnut.
Baking the Mochi Base for Perfect Results
First things first: get that oven preheating to 350°F (175°C). Grab an 8×8 inch pan, and this is super important: grease it well, and then line it with parchment paper that hangs over the sides. Seriously, that overhang is your best friend when you need to lift the whole block out later. No sticking means no heartbreak!
Mix your dry stuff—the rice flour, the half cup of sugar, baking powder, and salt—in a big bowl. In another bowl, whisk together all the wet ingredients: the melted butter, milk, eggs, and vanilla. You want them fully incorporated. Then, pour the wet into the dry. Whisk it gently until everything is smooth. I mean smooth, but stop the second you don’t see streaks of dry flour anymore. Overmixing develops the few starches we *do* have, and we want it tender, not tough!
Pour the batter into your prepared pan. Bake this beautiful base for about 30 to 35 minutes. You’re looking for the edges to look set and maybe a *hint* of light gold on top. A toothpick test works, but I look for the mochi pulling just slightly away from the sides of the pan, too. Once it’s done, take it out and swear an oath to yourself: you absolutely must let this cool completely. I mean room temperature, like, an hour minimum. This ensures your final Crispy Shanghai Butter Mochi squares cut perfectly.
Achieving the Signature Pan Fried Mochi Butter Crunch
Now for the glorious finale! Once it’s totally cool, use those parchment overhangs to lift the cake out onto a cutting board. Cut it carefully into 16 squares. They should hold their shape perfectly now.
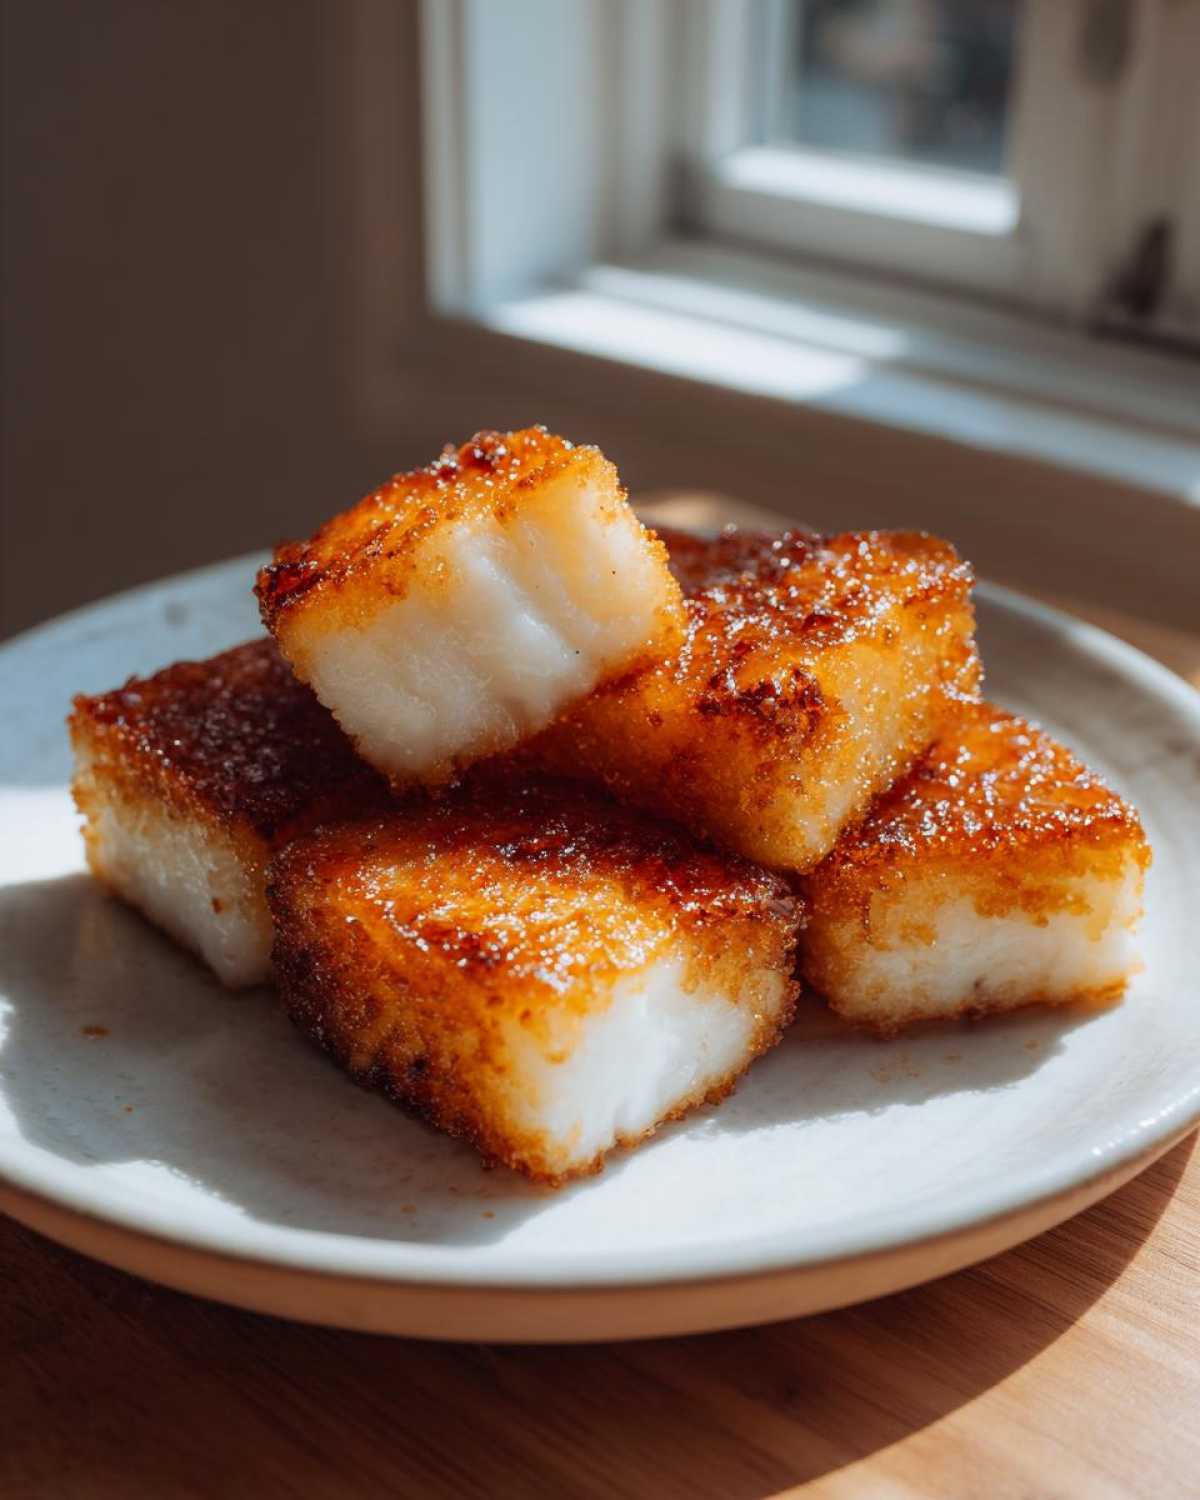
Get a large non-stick skillet heating over medium heat, and melt those last two tablespoons of butter. Don’t let it brown too much; you want that sweet, fresh butter flavor! This is where the technique pays off for the pan fried mochi butter crunch. Take your squares and lightly coat the top side of *each one* with some of that reserved granulated sugar. Don’t drown it, just give it a nice, even dusting.
Place the mochi squares sugar-side DOWN into the hot butter. Crowd the pan just a little bit—they should be snug but not stacked—because we want direct contact with the heat for that crust. Let them fry undisturbed for 2 to 3 minutes. Watch that sugar! It should bubble, melt, and turn into that gorgeous, crispy, golden caramel crust right before your eyes. Flip them carefully and cook the other side for just a minute or two until it gets a light color. Pull them out right away and serve these hot!
Tips for Success with Your Homemade Butter Mochi Crunch
Making the Homemade Butter Mochi Crunch is really about respecting the steps, honestly. If you remember just a few things, you’ll have the best batch ever. My biggest advice is that cooling step after baking; it’s non-negotiable! If you cut it warm, the inside will just smear, and you won’t get those clean squares needed for a perfect fry surface.
Also, when you get to the frying, remember that medium heat is your friend. If the pan is too hot, that beautiful sugar coating on the Crispy Shanghai Butter Mochi will burn before the mochi warms up through the center. You want a beautiful golden brown, not black!
And finally, promise me you’ll eat these right away. Seriously, serve them within 10 minutes of leaving the skillet. That contrast between the hot, shattering crust and the warm, chewy center is what makes this entire recipe worth it. Once they cool down, the crust softens fast, even though the flavor holds up great.
Storage and Reheating Instructions for Crispy Shanghai Mochi
Okay, real talk: this treat is built for immediate satisfaction. The beauty of the Crispy Shanghai Butter Mochi is that crust, and sadly, moisture from the chewy center starts softening it almost instantly. If you want the absolute best experience, eat these the day you make them!
If you have leftovers, do not store them in an airtight container—that traps the steam and equals instant sogginess. Keep them in a loosely covered container at room temperature. If you need to bring back that glorious crunch? Don’t even think about the microwave!
Pop those squares into a toaster oven or a regular oven set to about 350°F (175°C) for just 3 to 5 minutes. You want to wake up that crusty exterior without melting the whole thing into a puddle. A quick blast in the air fryer works wonders, too, especially if you’re reheating my baked zucchini fries style!
Variations on This Rich Butter Dessert Ideas
While I stand by the classic pairing of sweet carrot and butter flavor in my favorite mochi, this base is truly versatile! Since we are already playing in the fusion zone with this Shanghai Mochi Recipe, why not experiment a little bit? If you love green tea, try whisking one teaspoon of high-quality finely sifted matcha powder right into your dry ingredients before adding the milk. It gives you this gorgeous, slightly earthy flavor that pairs surprisingly well with the caramelized sugar crust.
Another way to really wake up the flavor profile is to introduce some brightness. A half teaspoon of finely grated orange or lemon zest mixed in with the wet ingredients right before combining always feels fancy. It cuts through the richness of the butter just enough! It’s a small change, but it gives your easy Shanghai dessert a totally different vibe. We have a lemon vinaigrette recipe for a salad, and that citrus principle works here beautifully too!
Frequently Asked Questions About the Shanghai Mochi Recipe
You might have some questions after diving into this unique texture experience! It’s not every day you pan-fry a cake, right? I want to make sure your first batch of this Shanghai Mochi Recipe comes out absolutely perfect and gives you that wonderful, sweet, flaky crunch.
Can I skip the frying step for this Crispy Shanghai Butter Mochi?
You totally *can* skip the frying, sure, but then you’re just making standard baked butter mochi! That final pan-fry step is what gives us that signature chewy outside crispy inside texture we built this whole recipe around. If you skip it, you’ll end up with a soft, delicious, rich square, but you miss the crunch. For the true Best Crispy Mochi Recipe experience, you gotta fry!
What is the best way to cut the mochi squares cleanly?
Cutting requires patience, my friend! First, you must let the mochi cool *completely* after it comes out of the oven. If you try to cut it warm, it will smear and stick to your knife, making a huge mess. Once cool, take a long, sharp chef’s knife and wipe the blade with a little neutral oil before each cut. That clean edge on the knife prevents sticking and gives you those precise squares we need for the frying step!
What makes this recipe different from standard Butter Mochi?
Standard Butter Mochi is wonderful, don’t get me wrong, but it usually relies only on baking for texture. This variation is a Butter Mochi Fusion, bringing in that crispy element associated with street snacks. The key difference is that second step: cutting and then quickly pan-frying the sugar-coated squares in butter. It’s our little trick to make it a true Homemade Butter Mochi Crunch!
Why do I need two different amounts of sugar?
That’s a great question about the measurements! We use the first half-cup of granulated sugar mixed *into* the batter just to sweeten the mochi throughout, which is standard for any sweet rice cake crispy base. The second allotment—that quarter cup—is sprinkled *only* on the outside of the cut squares right before frying. This exterior sugar is what melts and caramelizes in the hot butter to form that hard, crispy shell. It’s the crucial component for the crunch!
Estimated Nutritional Profile for One Serving of Crispy Shanghai Butter Mochi
I always like to give you a general idea of what’s in the food we make, just so you aren’t guessing! Now, remember, because we are dealing with real ingredients—especially rich butter and sugar for that incredible crisp—this is definitely a treat! These numbers are just estimates based on the ingredients list I provided for one square, so they can bounce around a little depending on the exact brands of milk or butter you use.
Think of these figures as what you’d see posted next to a famous dip at a party—a good baseline, but not gospel truth! We’re looking at a higher fat and sugar content because, hello, butter and sugar are the secret to that amazing crunch we worked so hard for!
- Serving Size: 1 square
- Calories: 250
- Sugar: 18g
- Sodium: 110mg
- Fat: 14g (With 8g of that being Saturated, that butter does some work!)
- Carbohydrates: 29g
- Protein: 4g
So, if you’re cutting these into 16 squares, it’s best enjoyed as an indulgence! Enjoy every single crunchy, chewy bite of this unique dessert!
Share Your Crispy Chewy Dessert Creations
Whew! We made it through the baking and the frying! Now that you have your own batch of what I truly think is the Best Crispy Mochi Recipe out there, I desperately want to see what you created. Did you nail that perfect sugar caramelization on the first try? Tell me everything!
Please, please leave a rating for this Crispy Chewy Dessert below—five stars if it lived up to the crispy promise! Seriously, those ratings help other bakers decide if they should dive into this fun recipe. I love seeing how everyone manages their heat for that final fry!
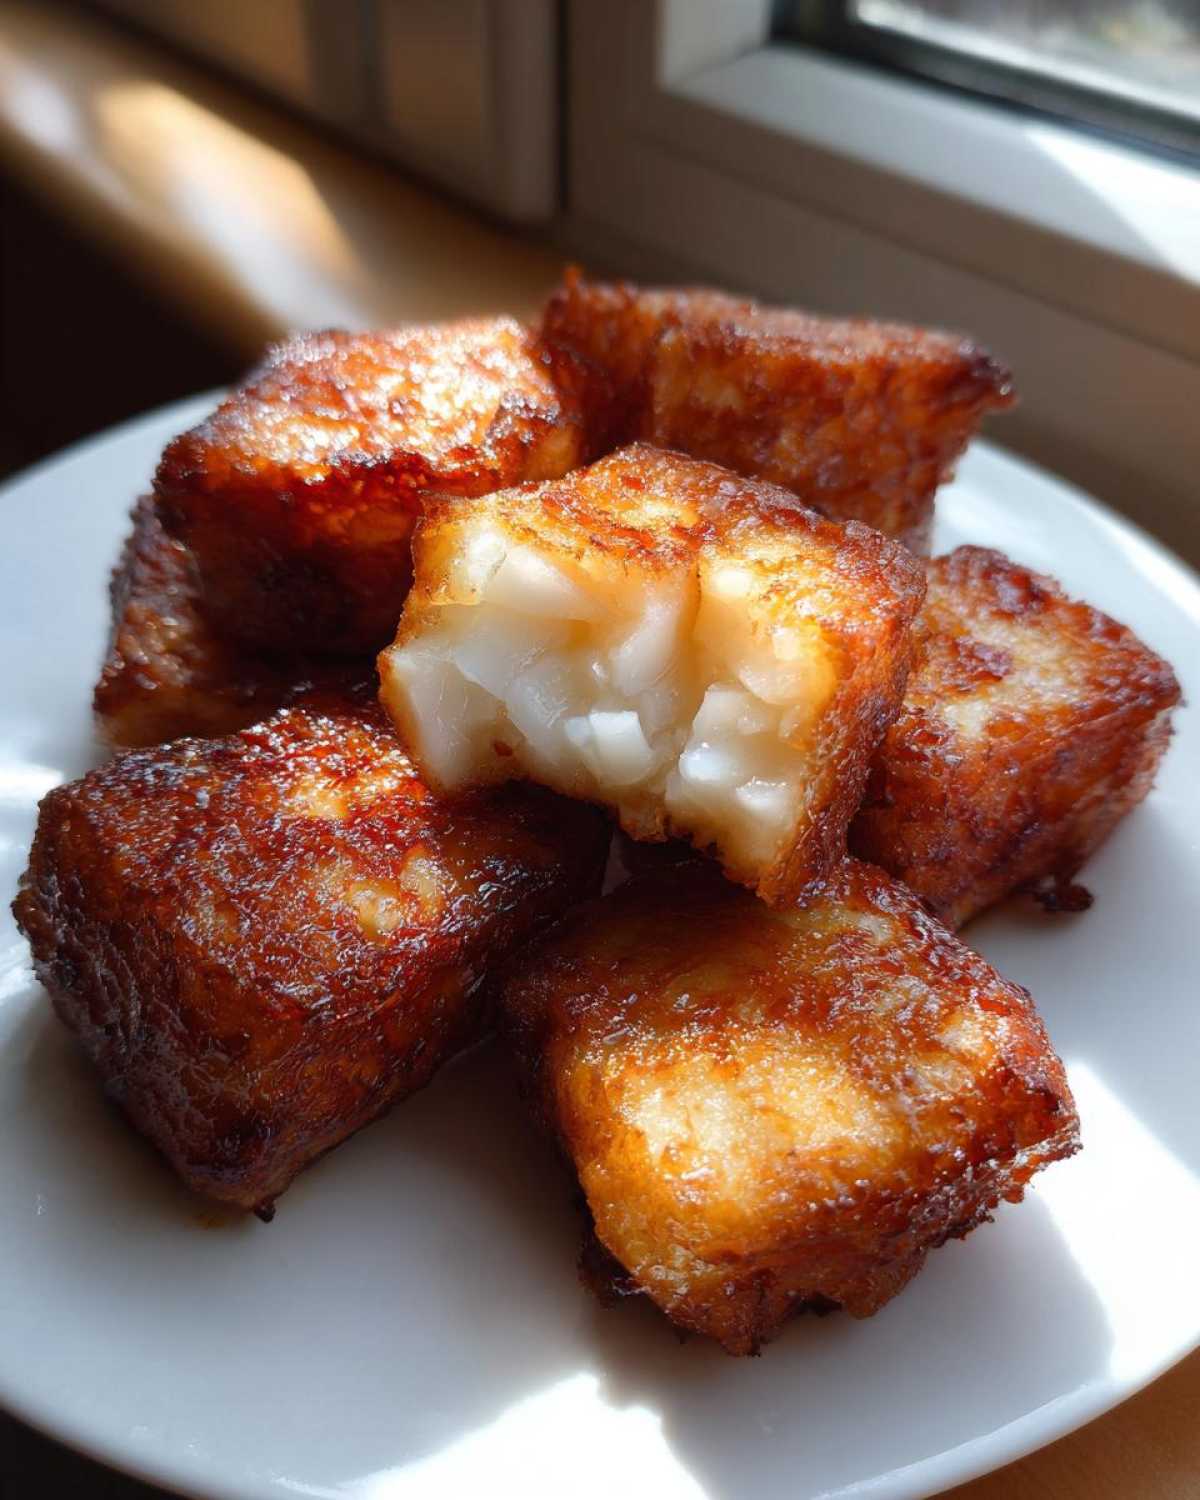
If you snapped a picture of your golden, crunchy squares—especially if you managed to get a cross-section showing the chewiness inside—tag me on social media! I save every picture, and it truly makes my whole week seeing my recipes in your kitchen. Did you try the citrus variation, or did you stick to the pure butter flavor? I can’t wait to hear how easy you found making this unique Asian dessert!
Don’t be shy—drop your comments below about achieving that crunch. What temperature did you finally settle on for your pan-fry? Let’s keep the conversation going about this amazing Pan Fried Mochi Butter technique!
PrintCrispy Shanghai Butter Mochi
A recipe for making mochi with a rich butter flavor, featuring a distinct crispy exterior and a chewy interior, inspired by Shanghai dessert styles.
- Prep Time: 15 min
- Cook Time: 40 min
- Total Time: 55 min
- Yield: 16 squares
- Category: Dessert
- Method: Baking and Pan Frying
- Cuisine: Fusion (Chinese/American)
- Diet: Vegetarian
Ingredients
- 1 cup glutinous rice flour
- 1/2 cup granulated sugar
- 1 teaspoon baking powder
- 1/4 teaspoon salt
- 1 cup whole milk
- 1/2 cup unsalted butter, melted
- 2 large eggs
- 1 teaspoon vanilla extract
- 1/4 cup granulated sugar, for coating
- 2 tablespoons unsalted butter, for frying
Instructions
- Preheat your oven to 350°F (175°C). Grease and line an 8×8 inch baking pan with parchment paper, leaving an overhang.
- In a large bowl, whisk together the glutinous rice flour, 1/2 cup sugar, baking powder, and salt.
- In a separate bowl, whisk together the melted butter, milk, eggs, and vanilla extract until combined.
- Pour the wet ingredients into the dry ingredients. Whisk until the batter is smooth. Do not overmix.
- Pour the batter into the prepared baking pan.
- Bake for 30 to 35 minutes, or until the edges are set and a toothpick inserted near the center comes out mostly clean. The top should be lightly golden.
- Let the mochi cool completely in the pan on a wire rack. This is important for texture.
- Once cool, lift the mochi out using the parchment paper overhang. Cut the mochi into 16 squares.
- In a large non-stick skillet, melt the 2 tablespoons of butter over medium heat.
- Place the mochi squares in the hot butter, ensuring not to overcrowd the pan.
- Lightly coat the top side of each square with the remaining 1/4 cup of sugar.
- Fry the mochi, sugar-side down, for 2 to 3 minutes until the sugar caramelizes and forms a crisp, golden-brown crust.
- Flip the mochi and cook the other side for 1 to 2 minutes until lightly browned.
- Remove from the pan and serve immediately while the exterior is crispy.
Notes
- For the crispiest result, ensure the mochi is completely cool before cutting and frying.
- Use high-quality butter for the best flavor in this rich dessert.
- If you prefer a slightly softer crust, reduce the frying time slightly.
Nutrition
- Serving Size: 1 square
- Calories: 250
- Sugar: 18
- Sodium: 110
- Fat: 14
- Saturated Fat: 8
- Unsaturated Fat: 6
- Trans Fat: 0
- Carbohydrates: 29
- Fiber: 1
- Protein: 4
- Cholesterol: 65


Comments are closed.