


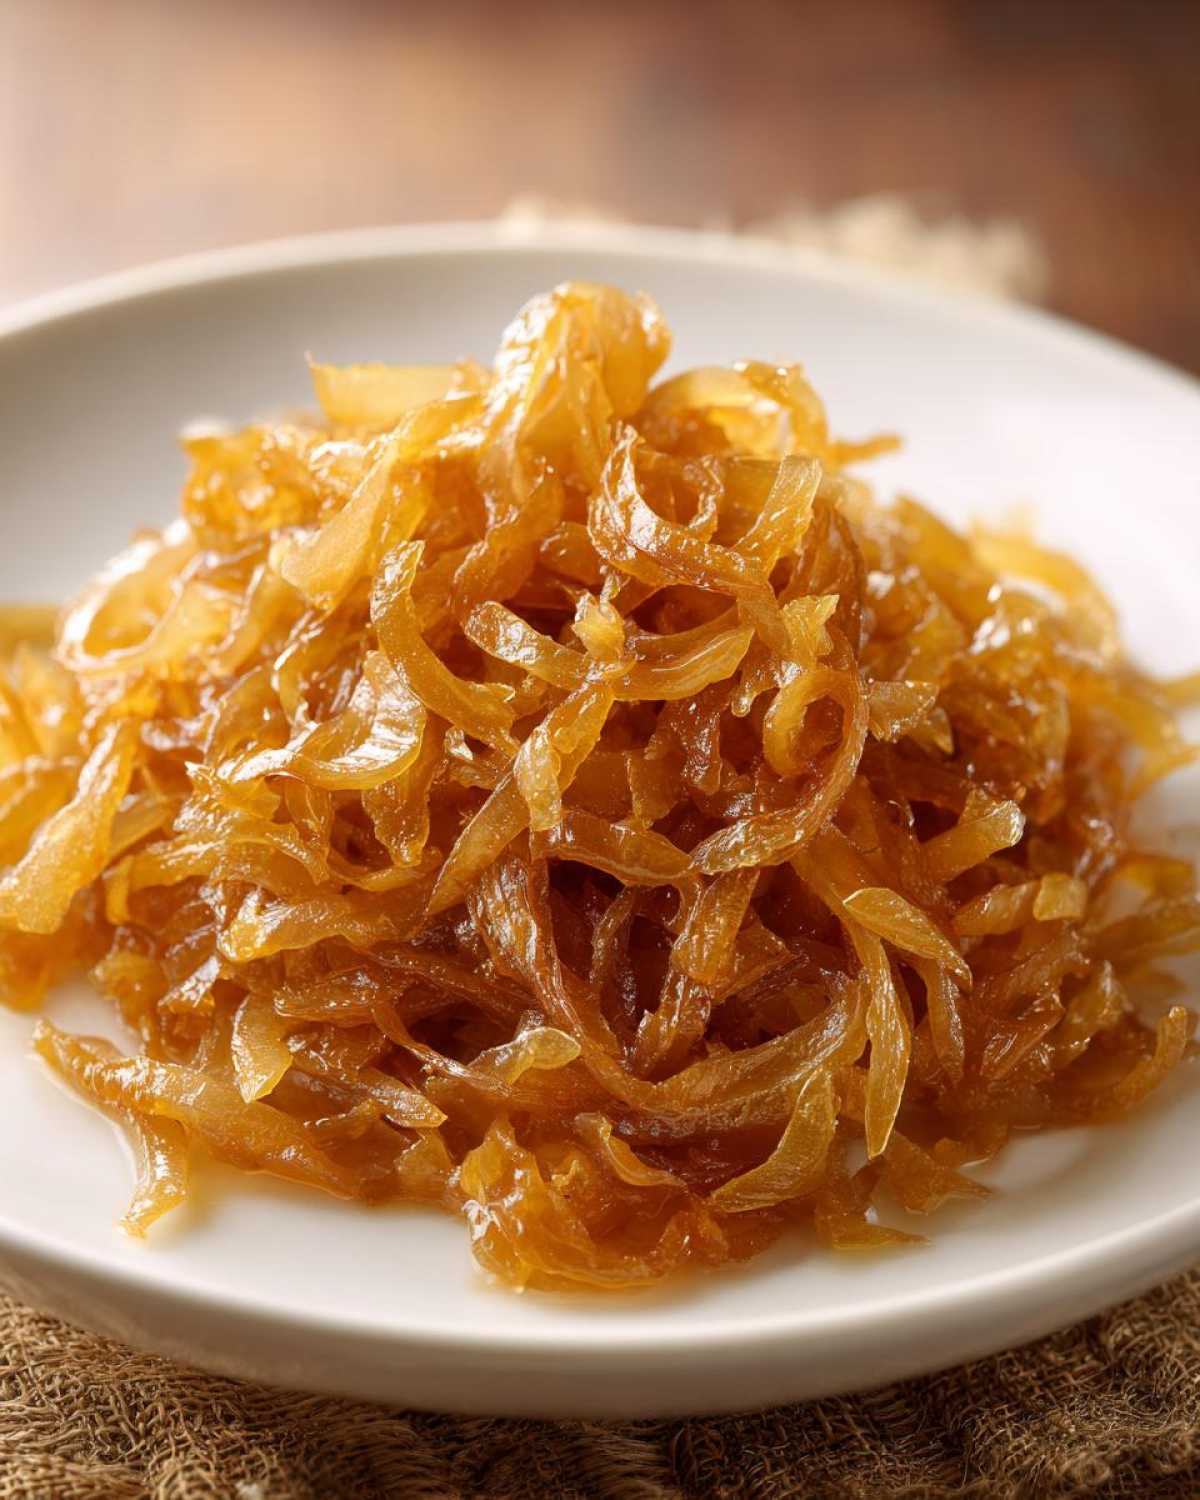
It still blows my mind every time I make them—you take these humble, tear-inducing yellow onions and, with nothing but time, a little fat, and some gentle heat, transform them into something utterly luxurious. That’s the magic of truly great caramelized onions! They go from sharp and sulfurous to deep, dark, and intensely sweet, taking on this gorgeous, melting texture. Forget those pale, barely cooked excuses you see sometimes; we’re aiming for that rich, golden-brown color that signals pure flavor depth. After years of burning batches, I finally perfected this low-and-slow method that guarantees you’ll get the best, jammiest results every single time you try this recipe.
Why You Will Love This Perfect Caramelized Onions Recipe
This isn’t just a list of instructions; it’s your blueprint for kitchen gold. Seriously, once you have this technique down, you’ll never look at onions the same way again. Here’s why I swear by this method:
- Total Flavor Payoff: The slow cooking turns harsh vegetables into deeply sweet onions. It’s comfort food in a skillet!
- Surprisingly Easy: While patience is involved, the actual work is minimal. Just stir occasionally and walk away.
- Incredible Versatility: These are the ultimate topping for everything from burgers to savory tarts.
Essential Ingredients for Rich Caramelized Onions
Okay, don’t let the short ingredient list fool you; this is where the alchemy begins. We start with three large yellow onions—slice them thinly and try to keep those slices uniform; that’s super important for even cooking! You absolutely need butter for richness, but I always cut it with a little olive oil so the butter solids don’t burn too fast. Don’t forget the salt to help draw out that initial moisture. Now, that little bit of sugar? It’s optional, but trust me, it gives the browning process a helpful little nudge right when you need it.
The Step-by-Step Technique: How to Caramelize Onions Perfectly
Listen up, because this is the part where people usually quit or burn them! The actual work involved in making the best caramelized onions is totally hands-off, but you have to respect the heat. Uniform slicing is your first major win here; grab a sharp knife and make sure those onion pieces are roughly the same thickness so they cook down together. Once they’re prepped, get your heavy skillet hot over medium-low heat—don’t rush this! We need to coax the sugar out, not scorch it. Mixing them with the fat and salt right away helps start that process beautifully. Seriously, once you master this heat control, you can use these onions as a base for so many things, like the amazing roasted chicken and tomato skillet!
Preparation and Initial Sauté for Caramelized Onions
First things first: slice those babies thin. If you have pieces that are thick and others that are paper-thin, the thin ones will disappear before the thick ones even start to soften up. In your big, thick-bottomed pan—that helps distribute heat evenly—melt the butter right into the olive oil. Add all your sliced onions and that salt. Stir everything until those slices look glistening. Now, let them cook! For the first 20 minutes, you’re just aiming for soft and translucent. Don’t expect much color yet; they are just letting out all their internal water content.
Developing the Deep Color: Achieving Jammy Caramelized Onions
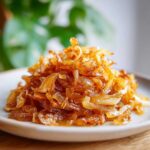
Once those onions are soft and look a little wilted, it’s time for the main event. This is where the magic happens, and this is where the best caramelized onions are created. You’ll keep the heat low—seriously, low!—and continue cooking for another 30 to 45 minutes. As they cook down more, you’ll notice dark brown spots sticking to the bottom of the pan. That’s called the ‘fond,’ and it’s pure, concentrated flavor! You must scrape up those bits with your spatula every time you stir. If you’re looking for that truly jammy, almost-black texture, keep going until they are the color of dark mahogany. They’ll shrink down so much, you’ll wonder where all those onions went!
Expert Tips for Mastering Caramelized Onions
Even with the perfect low-and-slow setup, sometimes things get a little sticky, literally! Don’t panic if your onions start gluing themselves to the bottom halfway through cooking—that browning is flavor building up, but you don’t want it to burn into ash. If they look too dry before they’ve achieved that deep color, grab a tablespoon of water or broth and pour it right into the pan. Use your spatula to scrape up all those tasty stuck bits; that’s called deglazing, and it’s essential for that rich, sweet finish.
Now, if you’re really slammed for time and need quick caramelized onions, yes, you can crank the heat up to medium. But I’m warning you: you have to watch them like a hawk! You’ll need to stir almost constantly to keep that fond from scorching. It cuts the time down, but my personal opinion? The low and slow route really delivers those truly best caramelized onions that taste complex and buttery, not just rushed.
Variations on Classic Caramelized Onions
The basic recipe is perfect on its own, especially if you’re just looking for a simple onion side dish. But once you’ve mastered the fundamentals, you can start playing around! I love treating these sweet onions as a base for something truly special. Think of them as your blank canvas for a truly gourmet onion topping.
My absolute favorite trick is adding a tiny splash of liquid right at the very end, just after they hit that perfect deep brown. If you’re making something savory that can handle a little tang, pour in just a teaspoon of balsamic vinegar. It hits the dark sugars and makes them sing! A little trick I picked up for elegant dinners is deglazing with a splash of dry sherry—it adds such a complex, warm background note that people always ask me what the secret is.
If you want something creamy, you can mix them warm into soft goat cheese or mascarpone for a fantastic spread. I keep meaning to try folding them into a homemade dressing sometime, maybe something bright to balance out the richness, perhaps exploring ideas similar to my Caesar dressing base! Just remember, anything you add at the end needs to be cooked down until it’s perfectly absorbed so you keep that wonderful, jammy texture.
How to Use Your Golden Onions: Serving Suggestions
So now you have this incredible batch of warm, sweet, savory goodness. What on earth do you do with them all? Honestly, you could just eat them straight from the bowl with a spoon, but resist that urge! These are too good to hide.
The most obvious use is piling them high! They are the perfect caramelized onions topping; try them on a grilled steak, a crispy pizza, or piled onto a good smear of melted cheese on toast. They make a fantastic onion side dish, especially next to roasted chicken or pork chops.
I love making a savory base with them, too. Mix them into cream cheese or sour cream for a simple party dip—one of my favorites you can blend them into is the base for a delicious dip like my pizza dip! And of course, you absolutely have to treat yourself to a stack of fantastic burgers topped with these beauties, just like I do on my burger night.
Storage and Reheating for Best Caramelized Onions
Don’t rush to use all your rich, sweet onions if you made a huge batch—they store like a dream! This is one of my favorite parts because having homemade caramelized onions ready in the fridge is like having a superpower for quick weeknight meals.
For the fridge, just pop your cooled onions into an airtight container. They’ll easily last a week, maybe even ten days, and honestly, sometimes they get even deeper in flavor overnight! If you want to save them for the long haul, freezing is the way to go. You can either freeze them flat in a zip-top bag, or, and this is my favorite hack, freeze small portions in ice cube trays. Once they are solid, pop those frozen little flavor bombs into a freezer bag. That way, you can pull out exactly what you need for a quick topping!
When it’s time to use the refrigerated onions, just toss them back into a skillet over very low heat for a few minutes. You want to warm them through gently. If you reheat them too quickly or too high, they can start to dry out or even scorch since all the water is already gone. For the frozen ones, thaw them in the fridge overnight if you can, and then gently reheat in a pan the same way. Heating them low and slow ensures you keep that beautiful, delicate, jammy texture we worked so hard to achieve!
Frequently Asked Questions About Caramelized Onions
I know you’re going to follow my steps perfectly, but just in case you have a quick question pop up mid-cook, here are some things I get asked all the time about how to caramelize onions. Hopefully, this helps you reach those best caramelized onions every time!
Why are my caramelized onions turning bitter instead of sweet?
Oh, I remember my first few disastrous batches! Bitterness almost always means you’ve gone too hot, too fast, and you’re scorching the sugars instead of letting them caramelize properly. If you see black, carbonized bits sticking hard to the bottom of the pan—not just the nice brown fond—you’ve likely burned them slightly. The fix? Immediately pull the pan off the heat, add a tablespoon of water to loosen those burnt spots, scrape well with a wooden spoon, and lower your heat significantly, maybe even adding a little fat back in if they seem dry. That low and slow approach is your safety net!
Can I make caramelized onions in an Instant Pot or slow cooker?
Yes, you absolutely *can*, and people do it when they want to set them and forget them for hours. If you use a slow cooker, they will eventually brown, but they often end up steamier and softer rather than achieving that deep, rich, jammy texture we are looking for on the stovetop. If you use an Instant Pot, you need to use the ‘Sauté’ function on low, and you still have to stir it frequently. Honestly, if you’re aiming for the truly gourmet flavor that comes from scraping up that fond, the skillet method just offers superior texture control for your classic caramelized onions.
Nutritional Snapshot of This Onion Side Dish
Now, I always try not to stress too much about the numbers when I’m making something this purely comforting, but I tracked this recipe down just so you can see what you’re getting out of this wonderful onion side dish! Remember, since this is based on an estimate using butter and oil, the exact numbers might change a bit depending on how much you use and how much delicious liquid you scrape up from the bottom of the pan!
- Serving Size: 1/4 cup
- Calories: 75
- Fat: 4g
- Carbohydrates: 10g
- Sugar: 7g
- Protein: 1g
- Sodium: 115mg
See? Mostly vegetables and satisfying fat! It’s a wonderfully flavorful side dish without packing a heavy caloric punch, even with all that natural sweetness.
PrintHow to Caramelize Onions: The Ultimate Guide
Learn the simple technique to slowly cook onions until they become deeply sweet, golden, and jammy.
- Prep Time: 10 min
- Cook Time: 50 min
- Total Time: 60 min
- Yield: About 1.5 cups
- Category: Side Dish
- Method: Stovetop Cooking
- Cuisine: General
- Diet: Vegetarian
Ingredients
- 3 large yellow onions, thinly sliced
- 2 tablespoons unsalted butter
- 1 tablespoon olive oil
- 1/2 teaspoon salt
- 1/4 teaspoon sugar (optional, for faster browning)
Instructions
- Slice the onions thinly and uniformly. Uniformity helps them cook evenly.
- In a large, heavy-bottomed skillet, melt the butter with the olive oil over medium-low heat.
- Add the sliced onions and salt to the skillet. Stir to coat them completely with the fat.
- Cook the onions slowly, stirring every 5 to 7 minutes. Keep the heat low to prevent burning. This initial stage will take about 20 minutes, and the onions will soften and release moisture.
- If using, sprinkle the sugar over the onions after they have softened.
- Continue cooking, stirring more frequently as the onions begin to stick slightly to the bottom of the pan (this is good fond development). Scrape up the browned bits with your spatula.
- Maintain low heat and continue cooking for another 30 to 45 minutes, or until the onions reach a deep, rich brown color and have a jammy texture.
- Remove from heat and serve immediately or store for later use.
Notes
- For a quicker method, increase the heat slightly to medium, but stir every 2 to 3 minutes to prevent scorching. This reduces the total time but requires more attention.
- If the onions start to dry out or stick too much before browning, add 1 tablespoon of water or broth to deglaze the pan, scraping up the browned bits before continuing to cook.
- Use these onions as a topping for burgers, mixed into scrambled eggs, or as a base for French onion soup.
Nutrition
- Serving Size: 1/4 cup
- Calories: 75
- Sugar: 7
- Sodium: 115
- Fat: 4
- Saturated Fat: 2
- Unsaturated Fat: 2
- Trans Fat: 0
- Carbohydrates: 10
- Fiber: 2
- Protein: 1
- Cholesterol: 5

Comments are closed.