


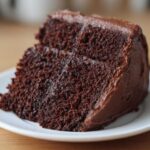
Oh, welcome friend! If you are chasing that mythical, bakery-quality texture—you know the one: tall, gloriously flaky, and meltingly buttery—then pull up a chair. I’ve got the magic right here for you! Leaving my hectic marketing life behind to build Sunday Flavor taught me one thing: joy shouldn’t wait. And that joy starts with baking the perfect scones. Forget those dense hockey pucks you sometimes end up with; this simple buttermilk base recipe is my absolute favorite way to guarantee lift and moisture every single time. Seriously, these will change your brunch game forever. I can’t wait for you to try them! You can read more about my journey to finding my own kitchen sanctuary over on my About Me page, but for now, let’s bake!
Why This is the Best Scone Recipe for Tall, Flaky Scones (E-E-A-T)
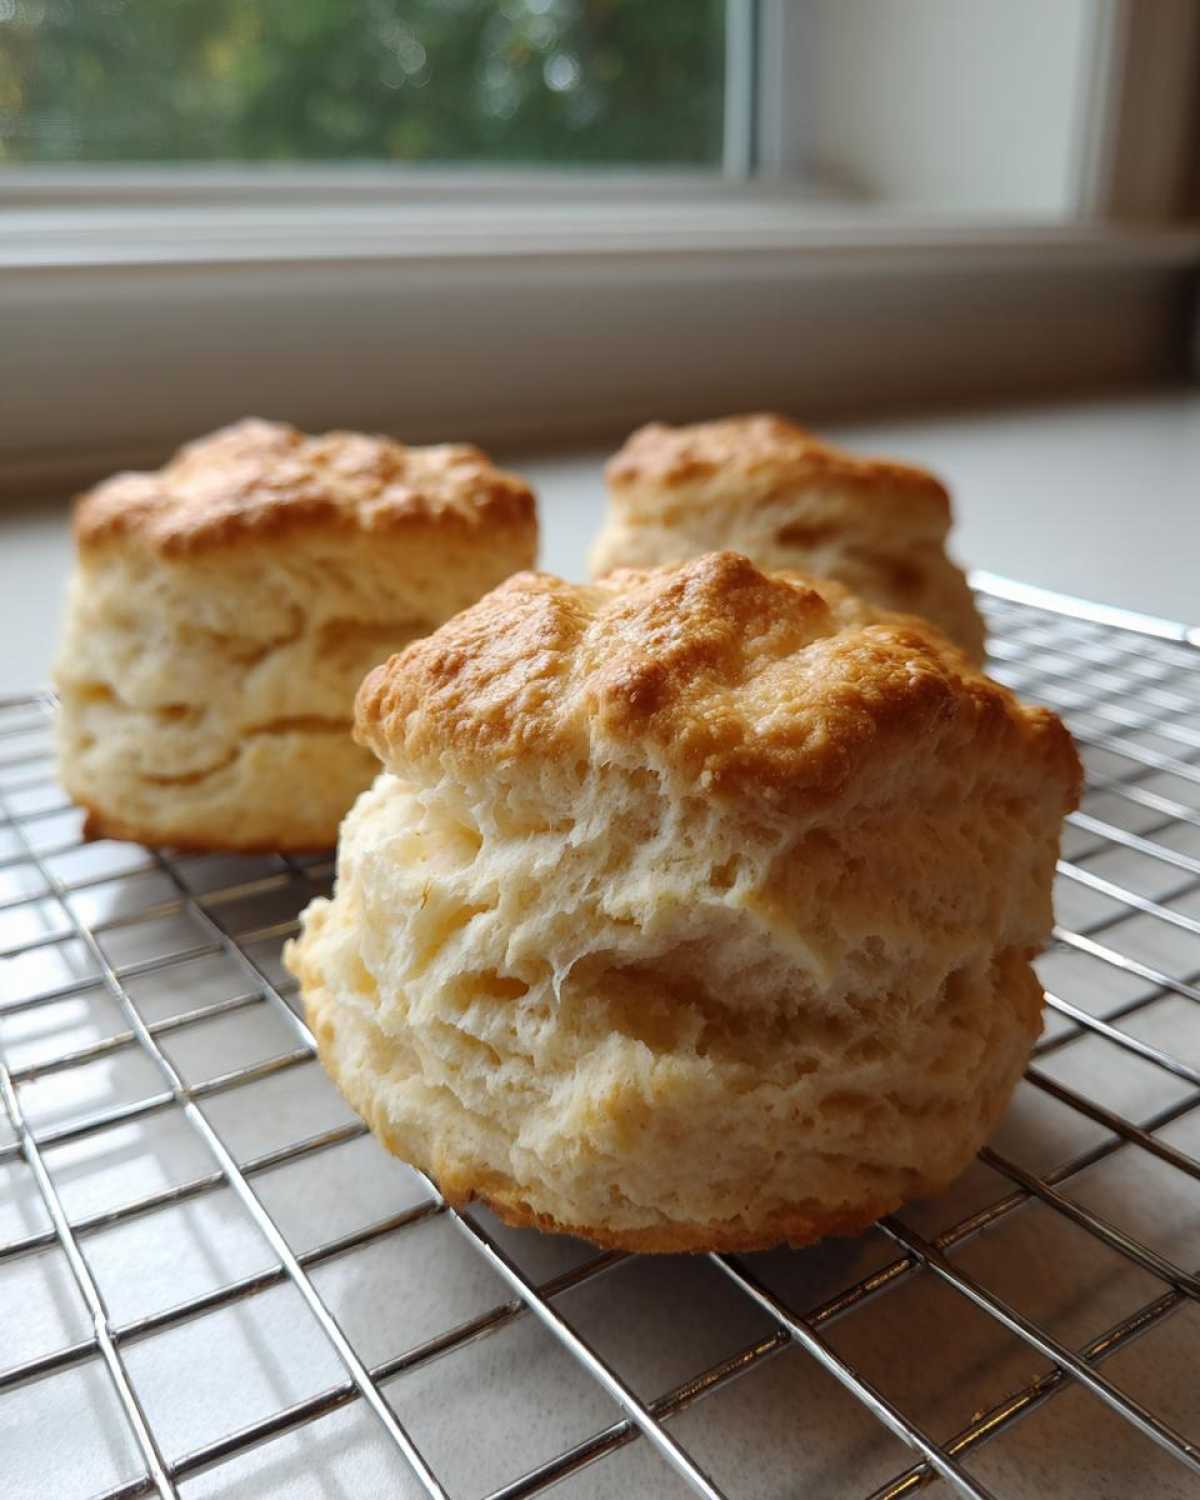
I needed a foolproof method for my Sunday mornings, and after way too many flat baking failures, I finally cracked the code to truly tall, flaky scones. This isn’t just luck; it’s science, darling! This buttermilk recipe is hands-down the Best Scone Recipe I’ve ever developed because it respects the ingredients. The most important thing you need to remember is this: keep everything freezing cold. When I first achieved those incredible, sky-high layers that looked just like the ones at that fancy coffee shop downtown, I actually gasped. The secret lies in controlling the melt!
If you’re looking for that perfect texture for your next big spread, check out more of my favorite brunch ideas. But first, let’s talk lift!
The Secret to Buttery Scones and Maximum Height
There are three simple rules that separate a sad, squat scone from one that looks like a tiny, delicious layer cake. Rule number one is the butter, and rule number two is the buttermilk; they must both be ice cold. Cold butter creates pockets when we cut it in, and when that butter hits the hot oven, it steams, pushing the dough layers apart—that’s flakiness right there! This whole process makes for incredible Buttery Scones Baking success.
The third factor is technique. We aren’t just mixing; we are laminating by folding the dough over on itself a couple of times before cutting. This builds those vertical layers that give you incredible height when they bake. Keep the handling minimal, and you’ll be rewarded with a tender, airy crumb that melts in your mouth.
Gathering Ingredients for Perfect Scones
Okay, now for the fun part: getting everything ready on the counter! Remember, we are aiming for tender and moist today, so I need you to be very strict about the temperature of these ingredients. Don’t let your butter soften while you measure the flour; that’s a rookie mistake that leads to flat results later. I always pull my butter and buttermilk out right before I start measuring the dry stuff. For this recipe, you’ll need the following quantities:
- 2 cups all-purpose flour
- 1/4 cup granulated sugar
- 1 tablespoon baking powder
- 1/2 teaspoon salt
- 1/2 cup (1 stick) unsalted butter, cut into small cubes AND COLD
- 1 cup cold buttermilk (yes, it really needs to be cold!)
- 1 large egg, beaten (we use this for the wash later)
- 1 tablespoon coarse sugar (optional, only if you want a sparkly top!)
Ingredient Notes and Substitutions for Your Scones
Let’s talk specifics because ingredient quality really matters here. Buttermilk is my non-negotiable hero in this Best Scone Recipe. The acid in the buttermilk reacts with the baking powder, giving us that gorgeous lift, plus it tenderizes the dough so our scones stay moist. If you are desperate and only have regular milk, you can use that, but you should add a teaspoon of white vinegar or lemon juice to it first and let it sit for 5 minutes to create a quick “sour milk.” It won’t be quite as tender as true buttermilk, but it works in a pinch!
The butter must be cut into those tiny cubes we talked about, and it needs to be straight out of the fridge—or even the freezer for five minutes. Those little cubes are what vaporize in the oven, creating space between your layers, which is the key to flaky deliciousness. If you want to add flavor right now, this is the moment! For those gorgeous blueberry scones everyone saves on Pinterest, gently fold in about a cup of fresh or frozen blueberries right after you add the buttermilk. Don’t go crazy folding—just until they appear!
How to Make Scones From Scratch: A Fluffy Scones Tutorial
Alright, let’s get down to the hands-on work! This is where the magic happens that turns basic ingredients into those dreamy, Fluffy Scones Tutorial results you see all over your feed. I always put on my favorite upbeat music during this stage because there is no room for stress! We are following those instructions perfectly, remembering that gentle handling keeps these scones tender.
If you want to see my full video guide on the process, you can check out my dedicated page on How to Make Scones From Scratch for a visual walkthrough. But honestly, trust your hands—they usually know better than the timer!
Mixing the Dough: The Gentle Touch for Tender and Crumbly Scones
After you’ve gotten that cold butter cut into the flour mixture until it looks like coarse crumbs, it’s time for moisture. Make a little crater in the middle of your dry ingredients and pour in that icy buttermilk. Now, STOP! Grab a fork and mix only until things start to come together. I mean it, stop stirring when it looks shaggy.
Shaggy means there are still spots of dry flour visible, and that is absolutely okay. If you mix until it’s smooth right here, you’ve already overdeveloped the gluten, and you’re heading straight for tough scones. For Easy Homemade Scones that are tender and crumbly, we only mix until the dough *barely* holds hands. That’s it. Don’t worry about the stray bits of flour; we handle those next.
Cutting and Shaping for Perfect Scones
Now we turn the shaggy mess onto a lightly floured counter. Here’s where we build our height! Gently pat the dough, don’t squash it, into a rectangle or circle about 1-inch thick. Now, fold it in thirds, like closing a letter, and pat it down again to that 1-inch thickness. Those folds are your secret weapon for achieving those Tall Bakery Style Scones!
Grab your sharp biscuit cutter—and this is crucial—press straight down firmly without twisting. Twisting seals the edges, stopping the scones from rising tall. I know it’s tempting to twist, but resist! For the bake, space them slightly apart if you want crispy edges, or press them right up against each other so they bake tall and have those soft, squishy sides. They look perfect either way!
Baking Your Scones to Golden Perfection
We’ve done the hard part—mixing gently and folding perfectly—so now we just need to get them into that hot oven! Honestly, this part is so fast, it’s almost anticlimactic. Preheat your oven to 400°F (200°C). That high heat is what gives us immediate lift, so don’t be tempted to start lower. Remember, we want a Moist Scone Recipe, and rushing the temperature is the number one way to end up with a dry mess!
Before they go in, you need to give them a little spa treatment with the egg wash. I take that beaten egg and brush just the tops lightly—try to keep it off the sides! The egg wash is pure magic; it seals in a little moisture while guaranteeing that beautiful, deep golden shine that makes them look professionally done. If you skipped the coarse sugar earlier, now is the time to sprinkle a tiny bit on top for texture contrast.
They usually need about 14 to 18 minutes. Keep an eye on them, but try not to open the oven door too much while they are puffing up! You’ll know they are done when the tops are nicely browned and, if you gently tap the bottom, they sound a little hollow. Too short, and the inside will be doughy; too long, and we lose that soft crumb we worked so hard for. Pop them out and let them catch their breath on a wire rack for just five minutes before slathering them with butter or jam. Enjoy that incredible, fresh-from-the-oven smell!
Flavor Variations for Your Simple Scone Base Recipe
This is the best part about having a fantastic base recipe, and trust me, this buttermilk base is rock solid! It means you don’t need a brand new recipe every time you want a blueberry batch or some zingy lemon flavor. You have the perfect canvas for making all sorts of delicious scones. We’re talking about taking the dough you just made and transforming it into something totally new in mere minutes. It keeps your baking exciting without adding any extra stress to your Sunday!
I think it’s so much fun to adapt these ratios. For instance, if you’re interested in learning how to make a few other quick breads like my spiced donut recipe, you can peek at that here: cinnamon sugar donuts recipe. But back to our scones!
Ideas for Perfect Afternoon Tea Scones
When I think of afternoon tea, I picture elegance, right? For that refined experience, sometimes you want the scones to be light and serve as the perfect vehicle for clotted cream and strawberry jam. For traditional English scones or something light enough for high tea, stick to the plain recipe, maybe flavoring just the flour mix with a teaspoon of vanilla or some finely grated lemon zest. The key here is subtlety so the toppings truly shine.
If you want a little extra sweet finish that screams ‘fancy,’ you can whip up the easiest lemon glaze. Just whisk together powdered sugar with a tablespoon of fresh lemon juice—and I mean *just* enough juice until it’s creamy but still thick enough to cling to the top of the scone. Drizzle that over your cooled lemon-zest scones! For those who want the ultimate expert rundown on achieving height across various flavors, check out this amazing resource on how to make perfect scones.
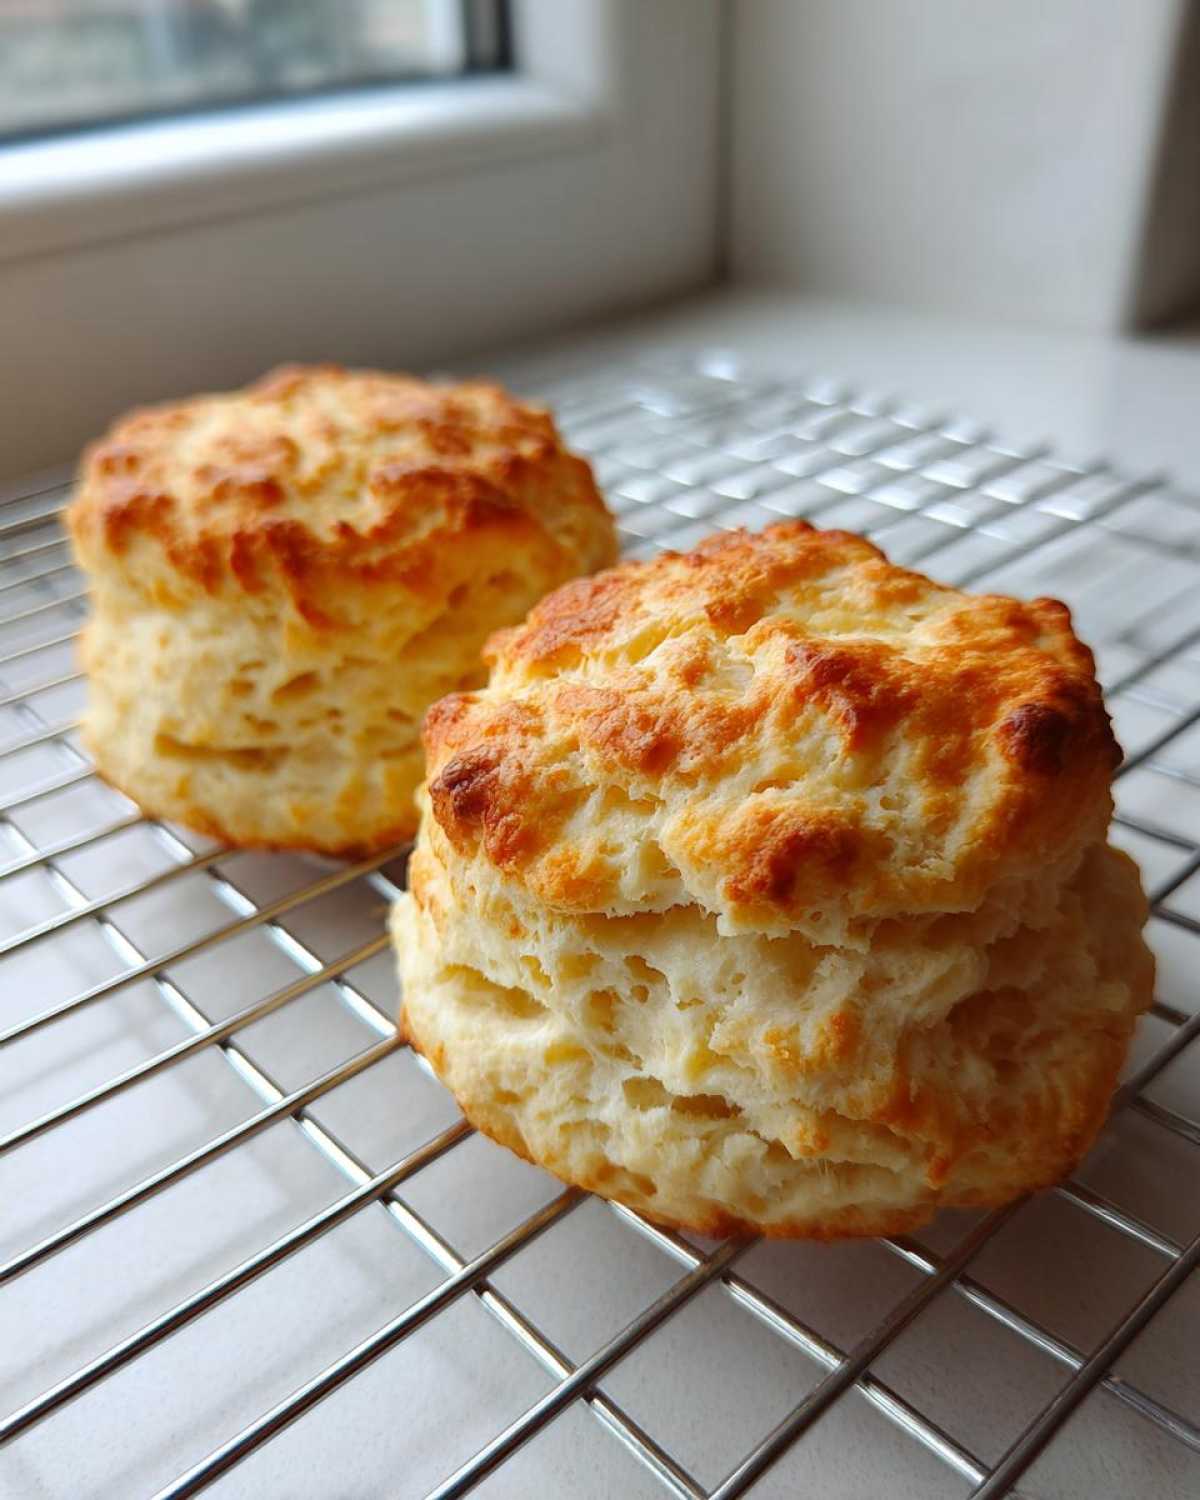
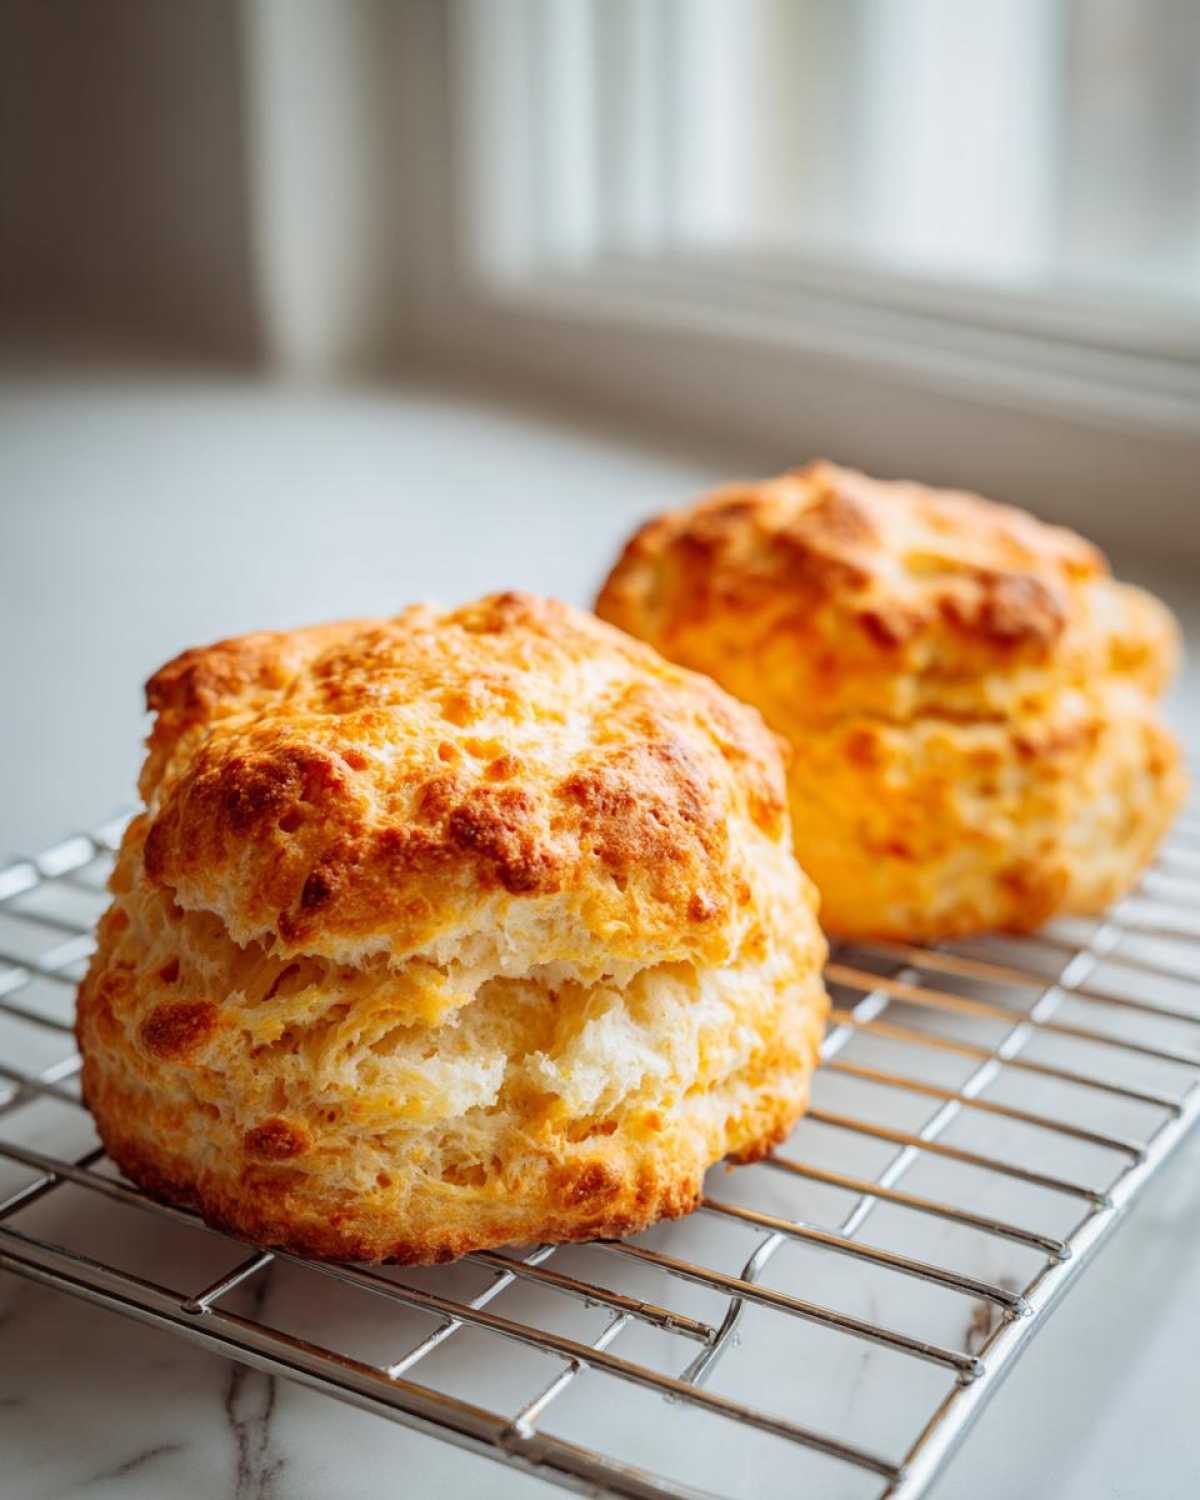
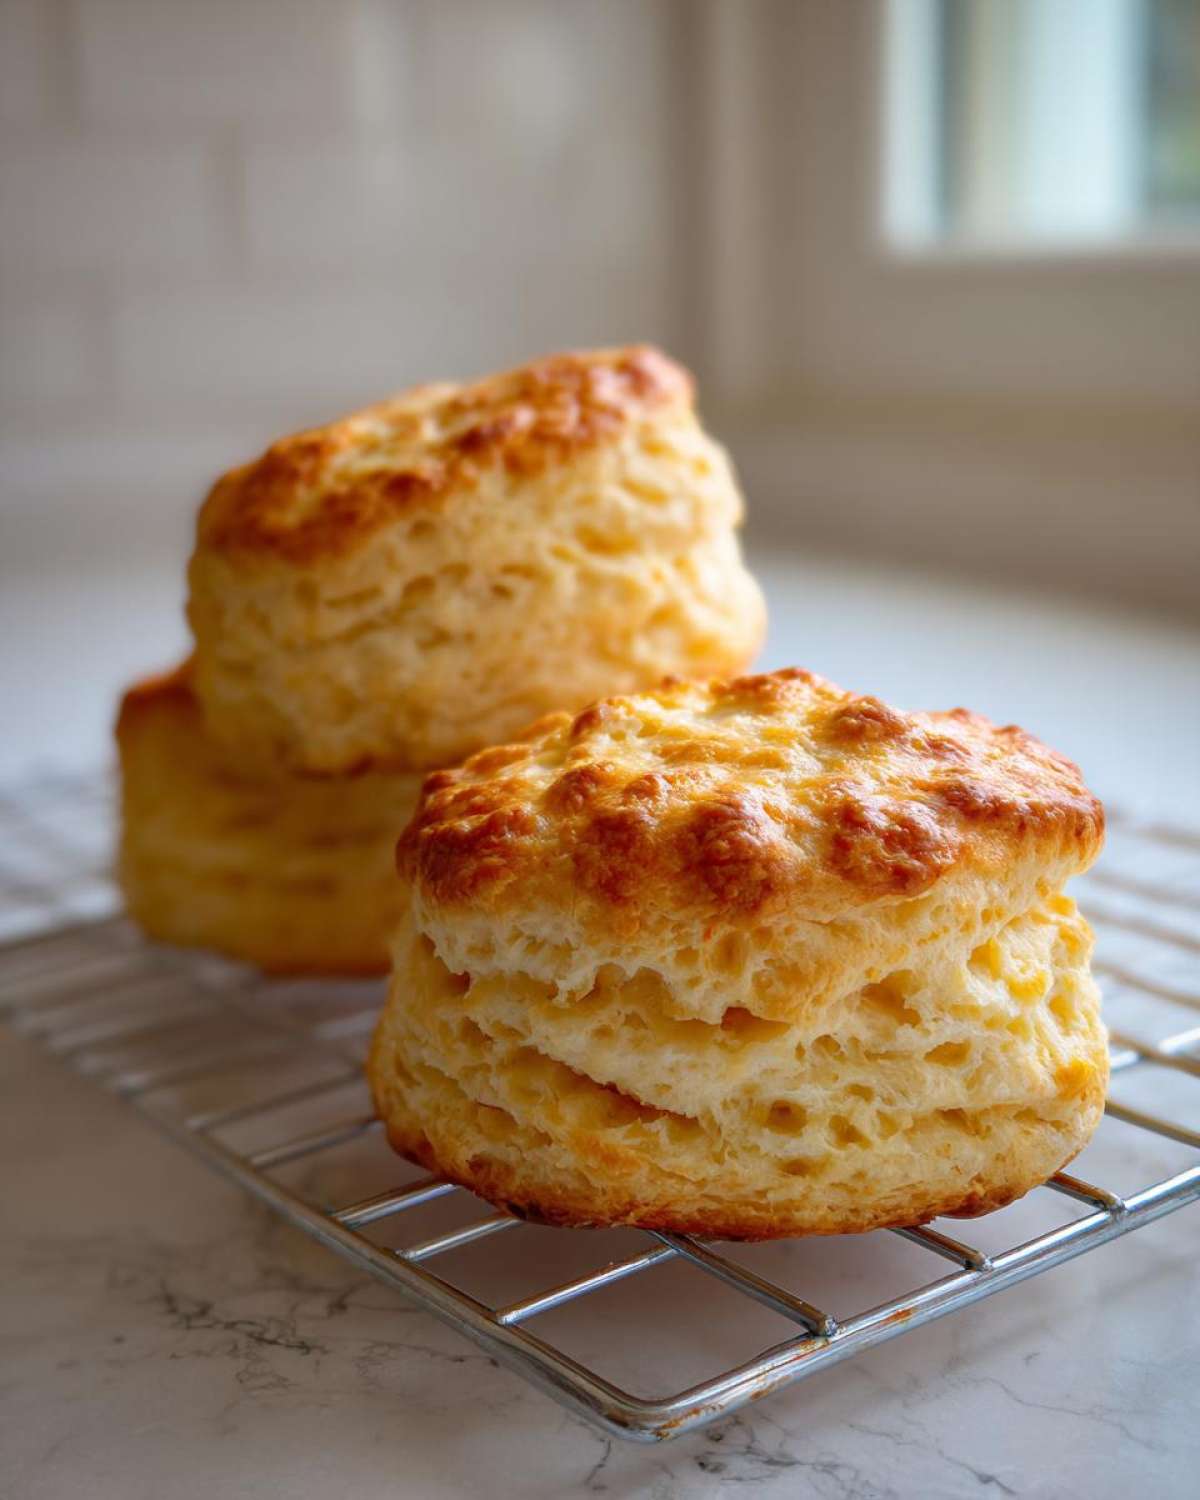
Now, if you want to go bolder, you just add them into the dough right after the buttermilk: toss in a cup of fresh blueberries (gently!), or try adding half a cup of sharp, shredded cheddar and a teaspoon of dried chives for savory scones. Cheese scones are a total game-changer for brunch, by the way. Just remember to keep stirring to an absolute minimum once those mix-ins are in there!
Storage and Make Ahead Scones Tips
I know life gets hectic, and sometimes you can’t eat all eight perfect, tall scones the minute they come out of the oven—even though you really, really want to! Don’t fret about leftovers; these are fantastic for planning ahead. My goal is always to make sure you get that fresh-baked flavor whenever you crave it, which is why I break storage down into two parts: baked and unbaked.
For baked scones, storing them is super easy. If you plan to eat them within two days, just keep them tightly wrapped in plastic wrap or store them in an airtight container at room temperature. Countertop storage is best because chilling them can sometimes make them a little dry too quickly. If you want them to taste like they just came out of the oven the next morning, just pop one in the microwave for about 10 to 15 seconds. Wow, they revive beautifully!
Now, for true Make Ahead Scones success, you need to leverage the freezer. This is my absolute favorite trick for busy weekends. Once you’ve cut your raw dough shapes (Step 6 or 7), place the unbaked scones on a parchment-lined baking sheet and flash freeze them until they are solid. Then, transfer the frozen rounds into a freezer bag. When you wake up craving a fluffy scone, you don’t even need to thaw them! Just preheat your oven, brush them with the egg wash, and toss them straight onto the sheet. You’ll need to add about 5 extra minutes to your baking time, but trust me, biting into a fresh, hot scone on a Tuesday morning feels like cheating in the best possible way!
Troubleshooting Common Scone Issues
Even when following the very best recipe, sometimes things go a little sideways in the oven. Don’t you dare throw those flat, sad-looking things in the bin! Every baker, myself included, has had days where the scones just didn’t cooperate. That’s totally normal, and honestly, figuring out *why* they failed is how we turn into truly confident bakers. I’ve collected the top three complaints I hear about this quick bread recipe and what you can do to fix them next time.
If you’ve found your scones look a bit defeated, read through this list. It usually comes down to temperature or mixing technique!
Problem 1: My Scones Fell Flat and Didn’t Rise High.
When you wanted those gorgeous, tall bakery style scones but ended up with something closer to a pancake, it almost always points to a temperature issue or a sealing issue. Did your butter melt before it even hit the flour? If the butter isn’t ice cold, it melts immediately into the flour instead of creating those steam pockets we need for lift. Also, check your cutting technique. Did you twist that biscuit cutter? Twisting is the enemy of height because it seals the edges, preventing the dough from climbing upwards!
Problem 2: My Scones Are Tough and Chewy, Not Flaky.
This is perhaps the most common heartbreak when making homemade scones, and the culprit is 99% of the time: overmixing. You have to stop stirring the second the liquid is incorporated. What happens is you develop the gluten in the flour, giving you a chewy texture, like bread, instead of a tender, crumbly bite. Remember that shaggy dough we talked about? If you mixed past that point, you’ve gone too far. Next time, stop stirring before you think you should.
Problem 3: My Scones Seem Dry After Baking.
Dryness can sneak in right at the end. While buttermilk helps immensely, baking time is crucial for a moist scone recipe. If you baked them too long—even an extra five minutes can make a difference—the residual moisture evaporates. Also, check if you used a lower-fat liquid than the buttermilk called for. Using skim milk instead of buttermilk or heavy cream will result in a drier crumb because the fat content just isn’t there to keep things tender during the bake. Always check them right at the 14-minute mark!
Frequently Asked Questions About Making Scones
I love hearing from you all, and honestly, the questions that pop up after my readers try a new recipe are the best part of running Sunday Flavor! Most of the time, your baking concerns revolve around that perfect texture we talked about—keeping them tall, flaky, and moist. If you’ve still got a burning question about your batch of scones, maybe it’s answered here. If not, feel free to send me a note on my contact page!
Should I twist the biscuit cutter when cutting out the shapes?
Oh, please, please, please do not twist the cutter! I know it feels natural, like you are getting a better seal, but twisting actually crimps the sides of the dough shut. When the dough heats up in the oven, it needs to be able to expand straight up like a little accordion catching air. If you seal the edges by twisting, you sabotage your chances of getting those stunningly tall bakery style scones. Press straight down firmly until you feel the bottom cut through, then lift straight up! This is non-negotiable for that tender crumb!
Can I use regular milk instead of buttermilk for this Easy Homemade Scones recipe?
You absolutely can! If you’re in a rush and don’t have buttermilk on hand, you can easily make a substitute. Take 1 cup of regular whole milk (or half-and-half if you have it!) and stir in one tablespoon of white vinegar or fresh lemon juice. Let that mixture sit on the counter for about five minutes until it curdles slightly and thickens up. This mimics the acidity of buttermilk ever so slightly, which helps activate the baking powder for some lift. Using whole milk will give you a slightly less tender result than true buttermilk, but these will still be wonderfully moist scone recipe favorites!
How do I get a crisp edge versus a soft side on my scones?
This is such a fun little customization trick! It all comes down to how you place them on the baking sheet. If you like those soft, easy peel-apart sides that are common in traditional English tear-and-share scones, arrange them so they are just touching each other on the parchment paper. They have to grow into each other, which keeps the sides tender. If you prefer that crunchy exterior all the way around—perfect for your upcoming brunch—give them some personal space! I leave about an inch between each one, and the circulating hot air gives you crispy edges all around.
Why do my scones taste dense instead of light and fluffy?
If your scones aren’t light, nine times out of ten it comes down to two suspects: warm butter or overmixing. If the butter isn’t really cold, it incorporates too thoroughly into the flour before baking, meaning there are no cold fat pockets to create steam and lift. That leads to a dense texture. Secondly, revisit the mixing stage. Did you mix everything until the dough looked perfectly uniform? If so, you developed gluten! We want the dough to be shaggy and slightly messy when you turn it out to knead those mere few times. This is the cornerstone of a successful Fluffy Scones Tutorial!
Can I make these scones savory instead of sweet?
Oh, yes! These are the best for adapting to savory flavors. For perfect cheese scones, all you need to do is omit the 1/4 cup of sugar completely. Then, when you are cutting in the butter (Step 3), toss in about 3/4 cup of sharp, freshly grated cheddar cheese. I sometimes sneak in a teaspoon of finely chopped chives or a pinch of cayenne pepper for a little kick—they are divine served warm with just a smear of butter!
What is the best way to serve these buttery scones?
While they are heavenly plain, the absolute classic way to serve these Best Ever Scone is warm, split in half, with clotted cream and your favorite fruit preserve. For a truly special occasion, like an afternoon tea gathering, strawberry jam is the standard. If you made a cheddar scone, skip the jam and just use soft, room-temperature butter. Seriously, it’s delicious!
Nutritional Estimate for These Buttermilk Scones
If you’re tracking macros or just curious, I always like to provide a basic snapshot! Based on the recipe above, one scone serving (without any toppings like jam or cream added) is estimated to contain about 280 calories and 15g of fat. Please remember these numbers are just my best guess based on the ingredients I used, so treat them as a fun guideline rather than strict nutritional fact. For official details, please review my standard site disclaimer.
PrintThe Ultimate Tall, Flaky Scones Recipe (Buttermilk Base)

Learn how to bake tall, flaky, and buttery scones that rival your favorite bakery. This easy homemade recipe uses buttermilk for a moist interior and is perfect for afternoon tea or brunch. Includes tips for achieving bakery-style height.
- Prep Time: 15 min
- Cook Time: 18 min
- Total Time: 33 min
- Yield: 8 servings
- Category: Breakfast
- Method: Baking
- Cuisine: American
- Diet: Vegetarian
Ingredients
- 2 cups all-purpose flour
- 1/4 cup granulated sugar
- 1 tablespoon baking powder
- 1/2 teaspoon salt
- 1/2 cup (1 stick) cold unsalted butter, cut into small cubes
- 1 cup cold buttermilk
- 1 large egg, beaten (for egg wash)
- 1 tablespoon coarse sugar (optional, for topping)
Instructions
- Preheat your oven to 400°F (200°C). Line a baking sheet with parchment paper.
- In a large bowl, whisk together the flour, granulated sugar, baking powder, and salt.
- Add the cold, cubed butter to the dry ingredients. Use a pastry blender or your fingertips to cut the butter into the flour until the mixture resembles coarse crumbs with some pea-sized pieces of butter remaining. This step is key for flaky scones.
- Make a well in the center of the flour mixture and pour in the cold buttermilk. Use a fork to mix until just combined. Do not overmix; the dough will look shaggy.
- Turn the dough out onto a lightly floured surface. Gently knead the dough 3 to 4 times, just enough to bring it together.
- Pat the dough into a 3/4-inch thick circle or rectangle. For tall scones, fold the dough in half, then fold it in half again (like folding a letter). Pat it back down to about 1-inch thickness.
- Use a sharp, floured biscuit or round cutter (about 2.5 inches) to cut out the scones. Press the cutter straight down without twisting to keep the edges clean and promote height. Rework scraps once if necessary.
- Place the cut scones onto the prepared baking sheet, ensuring they are touching slightly if you prefer softer sides, or spaced apart for crispier edges.
- Brush the tops lightly with the beaten egg wash and sprinkle with coarse sugar, if using.
- Bake for 14 to 18 minutes, or until the tops are golden brown and the scones are cooked through.
- Transfer the scones to a wire rack to cool slightly. Serve warm.
Notes
- For the best texture, keep all your ingredients, especially the butter and buttermilk, very cold before mixing.
- To achieve tall bakery style scones, avoid twisting the biscuit cutter; press straight down firmly.
- If you want flavor variations, gently fold in 1 cup of blueberries or mini chocolate chips after mixing the dough, or brush with a simple lemon glaze after baking.
Nutrition
- Serving Size: 1 scone
- Calories: 280
- Sugar: 6
- Sodium: 350
- Fat: 15
- Saturated Fat: 9
- Unsaturated Fat: 6
- Trans Fat: 0
- Carbohydrates: 32
- Fiber: 1
- Protein: 6
- Cholesterol: 55

Comments are closed.