


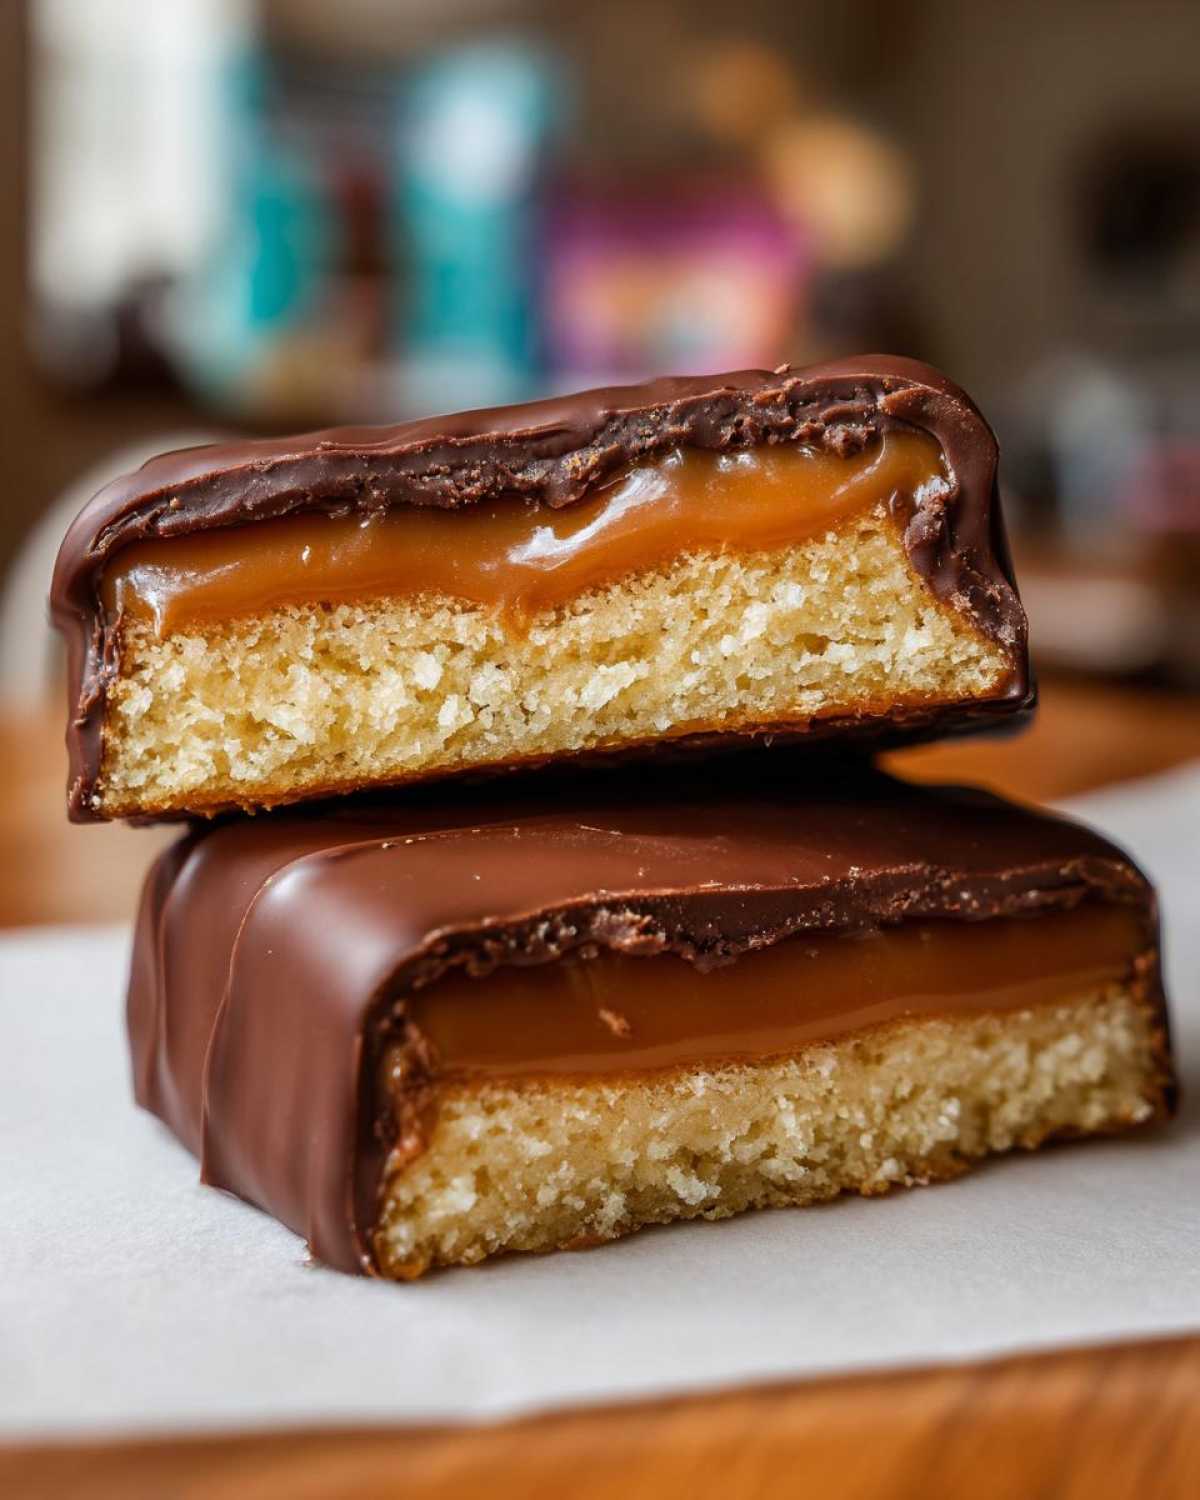
Listen, I get it. Sometimes you just need that perfect crunch of shortbread, that river of gooey caramel, and that crisp snap of chocolate, but you don’t want to unwrap a whole candy bar. That’s why I spent far too many afternoons testing batches of dough until I nailed it. Forget those hard, crumbly imitations! My recipe for the **ultimate soft and chewy Twix cookies** changes the game. We’re talking rich, buttery shortbread that melts in your mouth, followed by a genuine, stretchable caramel topping. Trust me, getting that center layer just right took patience, but now that I’ve figured out the secret to keeping it soft even after baking, these homemade candy bar cookies are my go-to for satisfying any craving. You’re going to want to make a double batch!
Why You Will Love These Ultimate Soft and Chewy Twix Cookies
I know there are a million cookie recipes out there, especially when it comes to copycat candy bar cookies, but these truly stand head and shoulders above the rest. I wouldn’t bother sharing a recipe with you if it didn’t blow the original candy bar out of the water. Here’s what makes these the best on the internet:
- They are intensely soft! We’re aiming for melt in your mouth cookies, not hard shortbread disks.
- The caramel layer is truly gooey. No stale, chewy caramel here; this layer stays lush even after cooling completely.
- The shortbread base is super buttery. It has that perfect structural integrity to hold up the toppings without tasting dry.
- Assembly is shockingly easy! We aren’t dealing with complicated tempering or fiddly layers; these are simple layered cookies.
- They freeze beautifully! Make a huge batch now, then pull them out whenever a craving hits for a decadent homemade candy.
- They replicate that iconic candy flavor almost perfectly—it’s instant nostalgia!
Gathering Ingredients for Your Homemade Twix Cookies
Okay, let’s talk components! The magic of these **homemade Twix cookies** really comes down to three layers working in perfect harmony. You can’t just substitute anything here if you want that genuine candy bar crunch balanced with softness. I’ve linked my favorite brownie recipe here if you need another layered project next week, but for these cookies, stick to these quantities!
For the Buttery Shortbread Cookie Base
This is the foundation, so make sure your butter is actually softened—not melted! It really makes a difference in how fluffy this shortbread dough gets. Don’t grab margarine, either; real unsalted butter is the key to that rich flavor!
- 1 cup (2 sticks) unsalted butter, softened
- 1/2 cup granulated sugar
- 1/4 cup packed light brown sugar—using the brown sugar here helps keep the shortbread from being too pale and chalky!
- 1 teaspoon vanilla extract
- 1 large egg yolk (just the yolk for richness, trust me!)
- 2 1/4 cups all-purpose flour
- 1/2 teaspoon salt
For the Gooey Caramel Layer
This is where most candy bar cookie recipes fail, but we are going to succeed! You absolutely must use soft caramel candies, and make sure they are unwrapped before you start your prep work. You don’t want to be peeling little wrappers while the dough clock is ticking!
- 1 cup soft caramel candies, unwrapped
- 2 tablespoons heavy cream or milk
For the Chocolate Coating
I prefer milk chocolate chips because they taste the most like the actual candy bar, but if you like a bit more bite, semi-sweet works too. The optional coconut oil is my secret weapon for making dipping ridiculously smooth.
- 1 cup milk chocolate chips
- 1 tablespoon coconut oil (optional, but recommended for that smooth finish when dipping)
Step-by-Step Instructions for Easy Twix Cookies
This is where the magic really happens, and honestly, it feels like assembling a mini candy bar right on your countertop! Don’t stress about timing; these **caramel chocolate cookies** come together super fast, as long as you follow the order. If you need another quick recipe to keep things moving while your cookies bake, check out my easy corn soup—it’s different, I know, but it’s fast!
Making the Buttery Shortbread Cookie Dough
First things first, let’s get that oven ready for baking! We need things hot to get that perfect golden edge on the shortbread.
- Preheat your oven to 350 degrees Fahrenheit. Then, line a couple of baking sheets with parchment paper. This prevents sticking later, which is a lifesaver!
- In a large bowl, you’ll cream together that softened butter, the granulated sugar, and the brown sugar until it gets nice and fluffy. This is called ‘creaming,’ and it really whips air into the dough base.
- Once it looks light, beat in the vanilla extract and that single egg yolk until they are just combined. Don’t go crazy mixing here; we want it incorporated, not fluffy again.
- In a separate bowl, whisk your flour and salt together first. Then, add those dry ingredients gradually to the wet ingredients. Mix this on low speed until you just see a soft dough start to form. Seriously, stop mixing when the flour streaks disappear! Overmixing makes these shortbread cookies tough instead of tender.
Baking and Cooling the Cookie Bases
Now we turn that gorgeous, soft dough into solid cookie bases ready for topping. This step is crucial for a great final texture.
- Roll your dough into 1-inch balls. Place them on the prepared sheets, leaving about 2 inches between them because they do spread a little. Then, take the bottom of a drinking glass and gently flatten each ball slightly.
- Bake these amazing shortbread bases for 10 to 12 minutes. You are looking for the edges to be just barely golden brown. Let them cool right there on the baking sheet for about 5 minutes—this helps them firm up—before moving them carefully to a wire rack to cool completely. They must be totally cool before the caramel goes on!
Assembling the Caramel Chocolate Cookies
We’re moving on to the best part: the gooey, sticky layers! Melting the caramel is easiest in the microwave, but you just have to be careful not to scorch it.
- To prepare the caramel layer, put your unwrapped caramel candies and the heavy cream (or milk) into a microwave-safe bowl. Microwave this in 30-second bursts, stirring really well between each one, until the mixture is completely smooth and glossy.
- Once your cookies are totally cooled, take about 1 teaspoon of that warm caramel mixture and spread it right over the top of each cookie. Now, you have to let these set for about 15 minutes. It feels like forever, but this sets the sticky layer so it doesn’t run everywhere into your chocolate!
- While we wait, make the chocolate coating. Put your milk chocolate chips and the optional coconut oil in another bowl. Microwave again, in 30-second intervals, stirring until the chocolate is beautifully smooth and dippable.
- Finally, it’s dipping time! You can dip the caramel side of the cookie right into the melted chocolate, or if you prefer less mess, just drizzle the chocolate over the caramel layer. Let that chocolate set hard before you even dream of trying one. That’s the final stage before you serve these glorious **copycat candy cookies**!
Expert Tips for the Best Twix Cookies
I’ve tinkered with this recipe enough times to know exactly what makes the difference between a good cookie and one that tastes exactly like your favorite candy bar. Don’t skip these little tricks—they are the secrets my notes shared with me over time!
- For a softer shortbread base, which I highly recommend if you want those super chewy caramel treats, chill the dough for 30 minutes before you roll it out and flatten it. It keeps the structure tight but ensures a more tender bite.
- If you look at the recipe and think, “I want more caramel!”—go for it! You can absolutely use slightly more caramel mixture per cookie, but just be careful; too much, and it might ooze out while the chocolate sets.
- While I swear by the milk chocolate chips for authenticity, don’t let that stop you if you prefer richness. Semi-sweet chocolate works like a charm for a deeper flavor throughout the coating.
- My extra tip? Don’t let that caramel mixture cool too long before spreading it onto the cookies. If it gets too stiff, it’s impossible to spread evenly, and you’ll end up with messy, uneven layers on your Twix cookies. Warm but spreadable is the target consistency!
Variations on Twix Cookies
I love my recipe exactly as written because it gives you that perfect, satisfying chew, but honestly, baking is all about making things your own! If you’re making these for a big holiday cookie swap, sometimes you need a quicker format or a slight change-up in texture. I’ve got a couple of ideas that still honor that classic candy bar flavor profile.
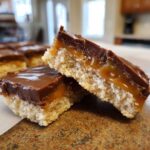
First off, if you’re tired of scooping and shaping individual cookie balls, let’s switch gears and make **Twix cookie bars**. Instead of rolling the dough into balls, press all the shortbread dough evenly into a greased 9×9 inch pan. Bake it the same way (10 to 12 minutes, checking the edges), let it cool slightly, and then drizzle that melted caramel evenly over the top. Once the caramel sets a little, pour your melted chocolate over everything! You slice them into squares once the chocolate is firm. They are even easier to transport this way!
Another fun twist, especially if you have slightly less dough than usual, is to make **thumbprint Twix cookies**. Roll the dough into balls like normal, but instead of flattening them with a glass, use your thumb (or the back of a small spoon) to create a deep well in the center of each cookie before baking. After they come out and cool, you fill that little indentation right up to the edge with the warm caramel. Then, you can dip the bottom of the entire cookie into the chocolate for a half-dipped look. It’s super cute for a platter!
If you want to add some serious crunch to the shortbread base, try adding a half cup of finely chopped pecans or peanuts right in with the dry ingredients when you mix the flour. Nuts add warmth and complexity—though be careful if you’re serving folks with allergies, of course. If you’re looking for an entirely different texture, though maybe less like the original candy, you might want to check out my recipe for cheesecake brownie cookies—though those are a whole different level of decadence!
Finally, playing with the chocolate is easy. If you want a richer, darker flavor, swap out the milk chocolate chips for a good quality bittersweet chocolate. It cuts through the sweetness of the caramel really nicely, giving you a more adult-tasting version of the classic treat.
Storing and Keeping Your Caramel Chocolate Cookies Fresh
Okay, so you’ve made the most decadent **caramel chocolate cookies** imaginable, and now you have to try and save some for later—good luck! Because of that fantastic, gooey layer of caramel we worked so hard on, these cookies need a little special love when it comes to storage. If you just toss them in a container, that caramel can get really hard and sticky, which totally ruins that soft, chewy texture we worked for.
The number one rule for keeping these **copycat candy cookies** just as good the next day is temperature control. I absolutely do *not* recommend storing them in the refrigerator! Seriously, cold air makes that beautiful, soft shortbread base turn rock hard, and the caramel will seize up like concrete. It’s a total texture tragedy.
For the best results, you want to keep these at room temperature. Air-tight containers are your best friend here. Layer them carefully with sheets of wax paper or parchment paper in between each layer. This stops the chocolate tops from sticking to the bottoms of the cookies stacked above them. I usually manage to keep them tasting fantastic for about three to four days this way.
If you manage to make a huge batch—because honestly, who doesn’t?—and you need to keep them longer than four days, the freezer is the way to go. Wrap the cooled, assembled cookies individually in plastic wrap first. This seals out any freezer air that could dry them out. Then, pop them into a heavy-duty freezer bag. They’ll keep perfectly for up to two months! When you want one, just pull it out and let it sit on the counter for about an hour while it comes up to room temperature. That time allows the caramel to soften back up to its amazing, gooey state, and you get that perfect bite just like when you first made them!
Making Twix Cookies for Holiday Cookie Ideas
You know, when people start asking me for **holiday cookie ideas** in late October, I immediately point them straight to this recipe. Why? Because they look incredibly fancy and decadent, but they are secretly so easy to assemble thanks to that layering trick we mastered. They absolutely dominate in any cookie swap or batch you bring to a party!
These **winter dessert recipes** are always crowd-pleasers, especially because everyone loves a good candy bar, and these homemade versions always taste better. If you’re planning for large-scale baking, the assembly line method really shines here. You can have one person dedicated to caramel spreading, one to chocolate dipping, and another to just cooling and stacking. It cuts the time down hugely!
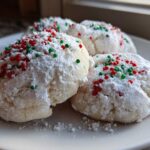
Now for the festive touch! Since the chocolate coating sets relatively quickly, it’s the perfect time to add a little sparkle if you want to elevate these **copycat candy cookies** for Christmas or New Year’s gatherings. Right after you dip or drizzle the chocolate—and I mean within 30 seconds while it’s still slightly wet—sprinkle them lightly with gold or silver sanding sugar. Another fun idea is to use crushed peppermint candy canes if you’re leaning into a peppermint mocha vibe. It looks absolutely stunning against the dark chocolate.
I actually featured these in my small-batch baking feature last year, because while they look complex, they’re faster than rolling out gingerbread! If you feel like tackling another fun, show-stopping baked good that features incredible swirls, you should take a peek at my swirled blackberry lavender sheet cake recipe. But for quick, satisfying holiday treats that taste like childhood, these **Twix cookies** are unbeatable!
Frequently Asked Questions About Twix Cookies
I know you probably have a few lingering questions after seeing how many steps are involved in layering all that caramel and chocolate! Don’t worry, that’s perfectly normal. I’ve answered the three most common things people ask me when they try to make my **best Twix cookie recipe** for the first time. If you have another question, just head over to my contact page and drop me a note!
Can I substitute the shortbread base for a chewier cookie dough in these Twix cookies?
That is such a great question that gets right to the heart of the candy bar experience! The shortbread base is really what distinguishes an actual Twix from a standard chocolate chip cookie. It provides that necessary crisp-yet-tender snap that balances the gooey topping. If you absolutely must have a totally softer bite, you can try pulling the shortbread out of the oven a minute or two early—around the 9-minute mark—and let it cool completely before adding the toppings. This might give you the texture you associate with **chewy caramel treats**, but be warned: too soft, and it won’t quite taste like the candy bar you’re trying to copycat!
What is the best way to get a smooth chocolate coating?
This is the make-or-break moment for the final presentation of your **chocolate coated cookies**, right? If you just melt the chips alone, they seize up fast and look thick and dull when they dry. My number one trick, which I included in the ingredient list, is adding a tiny bit of fat. That tablespoon of coconut oil—or even shortening—is what makes the difference! It lowers the melting point slightly and keeps the chocolate fluid for longer, allowing you to get a thinner, smoother coat when you dip.
If you are feeling really advanced and want that professional snap you get from high-end chocolate, you could try actual tempering techniques, but honestly, for simple **homemade Twix cookies**, the coconut oil is foolproof enough for everyday baking and still looks fantastic!
We should also touch on storage, because if the chocolate melts a bit during storage, they get sticky fast. Don’t store these in a warm spot!
Estimated Nutritional Information for These Copycat Candy Cookies
Since we are recreating a candy bar experience, I know some of you are curious about what exactly goes into these rich little bites. I always try to be as transparent as possible about what goes into my family’s favorite recipes, which is why I always feel it’s important to share this breakdown. Keep in mind that because we are using real butter, actual caramel candies, and thick layers of chocolate, these are definitely a treat!
The figures below are just an estimate based on standard ingredients and amounts listed in the recipe. If you use different brands or swap out the chocolate type, your numbers will shift a bit, which is why I always encourage you to check out my full disclaimer if you are tracking macros very closely!
Here is the estimated nutrition breakdown for one of these incredible **copycat candy cookies**:
- Serving Size: 1 cookie
- Calories: 180
- Sugar: 18g
- Fat: 10g (with about 6g being saturated fat from the butter and chocolate)
- Carbohydrates: 22g
- Protein: 2g
- Sodium: 85mg
See? Decadent, but worth every single calorie when you bite into that perfect combination of buttery shortbread, gooey caramel, and rich chocolate. Enjoy them!
PrintUltimate Soft and Chewy Twix Cookies
Make homemade cookies that taste like a Twix bar, featuring a buttery shortbread base, a layer of gooey caramel, and a milk chocolate topping.
- Prep Time: 25 min
- Cook Time: 12 min
- Total Time: 37 min
- Yield: About 30 cookies
- Category: Dessert
- Method: Baking
- Cuisine: American
- Diet: Vegetarian
Ingredients
- 1 cup (2 sticks) unsalted butter, softened
- 1/2 cup granulated sugar
- 1/4 cup packed light brown sugar
- 1 teaspoon vanilla extract
- 1 large egg yolk
- 2 1/4 cups all-purpose flour
- 1/2 teaspoon salt
- 1 cup soft caramel candies, unwrapped
- 2 tablespoons heavy cream or milk
- 1 cup milk chocolate chips
- 1 tablespoon coconut oil (optional, for smoother dipping)
Instructions
- Preheat your oven to 350 degrees Fahrenheit. Line baking sheets with parchment paper.
- In a large bowl, cream together the softened butter, granulated sugar, and brown sugar until light and fluffy.
- Beat in the vanilla extract and egg yolk until just combined.
- In a separate bowl, whisk together the flour and salt. Gradually add the dry ingredients to the wet ingredients, mixing on low speed until a soft dough forms. Do not overmix.
- Roll the dough into 1-inch balls and place them on the prepared baking sheets, leaving 2 inches between each ball. Flatten each ball slightly with the bottom of a glass.
- Bake for 10 to 12 minutes, or until the edges are lightly golden. Let the cookies cool on the baking sheet for 5 minutes before transferring them to a wire rack to cool completely.
- Prepare the caramel layer: Place the unwrapped caramel candies and heavy cream in a microwave-safe bowl. Microwave in 30-second intervals, stirring well after each interval, until the caramel is smooth and melted.
- Once the cookies are completely cool, spread about 1 teaspoon of the warm caramel mixture onto the top of each cookie. Let the caramel set for about 15 minutes.
- Prepare the chocolate coating: Place the milk chocolate chips and coconut oil (if using) in a microwave-safe bowl. Microwave in 30-second intervals, stirring until the chocolate is smooth.
- Dip the caramel side of each cookie into the melted chocolate, or drizzle the chocolate over the caramel layer. Allow the chocolate to set completely before serving.
Notes
- For a softer shortbread base, chill the dough for 30 minutes before rolling and flattening.
- If you prefer a thicker caramel layer, use slightly more caramel mixture per cookie.
- You can use semi-sweet chocolate instead of milk chocolate for a richer flavor.
Nutrition
- Serving Size: 1 cookie
- Calories: 180
- Sugar: 18
- Sodium: 85
- Fat: 10
- Saturated Fat: 6
- Unsaturated Fat: 4
- Trans Fat: 0
- Carbohydrates: 22
- Fiber: 1
- Protein: 2
- Cholesterol: 30

Comments are closed.