


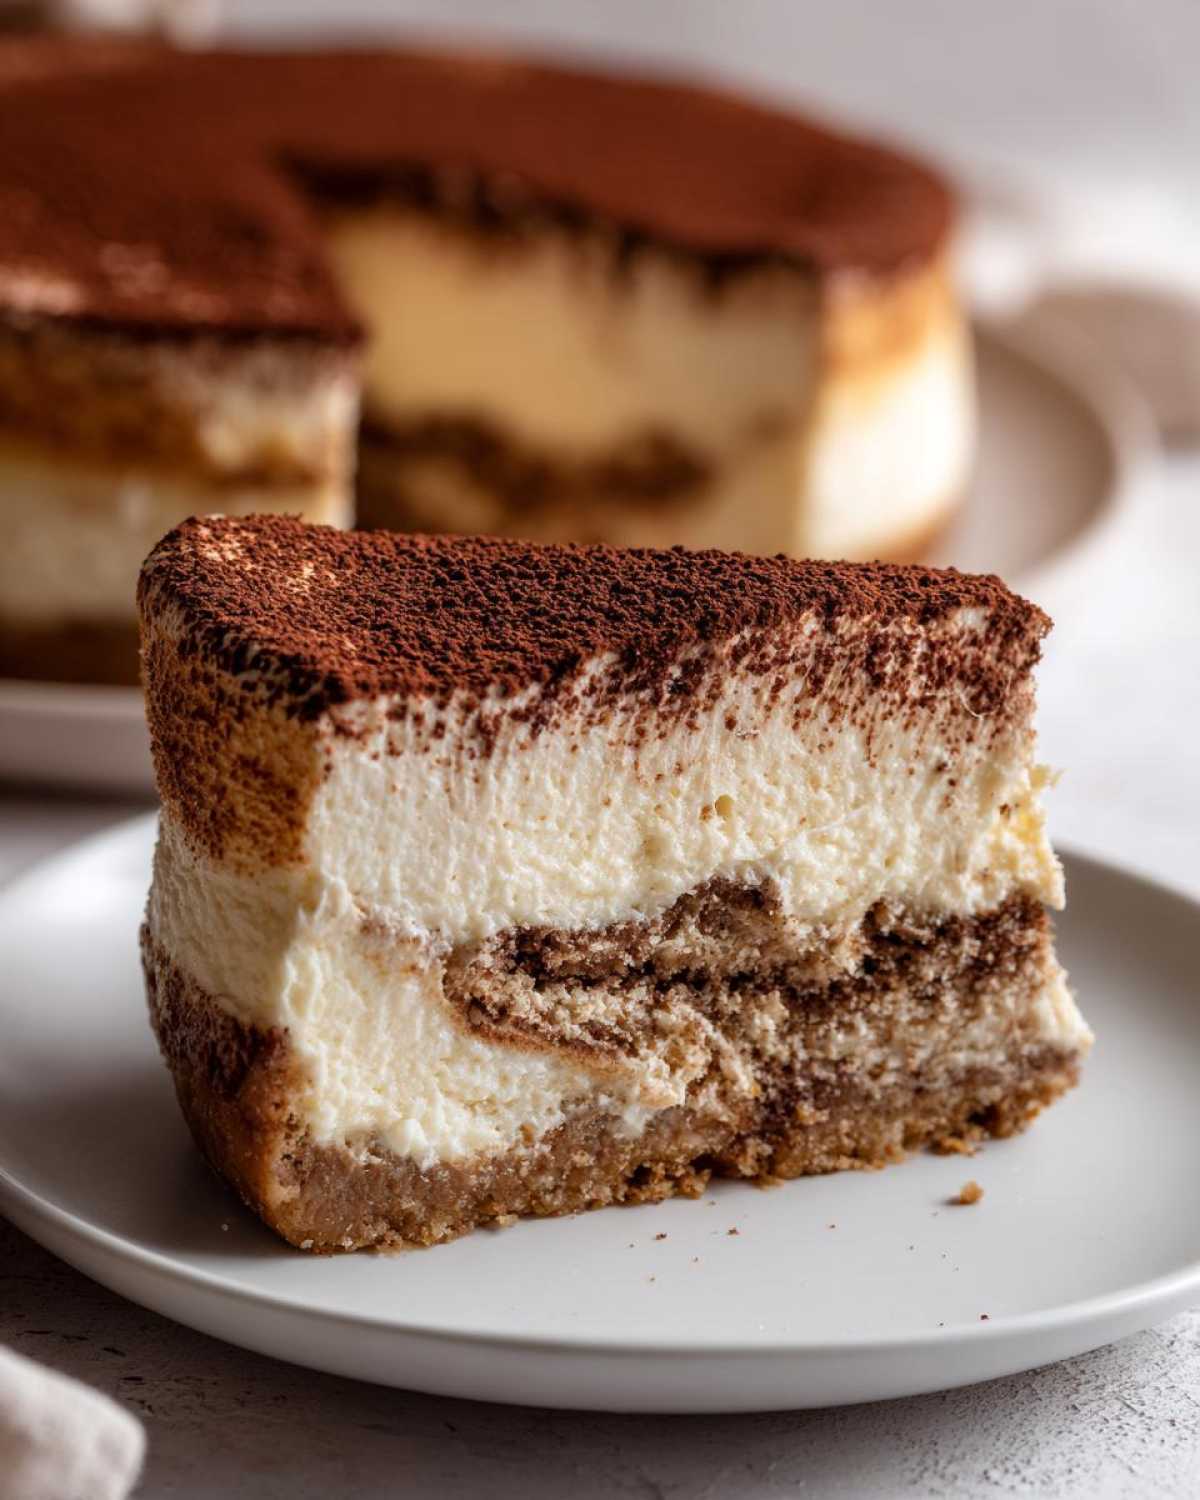
G’day and welcome back to Sunday Flavor! I am so excited you stopped by today because we are tackling something truly spectacular. If you’ve ever stood paralyzed in the dessert aisle wondering whether to choose something rich and creamy or something bold and espresso-soaked, I have the answer: we combine them! We are making the ultimate dessert mashup: the **tiramisu cheesecake**.
Forget everything you thought you knew about hybrid desserts. This isn’t just throwing a few flavors together; this is about achieving balance. We’re taking the velvety, luxurious texture of a classic cheesecake, infusing it with the deep coffee punch and mascarpone elegance of Italian tiramisu, and baking it into an absolute showstopper. If you loved my recipe for classic tiramisu, you’ll appreciate how we’ve elevated those notes here. Trust me, as someone who lives for creating memorable weekend moments, this **Baked Tiramisu Cheesecake** is destined for your next special occasion table. I spent ages perfecting the custard-to-soak ratio to ensure perfect flavor in every single bite.
It’s decadent, it’s elegant, and honestly, it tastes like a standing ovation in dessert form. You absolutely have to try this recipe!
Why This Baked Tiramisu Cheesecake Recipe is a Must-Try
If you are looking for that one dessert that makes everyone stop talking when you bring it out, this is the one. It hits all the best notes, offering complexity without being overly fussy!
The Perfect Italian Dessert Fusion
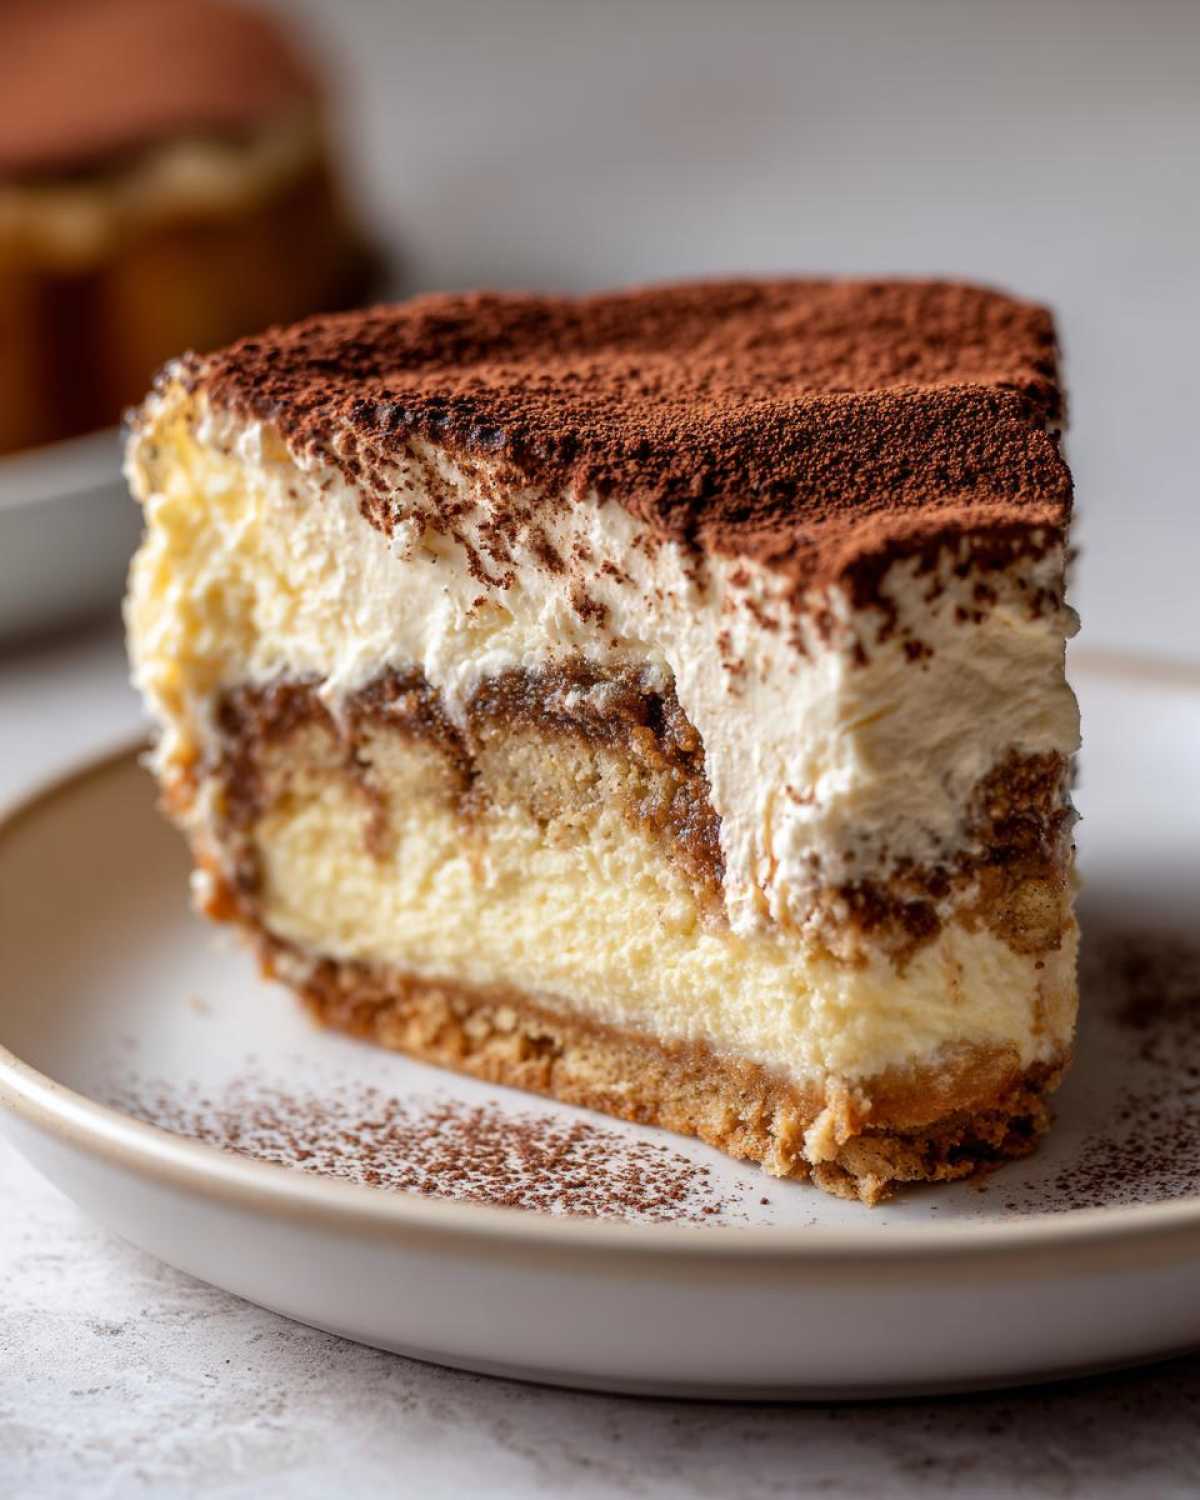
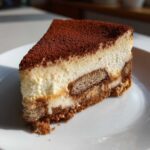
This recipe is pure magic because it unites two powerhouse desserts. It keeps the intensely creamy texture we all crave from the best **Mascarpone Cheesecake Recipe** components, but then we slice through that richness with bold, espresso-soaked ladyfingers. It’s truly a **Decadent Cheesecake** experience—rich, but balanced by that beautiful Italian bitterness.
Ideal for Dinner Parties and Holidays
Listen, when you’re hosting, you want something that looks like you spent three days slaving away, even if you didn’t! This **Baked Tiramisu Cheesecake** is inherently elegant and makes such a fantastic centerpiece. It looks sophisticated, travels well (once chilled!), and definitely falls into my list of favorite **Holiday Cheesecake Ideas**. Plus, because it *needs* to chill, it takes the pressure off you on the actual party day!
Gathering Ingredients for Your Tiramisu Cheesecake Recipe
Okay, let’s talk about the fun part—gathering our glorious ingredients! Because this is a fusion dessert, we need a few special components to make sure we get that true Italian flavor married perfectly to the cheesecake structure. The key here, if you want that amazing **Silky Smooth Cheesecake** texture, is making sure your cheeses are happy before they ever hit the mixer.
Grab your list, because mixing the richness of a great **Mascarpone Cheesecake Recipe** with the coffee base takes a little planning!
For the Chocolate Cookie Crust
We are skipping the traditional graham cracker here because we want that deep chocolate note to complement the coffee, so get ready for a rich base!
- 1 1/2 cups chocolate cookie crumbs (I always mean using Oreos—just toss the whole thing in the food processor, wrapper and all, then discard the wrapper leftovers!)
- 1/4 cup granulated sugar
- 6 tablespoons unsalted butter, melted
For the Creamy Mascarpone Filling
Remember, the secret to no lumps is temperature. Make sure your cream cheese and mascarpone have been sitting out for at least an hour. We want them totally soft!
- 1 pound cream cheese, softened
- 8 ounces mascarpone cheese, softened
- 1 cup granulated sugar
- 1 teaspoon vanilla extract
- 1/4 cup heavy cream
- 3 large eggs (Make sure these are room temp too, please!)
For the Espresso Soak and Dusting
This is where the Tiramisu essence really comes alive. Don’t skimp on the coffee; we want a genuine **Espresso Dessert** punch here!
- 1/2 cup strong brewed espresso, cooled completely
- 2 tablespoons coffee liqueur (Optional, but seriously, a splash of Kahlua makes this divine!)
- 1 package (7 ounces) ladyfingers
- Unsweetened cocoa powder, for dusting (Go heavy on this at the end!)
Step-by-Step Instructions for Baked Tiramisu Cheesecake
Alright, deep breath! This is where we bring the magic together. Don’t let the layers scare you; we’re just building flavor upon flavor. Follow these steps exactly, especially around the baking and cooling, and you will have the most flawless **tiramisu cheesecake** you’ve ever seen. For an extra coffee boost in your espresso soak, check out my thoughts on boosting coffee flavor here: my favorite shaken espresso technique!
Preparing the Crust and Preheating
First things first: fire up that oven to 325°F (160°C) and get your 9-inch springform pan ready! While it preheats, mix up that crust. Combine your chocolate cookie crumbs, that 1/4 cup of sugar, and the melted butter until it looks like wet sand. Press it down *firmly* into the bottom of your pan—you want that strong base to support our creamy layers. Pop it in the oven for 10 short minutes, then take it out to cool slightly while we whip up the filling.
Creating the Silky Tiramisu Cheesecake Filling
Time for the heavy hitters! In your biggest bowl, start by beating the softened cream cheese, mascarpone, 1 cup of sugar, vanilla, and heavy cream until it’s totally seamless. We are aiming for that perfect, lump-free, ultra-smooth texture. Now, add those eggs, but listen closely: add them one at a time, mixing *just* until they disappear into the batter. Seriously, overmixing those eggs is the express lane to cracks, and we want a **Silky Smooth Cheesecake**, not a cracked canyon!
Assembling the Ladyfinger Layers
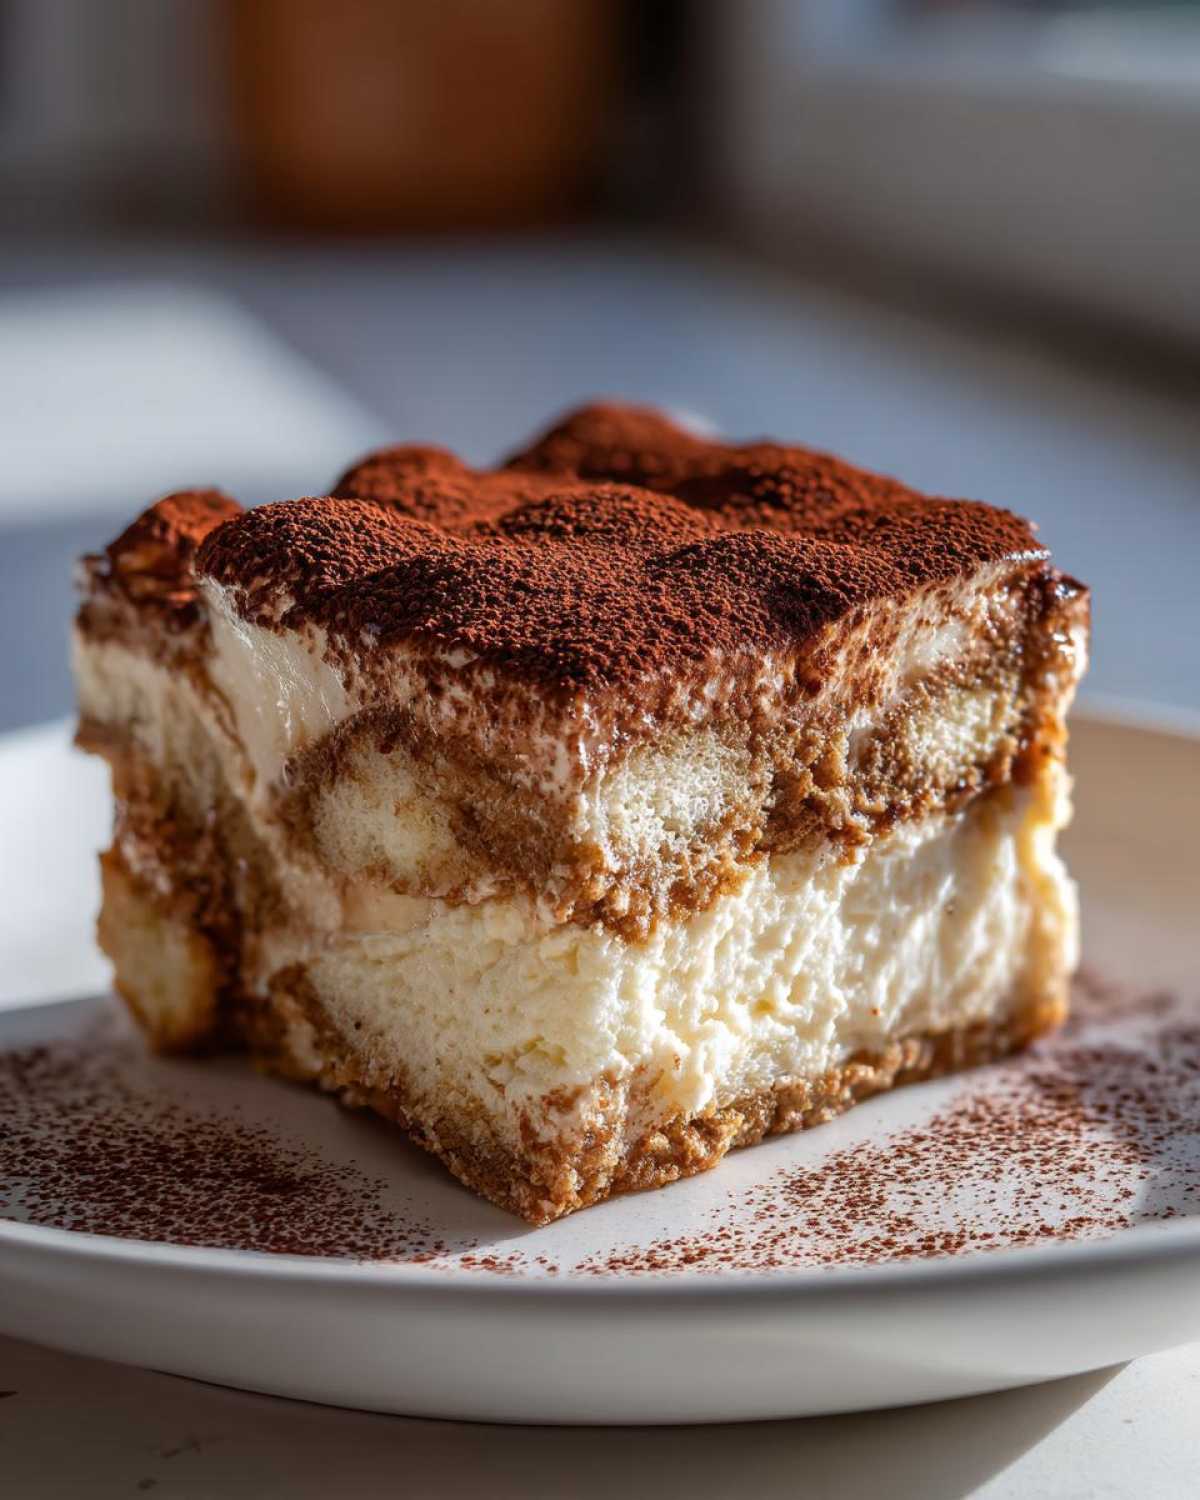
This part is fun but requires quick hands! First, get your espresso soak ready (add that Kahlua if you’re using it). You are going to quickly dip your ladyfingers—and I mean quick! One second on each side, nothing more. If they soak too long, they’ll turn to mush! Lay half of your soaked cookies over the cooled crust. Pour half the filling over them. Then, repeat: quick-dip the rest of the ladyfingers, lay them on top of the filling, and gently pour the remaining **Mascarpone Cheesecake Recipe** filling over the top. Check out this great post for visual assembly help!
Baking, Cooling, and Chilling
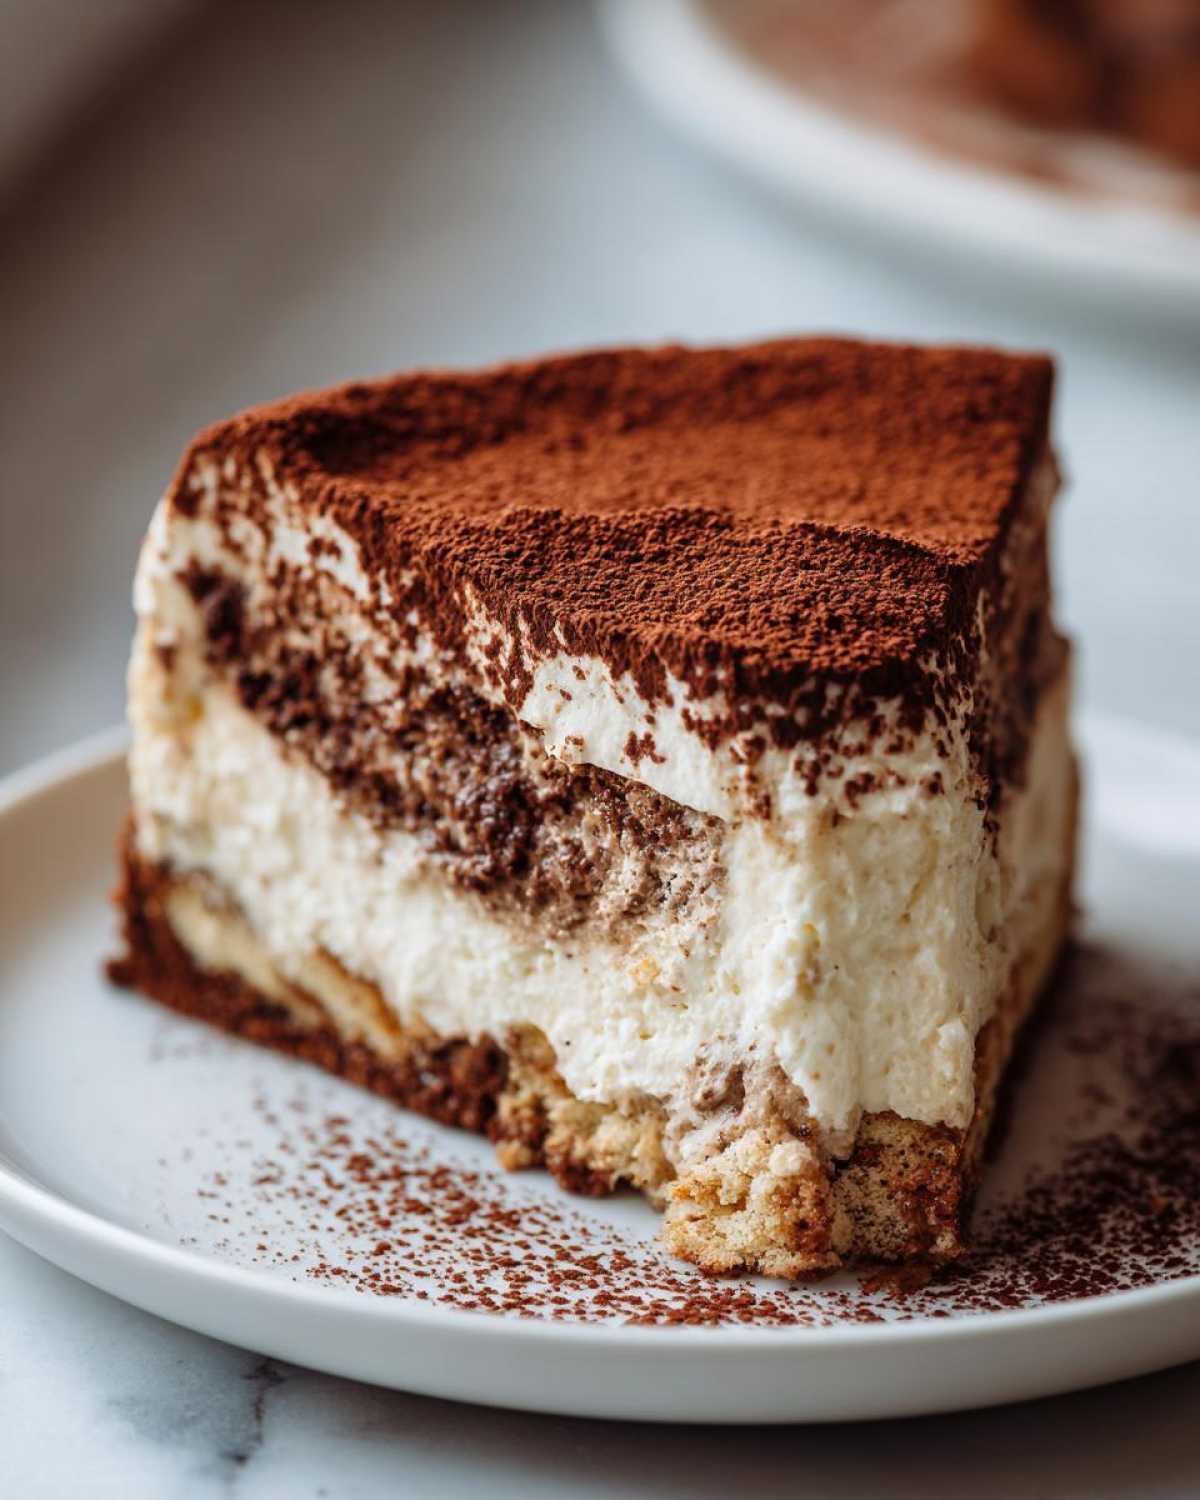
Place that springform pan on a baking sheet (always a good safety step!) and bake for 50 to 60 minutes. You know it’s ready when the edges look set but the center still has a nervous little wobble to it. Now, for the patience part! Turn the oven off, crack the door open, and leave the cheesecake inside for a whole hour. This slow cool-down prevents those awful cracks. Once it’s room temp, cover it and put it in the fridge for a minimum of 6 hours, but honestly, chilling overnight transforms this **Ladyfinger Cheesecake** into something truly decadent. Finish it with a dusting of cocoa right before slicing!
Tips for the Best Tiramisu Cheesecake Texture and Flavor
We’ve built this beautiful **tiramisu cheesecake**, but now let’s add those final pro touches so it tastes as incredible as it looks. Achieving that legendary smoothness and making sure that coffee flavor sings is all about a few tiny details. Trust me, these little tricks are what separate a good dessert from one people beg you to make every single year.
Mastering the Espresso Soak Technique
I cannot stress this enough: do not let those ladyfingers swim in the espresso! Just a lightning-fast dip on each side is plenty. Remember, they keep baking and absorbing flavor in the oven and while chilling. If they look soggy going in, they will dissolve completely!
If you decide to skip the **Kahlua Cheesecake Recipe** suggestion and leave the liqueur out, you need to compensate for the flavor deficit. I suggest mixing 1 teaspoon of instant espresso powder right into your cooled espresso soak. This gives you that deep, rich **Creamy Coffee Dessert** kick without needing the alcohol.
Achieving a Lump-Free Mascarpone Filling
This is the secret handshake for any luxury cheesecake, especially one featuring both cream cheese and mascarpone. They MUST be at true room temperature. If you try to mix cold cheese, you end up with tiny, hard bits suspended in your batter, and those bits will never soften. That ruins the whole **Silky Smooth Cheesecake** dream!
I actually take my cheeses out the morning before I plan to bake if I’m feeling organized. If you’re rushing, like I often am after a busy week, you can microwave the cubes separately for about 10 seconds at a time—just until they yield easily to the touch. It makes mixing so much easier! For more tips on getting your mixes perfect, take a peek at how I handle brown butter in my cookies—it’s all about gentle blending here too: my recipe for brown butter raspberry chocolate chip cookies.
Variations: Exploring No Bake Tiramisu Cheesecake Options
Now, I know what some of you are thinking: “Chloe, it sounds amazing, but I cannot turn my oven on this week!” And that’s totally fair. While this recipe is for the luscious, rich stability of a **Baked Tiramisu Cheesecake**, the flavors lend themselves beautifully to a no-bake version, too. If you’re hunting down the ultimate cool dessert, you’ll want to adapt this slightly.
The main difference with a **No Bake Tiramisu Cheesecake** is how we set the filling. Instead of eggs providing the structure in the oven, a no-bake version relies heavily on gelatin or just relying on the extreme cold to firm up that mascarpone and cream cheese. It ends up fluffier and more mousse-like than our baked version. If you’re after a chilled, effortless version, I highly recommend checking out my guide to no bake Oreo cheesecake for general setting tips!
Crust Swaps for Your Tiramisu Cheesecake
In the main recipe, we went for the deep, slightly bitter note of an all-chocolate crust—that’s the **Chocolate Cookie Crust Cheesecake** style, and I adore it. But if you don’t have chocolate wafers or Oreos on hand, don’t panic! You can absolutely use plain graham cracker crumbs or even vanilla wafers.
Just use the same ratio: 1 1/2 cups of crumbs mixed with 1/4 cup sugar and 6 tablespoons of melted butter. It will give you a less intense, but still wonderful, foundation for our coffee-soaked layers. It just shifts the intensity slightly away from the chocolate!
Adding Extra Booze: Kahlua Cheesecake Recipe Notes
We mentioned using Kahlua in the espresso soak, but you can really lean into that boozy depth! If you are making a **No Bake Tiramisu Cheesecake**, where the structure isn’t changing much anyway, adding a touch more Kahlua, perhaps even 3 tablespoons instead of 2, really elevates the flavor profile. This works great if you’re looking purely for a grown-up **Coffee Cheesecake** experience.
For those who enjoy darker spirits, occasionally I substitute the Kahlua for a good quality bourbon. Bourbon provides vanilla and oak notes that pair surprisingly well with the mascarpone and cocoa. Just be sure you are still keeping the total liquid volume in that soak similar so you don’t oversaturate your ladyfingers, whether you use coffee liqueur or something stronger! For an example of another great recipe featuring coffee liqueur, take a look at this no-bake version online.
Serving Suggestions for Your Layered Tiramisu Dessert
Once your magnificent **tiramisu cheesecake** has chilled overnight, the final presentation is everything! While a liberal dusting of cocoa powder is mandatory—it’s non-negotiable, truly—you can jazz it up a bit more for your guests. Since this is the ultimate **Dinner Party Dessert**, I love adding a little drama.
Try piping a few small dollops of stabilized whipped cream around the edge before the final cocoa sprinkle. Or, if you want an extra hint of richness, you can make little tiramisu truffles to serve alongside each slice! A thin garnish of shaved dark chocolate works beautifully too. Slice it when it is very cold—that gives you the cleanest edges for photographing!
Storage and Make-Ahead Tips for This Tiramisu Cheesecake
I always tell people that this **tiramisu cheesecake** is actually a baker’s best friend because it thrives on being made ahead of time! You absolutely cannot rush the flavor development here, so let’s talk about timing and storage.
For the absolute best texture and to let those coffee notes really soak into the creamy layers, you need to give this dessert at least 8 hours in the fridge, but honestly? Overnight is where the real transformation happens. This makes it such an **Easy Make Ahead Cheesecake** for busy entertaining schedules!
When storing leftovers—if there are any, ha!—keep it tightly covered in the refrigerator. It stays beautiful and delicious for up to four days. Remember to keep it covered so that cocoa powder on top doesn’t absorb any weird fridge smells. For more tips on getting that perfect flavor infusion, check out what another baker recommends for their best tiramisu cheesecake recipe!
Frequently Asked Questions About Tiramisu Cheesecake
I always get tons of questions whenever I post this recipe because, let’s be honest, it’s a showstopper! Here are a few things I hear most often about getting this decadent fusion just right. I hope these quick tips help smooth out any worries you have!
Can I use regular brewed coffee instead of espresso for the soak?
Oh, absolutely you can! Espresso is great because it’s super concentrated, which is what you want for a powerful **Espresso Dessert** flavor that cuts through the richness of the filling. But if your fancy machine is still sleeping in, strong brewed coffee works just fine!
My only warning is that regular drip coffee might dilute the flavor slightly. To fix that, just use less water than normal when brewing, or better yet, mix a teaspoon of instant espresso powder right into your hot brewed coffee before cooling it down. That gives you that intense punch we are aiming for!
How do I prevent my baked cheesecake from cracking?
Ah, the dreaded cheesecake crack! It’s the nemesis of every baker, but we have a couple of defenses built into this **Baked Tiramisu Cheesecake** recipe already. The most important step, which I detailed earlier, is the slow cooling method. Turning the oven off and leaving the cake inside with the door cracked for a full hour is my number one trick. The drastic temperature change shocks the custard and makes it seize up too fast, causing cracks.
If you are really worried, especially if your oven temperature tends to fluctuate, you can use a water bath! Wrap the bottom of your springform pan really well in heavy-duty foil (like triple-wrap!) and sit that pan inside a larger roasting pan. Pour boiling water into the roasting pan halfway up the side of the springform. The steam creates a super humid environment that keeps the cheesecake gentle and prevents those ugly fissures. It works wonders for achieving that **Silky Smooth Cheesecake** finish!
What is the best way to dust the cocoa powder on the tiramisu cheesecake?
This is a small detail, but it makes a huge difference in presentation! You might be tempted to dust that cocoa powder right after it comes out of the fridge, but I strongly advise against it. The condensation sitting on top of the chilled **tiramisu cheesecake** will instantly make the cocoa powder darken, dissolve, or become patchy.
My rule is: dust it right before you plan to slice and serve. Take your sieve, pile the cocoa high, and dust generously over the top surface. This keeps that beautiful, matte, powdery finish true to classic tiramisu presentation. It just looks so much more elegant when it hits the table!
Estimated Nutrition for This Decadent Cheesecake
When you are making something as incredible as this **tiramisu cheesecake**, you know it’s going to be rich! I’ve gone ahead and pulled together the nutrition based on the ingredients list so you have a general idea of what you’re enjoying. We’re aiming for indulgence here, so these numbers reflect a truly decadent slice!
It’s super important to remember that these are just estimates, right? Because what I use for chocolate cookie crumbs might be slightly different than what’s in your pantry, the final values could shift a little. Consider this your guide for planning ahead!
- Serving Size: 1 slice
- Calories: 450
- Sugar: 35g
- Sodium: 250mg
- Fat: 30g
- Saturated Fat: 18g
- Trans Fat: 0.5g
- Carbohydrates: 38g
- Fiber: 1g
- Protein: 9g
- Cholesterol: 120mg
See? Deliciously substantial! It’s the perfect dessert for a celebration where you want everyone to feel spoiled. Enjoy every single bite of this **Coffee Cheesecake** creation!
Share Your Sunday Flavor Creations
Well, you’ve made it to the end, and I have sent you off with everything you need to create the absolute best **tiramisu cheesecake** imaginable! Now comes my favorite part: seeing what you create in your own kitchens.
I genuinely hope this fusion dessert brings a little bit of that vibrant “Sunday Flavor” feeling into your week. Whether you’re aiming for an impressive **Dinner Party Dessert** or just treating yourself after a long Monday, this recipe delivers.
When you whip up this amazing **Tiramisu Cheesecake Recipe**—and I hope you do!—please do me a favor: snap a picture! I love seeing your gorgeous results. Tag me on social media so I can cheer you on. And if you loved how this dessert turned out, I’d be so grateful if you could hop back here and leave a quick star rating. It truly helps other bakers find their own moments of joy in the kitchen.
If you want to know more about why I traded my corporate desk for chasing flavor full-time, you can read all about my journey over on my About Me page. Until next time, keep those ovens warm and your aprons handy!
Cheers,
Chloe
PrintDecadent Baked Tiramisu Cheesecake Recipe
Create a truly impressive dessert by fusing classic Italian tiramisu flavors with a rich, creamy baked cheesecake. This recipe features espresso-soaked ladyfingers and a smooth mascarpone filling, perfect for your next special occasion.
- Prep Time: 30 min
- Cook Time: 60 min
- Total Time: 7 hours 30 min
- Yield: 12 servings
- Category: Dessert
- Method: Baking
- Cuisine: Italian Fusion
- Diet: Vegetarian
Ingredients
- 1 1/2 cups chocolate cookie crumbs (like Oreos)
- 1/4 cup granulated sugar
- 6 tablespoons unsalted butter, melted
- 1 pound cream cheese, softened
- 8 ounces mascarpone cheese, softened
- 1 cup granulated sugar
- 1 teaspoon vanilla extract
- 1/4 cup heavy cream
- 3 large eggs
- 1/2 cup strong brewed espresso, cooled
- 2 tablespoons coffee liqueur (optional, like Kahlua)
- 1 package (7 ounces) ladyfingers
- Unsweetened cocoa powder, for dusting
Instructions
- Preheat your oven to 325°F (160°C). Lightly grease a 9-inch springform pan.
- Prepare the crust: Mix the chocolate cookie crumbs, 1/4 cup sugar, and melted butter until combined. Press the mixture firmly into the bottom of the prepared springform pan. Bake for 10 minutes. Let cool while you prepare the filling.
- Prepare the espresso soak: In a shallow dish, combine the cooled espresso and coffee liqueur, if using. Set aside.
- Prepare the filling: In a large bowl, beat the softened cream cheese, mascarpone cheese, 1 cup sugar, vanilla extract, and heavy cream until the mixture is smooth and lump-free. Beat in the eggs one at a time, mixing just until combined after each addition. Do not overmix.
- Assemble the layers: Arrange half of the ladyfingers over the cooled crust. Dip each ladyfinger quickly into the espresso mixture before placing it down; do not let them soak too long or they will become soggy.
- Pour half of the cheesecake filling over the ladyfinger layer. Gently arrange the remaining espresso-dipped ladyfingers over the filling. Top with the remaining cheesecake filling.
- Bake: Place the springform pan on a baking sheet. Bake for 50 to 60 minutes, or until the edges are set but the center still has a slight wobble.
- Cool and chill: Turn off the oven, crack the door open slightly, and let the cheesecake cool inside for 1 hour. Remove from the oven and cool completely on a wire rack. Once cool, cover and refrigerate for at least 6 hours, or preferably overnight, for the best texture.
- Serve: Before serving, carefully remove the sides of the springform pan. Dust the top generously with unsweetened cocoa powder. Slice and enjoy this decadent dessert.
Notes
- For an even richer flavor, substitute some of the heavy cream in the filling with an extra ounce of mascarpone cheese.
- Make this dessert ahead of time; chilling overnight allows the coffee flavor to fully infuse the cheesecake layers, resulting in a silky smooth texture.
- If you skip the coffee liqueur, add 1 teaspoon of instant espresso powder to the espresso soak for a stronger coffee punch.
Nutrition
- Serving Size: 1 slice
- Calories: 450
- Sugar: 35g
- Sodium: 250mg
- Fat: 30g
- Saturated Fat: 18g
- Unsaturated Fat: 12g
- Trans Fat: 0.5g
- Carbohydrates: 38g
- Fiber: 1g
- Protein: 9g
- Cholesterol: 120mg


Comments are closed.