


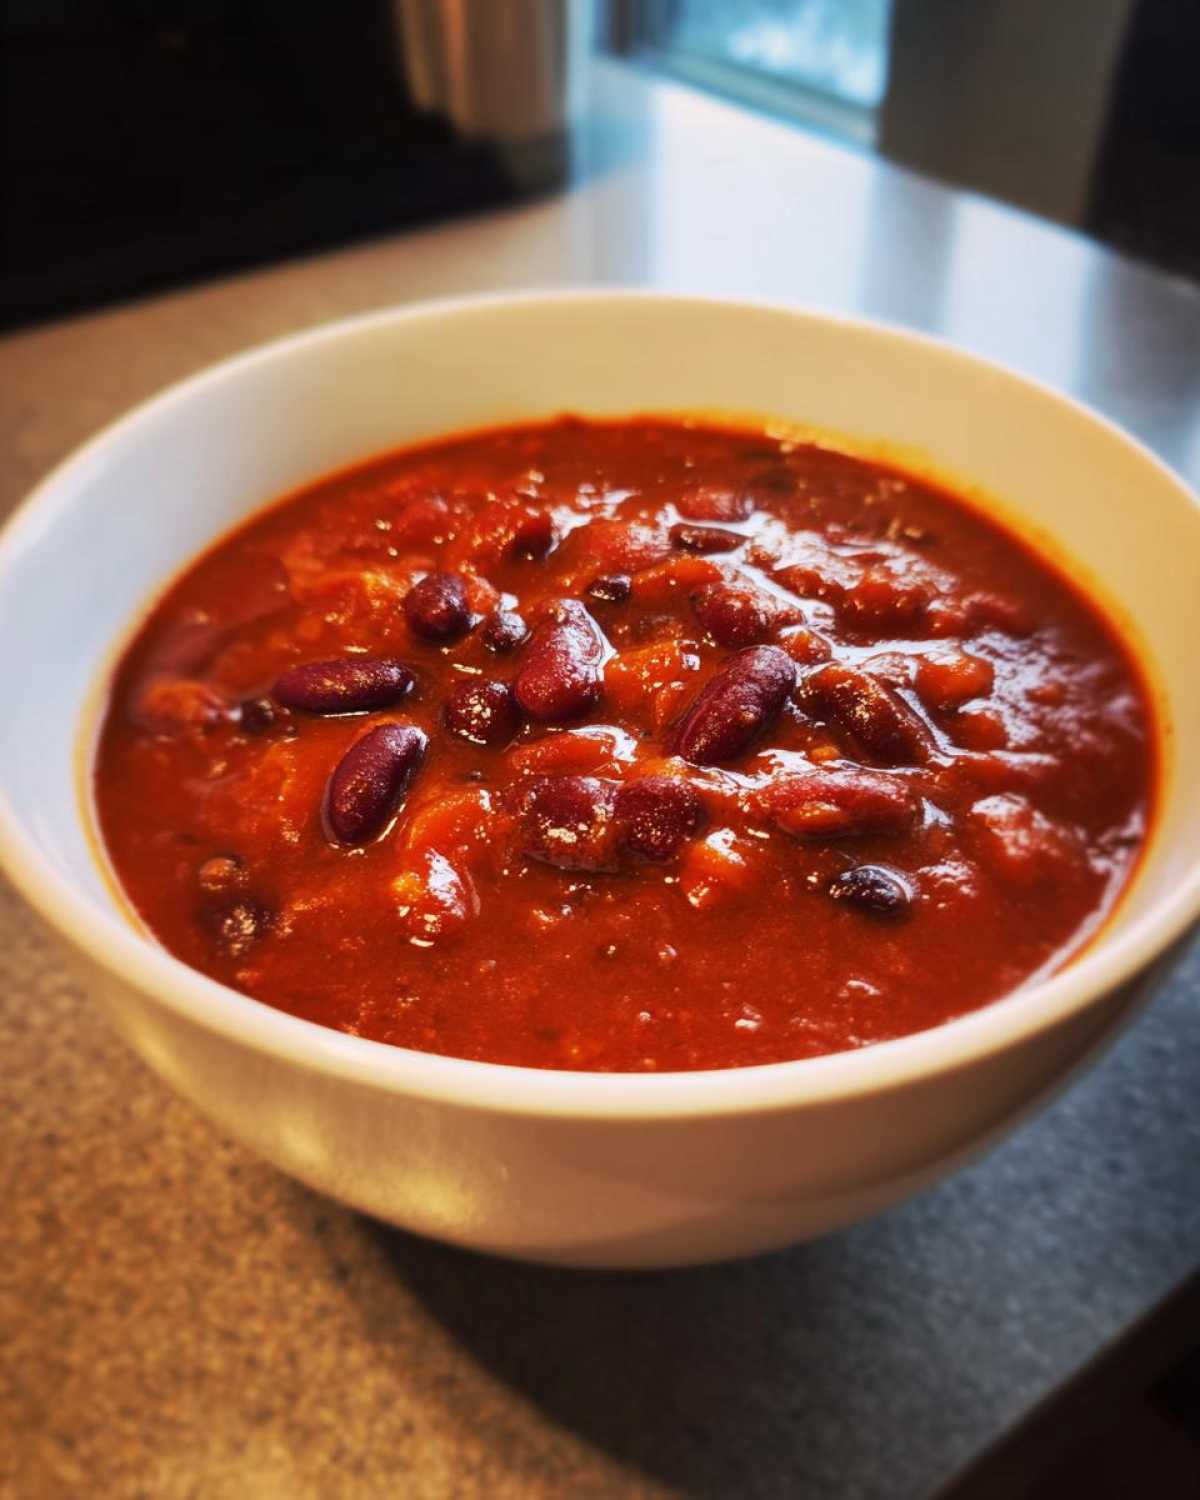
Oh, you are going to LOVE this! Some nights, I look in the fridge and honestly, it’s just sad—a lonely lemon and some takeout menus. On those nights, I rely completely on what I call my ‘Emergency Delicious Stash.’ That’s where this **Pantry Staple Chili with Beans** comes from. Seriously, it’s my secret weapon when dinner needs to happen in under an hour and I haven’t seen a grocery store in days. We’re talking about a rich, hearty chili built almost entirely from canned goods and dried spices. It’s satisfying, it’s unbelievably budget-friendly, and trust me, it tastes way too good for something that took zero real effort.
Why This Pantry Staple Chili with Beans is Your Weeknight Hero
I can’t tell you how many times I’ve pulled this recipe out on a chaotic Tuesday evening. This isn’t just chili; it’s peace of mind in a pot! When everything else fails, you can turn to this recipe and know you’re going to feed everyone something warm and satisfying. It truly shines because it relies only on what’s hiding on your shelves.
- It delivers deep, comforting flavor without needing hours on the stove.
- You’re saving money, since canned beans and tomatoes are so inexpensive compared to fresh meat and produce.
- The cleanup is minimal—we’re talking one pot for the entire meal!
Making this **Pantry Staple Chili with Beans** proves you don’t need a farmer’s market haul for an excellent dinner.
Quick Prep and Cook Time
Honestly, the active work part takes maybe ten minutes, tops. That’s just chopping optional items and stirring everything together. Once it starts simmering—which is totally hands-off time for you—it’s ready in about half an hour. Thirty minutes, people! That’s faster than most takeout these days.
Budget Friendly Bean Chili
This recipe is my go-to when I’m trying to stretch the grocery budget until payday. Everything here is shelf-stable, which means no worries about wilted produce going bad. It stands strong as the ultimate **Budget Friendly Bean Chili** because canned beans are fantastic, cheap protein. It keeps your wallet happy!
Essential Ingredients for Your Pantry Staple Chili with Beans
Okay, let’s talk about the actual stars of the show—the things you hopefully already have tucked away! The magic of this **Pantry Staple Chili with Beans** is that it rarely needs a full grocery run. I always keep these items stocked because you never know when you’ll need instant comfort food. Get your measuring spoons ready, trust me on the spice ratios!
Canned Goods Chili Recipe Staples
This is where the hearty texture comes from. You need those beans rinsed well—we don’t want all that extra sodium or the thick liquid from the can hanging around in our chili. Drain and rinse your kidney beans and black beans thoroughly. Then, grab your tomatoes: the diced tomatoes (and their juice—don’t dump that!) and the standard can of tomato sauce. The tomato paste is critical; it’s what gives the chili that deep, rich color and thickness that says ‘simmered all day,’ even if you only have twenty minutes!
If you’re looking for other great canned main dishes, check out my vegan chili recipe—it uses a similar base!
Flavor Builders: Spices and Liquids
This is the secret to making soup taste like *chili*. You absolutely need chili powder and cumin. I always measure generously because that’s what you’re tasting! Don’t forget the dried oregano; it adds that essential herbaceous note. For liquid, vegetable broth is best, but water works fine in a pinch. Now, here is the important part for avoiding a fresh produce trip: if you don’t have fresh onion or garlic, don’t panic! Just grab your garlic powder and dried onion flakes. We’ll toast these dried spices right at the beginning!
How to Prepare Your Easy Pantry Chili Recipe Step-by-Step
Don’t let the steps scare you; this is really straightforward cooking! Since we’re relying on canned goods, the preparation is all about layering those wonderful dry spices to bring the flavor forward. I always find that the secret to making a quick chili taste deep and rich is in how you wake up those spices first. It’s a tiny thing, but it makes such a difference!
Sautéing Aromatics and Toasting Spices
Get your biggest pot—the Dutch oven is perfect here—over medium heat and melt in that olive oil. Now, if you’re chopping a fresh onion, get that in first and let it soften up for about five minutes until it’s looking translucent. If you decided to skip the fresh stuff and just use dried onion flakes, hold off on them for a second. If you’re using fresh garlic, toss that in after the onion and cook it for just one minute until it smells amazing. If you’re going totally dry, throw the garlic powder in with the spices next.
Here is my favorite trick for building flavor: add your chili powder, cumin, oregano, salt, pepper, and cayenne (if you like heat!) right into the hot oil and stir constantly for one minute. This is called blooming, and it toasts the spices, making them ridiculously fragrant. You cannot skip this for maximum flavor in your **Easy Pantry Chili Recipe**!
Combining and Simmering for a Hearty Bean Chili Recipe
Once those spices are singing, it’s time to dump everything else in! Add your rinsed beans, the diced tomatoes (juice and all), the tomato sauce, that tiny can of tomato paste, and your broth or water. Stir everything up really well so the tomato paste dissolves nicely into the liquid. Bring the whole glorious mess up to a boil, and then—this is key—immediately turn that heat way, way down to low. We want a gentle simmer barely ticking over.
You need to let this simmer, covered, for a minimum of 20 minutes. That’s just enough time for the flavors to marry up the spices with the tomatoes. If you have an extra twenty minutes to spare, let it go for 40 or 45! The longer it sits on low heat, the deeper and richer that **Hearty Bean Chili Recipe** becomes. You can find my tips for turning this into a one-pot chili mac later, but for now, just let it bubble gently!
Tips for Success with Your Pantry Staple Chili with Beans
Even though this chili is designed to be simple, a couple of little tweaks can take it from perfectly fine to absolutely outstanding. Since we’re dealing with ingredients that are already cooked down (canned goods), sometimes the final texture can be a little thin. Don’t worry; I have a super easy fix for that, straight from my own kitchen notes!
When you nail these small details, you end up with the best **Pantry Staple Chili with Beans** possible, proving that convenience doesn’t mean sacrificing quality. If you’re looking to expand your pantry repertoire even further, you might want to check out my sweet potato and black bean chili for a different take!
Achieving Perfect Chili Thickness
This is my absolute favorite hack, especially if you skip meat, because sometimes bean chili can feel a little watery if you don’t manage the liquid right. Remember that note about wanting it thicker? Here’s how you do it: once the chili has simmered for at least 20 minutes, take about a cup of the chili out. Don’t be shy!
Scoop out the liquid and the beans from that cup, and crush them really thoroughly with a fork. You want it mostly mush. If you have one of those little immersion blenders, even better—just pulse it a few times right in the pot being careful not to blend the whole thing smooth. Stir that creamy, bean-heavy mixture right back into your pot. Boom! The starches from the mashed beans thicken the sauce immediately, giving you that rich, satisfying texture usually associated with meat chili.
Ingredient Swaps for Staples Only Chili
The beauty of a pantry recipe is its flexibility, especially if you keep dried goods on hand, too. If you find yourself running low on canned beans but you have dried lentils in the cupboard, you can swap those in easily! Just use about half a cup of dried lentils in place of one of the cans of beans.
But listen closely: lentils need more time to cook than beans that come straight from a can. If you make this swap, you need to add those dried lentils in with your broth right at the beginning of the simmer stage. Plan on pushing that simmer time back up to 35 or 40 minutes so those lentils have plenty of time to get totally tender. This keeps it solidly in the **Staples Only Chili** category!
Serving Suggestions for Your Minimal Ingredient Chili
This **Minimal Ingredient Chili** is fantastic on its own, but let’s be real—chili demands toppings! Since the whole point here is maximizing pantry power, we can’t be reaching for fresh cilantro or sour cream if the fridge is bare. Thank goodness there are tons of shelf-stable options that add texture and flavor without any extra trips to the store.
My favorite way to serve this up when I’m keeping it purely pantry-based is by creating a little topping bar using things I always have hanging around. It lets everyone customize their bowl, which is a huge win on weeknights.
- Crushed Tortilla Chips: Forget Fritos; crushed tortilla chips, even the slightly stale ones, are perfect for topping this chili! They give that wonderful crunch that breaks up the soft texture of the beans and tomatoes. It’s so much better than crackers, trust me.
- Dried Herbs and Flakes: Keep a jar of dried onion flakes or maybe some dried green onion tops handy. They rehydrate beautifully in the hot chili and add the look of freshness without the actual fresh item.
- A Dash of Something Sharp: If you buy shelf-stable pickled jalapeños or mild banana peppers in jars, those are your best friends! A couple of rings on top adds zing and acidity that cuts right through the richness of the tomato base.
- Liquid Smoke (Use Sparingly!): If you happen to have a bottle of liquid smoke—often found near BBQ sauces—a *single drop* stirred into the whole pot transforms this vegetarian base into something that tastes like it simmered over a campfire for hours. It’s smoky spice heaven!
Honestly, even just a sprinkle of some extra chili powder or a dash of hot sauce (which most people keep stocked!) is enough to make this **Simple Vegetarian Pantry Chili** feel like a complete meal. No fuss, maximum flavor delivery!
Storage and Reheating Instructions for Shelf Stable Chili Dinner
One of the unsung heroes of a great **Pantry Staple Chili with Beans** is how incredibly well it stores. Because this recipe doesn’t rely on fresh meat or dairy added during the cooking process, it actually tastes *better* the next day. It’s the perfect **Make Ahead Pantry Meal** because the spices just keep melding together overnight. When you rely on canned goods, you’re essentially working with ingredients that are already fully cooked, so the aging process just deepens those tomato and cumin notes.
If you’re planning ahead, double the batch! It’s almost no extra work for a huge payoff later in the week.
Refrigeration Guidelines
Pop your cooled chili into airtight containers right away. You can safely store this chili in the refrigerator for about four to five days. Seriously, try a bowl on day two—it’s incredible! The consistency will likely thicken up because of those beans absorbing some of the leftover liquid. If it looks a little too thick the next day, don’t sweat it; we’ll fix that when we reheat it.
For reheating, I always suggest using the stovetop if you have the time. Transfer the chili to a pot over medium-low heat. Stir frequently so the beans don’t stick to the bottom of the pan. If it’s too thick, add a splash of vegetable broth or even just water, a tablespoon at a time, until it reaches that perfect, loose consistency you had right after simmering. You can also use the microwave, but be sure to stir it halfway through to ensure it heats evenly.
Freezing for Longer Storage
If you’ve made a massive batch, freezing is your best friend for this **Shelf Stable Chili Dinner**. This chili freezes like a dream! Just make sure you leave about an inch of headspace at the top of whatever container you use, because liquids expand when they freeze. I love using heavy-duty zip-top bags laid flat on a baking sheet in the freezer—once they’re solid, you can stack them up vertically, saving tons of space in your freezer.
This chili stays good in the deep freeze for up to three months. When you’re ready to eat it, just move it to the fridge overnight to thaw slowly, and then reheat on the stovetop as mentioned above. Having this chili tucked away means you always have a backup make-ahead meal ready to go!
Frequently Asked Questions About Pantry Staple Chili with Beans
People always have questions when you try to make something magical out of just shelf-stable ingredients, and that’s totally fair! I get asked all the time about adding things to bulk it up or how to handle ingredients if my pantry is slightly different than theirs. This section covers all the common thoughts I have when making my **Pantry Staple Chili with Beans**!
Can I add meat to this Pantry Staple Chili with Beans?
Absolutely, you can! If you have a package of ground beef or turkey lurking in the freezer waiting for its moment, this is the perfect recipe to use it up. The key here is timing. You don’t want to add raw meat to the slow simmer with the canned goods, because it won’t brown nicely.
Instead, you need to brown that meat first in your pot where you’d normally sauté the optional onions (Step 1). After the meat is fully cooked, drain off any excess grease. Then, you proceed exactly as written: skip the oil added in Step 1, stir in your spices next, and then add all the tomato products and beans. Adding meat just means you should definitely stick to that minimum 20-minute simmer time so everything blends together perfectly!
What if I only have dried spices and no fresh onion or garlic?
This is the beauty of calling this a **Shelf Stable Chili Dinner** recipe! If your fridge is looking awfully bare, you don’t need to worry at all. We planned for that! If you are skipping the fresh onion and garlic because you only have flakes or powder, the instruction is simple: skip sautéing them in the oil on the stovetop.
Instead, grab your dried onion flakes (if using) and your garlic powder and add them right in with the rest of your dried spices in Step 2—that minute where you toast the chili powder and cumin. Toasting the dried onion flakes alongside the spices works perfectly and makes them savory rather than just dusty tasting. It keeps the entire process fast and easy!
If you had any questions about converting dried beans or other swaps, you can always check out my guide on how to make chili from pantry items for more inspiration!
Estimated Nutritional Data for Simple Vegetarian Pantry Chili
Now, I always feel like I need to give a little disclaimer here because I’m measuring things out by the scoop and nobody’s measuring my scoops exactly the same way! This nutritional breakdown is based on standard can sizes and the amounts listed in the recipe, using the vegetarian base—so no meat added in this version.
This is what you can generally expect when you serve up about one and a half cups of this amazing **Simple Vegetarian Pantry Chili**:
- Serving Size: About 1.5 cups
- Calories: Roughly 350 calories
- Fat: About 7 grams total fat
- Sugar: Around 12 grams (mostly natural sugars from the tomatoes!)
- Protein: A solid 16 grams, thanks to all those wonderful beans!
- Fiber: A whopping 18 grams—this stuff keeps you full for hours!
- Sodium: This one is always higher because of canned goods, coming in around 650mg, but remember, you can always rinse your beans extra well or use lower-sodium canned tomatoes to adjust this yourself!
Keep in mind that if you dump a ton of salty chips or cheese on top, those numbers are definitely going up! But for the base **Shelf Stable Chili Dinner**, this is fantastic, balanced nutrition made entirely from things you already have on hand. You can see just how much fiber and protein you pack into that bowl!
Share Your Pantry Staple Chili with Beans Experience
Well, that’s it! You now have everything you need to whip up a fantastic, filling **Pantry Staple Chili with Beans** the absolute moment hunger strikes. Whether you used just dried spices or you managed to keep an onion on hand, the process should have been breezy, right?
I truly hope this recipe becomes a regular rotation item for you, just like it is for me when life gets hectic. I always love hearing which pantry staples other people have that completely change the game. Did you discover a secret topping that’s not on my list? Maybe you used a different type of bean that worked beautifully?
Please, please hop down to the comments below! Rate this recipe—give it five stars if it saved your dinner plans! And let me know what creative swaps you made using only what you had in your cupboards. We bakers and cooks thrive on sharing those little tricks, and I’d love to hear yours. Plus, if you’re looking for more of the very **Best Pantry Staple Recipes** to keep your stock organized, you might want to browse some other ideas I’ve collected here: Best Pantry Staple Recipes.
Happy cooking, and enjoy that cozy, easy dinner!
PrintPantry Staple Chili with Beans

Make a hearty, satisfying chili using only ingredients you likely keep stocked in your pantry. This recipe requires minimal fresh produce and cooks quickly for an easy weeknight meal.
- Prep Time: 10 min
- Cook Time: 30 min
- Total Time: 40 min
- Yield: 4 servings
- Category: Main Dish
- Method: Stovetop
- Cuisine: American
- Diet: Vegetarian
Ingredients
- 2 tablespoons olive oil
- 1 large onion, chopped (optional, use dried onion flakes if avoiding fresh)
- 2 cloves garlic, minced (optional, use 1 teaspoon garlic powder)
- 1 (15 ounce) can kidney beans, rinsed and drained
- 1 (15 ounce) can black beans, rinsed and drained
- 1 (14.5 ounce) can diced tomatoes, undrained
- 1 (15 ounce) can tomato sauce
- 1 (6 ounce) can tomato paste
- 1 cup vegetable broth (or water)
- 2 tablespoons chili powder
- 1 tablespoon ground cumin
- 1 teaspoon dried oregano
- 1/2 teaspoon salt
- 1/4 teaspoon black pepper
- 1/4 teaspoon cayenne pepper (optional, for heat)
Instructions
- Heat the olive oil in a large pot or Dutch oven over medium heat. If using fresh onion, add it and cook until soft, about 5 minutes. If using dried onion flakes, add them with the spices later.
- If using fresh garlic, add it and cook for 1 minute until fragrant. If using garlic powder, set it aside for the next step.
- Stir in the chili powder, cumin, oregano, salt, pepper, cayenne (if using), and dried onion/garlic powder (if using). Cook for 1 minute, stirring constantly, until the spices are fragrant.
- Add the rinsed beans, diced tomatoes (with juice), tomato sauce, tomato paste, and vegetable broth to the pot. Stir well to combine all ingredients.
- Bring the mixture to a boil, then immediately reduce the heat to low.
- Cover the pot and let the chili simmer for at least 20 minutes, stirring occasionally. Simmer longer, up to 45 minutes, for deeper flavor development.
- Taste and adjust salt and pepper as needed before serving.
Notes
- For a thicker chili, remove about 1 cup of the mixture after simmering, mash it slightly with a fork or immersion blender, and stir it back into the pot.
- If you have dried lentils, you can substitute one can of beans with 1/2 cup of dried lentils; add them with the broth and increase the simmer time to 35-40 minutes to cook them through.
- Serve with shelf-stable toppings like crushed tortilla chips or dried herbs.
Nutrition
- Serving Size: 1.5 cups
- Calories: 350
- Sugar: 12
- Sodium: 650
- Fat: 7
- Saturated Fat: 1
- Unsaturated Fat: 6
- Trans Fat: 0
- Carbohydrates: 60
- Fiber: 18
- Protein: 16
- Cholesterol: 0

Comments are closed.