


Okay, let’s be honest, sometimes you want a dessert that looks like you wrestled with it for hours but only took about twenty minutes of actual work. Right? If you feel that way, you are in the absolute right place, because this **grasshopper pie** is my secret weapon for impressing everyone without sweating over a hot oven. It’s the king of easy, decadent treats!
This **No-Bake Creamy Mint Chocolate Grasshopper Pie** is everything you need when a craving hits—whether it’s for St. Patrick’s Day, a summer barbecue, or just a Tuesday night that needs some sparkle. I’ve tested the ratios on the filling dozens of times until it achieves that perfect, melt-in-your-mouth creaminess. Trust me, once you make this simple version, you won’t look back. It is astonishingly good for something this easy!
Why This No Bake Grasshopper Pie Recipe Works So Well
Look, there are fancy plated desserts, and then there are desserts that just *work* every single time. This recipe falls into that second category, hands down. The main reason people go crazy for this **grasshopper pie** is that it skips the oven entirely. We are aiming for maximum flavor with minimum fuss, which is my personal baking motto!
Here’s the quick breakdown on why I swear by this method:
- The prep is lightning fast, leaving all the hard work to the refrigerator.
- It always sets perfectly firm because of the right ratios.
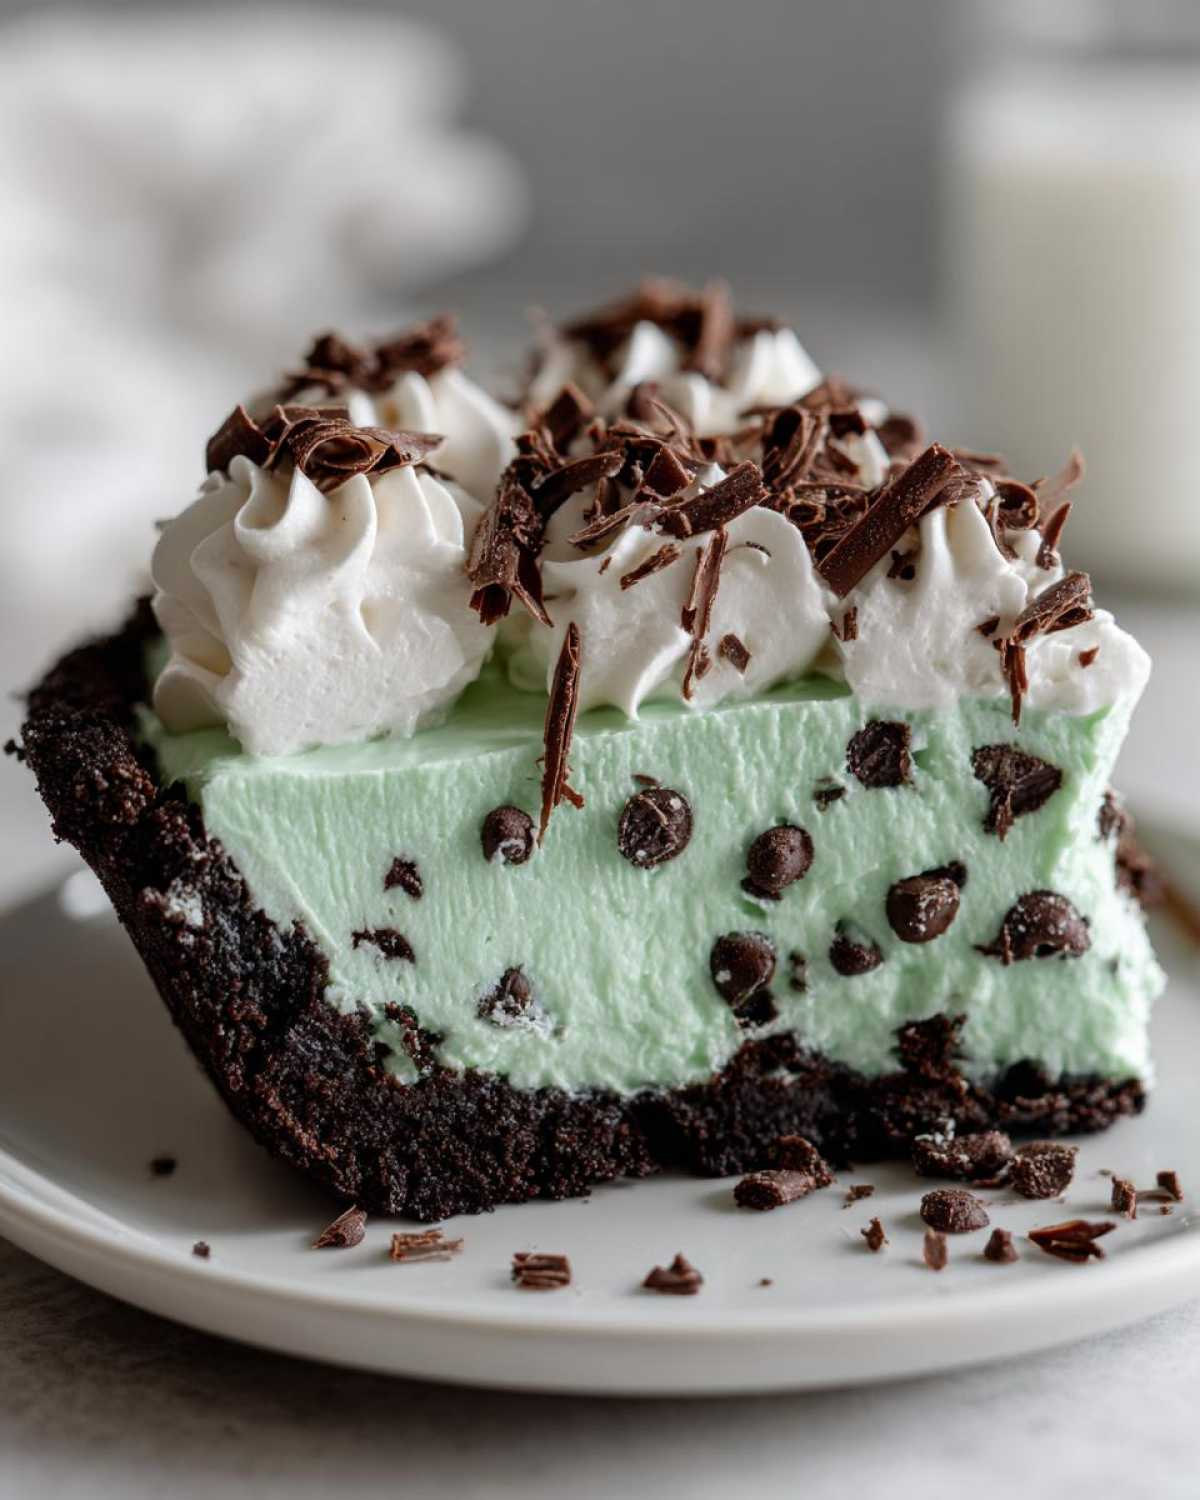
- The flavor contrast between the dark crust and bright mint is just heaven.
If you are looking for a showstopper that doesn’t require you to heat up your kitchen, keep reading!
Effortless Preparation: The No Oven Dessert Advantage
Seriously, this pie is the definition of a **No Oven Dessert**. You spend maybe twenty minutes crushing cookies and mixing everything up, and that’s it for active work! There’s no worrying about whether the edges are burning or if the center is still liquid. You just press the crust, mix the filling, pour, and wait. The waiting part is tough, I know, but it’s worth it to avoid turning on the appliance when it’s hot out!
Achieving the Perfect Creamy Mint Pie Texture
The secret handshake here is using both softened cream cheese *and* thawed whipped topping. They play so nicely together! The cream cheese gives it that wonderful, slightly dense structure you expect from great pies, while the whipped topping keeps it incredibly light and airy. It stops the filling from becoming too stiff or heavy, resulting in that gorgeous, silky texture we all crave in a cream pie.
Always remember to check my full ingredient list to make sure you have those two key components ready to go!
Gathering Ingredients for Your Grasshopper Pie Recipe
When you’re making a **grasshopper pie**, you need to make sure every single item sings in harmony. Since this is a no-bake situation, the quality of what goes in really shines through in the end result. We aren’t hiding anything in the oven’s heat, so let’s get our ducks in a row!
Get yourself a standard 9-inch pie plate—don’t even think about using a smaller one, or you’ll end up with filling spilling over the place. For the crust, you’ll need chocolate cookie crumbs (like Oreos, taken the filling out if you want them extra tidy, but I usually leave it in!) and some melted butter to hold it all together.
For that incredible mint filling, make sure your cream cheese is fully softened—I mean really squishy! We’re using powdered sugar, vanilla, cold milk, and the star: crème de menthe liqueur. And don’t forget the final touches of mini chocolate chips mixed right in!
If you need to review the exact measurements for the perfect mix, you can check out my official ingredient list right here to confirm you have everything ready.
Ingredient Notes and Substitutions for Grasshopper Pie
I get asked all the time about the alcohol, especially when serving family or if kids are around. Don’t panic if you need an alcohol-free version! You can skip the crème de menthe liqueur entirely. Instead, swap it out with 1/2 cup of regular cold milk. To get that signature minty punch, add about 1 teaspoon of peppermint extract, and if you want that classic bright green, swirl in a drop or two of green food coloring. It works beautifully!
Also, about those crumbs: using pre-made chocolate wafer crumbs saves your knuckles from pain, but crushing those cookies fresh gives the crust a better, slightly more uneven texture, which I prefer. Either way, just make sure your butter isn’t too hot when you mix it in so it doesn’t melt the fats in the cookies too fast.
Step-by-Step Instructions for the Best Grasshopper Pie
Alright, let’s make this magic happen! Because this is a no-bake **grasshopper pie**, the order of operations is key to making sure it sets up right and doesn’t turn into a runny mess when you slice it. Don’t rush the chilling, especially that first 15 minutes for the crust—that time is vital!
We are going to move quickly through the mixing part, but remember that folding the whipped topping needs a light touch. We want air in there! Once it’s assembled, it needs serious couch time in the fridge, so plan your day around that chilling period if this is for a party!
Preparing the Oreo Crust Pie Base
First things first, grab those chocolate cookie crumbs and your melted butter. Mix them together until every crumb looks perfectly coated—it should look like wet sand. Then, press that mixture firmly into the bottom and up the sides of your 9-inch pie plate. I use the bottom of a measuring cup for this; it makes getting a compact, even layer much easier. Once it’s rock solid, pop it into the freezer or fridge for about 15 minutes while you tackle that filling!
If you need to check the order of ingredients or timing again before you start, you can find my official instruction guide over here for reference.
Mixing the Creamy Mint Filling
This is where the creaminess comes into play! Start by beating that softened cream cheese until it’s silky smooth—no lumps allowed, please! Then slowly beat in your powdered sugar, followed by the vanilla, milk, and your mint liqueur or extract mix. Beat it until it looks gorgeous and uniform. The most important step comes last: take your thawed whipped topping and *gently* fold it in using a spatula. I mean slow and deliberate folding! You just want to incorporate it so there are no more white streaks. If you mix too hard, you deflate all the air, and suddenly your pie isn’t light anymore. Fold in those mini chocolate chips last, pour everything into that chilled crust, and that’s your hard work done!
Expert Tips for a Picture-Perfect Grasshopper Pie
Making this **grasshopper pie** look as good as it tastes is surprisingly easy once you know a few tricks. My biggest piece of advice? Patience during that final chill time. If you try to slice this beauty when it’s only been in the fridge for three hours, you’re asking for a sloppy mess—and nobody wants that!
To get that super smooth top layer that looks professional, gently spread the filling right to the edges but avoid swirling your spatula too much. It sets best when left undisturbed. If you want a super firm texture, especially if you’re planning ahead, pop it in the freezer! This creates an amazing **Frozen Grasshopper Pie** texture that’s perfect for a really hot day. Just let it sit on the counter for about 15 minutes before cutting, or you’ll need superhuman strength!
If you want to deepen your knowledge on pie-making in general, I always point people toward my general baking philosophy page—it covers why small details matter so much in desserts like this one.
Serving Suggestions for Your Chocolate Mint Delight
Once your pie has set up perfectly—and trust me, waiting is worth it—it’s time for the fun part: decorating! This pie looks fantastic all on its own on your dessert table, but a few simple additions truly elevate it, especially when you are serving it as a **Holiday Pie Recipe**.
Forget just sprinkling some chocolate shavings on top, though that’s always welcome! I love adding a generous swirl of freshly prepared whipped cream right in the center, almost like a snowy mountaintop. Then, stick a few tiny, bright green mint sprigs right into that whipped cream. The visual pop against the dark chocolate and light green filling is just stunning.
For serving, this pie pairs beautifully with a cup of strong black coffee, which cuts through the richness nicely. If you’re looking for a drink pairing, I’ve got tons of ideas on my shaken espresso page that would work as a wonderful, slightly less sweet contrast to this rich dessert!
Storage and Make Ahead Dessert Instructions for Grasshopper Pie
This is truly the ultimate **Make Ahead Dessert**! The best part about this **grasshopper pie** is that it *needs* to chill, so you can absolutely make this the day before your event. Don’t even think about slicing it too early!
You must refrigerate this pie for a minimum of six hours, but honestly, overnight is when the real magic happens and everything firms up perfectly. Covered loosely with plastic wrap, it’s good in the fridge for about three days. If you want it even firmer, go ahead and freeze it—just let it sit on the counter for about 15 to 20 minutes before you try to cut those perfect slices. For more tips on making desserts ahead of time, you should definitely check out my thoughts on my pretzel pie prep secrets!
Frequently Asked Questions About This Easy Mint Chocolate Pie
I get so many questions about this **grasshopper pie** because everyone wants to make sure it turns out right the first time! Since this is such a popular request for parties and holidays, I wanted to tackle the most common worries right here so you can bake with confidence. Trust me, once you nail this **Easy Mint Chocolate Pie**, you’ll be making it all the time!
Here are the things folks ask me most often about getting that great set and flavor:
Can I make this Grasshopper Pie without alcohol?
Absolutely, yes! That’s one of the best things about this recipe—it’s totally adaptable. If you skip the crème de menthe liqueur, you just replace that half-cup with regular cold milk. If you really want that iconic minty flavor without the booze, add about 1 teaspoon of peppermint extract to that milk mixture. For color, you can add a drop of green food coloring if you like that vibrant look, but the flavor will still be amazing.
What is the best crust substitute for the Oreo Crust Pie?
While I personally adore the deep, dark chocolate flavor of the **Oreo Crust Pie** base, you certainly have options if you run out of chocolate wafers or just prefer something different! Graham crackers work wonderfully and give you a slightly saltier, more traditional **Simple Cream Pie** flavor profile. Vanilla wafers are another excellent substitute, giving you a sweeter, lighter-colored base.
Honestly, any fine crumb works! Just remember that if you use graham crackers, you might need to bump up the butter just a tiny bit, maybe by a tablespoon, because they don’t have as much fat as the chocolate cookies do.
If you have more questions about ingredients or timing, make sure you check my terms over at my terms and conditions page for general guidelines!
Estimated Nutrition for This Refreshing Summer Pie
I know a lot of us are watching what we eat, even when we’re enjoying a fantastic **Refreshing Summer Pie** like this one! Just keep in mind these numbers are estimates based on the ingredients listed above, and your brand choices will definitely change things slightly. Nobody’s expecting perfection here, right?
For one generous slice (we’re talking 1/8th of the pie, so pile it high!), you’re looking at:
- Calories: About 350
- Fat: 22g
- Carbohydrates: 35g
- Protein: 4g
It’s rich, it’s creamy, and it delivers that sweet punch we all need sometimes! For the full breakdown, including sugar and sodium, you can always check the detailed chart on my full recipe information page. Enjoy every bite!
Share Your Experience Making This Simple Cream Pie
Okay, now that you have made what I promise is the very **best grasshopper pie** recipe out there, I desperately want to hear all about it! Telling you how good it is just isn’t the same as seeing your version!
Did you stick to the classic recipe, or did you play around with substitutions? Maybe you went totally wild and used peanut butter cookies for the crust? I love hearing about those little experiments people try!
Please, please leave a rating right here on the page. Stars help other bakers know this **Simple Cream Pie** is worth their time. And if you managed to snap a picture of that gorgeous green filling sitting next to the chocolate shavings, tag me! I check my comments all the time, and nothing makes my day more than seeing someone else’s table topped with this dessert.
If you have any lingering questions about technique or ingredients that I didn’t cover, drop them below too! I’m always here to help you troubleshoot. You can also take a look at my statements on privacy and data handling if you have questions about leaving your comments!
PrintNo-Bake Creamy Mint Chocolate Grasshopper Pie

Make this easy, no-bake Grasshopper Pie featuring a chocolate cookie crust and a rich, creamy mint filling.
- Prep Time: 20 min
- Cook Time: 0 min
- Total Time: 6 hr 20 min
- Yield: 8 servings
- Category: Dessert
- Method: No-Bake
- Cuisine: American
- Diet: Vegetarian
Ingredients
- 1 1/2 cups chocolate cookie crumbs (about 30 cookies)
- 6 tablespoons unsalted butter, melted
- 1 package (8 ounces) cream cheese, softened
- 1 cup powdered sugar
- 1 teaspoon vanilla extract
- 1/2 cup cold milk
- 1/2 cup crème de menthe liqueur (or mint extract for non-alcoholic version)
- 1/2 teaspoon peppermint extract (optional)
- 1 container (8 ounces) frozen whipped topping, thawed
- 1/2 cup mini chocolate chips
- Whipped cream and chocolate shavings for topping
Instructions
- Combine the chocolate cookie crumbs and melted butter in a bowl. Press the mixture firmly into the bottom and up the sides of a 9-inch pie plate. Chill the crust for 15 minutes.
- In a large bowl, beat the softened cream cheese until smooth. Gradually beat in the powdered sugar until fully combined.
- Mix in the vanilla extract, cold milk, crème de menthe liqueur (or mint extract), and peppermint extract, if using. Beat until the mixture is smooth.
- Gently fold in the thawed whipped topping until no streaks remain. Fold in the mini chocolate chips.
- Pour the mint filling into the chilled crust. Spread evenly.
- Cover the pie loosely with plastic wrap and refrigerate for at least 6 hours, or preferably overnight, until the filling is firm.
- Before serving, top with additional whipped cream and chocolate shavings.
Notes
- For a non-alcoholic version, substitute the crème de menthe liqueur with 1/2 cup of milk mixed with 1 teaspoon of peppermint extract and green food coloring, if desired.
- You can freeze this pie for a firmer, frozen dessert texture. Thaw slightly before slicing.
- Use store-bought chocolate wafer crumbs to save preparation time.
Nutrition
- Serving Size: 1 slice
- Calories: 350
- Sugar: 30
- Sodium: 250
- Fat: 22
- Saturated Fat: 13
- Unsaturated Fat: 9
- Trans Fat: 0.5
- Carbohydrates: 35
- Fiber: 1
- Protein: 4
- Cholesterol: 55


Comments are closed.