

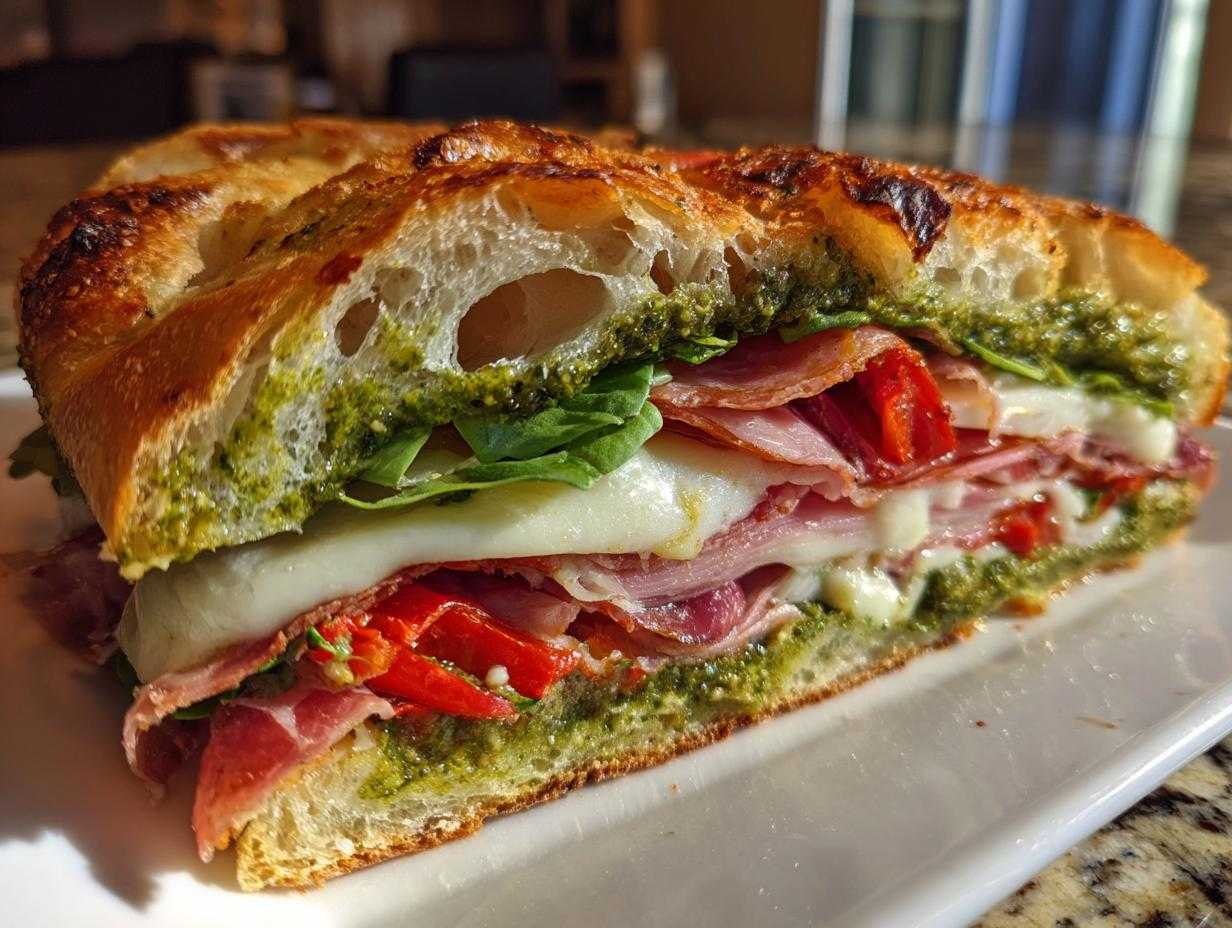
You know how sometimes you just NEED that towering, flavorful deli sandwich but you’re stuck at home? I always end up dreaming about those perfectly layered, salty, cheesy creations. Well, I cracked the code for achieving that intense deli flavor right in my kitchen, and trust me, the bread makes all the difference. This isn’t just any sub; we’re talking about the absolutely show-stopping Focaccia Grinder Sandwich with Pesto. The softness of the focaccia handles huge fillings without falling apart, and that homemade basil punch binds everything together beautifully. It’s hearty, it’s bright, and it’s my secret weapon when I need a serious lunch upgrade. You absolutely have to try this method, it’s a total game-changer for big, layered sandwiches!
Why This Focaccia Grinder Sandwich with Pesto is the Ultimate Lunch
I swear, this sandwich takes all the best parts of Italian deli sandwiches and makes them even better because of that fluffy bread. It’s honestly the best when you think about Hearty Sandwich Recipes with Focaccia Bread. Plus, the way the pesto and meat oils get pressed in makes it taste like it’s been aging perfectly for days! Check out my tips for the ultimate party sub for more layering secrets!
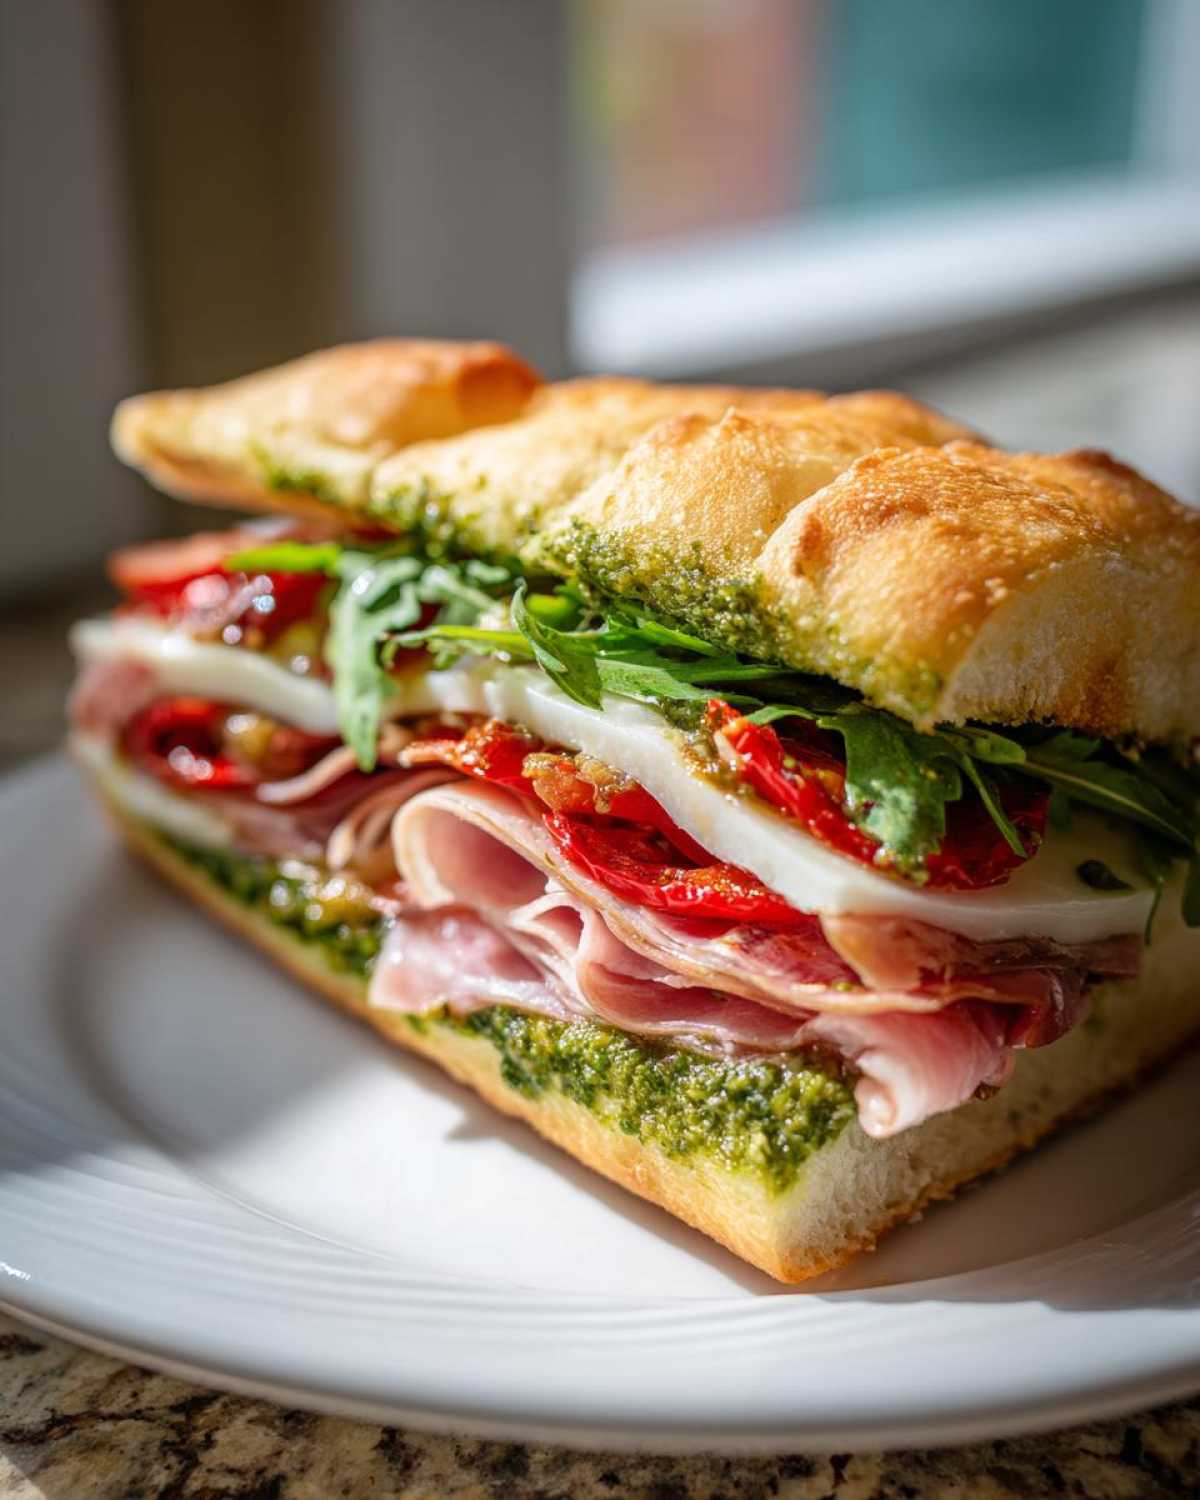
- The Pesto Factor: That bright, garlicky basil flavor screams summer and cuts right through the richness of the meats and cheese.
- Texture Perfection: The pressing step—don’t skip it!—makes the soft focaccia sturdy enough to handle all those glorious fillings.
- Built to Travel: Because it presses down so nicely, it’s perfect for packing up for a picnic or bringing to a tailgate.
- Flavor Melding: Pressing forces the oils from the pesto, meat, and vinegar right into the bread, making every single bite taste like it’s been marinating for hours.
Gathering Ingredients for Your Focaccia Grinder Sandwich with Pesto
Okay, this is the fun part—rounding up the superstar ingredients! Since this sandwich is all about layering, assembly is key, but first, we need to make sure we have the absolute best components ready to go. Because we aren’t cooking anything here, the quality of your deli slices and cheese is what makes or breaks this whole experience. Don’t skimp on the meat!
Here’s what you need to pull together this epic lunch:
- 1 loaf (about 10×14 inches) plain or rosemary focaccia bread
- 1/2 cup basil pesto (homemade or store-bought)
- 4 slices provolone cheese
- 4 slices fresh mozzarella cheese
- 4 ounces thinly sliced prosciutto
- 4 ounces thinly sliced Genoa salami
- 4 ounces thinly sliced mortadella
- 1/2 cup thinly sliced roasted red peppers, drained
- 1/2 cup thinly sliced red onion
- 1 cup baby arugula
- 2 tablespoons olive oil
- 1 tablespoon red wine vinegar
Pesto Quality and Preparation Notes
If you’re using jarred pesto, just give it a little taste test first. Sometimes the store-bought stuff is surprisingly thick, almost like a paste. If it seems stiff, I actually thin mine out a touch! You can follow the recipe note and mix it with 2 tablespoons of softened butter until it’s easier to spread smoothly across that huge piece of bread. If you have time to make your own, look for a really bright, basil-forward flavor—it makes all the difference when it really soaks into the bread. For great dressing inspiration, you should check out my Caesar dressing tutorial; the principles of layering flavor are the same!
Step-by-Step Instructions for the Focaccia Grinder Sandwich with Pesto
Putting this amazing sandwich together is faster than hitting the drive-thru! Seriously, once you have your ingredients laid out, assembly is a breeze. The key here is building it right so that when you press it, everything stays where it should be. I always lay everything out on my biggest cutting board so I can see the whole thing before I start stacking. This results in the most incredible, flavor-packed Focaccia Grinder Sandwich with Pesto you can imagine.
Preparing the Focaccia and Spreading the Pesto
First things first, we need to deal with that gorgeous focaccia loaf. Just slice it right down the middle, keeping it horizontal to create your top and bottom bread halves. Now, if your focaccia is the really thick, pillowy kind—and I hope it is!—you might want to use a bread knife to gently shave a *tiny* bit out of the inside crumb of both sides. This step makes sure the final sandwich, even after pressing, isn’t obscenely tall. Once trimmed, go ahead and spread that bright basil pesto evenly onto the cut side of both the top and bottom pieces of bread. That’s the flavor foundation for your perfect Focaccia Grinder Sandwich with Pesto!
Layering the Focaccia Grinder Sandwich with Pesto Fillings
Now for the fun stacking part! We need to build from the bottom up to keep the moisture barrier working right. Start with all your cheese on the bottom half first—get that provolone down, then nestle the fresh mozzarella on top. Next up are the meats! Layer the prosciutto, salami, and mortadella evenly so you get a little bit of everything in every bite. Then, scatter those sweet, drained roasted red peppers and thin slices of red onion. Finally, grab that arugula, toss it quickly in the olive oil and red wine vinegar right before you pile it on top of the veggies. Don’t toss it too early, or it gets sad fast!
The Essential Pressing and Serving of Your Grinder
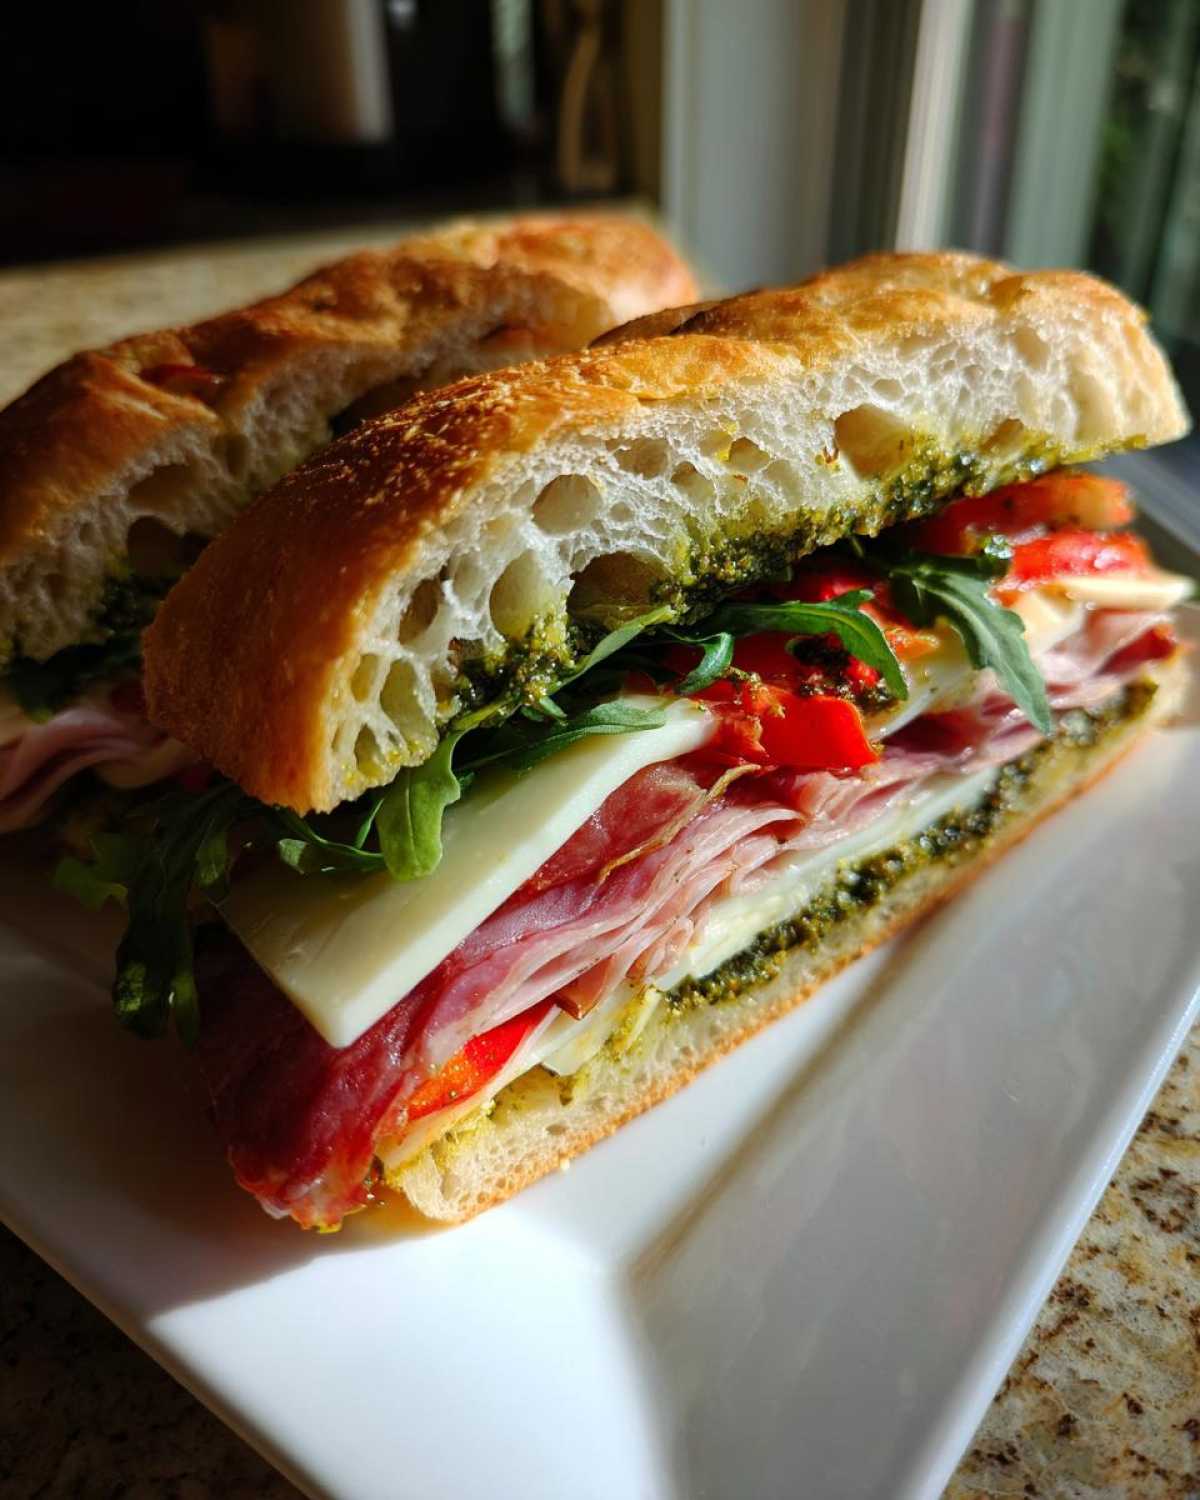
Carefully place the top half of the focaccia onto your vegetable layer to close up that beautiful Focaccia Grinder Sandwich with Pesto. Now, this next step is NON-NEGOTIABLE for a true grinder: TIGHTLY wrap the whole thing in plastic wrap or some parchment paper. Then, you need weight! I usually put a cutting board on top and then stack a few heavy books or my trusty Dutch oven right on top of that. Let it press for a minimum of 30 minutes—this is crucial because it melds the flavors together, stops the fillings from sliding out, and gives you that satisfying, structurally sound bite. When it’s done pressing, unwrap it, cut it into four generous portions, and serve it up! If you’re heading out, check out my tips for grilling similar sandwiches over on this Caprese Panini post; the pressing technique is very similar!
Tips for the **Best Focaccia Sandwich Ideas**
Listen, while this specific recipe for the Focaccia Grinder Sandwich with Pesto is nearly perfect, baking and cooking is all about adapting to what you love! That’s why I always keep a few basic tweaks in my back pocket for when I’m making any kind of Focaccia Bread Lunch Ideas.
Here are my top three tips for taking any sandwich built on focaccia bread from good to absolutely unforgettable:
- Slightly Toast the Bread First: If you absolutely cannot wait the full 30 minutes for the press, or if you are just nervous about sogginess, lightly toast the cut sides of the bread under the broiler for just 60 seconds before you add any wet ingredients like the pesto or vinegar. This builds a microscopic moisture barrier! For a similar pressed treat, check out how I build my Caprese Panini.
- Embrace Marinades: If you’re using heartier vegetables like cucumber or artichoke hearts (great additions!), slice them thin and let them sit in a little extra red wine vinegar and olive oil for about ten minutes before you layer them in. They soak up flavor instead of drawing moisture out of the bread once it’s pressed.
- The Meat Roll: When you’re layering thin meats like prosciutto used in deli-style subs, don’t just slap them flat! Give them a little loose fold or roll. They create little air pockets that give the finished, pressed sandwich a lighter bite instead of a solid dense layer of meat.
Making an **Italian Grinder Sandwich on Focaccia** Warm
Okay, so the recipe above produces a fantastic cold, pressed sandwich—perfect for taking to work or having on a hot summer day. But let’s be honest, sometimes you just want that gooey, oven-baked feel, right? If you want to turn your Focaccia Grinder Sandwich with Pesto into a warm, melty masterpiece, you absolutely can! It completely changes the texture; the cheese gets dreamy and the pesto actually blooms a little under the heat.
The key to warming this specific recipe up is figuring out what kind of heat you’re using. If you just toss the already-assembled sandwich into a regular oven, the bread can dry out too fast before the cheese even thinks about melting. We want warm, not crispy!
The Panini Press Method for a Warm Grinder
If you own a panini press, this is your moment to shine! This is the easiest route because the flat, heavy plates mimic that pressing step from the recipe but add direct heat. Once you’ve fully assembled your Focaccia Grinder Sandwich with Pesto (yes, layer everything first!), lightly brush the *outside* of the top and bottom focaccia pieces with a little olive oil. You don’t even need to wrap it in plastic for this method!
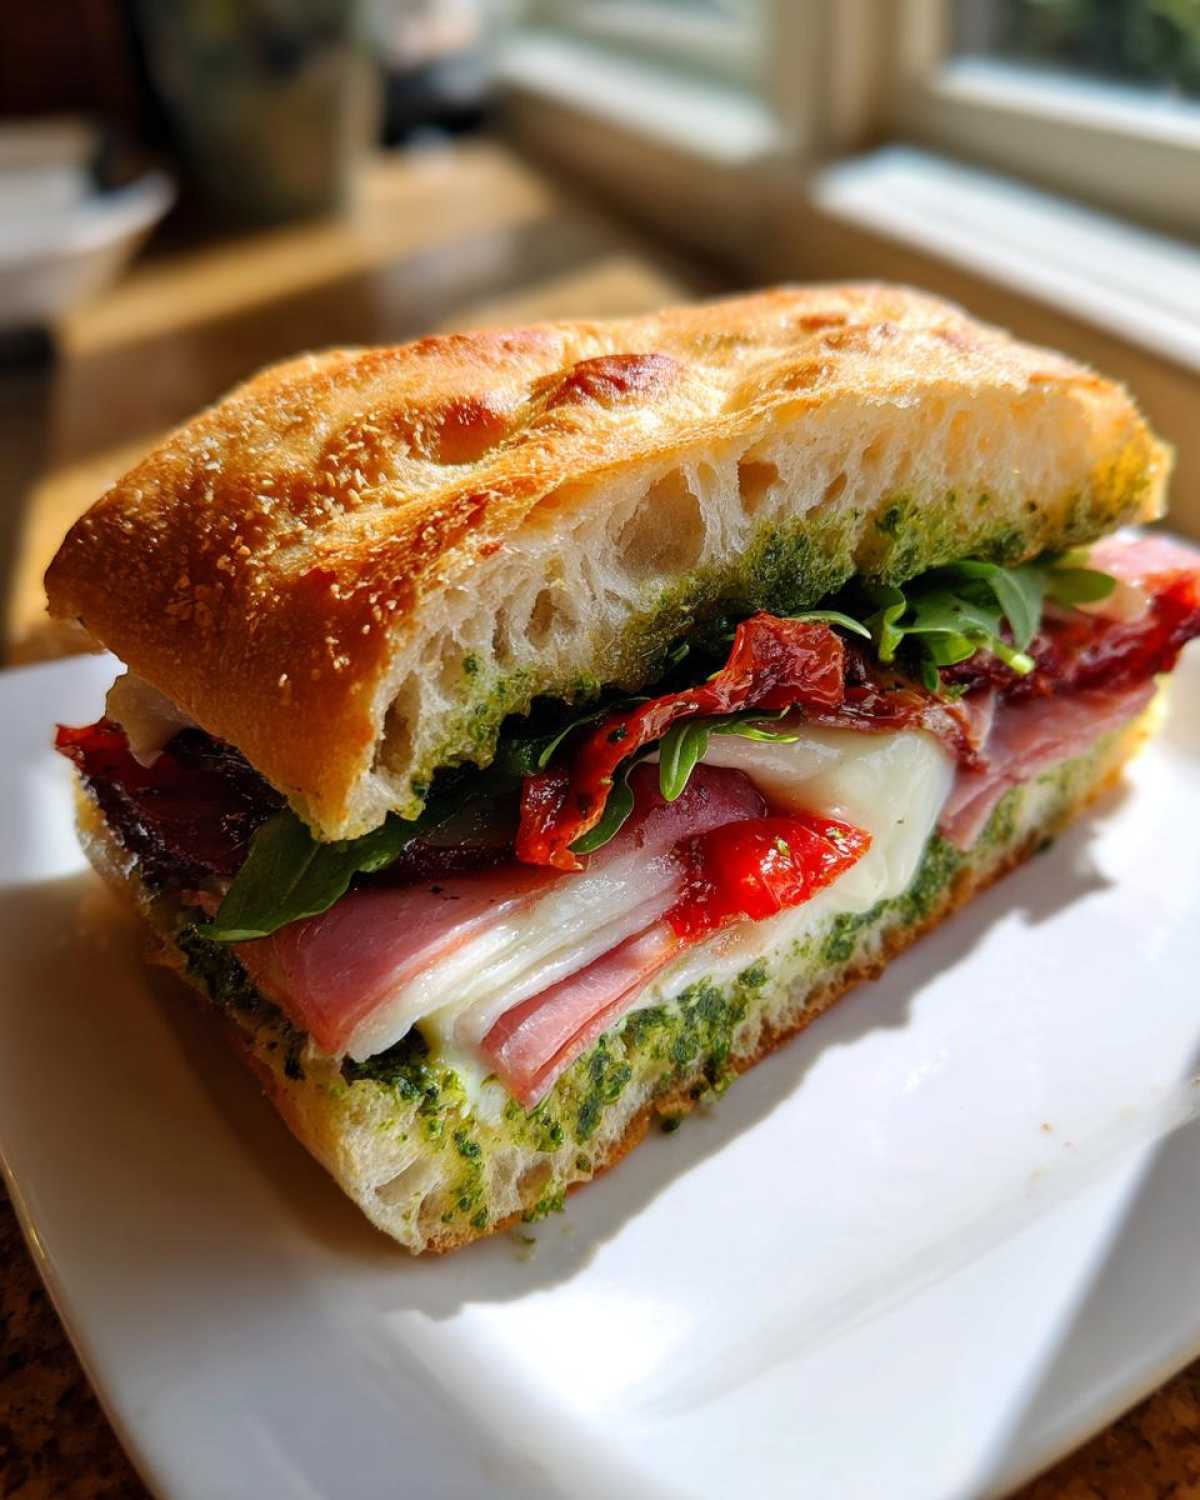
Heat your panini press to a medium setting—don’t go scorching hot! Carefully place the sandwich inside and gently close the lid. You should only need about 3 to 5 minutes. You’re looking for those beautiful grill marks, but more importantly, you want the provolone and mozzarella to be completely melted and oozing out just a little bit. This shortcut skips the 30-minute cold press and gives you instant gratification.
Using the Oven for a Larger Batch
Say you made the whole loaf and need to warm up half of it for dinner. Using the oven is totally fine, but you have to keep the pressure on! Assemble the sandwich as directed, wrap it up super tight in foil—this keeps the moisture locked in—and place it on a baking sheet. Set your oven to about 350°F (175°C).
Now, once you set it on the middle rack, you need to weigh it down again! Put a second oven-safe layer on top, like another baking sheet, and maybe even a heavy, oven-safe dish. Bake for about 15 minutes. Since the heat is gentler, it melts the cheese beautifully while steaming the bread slightly, keeping it tender. It’s a great alternative if you don’t want the grill marks you get from the press. It’s fantastic, and for more ideas on oven-finished treats, check out my Caprese Panini recipe for similar techniques!
Gourmet **Focaccia Grinder Sandwich Fillings** Variations
I love that this Focaccia Grinder Sandwich with Pesto recipe is already so rich with flavor from the salami and prosciutto, but honestly, half the fun is playing around with the fillings! Because pesto is so vibrant—it’s herbal, a little garlicky, and rich with Parmesan—it pairs beautifully with so many things. If you’re feeling adventurous, it’s the perfect base for trying out some new combinations. This is where those Gourmet Focaccia Sandwich Fillings really shine!
I usually stick close to the classic Italian profile, but if you want to pivot hard into vegetarian territory, you totally can. Just make sure whatever you add has enough substance to hold up to that heavy press!
Swapping Out the Meats for Something Different
If you’re not in the mood for the classic trio we used, you can easily swap them for other Italian staples. Prosciutto is amazing, but sometimes I crave something leaner. Turkey breast, thinly sliced and maybe even lightly smoked, works surprisingly well with the basil notes. Or, if you want to double down on richness, swap the mortadella for thinly sliced coppa or even a beautiful speck!
Another great move is moving away from Italian cured meats entirely. Try grilled chicken breast that you’ve tossed with a little salt, pepper, and oregano before layering it in. Just make sure whatever meat you choose is sliced thin enough so that the sandwich compresses neatly instead of bulging out.
Vegetarian Twists That Still Feel Hearty
This sandwich is fantastic when we make it meat-free, especially in the summer when garden vegetables are tasting their best! The key to a successful vegetarian build is texture, since you lose the density of the salami. Instead of relying heavily on just tomatoes, try stacking grilled or roasted eggplant slices. Eggplant soaks up the pesto beautifully, making it feel super satisfying.
If you are looking for a complete side dish that still uses those amazing Italian flavors, you have to try my recipe for Vegetarian Spinach Lasagna—it uses similar bright herbs! For the sandwich itself, add roasted zucchini and maybe even some marinated artichoke hearts alongside your mozzarella for that needed savory punch.
Adding Layers of Brightness with Veggies
Even if you keep the meats and cheeses the same, adding one extra vegetable layer can totally change the profile of your **Focaccia Grinder Sandwich with Pesto**. My favorite addition is jarred, slow-roasted sweet peppers, but if you’re feeling bold, try taking a jar of sun-dried tomatoes packed in oil, draining them slightly, and chopping them up. That intense, tangy sweetness is phenomenal against the saltiness of the provolone.
Also, don’t underestimate raw, sliced cucumbers! I know, cucumbers sound boring, but if you put them under the press, they release just enough cool moisture to balance out how rich the pesto and cheeses are. Remember to keep your onion thin; chunky red onion can fight the press!
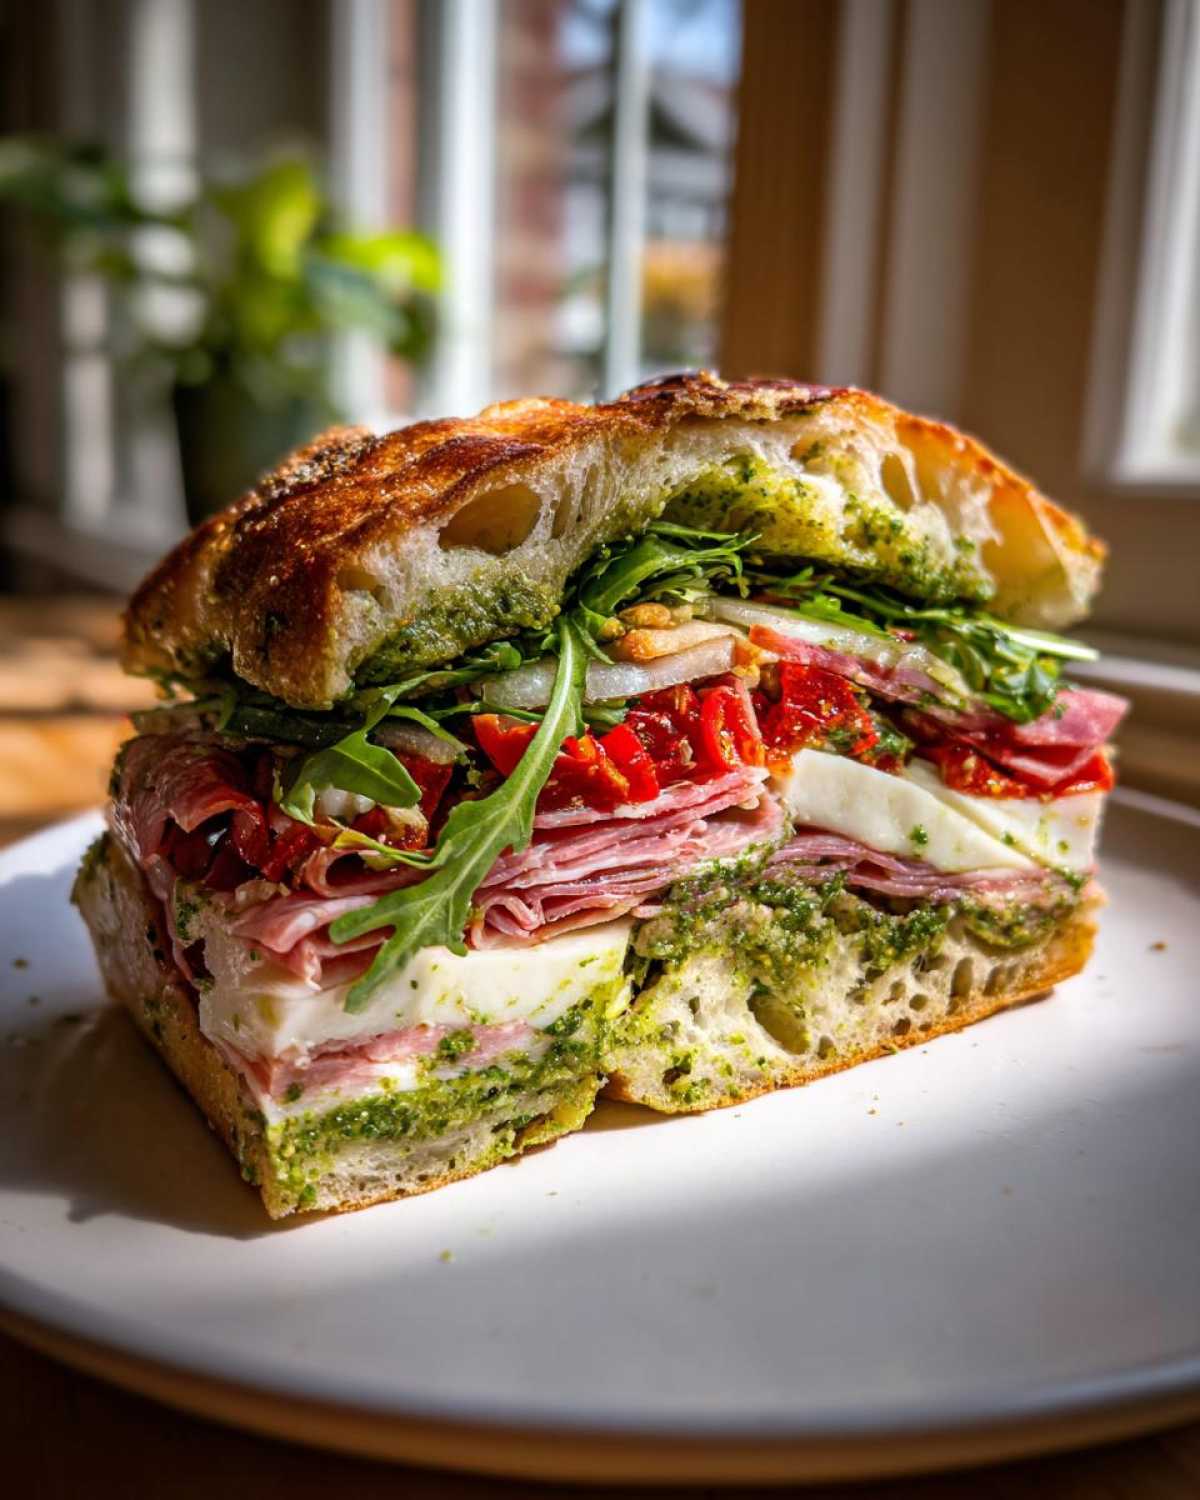
Storage and Reheating for Your Focaccia Grinder Sandwich with Pesto
So, you made this monster of a sandwich, and naturally, you can’t eat four servings in one sitting—even if you really, *really* want to! That’s okay, because the pressing step actually helps this sandwich store better than a regular loose sub. But we do need to talk about sogginess, because bread and liquids are never the best roommates overnight.
The truth is, this Focaccia Grinder Sandwich with Pesto is designed to be eaten fresh after that initial 30-minute press. That’s when the bread is perfectly compressed but hasn’t had time to fully absorb all that delicious oil and vinegar from the arugula dressing. If you need to save leftovers, here is what I always do.
Refrigerating the Pressed Sandwich
If you have leftovers, the best way to handle them is to keep the sandwich pressed! When you’re finished serving the first few portions, wrap the remaining block up tightly again—plastic wrap is best here to keep air out—and stick it in the fridge. The cold temperature actually firms up the fats in the cheese and pesto, which helps keep the bread from becoming totally saturated and falling apart. You can safely store it like this for up to two days.
Pro Tip: Resist the urge to slice it until you’re ready to eat it! Slicing exposes more bread surface area to air, which speeds up drying. Keep it whole for as long as possible.
The Best Way to Reheat Leftovers
Okay, reheating a pressed sandwich is tricky business. If you try to microwave it, you’re basically asking for a soggy, rubbery mess. Nobody wants that! Honestly, the best way to revive leftovers is to bring them back to room temperature, but if you crave warmth, you need dry heat to counteract the moisture built up in the fridge.
I recommend unwrapping your slice (or portion) completely and placing it directly onto a non-stick skillet or griddle over medium-low heat. You want to heat it slowly, maybe 3-4 minutes per side. This evaporates some of the trapped moisture from the vegetables and greens while warming the cheese just enough to make it soft again, without reaching that piping hot, soupy stage. It won’t be quite the same as fresh, but it’s miles better than the microwave!
What Happens if the Bread Gets Too Soft?
If you pull out a piece and it feels just a little too damp, don’t panic! This usually happens if you used overly juicy tomatoes or didn’t drain your peppers well enough. If the bread feels too soft but you haven’t cut it yet, lay the whole wrapped sandwich back under the weight for another hour before slicing. That extra pressure can sometimes squeeze out excess liquid.
If you’ve already sliced it and it’s a little floppy, skip the skillet reheat and go straight to a low-temp toast! Pop the slices open-faced onto a baking sheet and bake at 300°F (150°C) for about 8 minutes. This dries the bread slightly while warming the fillings. It won’t be a true grinder anymore, but it’ll be delicious!
Frequently Asked Questions About This Sandwich
I totally get it—when you find a recipe that looks this good, you’re going to have questions! I tried to cover all the essentials in the recipe itself, but sometimes you just need a quick answer to make sure your sandwich game is strong. Here are the few things I hear most often when people make this big Italian lunch!
Can I use bread other than focaccia?
Oh, you *can*, but you’re really missing the point of the ultimate Focaccia Grinder Sandwich with Pesto! Focaccia’s airy but sturdy structure is what lets it soak up all that pesto and vinegar without collapsing into soup. If you absolutely must substitute, reach for a ciabatta loaf or a good, sturdy Italian bread roll. Avoid soft white bread at all costs; it will disintegrate under the pressure. For dressing inspiration that works on any bread, you should check out my Caesar dressing page!
How long do I *really* need to press the sandwich?
I know, waiting 30 minutes when you’re hungry feels like an eternity! But please, try to wait the full half-hour, especially if you used the arugula tossed in vinaigrette, which adds extra liquid. That 30 minutes is what allows the heavy weight to squeeze out air pockets and gently infuse the bread with the cured meat fats and pesto. If you press for less time, the sandwich tends to slide apart when you slice it.
What if I don’t like salami or cured meats?
That’s perfectly fine! This is *your* sandwich, not mine (though mine is pretty great, if I do say so myself!). If you skip the salami and mortadella, you just need to amp up the cheese or add a really satisfying vegetarian block. I love using thick slices of roasted portobello mushroom caps spread with a little lemon zest and herbs, or even grilled halloumi cheese. If you’re going veggie, you might want to add an extra slice of mozzarella just to give it that needed density for pressing.
Can I make this ahead of time the night before?
Yes, but be careful! Because of the arugula treated with vinegar and oil, I wouldn’t recommend assembling the whole thing more than 6 hours in advance. If you need to prep the night before, do this: Slice the focaccia, spread the pesto on both halves, and layer *only* the meats and cheeses. Wrap that block up tight and store it in the fridge. The next day, add the dressed arugula just before you press it. This keeps the greens from wilting totally flat and protects the bread from getting too soggy overnight.
Serving Suggestions for Your **Focaccia Grinder Sandwich with Pesto**
You’ve done the hard work—you’ve made the ultimate Focaccia Grinder Sandwich with Pesto, and you’ve pressed it until it’s perfect. Now comes the best part: deciding what to serve alongside it! Because this sandwich is so rich, salty, and heavy on the Italian deli flavors, you need sides that are simple, bright, or offer a comforting textural contrast. You don’t want anything that requires a ton of effort when you’re already dealing with such an epic main course.
For me, balancing out that great flavor profile is everything. I usually look for something acidic or something creamy to cut through the fat of the mortadella and provolone. These pairings work perfectly for any of my Focaccia Bread Lunch Ideas.
The Perfect Simple Green Salad
Forget heavy ranch dressing! Since our grinder already has arugula tossed in a little vinegar and oil, we want to keep the salad simple. Think of it as an palate cleanser. I toss some mixed greens—maybe some butter lettuce or a delicate spring mix—with just a tiny squeeze of fresh lemon juice and a sprinkle of sea salt. That’s it! The bright tartness of the lemon cleanses your mouth from the cured meats, making the next bite of your grinder taste even better. It’s light, it’s fast, and it doesn’t compete with the star of the show.
Classic Kettle Chips and Pickles
Sometimes you just want that pure crunch, right? There is absolutely no shame in grabbing a bag of high-quality, thick-cut kettle chips. The big, irregular crunch echoes the satisfying break of the pressed bread crust. I like plain sea salt or subtle salt-and-vinegar chips for this. To balance the salt, you need a good deli pickle spear. A crisp, sour dill pickle or even a slightly sweet bread-and-butter chip adds that sharp acidity that screams classic Italian deli and cuts right through the pesto richness.
Pairing with a Warm, Comforting Soup
If you happen to be making your Focaccia Grinder Sandwich with Pesto on a cooler day, serving a small cup of soup alongside it turns this lunch into a powerhouse meal. Since the sandwich is so heavy on the basil and tomato notes (thanks to the roasted peppers), the pairing writes itself.
I often make a big batch of creamy soup just so I have this on hand! The classic pairing is a beautiful tomato basil soup. If you need a recipe that complements all these Italian flavors perfectly, you have to try my Creamy Tomato Basil Soup. It’s luxurious enough to feel special but simple enough that you won’t be tired out from too much cooking.
PrintFocaccia Grinder Sandwich with Pesto

Assemble a hearty, layered grinder sandwich using soft focaccia bread, savory Italian meats, fresh cheese, and bright basil pesto.
- Prep Time: 15 min
- Cook Time: 0 min
- Total Time: 45 min
- Yield: 4 servings
- Category: Lunch
- Method: Assembling
- Cuisine: Italian American
- Diet: Vegetarian
Ingredients
- 1 loaf (about 10×14 inches) plain or rosemary focaccia bread
- 1/2 cup basil pesto (homemade or store-bought)
- 4 slices provolone cheese
- 4 slices fresh mozzarella cheese
- 4 ounces thinly sliced prosciutto
- 4 ounces thinly sliced Genoa salami
- 4 ounces thinly sliced mortadella
- 1/2 cup thinly sliced roasted red peppers, drained
- 1/2 cup thinly sliced red onion
- 1 cup baby arugula
- 2 tablespoons olive oil
- 1 tablespoon red wine vinegar
Instructions
- Slice the focaccia loaf horizontally to create a top and bottom half. If the bread is very thick, you may want to trim the interior slightly to make room for fillings.
- Spread the basil pesto evenly over the cut side of both the top and bottom halves of the focaccia.
- On the bottom half, layer the cheeses: place the provolone slices first, followed by the fresh mozzarella slices.
- Layer the meats over the cheese: arrange the prosciutto, salami, and mortadella evenly across the bread.
- Top the meats with the roasted red peppers and thinly sliced red onion.
- In a small bowl, toss the baby arugula with the olive oil and red wine vinegar. Place the dressed arugula on top of the vegetables.
- Place the top half of the focaccia onto the bottom half to complete the sandwich.
- Wrap the sandwich tightly in plastic wrap or parchment paper. Place a heavy object, like a cast iron pan or a few heavy books, on top of the wrapped sandwich. Let it press for at least 30 minutes at room temperature.
- Unwrap the sandwich, slice it into four equal portions, and serve immediately.
Notes
- For a warm grinder, lightly toast the cut sides of the focaccia before spreading the pesto.
- If you prefer a less intense flavor, mix the pesto with 2 tablespoons of softened butter before spreading.
- Use high-quality, thinly sliced deli meats for the best texture in the grinder style.
Nutrition
- Serving Size: 1 portion
- Calories: 650
- Sugar: 4
- Sodium: 1100
- Fat: 40
- Saturated Fat: 14
- Unsaturated Fat: 26
- Trans Fat: 0
- Carbohydrates: 45
- Fiber: 3
- Protein: 35
- Cholesterol: 75



Comments are closed.