


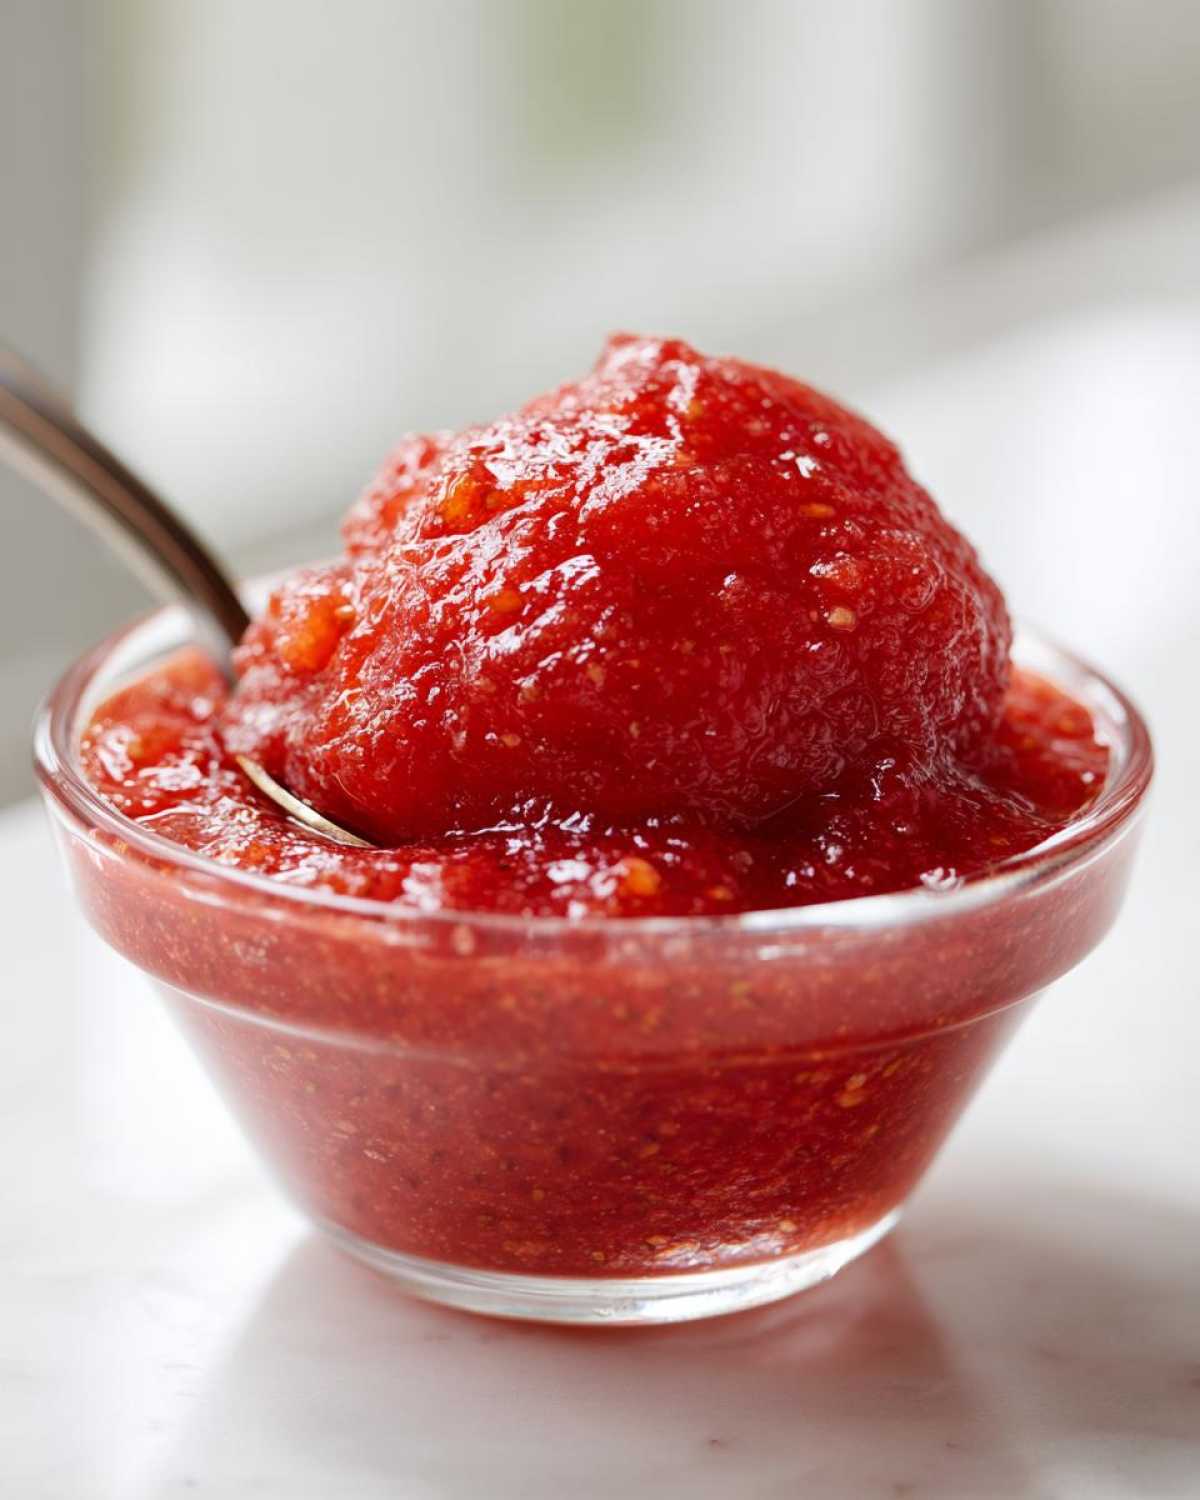
Oh my goodness, do you smell that? That’s the smell of pure, unadulterated summer sunshine captured right in a jar! If you’re anything like me, you look at those overflowing baskets of strawberries—bright red, fragrant, perfect—and think, “I have to save this flavor for winter!”
Well, forget hauling out the giant canning pots and dealing with all that boiling water. Trust me, after years of making preserves, I found the absolute fastest, easiest way to capture that fresh taste: freezer jam. This isn’t your grandma’s canned stuff; this is a brilliant, no-fuss method that keeps the fruit flavor bright and handles the tricky boiling parts for you.
I’ve perfected this specific strawberry recipe—it’s no-cook, requires zero canning know-how, and honestly, it sets up beautifully every single time. If you’ve always been intimidated by making jam, this is where you start. I promise you, once you try this simple way to make freezer jam, you won’t go back. Pull out those containers; we’re getting started!
If you want to know more about my kitchen philosophy, you can always check out my About Me page, but honestly, today is all about the fruit!
Why This Strawberry Freezer Jam is the Best (Easy Freezer Jam)
Let’s be honest, we want jam that tastes like we just picked the fruit this morning, not like it’s been sitting in a hot water bath for an hour. That’s the massive win with this recipe. We are keeping everything super simple. I’ve played around with lots of homemade jam recipes over the years, and this particular method delivers the freshest flavor by hardly cooking the berries at all.
This is truly the ultimate recipe when you need an easy freezer jam. Look at what you get when you choose this path:
- It’s incredibly fast to assemble—we’re talking actual kitchen time under 30 minutes.
- The texture is just spot-on. It’s thick enough to stay piled high on your toast but still soft and spoonable.
- It preserves that vibrant, slightly tart flavor of fresh strawberries that gets mellowed out when you boil everything down for canning.
Quick Jam Recipe: Ready in Under 30 Minutes
Seriously, the clock is your friend here! The only part that needs heat is treating the pectin with a little water to wake it up. That whole boiling stage takes maybe sixty seconds, tops. Once that hot liquid touches the fruit and sugar mixture, you’re just stirring gently. You’ll be labeling your jars way faster than you think. It’s the definition of a quick jam recipe!
No Canning Jam Method for Beginners
If the phrase “water bath canning” makes you break out in a cold sweat, I’ve got your back. This is a complete no cook jam method once the pectin is activated. We are skipping all the complicated sterilization and sealing steps entirely. You mix, you fill, you freeze, and you’re done! It’s the most accessible way to start making fresh fruit preserves at home, and I recommend it to every beginner cook I meet.
Ingredients for Your Easy Freezer Jam
Okay, let’s talk supplies! Because this is a no-cook recipe, the quality of your starting ingredients is everything. We want that bright, pure strawberry flavor to shine through, so please reach for the freshest, ripest berries you can find. Don’t grab those pale ones they had on sale last week!
For this batch, which yields about six half-pint jars—perfect for small gifts or just keeping one in the fridge and freezing the rest—here is exactly what you need:
- 4 cups fresh strawberries, hulled and crushed
- 1 package (1.75 oz) powdered fruit pectin (This is crucial for the set!)
- 7 cups granulated sugar (Don’t skimp here; the sugar does heavy lifting in the set!)
- 1/2 cup water
If you’ve ever made other preserves, you might notice this uses a lot of sugar, but for a no-cook method, it’s essential for a good texture.
Ingredient Notes and Substitutions for Freezer Jam
My biggest piece of advice here revolves around the pectin and the sugar. Since we aren’t boiling the berries for long, the pectin is our magic ingredient that forces everything to set up firm when it chills. You absolutely need the powdered fruit pectin, not the liquid variety, for this specific formula to work correctly!
As for the sugar? I know it seems like a mountain of white stuff, but in freezer jam, the sugar draws out the liquid and works with the pectin to create that perfect spreadable texture. Trust me when I say reducing it too much will result in runny fruit syrup instead of jam. If you are absolutely swimming in strawberries, scale everything down proportionally, but stick to this ratio!
Step-by-Step Instructions for No-Cook Strawberry Freezer Jam
This is where the science meets the magic! Even though we aren’t traditional canning, the order in which you combine these ingredients totally matters if you want that perfect set. Don’t worry, I’ll walk you through it exactly as I do it every time. I’ve got a whole little bit of a sweet tooth, so I always appreciate a recipe that moves fast!
Before we even start the stove, make sure your freezer-safe jars are clean and ready to go. This is a fast recipe, and you don’t want to be washing containers while the pectin is boiling!
Preparing the Fruit and Pectin Base
First things first: the strawberries. You need to get them hulled and crushed until they are exactly how you like them. I prefer mine a little chunky for texture, so I usually use a sturdy potato masher right in the bowl. If you want it smoother, pulse them quickly in the food processor, but don’t puree them! We want some body here.
Next, we wake up the pectin. Grab a small saucepan, pour in the pectin packet and the half-cup of water. Set this over high heat. This step is non-negotiable: you must bring this mixture to a rolling, vigorous boil—a boil so hard it won’t stop when you stir it—and you have to let it roll hard for exactly one full minute. Set a timer if you have to! Once that minute is up, yank it off the heat immediately.
Combining Mixtures to Create the Best Freezer Jam
This is the critical assembly line moment! Pour that steaming hot pectin mixture right over your crushed, room-temperature strawberries. Stir that together really well for about two minutes. You are essentially combining your binder with your fruit base here.
Now, take your 7 cups of granulated sugar and gradually stir it into the strawberry-pectin blend. Stir until that sugar is completely dissolved. My expert tip? As soon as the sugar melts away, stop stirring! Seriously, slow down then. Overmixing once the sugar is incorporated can actually cause the jam to lose its ability to set up properly later on. It’s counterintuitive, I know, but gentle mixing is your friend now.
Once it looks uniform—no dry pockets of sugar left—you can ladle it right into those waiting freezer jars. Remember to leave about a half-inch of empty space at the top (that’s headspace). The mixture will look a little thin right now, almost soupy. That’s normal! Let the jars sit on the counter until they cool down completely, then cover them tightly and slide them right into the deep freeze.
Tips for Success When Making Freezer Jam
See how easy that was? Now that you’ve got your wonderful, brightly colored strawberry mixture ready for the deep freeze, let’s talk about making sure it comes out perfectly when you finally pull it out next month. A few small habits I picked up over the years make all the difference in keeping the quality high for maximum enjoyment.
First off, the longevity question! While this freezer jam technically lasts ages because it’s frozen, I strongly recommend you try to use it up within six to eight months. After that mark, the flavor starts to lose that brilliant, fresh-from-the-garden pop. It’s still safe, but you want that *wow* factor, right?
The most important textural tip involves sugar reduction—which you probably already noticed we didn’t mess with much above. If you absolutely must have less sweetness, you can try reducing the sugar by just half a cup total. Any more than that, and you risk the jam staying too loose, even after it thaws completely. It’s a delicate balance!
Remember that headspace I mentioned? It needs to be about a half-inch gap between the jam surface and the lid. If you fill the jars right to the rim, the jam has nowhere to expand when it freezes solid, and guess what? You’ll end up with cracked jars or lids popping off. Nobody wants that messy freezer situation!
Also, if you’re on the fence about crushing by hand versus the food processor—I highly recommend the light pulse in the processor if you’re making a big batch. It saves your knuckles! However, if you want to try mixing up some other flavors for fun, maybe even a savory element like a spicy tomato spread, you can check out my tips on homemade dressings for inspiration on controlling texture in spreads. But for strawberries, keep those berries mostly whole!
Storing and Thawing Your Fresh Fruit Preserves
One of the best things about making this freezer jam is that you don’t have to rush to eat it all right away, though trust me, the smell alone might make you want to sneak a jar open immediately! This method is fantastic for summer fruit preserving because you capture peak flavor and save it for later.
When it comes to frozen storage, I always tell people to aim for the sweet spot. While this jam will be safe in the freezer for *ages*, the flavor starts to fade noticeably after about six to eight months. So, if you make a huge batch for pantry stocking recipes, maybe stick a little calendar reminder on the very bottom of the container so you know when to pull it out!
Now, for the thawing process—this is key to getting that perfect texture again. You can’t just microwave it, oh no! That will ruin the lovely texture we worked so hard to achieve during the mixing stage. Instead, always transfer your fresh fruit preserves from the freezer to the refrigerator the day before you plan to use them. An overnight thaw in the fridge is perfect.
What happens during that slow thaw? The jam gets slightly firmer as it begins to set up in the cold refrigerator air, thickening up from that thin liquid state it was in when it first went into the freezer. It thickens up beautifully as it waits for you. We want it spreadable, not runny, and that slow chill nails the texture every single time. It’s like magic, but it’s just science working slowly!
If you stash a few jars away, you’ve basically guaranteed yourself a wonderful spread for toast, scones, or mixing into yogurt all year long, without having to fire up the stove. It’s my favorite way to keep the joy of summer alive in the kitchen, and you can find more inspiration for using your stocked items right here on my pantry page!
Variations on This Quick Jam Recipe
Once you master the method for this strawberry freezer jam, the entire world of fruit preserving opens up to you! Since we aren’t boiling the fruit down and relying on long-term sterilization, we can get really creative with what we put in the bowl. This no-cook technique works beautifully for almost any fruit that hangs out in the summer sunshine.
You can absolutely use this base recipe for other things! Think about blackberries, blueberries, or even luscious peaches. The crucial thing to remember is that different fruits have different natural acid and pectin levels. If you start using something that’s less tart than strawberries, like perhaps a sweet plum, you might find the jam is a little softer when it thaws.
If you follow this same recipe exactly but use, say, 4 cups of pureed blueberries, it will still set up nicely because we are using the pre-measured packet of powdered pectin. However, if you move beyond the basic packet recommendation, you might need to adjust that 1/2 cup of water or add a splash of lemon juice to boost the acidity for a truly firm set later on. But for a first try with other fruits, just stick to the recipe above and see how it goes!
For example, I adore making a savory-sweet version that combines blackberries and peaches. It turns out incredible on a grilled sandwich! You can see my favorite combo for that right here: Blackberry Peach Grilled Cheese. But for the jam itself, stick to one fruit per batch for simplicity!
Making Small Batch Jam for Gifting
Since this is already a relatively quick and small batch jam recipe, it’s honestly the perfect candidate for making fruit preserves for gifts. Who doesn’t love getting a jar of homemade jam when you visit someone? It feels so personal!
When I make gifts, I usually divide the ingredients by half. That way, I get about three cute little half-pint jars instead of six. The process stays exactly the same—you just halve everything right down the middle. You still need that full packet of pectin, though, unless you are halving that too! For gifting, use the best labels you can find, tie a little ribbon around the neck of the jar, and you’ve made someone’s whole week.
It’s such a wonderful, tangible way to share the feeling of summer harvest, and since you didn’t have to spend an entire day sterilizing jars, you have more time to relax and enjoy the amazing smell coming from your kitchen!
Serving Suggestions for Homemade Jam Recipes
So, you’ve got these beautiful containers of bright, slightly sweet, perfectly set strawberry jam sitting in your freezer! What now? Toast is great, sure, and I certainly eat my fair share with a thick slathering on a warm biscuit, but these homemade jam recipes deserve to be celebrated in bigger, bolder ways!
Because this is a no-cook freezer jam, it stays softer and fresher tasting than traditional jelly, which means it melts beautifully over warm things without losing that fresh fruit tang. Think beyond breakfast! I think of these as my secret weapon for easy weekday flavor upgrades.
My absolute favorite way to use this jam is as an instant glaze or ripple. If you’re making pancakes or waffles for the kids, a little warm dollop on top tastes a hundred times better than syrup. If you’re feeling fancy, swirl some into plain Greek yogurt with a handful of granola—instant, delicious parfait!
If you’re a baker, this strawberry jam is amazing swirled into cheesecake batter before baking, or used as the simple filling between layers of a vanilla cake. Honestly, it makes any dessert feel instantly homemade and special. I even use it as a slightly thinner topping when I make my baked strawberry glazed doughnuts; the color just pops!
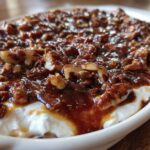
These simple fruit spreads can also save a basic savory meal. Try spooning a little over baked brie cheese with some toasted pecans—it’s sophisticated and takes zero effort. Or, use it as a glaze baste on chicken or pork chops in the last few minutes of baking. The sugar caramelizes perfectly and gives you this gorgeous, slightly fruity crust. Seriously, once you start using your freezer jam this way, you’ll realize you need twice as many jars next season!
Frequently Asked Questions About Freezer Jam
Whenever I share this recipe, there are always a few questions that pop up constantly. People are naturally curious, especially when they’re new to the no-boil method. I totally get it; when you start beginner jam making, you want to cover all your bases! Here are the things I hear most often about whipping up a batch of this easy spread.
Do I absolutely need pectin for this freezer jam?
Yes, for this specific formula, you do! This is the number one question I get. Since we are skipping the long cooking time that naturally activates the pectin already present in the fruit, we rely on that little packet of powdered stuff to give us the structure we need. If you decide to try a full **blueberry jam no pectin** recipe later on, you’ll need to cook those berries down for a very long time until the sugar concentrates enough. But for this quick, fresh-tasting batch? Use the pectin. It’s your insurance policy against mushy fruit!
Can I use applesauce or another thickener instead of commercial pectin?
I haven’t tested that substitution here, and honestly, it makes me nervous! Commercial pectin is scientifically balanced to work with the specific ratios of sugar and acid we use in this recipe. Applesauce is great in other baked goods, but it won’t gel the way this jam needs to when it thaws. If you’re looking for a very low-sugar spread, sometimes people use chia seeds, but that changes the whole texture profile. I’d stick to the powdered pectin for the most reliable results with this easy freezer jam.
How long can I keep this jam in the refrigerator (not the freezer)?
That’s a very practical question! Because this freezer jam hasn’t gone through a full canning process, it’s not shelf-stable. If you want to eat a jar right away, it will last about three weeks in the refrigerator before the quality starts to slip. That’s why I always recommend freezing the rest immediately after they cool down on the counter. If you’re making a big batch and thinking about using some over the summer, transferring one jar to the fridge right away is a smart move. It’s basically the same as if you made my blueberry iced tea—great fresh, but needs refrigeration!
If I use a slightly less sweet fruit, can I cut the sugar down?
This is such a common query, especially when people are trying to cut back on sugar. With this no canning jam method, the sugar isn’t just for sweetness; it’s a vital structural component, almost like another kind of preserving agent working alongside the pectin. If you reduce the sugar by a cup or two (out of the seven), the jam will likely thaw out as a very loose, runny sauce rather than a proper spread. For the best texture, stick to the formula, or better yet, try using super flavorful berries so the sugar doesn’t seem as dominant!
Estimated Nutritional Data for This Simple Fruit Spread
Before you dig into this amazing, easy-to-make strawberry treat, I always like to give a little heads-up on what’s in it. We’re dealing with a lot of sugar here, because, as we discussed, sugar is key to getting that perfect set in a no-cook recipe, but I figure it’s good to know exactly what you’re spreading on your morning toast!
Please remember that these numbers are just an estimate. They’re calculated based on the full recipe yield divided by the serving size, and they assume you used standard granulated sugar and ripe, fresh strawberries. When you’re serving up your amazing simple fruit spread, keep this in mind!
- Serving Size: 2 tablespoons
- Calories: 75
- Sugar: 19g (Yes, that’s where most of the carbs come from, that’s the jam magic!)
- Fat: 0g
- Sodium: 2mg
- Protein: 0g
- Cholesterol: 0mg
It’s basically sunshine, sugar, and strawberries, all concentrated! If you’re watching your sugar intake, remember that a little bit of this powerful freezer jam goes a long way. A tiny dollop on plain yogurt or mixing it into a sparkling water is often more than enough to get that lovely fresh strawberry kick!
PrintEasy No-Cook Strawberry Freezer Jam
Make bright, fresh strawberry jam quickly without boiling or canning. This simple recipe uses pectin for a perfect set and stores well in the freezer.
- Prep Time: 20 min
- Cook Time: 5 min
- Total Time: 25 min
- Yield: About 6 half-pint jars
- Category: Dessert Topping
- Method: No-Cook Mixing
- Cuisine: American
- Diet: Vegetarian
Ingredients
- 4 cups fresh strawberries, hulled and crushed
- 1 package (1.75 oz) powdered fruit pectin
- 7 cups granulated sugar
- 1/2 cup water
Instructions
- Prepare your containers: Wash and dry small freezer-safe jars or plastic containers.
- Crush the strawberries: Place the strawberries in a large bowl and crush them until you reach your desired consistency. You can use a potato masher or a fork.
- Mix pectin and sugar: In a separate small saucepan, combine the pectin and water. Bring this mixture to a rolling boil over high heat, stirring constantly. Boil hard for exactly one minute. Remove from heat.
- Combine mixtures: Immediately stir the boiling pectin mixture into the crushed strawberries. Mix well for about two minutes.
- Add sugar: Gradually stir in the granulated sugar until it is completely dissolved. Do not overmix once the sugar is added.
- Fill containers: Ladle the jam mixture into your prepared freezer containers, leaving about 1/2 inch of headspace.
- Cool and freeze: Let the jam cool to room temperature on the counter for about 30 minutes. Cover the containers tightly and place them in the freezer.
- Thaw for use: When you want to use the jam, transfer a container to the refrigerator to thaw overnight. It will thicken as it thaws.
Notes
- This jam is best eaten within 6 to 8 months for optimal flavor.
- If you prefer a slightly looser jam, reduce the sugar by 1/2 cup.
- For a smoother texture, pulse the strawberries briefly in a food processor instead of crushing by hand.
Nutrition
- Serving Size: 2 tablespoons
- Calories: 75
- Sugar: 19
- Sodium: 2
- Fat: 0
- Saturated Fat: 0
- Unsaturated Fat: 0
- Trans Fat: 0
- Carbohydrates: 19
- Fiber: 0
- Protein: 0
- Cholesterol: 0

Comments are closed.