


Oh my goodness, are you ready for a treat that tastes like cozy autumn evenings melted into the creamiest dessert you’ve ever had? Seriously, sometimes you just need something decadent but don’t want to turn on the oven, right? That’s why I’m obsessed with sharing my recipe for cookie butter cheesecake cups. They come together so fast, and since they are served individually, they make portion control (or lack thereof!) super easy. I love these because they are the ultimate ‘wow’ factor for zero effort. Trust me, these rich, no-bake delights are about to become your new go-to crowd pleaser!
Why You Will Love These No-Bake Cookie Butter Cheesecake Cups
Honestly, they are the dream dessert for busy people like us! You get all the indulgence of a full cheesecake but in cute little servings. Here’s why you absolutely must try these cookie butter cheesecake cups:
- They are genuinely no oven treats! We skip the baking and go straight to chilling, which feels like magic.
- They create perfectly portioned, creamy dessert cups, ideal for gatherings or just snacking straight from the fridge.
- Because these are a fantastic make ahead dessert, you can whip them up the day before that party and forget about them until serving time!
- The spiced cookie crust combined with the smooth filling offers serious flavor—they are better than any other easy dessert cups you’ve tried before. I promise! Check out my Oreo version if you need another quick fix!
It’s just pure, creamy happiness with zero fuss!
Essential Ingredients for Perfect Cookie Butter Cheesecake Cups
To make sure these cookie butter cheesecake cups are perfectly stable and incredibly creamy, we need to pay attention to the details. Don’t worry about rushing here; getting the prep right is half the battle for any great no bake cheesecake.
Crust Components and Filling Base
For the base, you’ll need 1 1/2 cups of crushed Biscoff cookies—or whatever your favorite speculoos cheesecake cookie is! Mix that with 6 tablespoons of melted, unsalted butter. Keep that butter warm until you mix it in. Then for the filling, make sure your 8 ounces of cream cheese is truly softened; no one likes lumps! We use 1/2 cup of powdered sugar and 1 teaspoon of vanilla extract. Oh, and the secret to the lightness is 1 cup of *cold* heavy whipping cream that we’ll whip up separately.
Cookie Butter Cheesecake Cups Topping
This is where the flavor really hits! You’ll need about 1/2 cup of your favorite smooth cookie butter spread for folding into the filling. But for the beautiful presentation on top, make sure you have a little extra cookie butter reserved. Warming up just a couple of spoonfuls of that extra spread slightly before you drizzle it over the top makes it pourable and gorgeous. It brings that final punch of spice and sweetness!
Step-by-Step Instructions for No-Bake Cookie Butter Cheesecake Cups
Alright, this is where the fun starts, and I really need you to listen up because these are no oven treats! We aren’t baking anything, which is the best part. It’s all about mixing and chilling. Grab your little ramekins or mason jars—whatever you’re using for your individual cheesecake recipe—and let’s get going. This process is fast, but the chilling time is non-negotiable if you want that perfect, firm texture.
Preparing the Cookie Butter Crust Base
First up, the crust! In a bowl, simply combine those 1 1/2 cups of crushed Biscoff cookies with your 6 tablespoons of melted butter. You want it to look like wet sand when you squeeze it; if it seems too dry, add just a touch more butter. Then, take about 2 tablespoons of that mixture and press it firmly into the bottom of each of your 6 cups. This layer gives us the structure! Pop these crusts into the fridge now for about 10 minutes while you handle the filling. That quick chill helps them set up nicely.
Assembling the Creamy Cheesecake Filling
Now for the filling, which makes these the ultimate creamy dessert cups. In one bowl, beat your softened cream cheese with the powdered sugar and vanilla until it’s completely smooth—no gritty bits allowed! In a separate, clean bowl, whip up that 1 cup of *cold* heavy whipping cream until you get stiff peaks. Don’t stop too early; stiff peaks mean it’s airy and light!
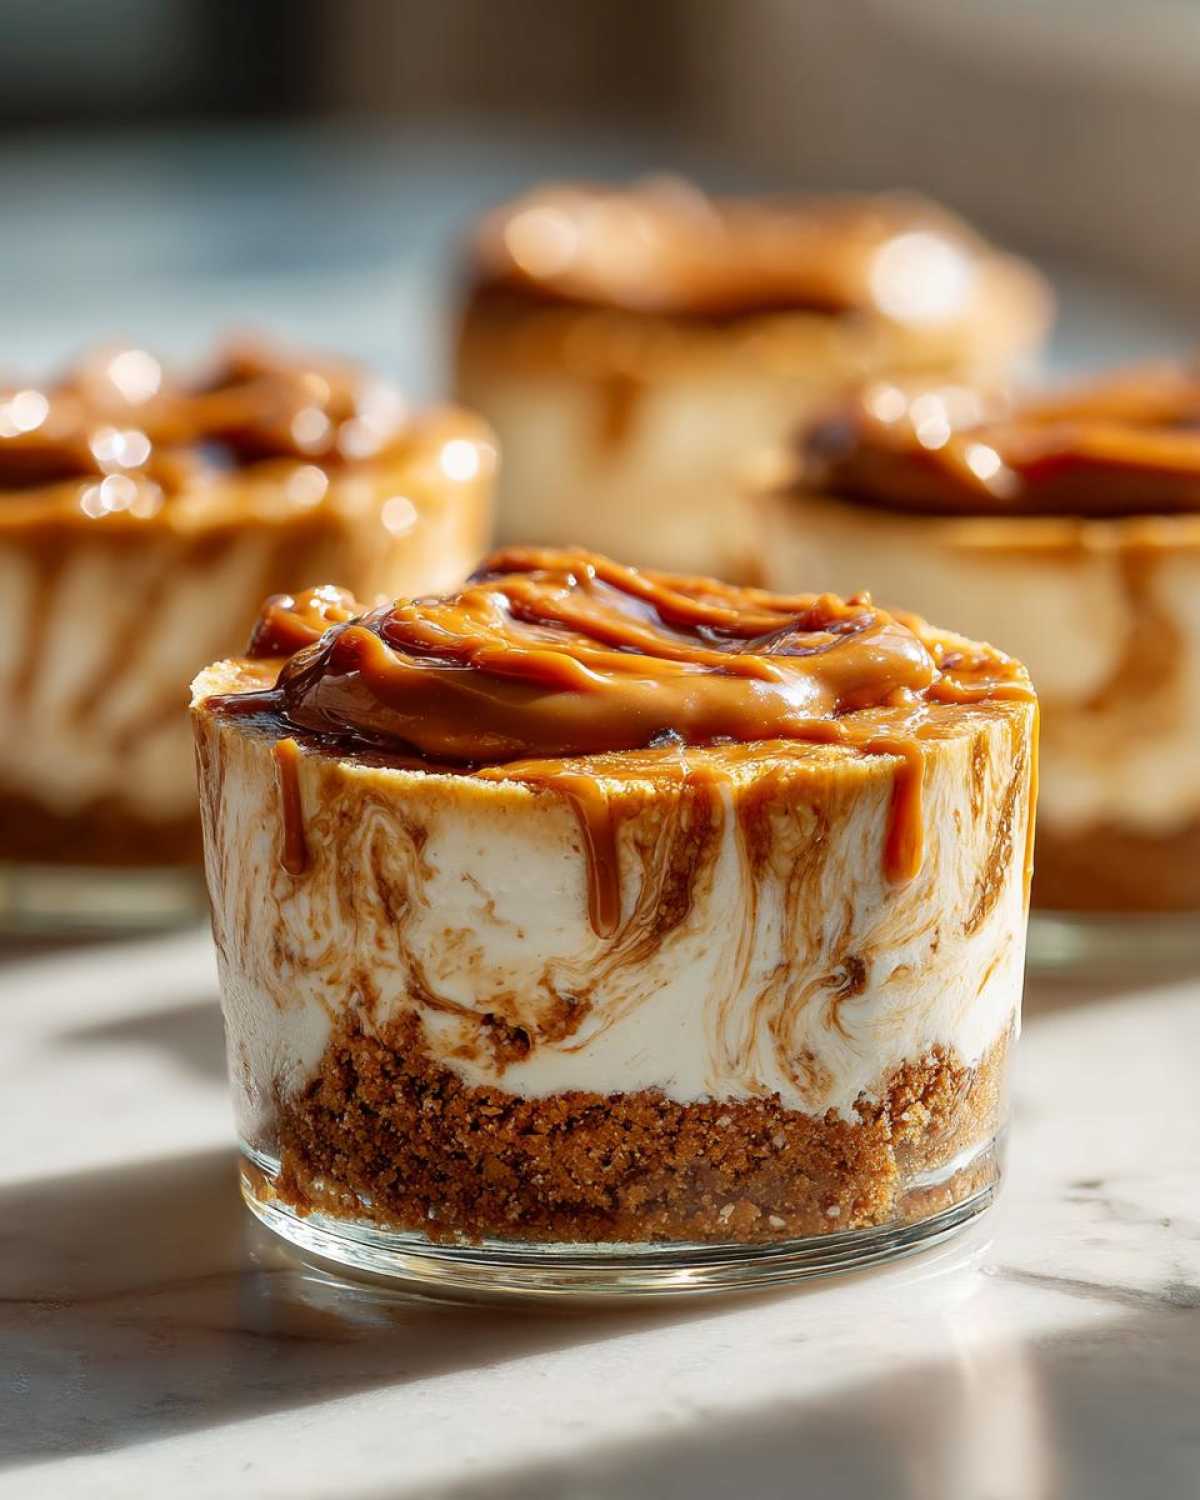
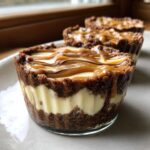
Achieving the Marbled Cookie Butter Cheesecake Cups Look
This is my favorite technique for making the filling look special! Take the smooth cream cheese mixture and gently fold in your 1/2 cup of cookie butter spread. Here’s the crucial expert tip for beautiful cookie butter cheesecake cups: DO NOT overmix! I mean it! You want to fold until you see beautiful streaks of the lighter cream cheese base and the darker cookie butter swirling together. If you blend it completely, you lose that gorgeous marbled effect.
Setting and Finishing Your Cookie Butter Cheesecake Cups
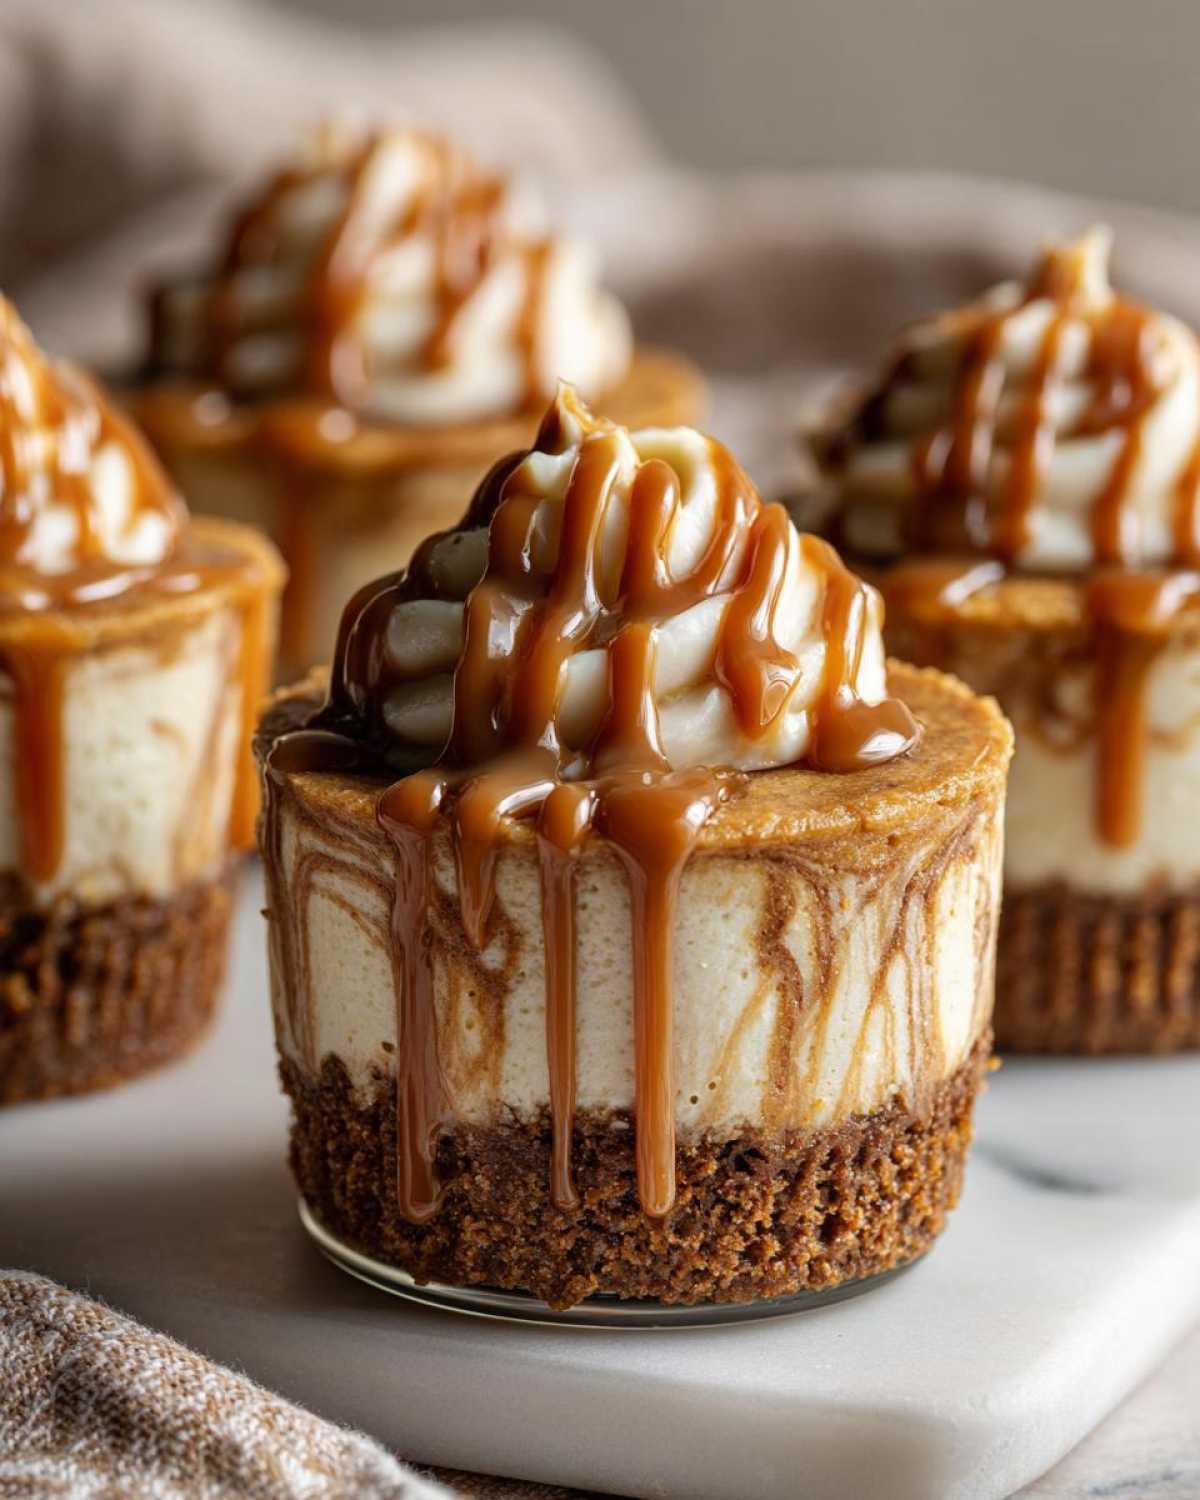
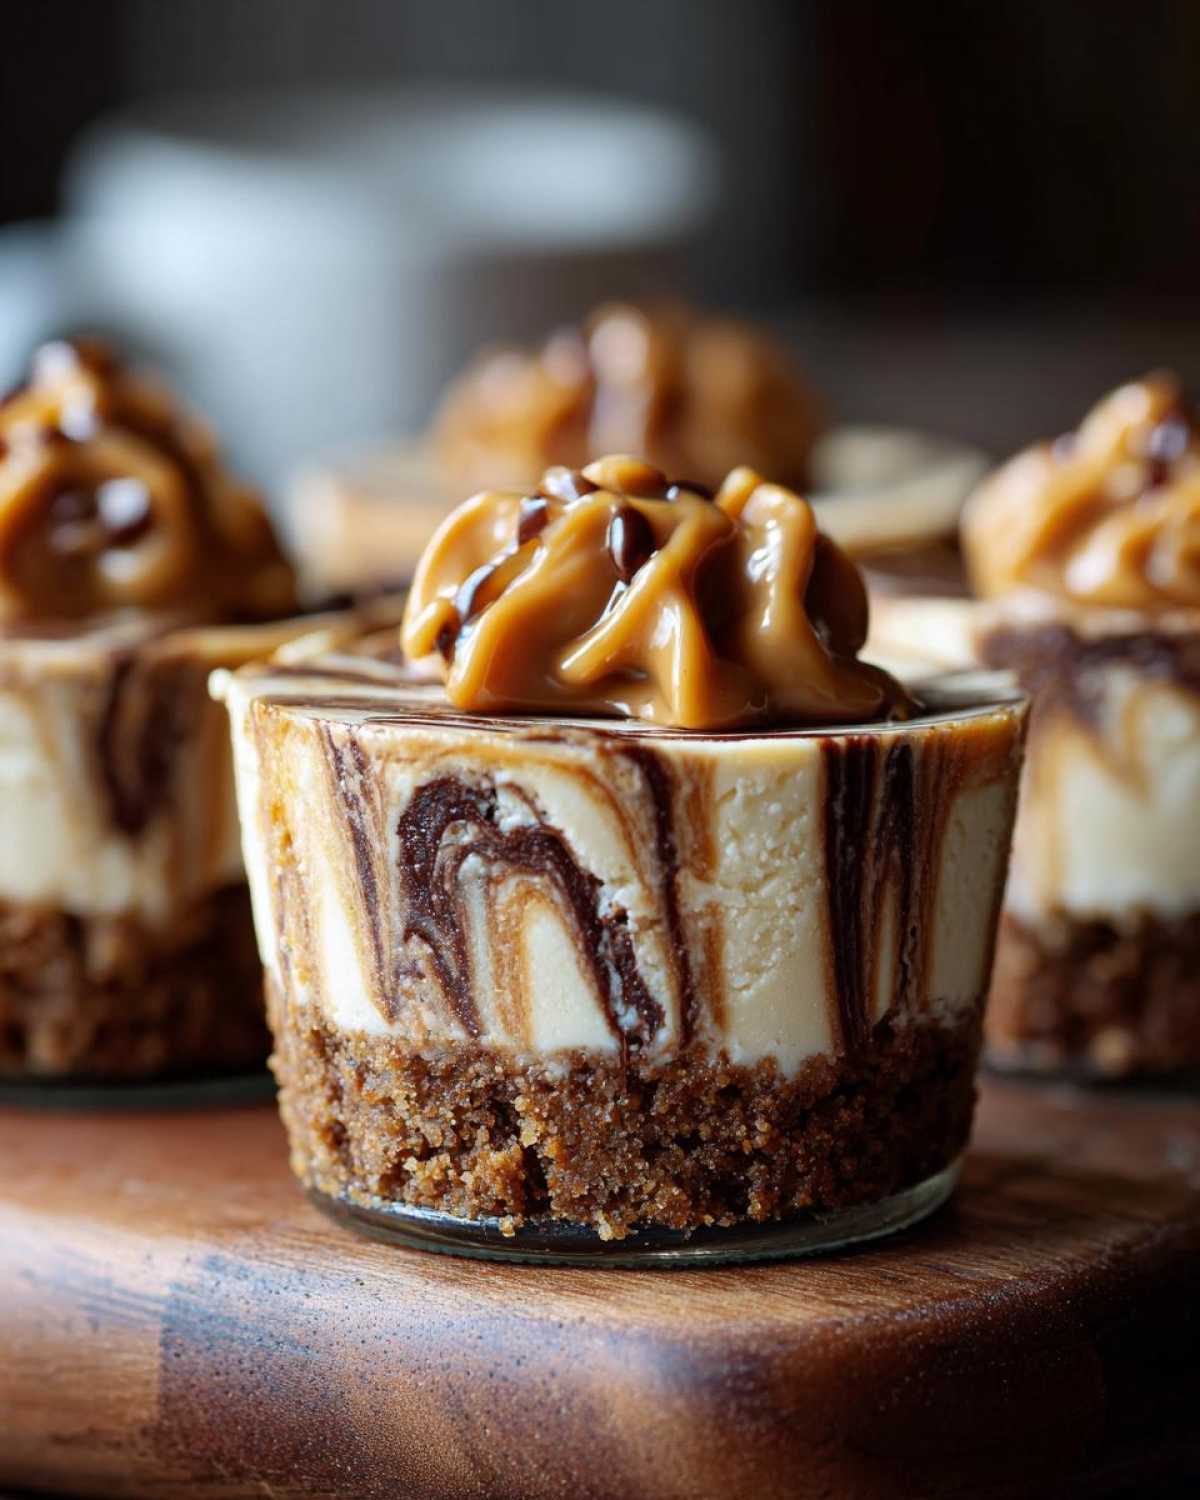
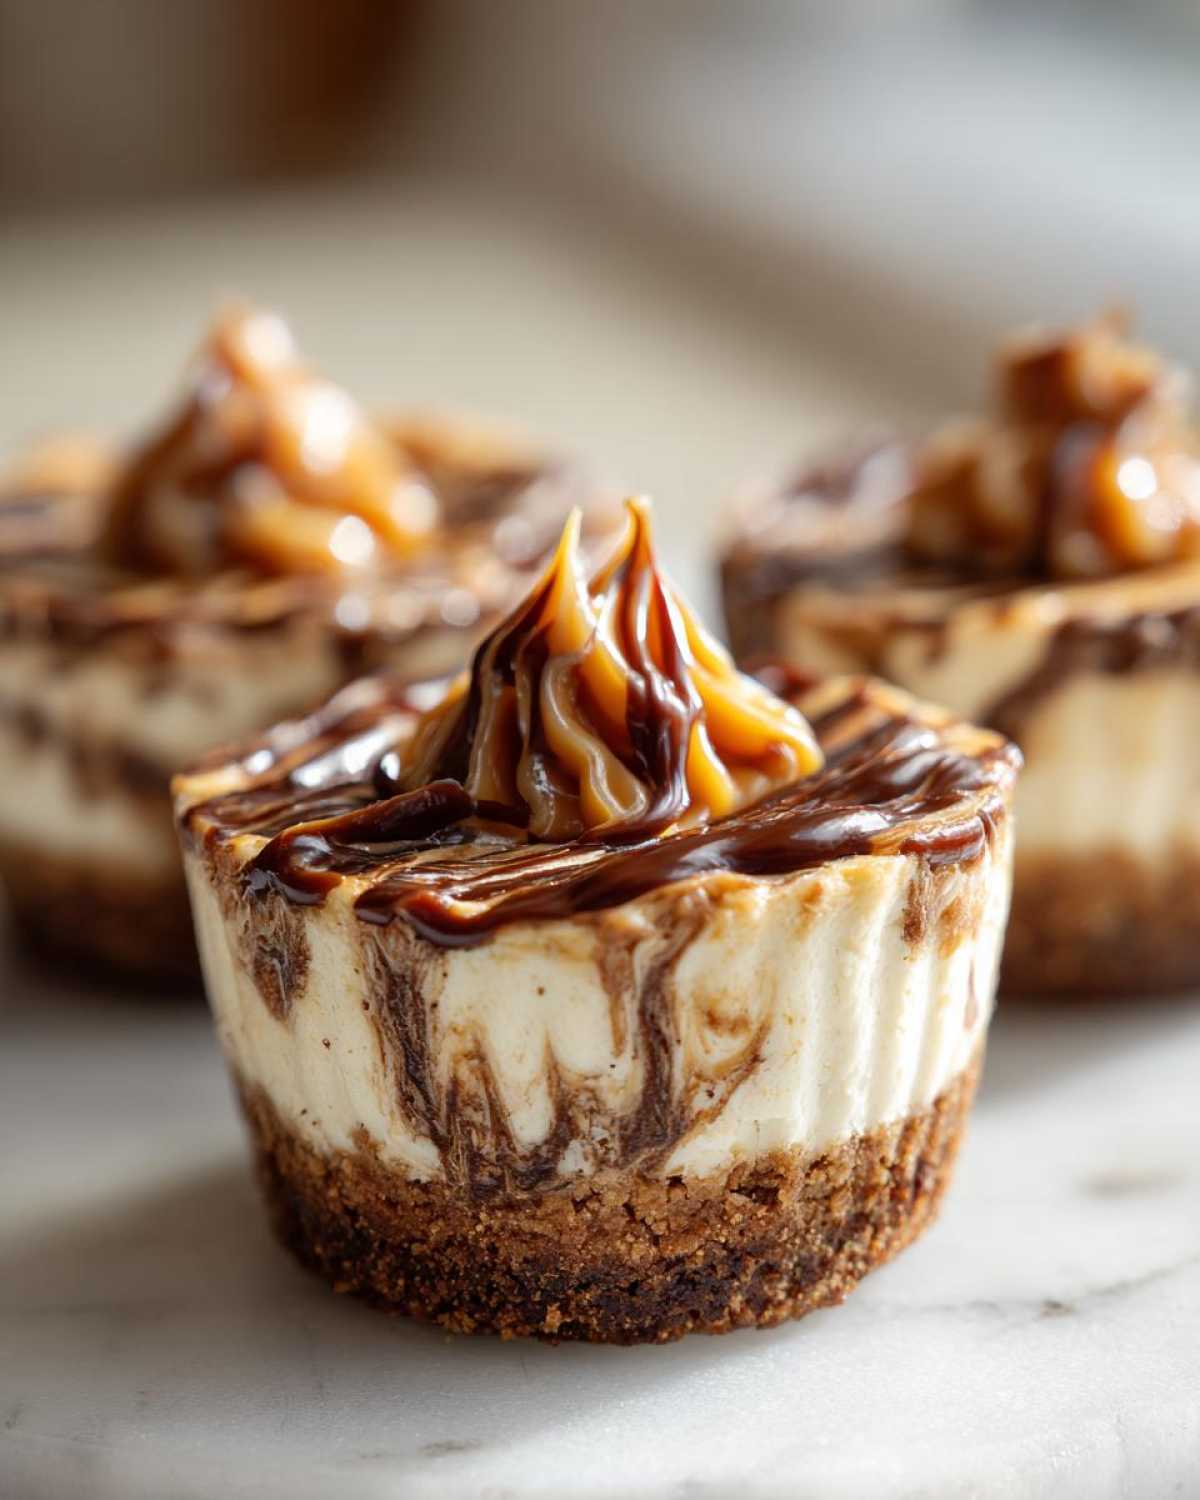
Once you’ve got that lovely marbled filling, spoon or pipe it right over those chilled crusts. Now comes the hardest part—waiting! These need at least 4 hours in the refrigerator to set properly. Seriously, don’t rush this; it’s vital for the no-bake structure. Once they are firm (this is a great make ahead dessert option!), warm up a little extra cookie butter until it’s runny and drizzle it right over the top just before serving. Wow! This technique works great for my Oreo version too!
Tips for Making the Best Cookie Butter Cheesecake Cups
If you want these cookie butter cheesecake cups to really sing, a few expert tricks make all the difference. First, when you are whipping that heavy cream, make sure your bowl and whisk attachments are super cold. Seriously, stick them in the freezer for 15 minutes beforehand! This guarantees you get those stiff peaks so your filling stays light and airy, which is the key to any good no bake cheesecake.
Secondly, for the deepest flavor in your crust—especially if you’re making these for a holiday—try mixing in just a tiny pinch of ground cinnamon or cloves with the crushed cookies. It really enhances the spice notes in the speculoos cheesecake flavor profile! These individual cheesecake recipe cups are fantastic because they look so fancy, but they start with such simple, smart steps. Don’t skip that chilling time, though; that’s what locks in the creaminess!
Ingredient Notes and Substitutions for Cookie Butter Cheesecake Cups
Listen, I know sometimes you have to shop with what you have on hand, but with these cookie butter cheesecake cups, a few ingredients are non-negotiable if you want that perfect texture. You absolutely must use full-fat cream cheese. If you try to use the low-fat stuff, your filling just won’t firm up properly when it chills—it’ll turn soupy, and we definitely don’t want that sad situation!
Now, about the cookies. If you can’t find Biscoff, don’t panic! The recipe data notes that you can swap in graham crackers for the crust. That works fine, but you’ll lose some of that deep, complex spice flavor. If you substitute the cookies, make sure you add a little extra pinch of cinnamon into that crust mixture to try and mimic the spice!
Serving Suggestions for Your Cookie Butter Cheesecake Cups
You absolutely have to prepare these when you need super fast, yet impressive, sweet treats. Because these are already designed as a dessert in a cup, they are instantly great for entertaining. I bring these cookie butter cheesecake cups to every gathering now because they are such an easy win!
They make phenomenal quick party desserts, especially when you have a mix of people who like creamy vs. cakey sweets. They are a real crowd pleaser dessert, naturally! For a little extra flair, I sometimes layer a tiny bit more crushed cookie crumbs right on top of the drizzle, or place a single whole speculoos cookie right on the edge of the cup just before serving. If you need more last-minute ideas, you should definitely peep my tips on making the ultimate party subs; sometimes you need savory right after you’ve gone heavy on the sweet!
Storage and Make Ahead Tips for Cookie Butter Cheesecake Cups
If you’re planning ahead—which I highly recommend for these cookie butter cheesecake cups—you’re in luck! These are honestly better when they’ve had a good, long rest in the fridge. You can safely store them covered tightly in the refrigerator for up to three days. That means you can totally knock them out the day before your big event and serve them chilled the next day. That’s the beauty of a good make ahead dessert!
If you need to keep them longer, you can freeze them! Just make sure they are firmly set, cover them really well so they don’t pick up any freezer smells, and freeze for up to a month. When you want to serve them, just let them thaw slowly in the fridge for a few hours. They come out perfect, though you might want to add a fresh drizzle of cookie butter when you serve them!
Frequently Asked Questions About Cookie Butter Cheesecake Cups
I know you might have a few last-minute questions before you grab your spatulas. It’s totally normal! When you’re dealing with a perfect no bake cheesecake, you want to make sure everything is just right. Here are the things I always get asked about these little gems.
Can I make these cookie butter cheesecake cups vegan?
That’s a great question for anyone with dietary restrictions! Yes, you absolutely can tweak these to be vegan, though it definitely changes the texture slightly depending on your ingredients. You’ll need to swap out the dairy, of course. Look for high-quality vegan cream cheese replacements and use a full-fat coconut cream whipped stiffly instead of heavy cream. It works great for creating those creamy dessert cups without the dairy!
How long do these no bake cheesecake cups need to set?
I know patience isn’t anyone’s strong suit when dessert is waiting, but this step is crucial for these cookie butter cheesecake cups. The absolute minimum chilling time you must give them is 4 hours. If you can stand it, though, let them go overnight! When they sit longer, that filling gets firmer, the crust locks down, and the flavors really marry up beautifully. Seriously, overnight yields the best, most stable texture for these individual cheesecake recipe portions.
What happens if I use Cool Whip instead of whipping heavy cream?
You certainly *can* use stabilized whipped topping like Cool Whip—it saves a whipping step! However, you won’t get that incredible, rich texture that comes from real heavy cream. The whipped topping is lighter and airier, which might make the final product a little less dense and luxurious than my preferred recipe calls for. It’s faster, but maybe slightly less indulgent for your easy dessert cups.
Can I bake these cookie butter cheesecake cups?
Nope! And that’s the beauty of them! These are specifically designed as a no oven treat. If you bake them, the high fat and sugar content will cause the cream cheese to melt and break. Stick to the chilling method to keep them perfectly smooth and creamy!
What if I don’t have Biscoff cookies for the crust?
If you can’t find actual Biscoff cookies, don’t sweat it! You can use any spiced shortbread cookie you like, or even standard graham crackers, as I mentioned in the notes. Just remember that by swapping out the cookie, you are changing the spice profile, so you might want to add that tiny pinch of ground cinnamon to the crumbs to bring back some of that warm flavor!
Nutritional Estimates for Your Cookie Butter Cheesecake Cups
Now, let’s talk fuel, even though these cookie butter cheesecake cups are definitely meant for treating ourselves! You deserve to know what you’re diving into, right? I ran these ingredients through one of my handy online calculators. Remember, this is just an estimate, kind of like a ballpark figure.
The exact numbers might shift a bit depending on which brands of cream cheese, cookie butter, and heavy cream you use—you know how sneaky ingredients can be! But generally, for one of these delicious little servings, here’s what you’re looking at:
- Serving Size: 1 cup
- Calories: 450
- Fat: 30g (Of that, about 18g is saturated fat, sorry! It’s the cream cheese and butter working their magic.)
- Carbohydrates: 40g
- Sugar: 35g (It’s a dessert, so we expect some sweetness!)
- Protein: 6g
This is a rich treat, so one cup is usually plenty! If you’re looking for lighter ideas for when you need something less indulgent, check out my recipe for healthy zucchini bread, which skips a lot of the heavy fat content but is still delicious!
PrintNo-Bake Cookie Butter Cheesecake Cups
Make individual, creamy cheesecake cups using cookie butter and a simple no-bake method. These are quick to assemble and perfect for parties.
- Prep Time: 20 min
- Cook Time: 0 min
- Total Time: 4 hr 20 min
- Yield: 6 servings
- Category: Dessert
- Method: No-Bake
- Cuisine: American
- Diet: Vegetarian
Ingredients
- 1 1/2 cups crushed Biscoff cookies (or similar speculoos cookies)
- 6 tablespoons unsalted butter, melted
- 8 ounces cream cheese, softened
- 1/2 cup powdered sugar
- 1 teaspoon vanilla extract
- 1 cup heavy whipping cream, cold
- 1/2 cup cookie butter spread (plus extra for topping)
Instructions
- Combine the crushed cookies and melted butter in a bowl. Mix until the crumbs are evenly moistened.
- Press about 2 tablespoons of the crumb mixture into the bottom of 6 small serving cups or ramekins. Chill the crusts for 10 minutes.
- In a separate bowl, beat the softened cream cheese, powdered sugar, and vanilla extract until smooth.
- In another bowl, whip the cold heavy whipping cream until stiff peaks form.
- Gently fold the whipped cream into the cream cheese mixture until just combined.
- Fold in 1/2 cup of the cookie butter spread until streaks remain; do not overmix for a marbled effect.
- Spoon or pipe the cheesecake filling evenly over the chilled crusts in the cups.
- Refrigerate the cups for at least 4 hours, or until firm.
- Before serving, warm a small amount of extra cookie butter slightly and drizzle it over the top of each cheesecake cup.
Notes
- Use full-fat cream cheese for the best texture.
- You can substitute graham crackers for the cookie butter crust if desired.
- These cups are best made one day ahead to allow for proper setting.
Nutrition
- Serving Size: 1 cup
- Calories: 450
- Sugar: 35
- Sodium: 250
- Fat: 30
- Saturated Fat: 18
- Unsaturated Fat: 12
- Trans Fat: 0
- Carbohydrates: 40
- Fiber: 1
- Protein: 6
- Cholesterol: 95


Comments are closed.