


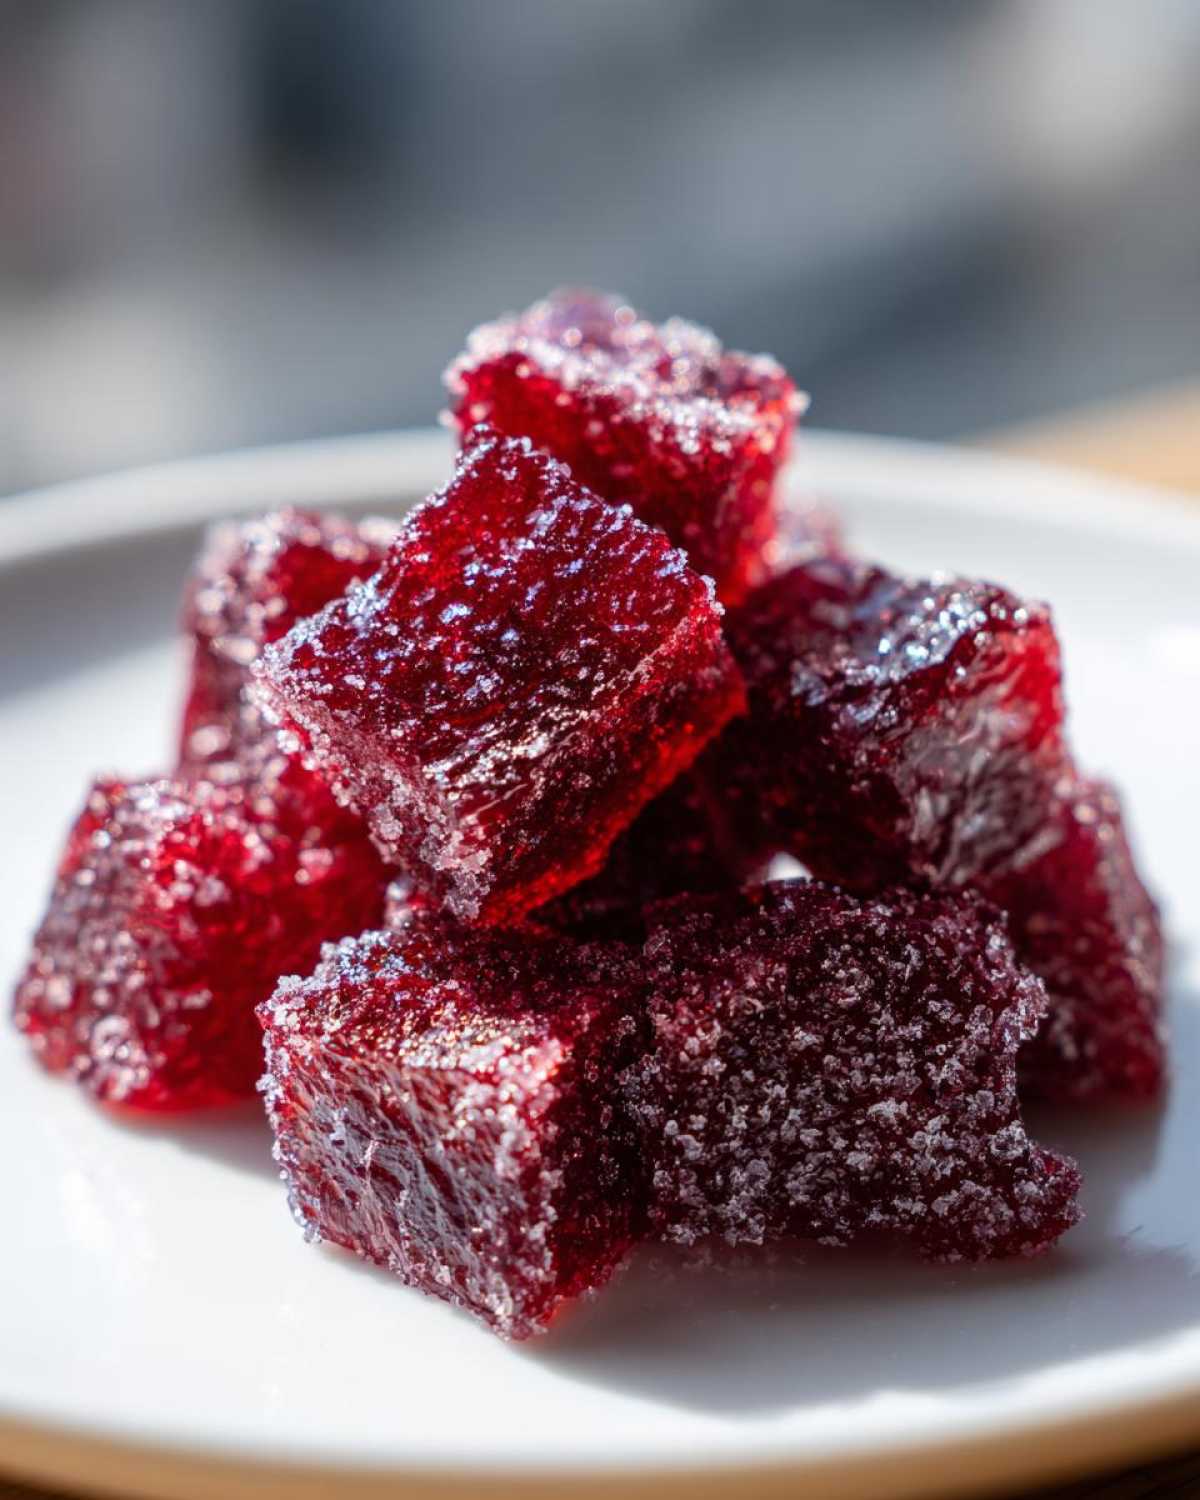
Oh my goodness, do I have a treat for you today! If you’re anything like me, you get totally nostalgic looking at those old-timey candy jars filled with colorful, crunchy sweets. Well, forget the store-bought stuff because we are diving headfirst into making the BEST cinnamon rock candy right on your stovetop. Seriously, this recipe feels like it came straight out of my great-aunt Mildred’s recipe box—it’s pure gold from the Old Fashioned Candy Recipes playbook.
I know what you’re thinking: hard candy is intimidating, right? Crystals everywhere, burnt sugar smells? Nope! I’ve messed this up enough times for both of us so you don’t have to. Trust me, this specific method is my secret weapon for getting that shatteringly perfect, crystallization-free hard candy texture every single time. It’s spicy, it’s crunchy, and honestly, making it feels like magic! If you love that spicy kick, you absolutely have to check out my cinnamon bread soon, too.
Why This Easy Old-Fashioned Cinnamon Rock Candy Recipe Works
This recipe isn’t just throwing ingredients into a pot; it’s built specifically to give you success, even if your past candy attempts ended in a sticky, sugary mess. I want you to feel confident when you hit that 300-degree mark!
- It uses just three main components, making grocery planning super simple compared to elaborate confections.
- The resulting rock candy is incredibly stable—it stays crunchy for ages if you store it right.
- The cinnamon flavor is bold, just like those classic candies we remember from childhood.
If you’re also looking for something savory and refreshing after all this sugar, you have to try my peach feta salad sometime next week!
Achieving Perfect Crunchy Cinnamon Candy Texture
The absolute secret weapon here is the light corn syrup. That’s what makes this a true Crystallization Free Candy experience. It stops the plain sugar from grabbing onto itself and forming those annoying, gritty crystals. It keeps things perfectly smooth and glassy.
Ideal for Holiday Edible Gifts and Party Favors
Honestly, these little shards of spicy heaven look fantastic wrapped up in cellophane bags tied with a red ribbon. They make the best little stocking stuffers or additions to a holiday treat platter. Everyone loves these Spicy Sweet Treats because the flavor is so much more exciting than plain sugar candy!
Essential Ingredients for Homemade Rock Candy Recipe
Okay, gather your supplies! Since this is a very simple recipe, the quality of what you use really shines through. For that intense, authentic kick we want in our cinnamon rock candy, we are relying on a few key players. You need two cups of plain white sugar, corn syrup (this is non-negotiable for that glassy finish!), and water. We keep the ingredient list short so the cinnamon flavor can absolutely dominate!
If you’re aiming for the classic bright red look, you’ll need coloring, but I keep that optional since I love the clear amber color too. We’ll whip up a batch of these soon for the holidays, and I think you’ll be amazed at how little you need to make such a big impact. You might want to save this recipe when you’re looking at making my brown butter cookies later this week!
Ingredient Notes and Substitution Guidance
Listen up about the spice—this is important for any good candy maker. I highly recommend using pure cinnamon oil if you can find it. It provides that sharp, wonderful punch characteristic of classic cinnamon rock candy without adding any extra bulk or graininess to your syrup. If you use ground cinnamon instead, you absolutely *must* strain the entire mixture through cheesecloth before pouring it out, or you’ll end up with gritty, spicy sugar bits.
For that super fun, fiery look that reminds everyone of a Red Hot Candy Tutorial, a tiny drop or two of red food coloring works wonders. Don’t overdo the coloring, though; we want it vibrant, not opaque!
Equipment Needed for DIY Hard Candy
Before we even think about heating up that sugar, we need to make sure our workspace is ready! Candy making is fast once things get hot, so preparation is half the battle. If you have everything laid out, you won’t panic when you reach that 290-degree mark, I promise. You don’t need a ton of fancy gear, but you absolutely must have one item that I consider sacred when cooking anything above 250 degrees Fahrenheit.
You’ll want to grab your heaviest saucepan—something with a good thick bottom works best to spread the heat evenly. A light-colored pan is sometimes helpful too, so you can clearly watch the color change in the syrup as it cooks. Also, get your pouring surface ready! I usually wipe down a cookie sheet with some vegetable oil, but parchment paper works beautifully as well. It just makes cleanup so much less stressful.
If you want to see how I tackle other quick kitchen setups, check out my tips for my five-ingredient corn soup—it requires similar quick staging!
Here’s the essential list for successfully learning How To Make Rock Candy At Home:
- Heavy-bottomed saucepan (5-quart is perfect for this small batch).
- Candy Thermometer—this is non-negotiable! Seriously, don’t try to eyeball it, or you’ll end up with chewy caramel or burned sugar.
- A sturdy whisk or wooden spoon for the initial dissolving process.
- A silicone spatula for scraping down the sides if you absolutely have crystals forming (but hopefully, you won’t need it!).
- A prepared baking sheet or silicone mat for pouring.
- A mallet or rolling pin for breaking the candy once it’s totally set.
Step-by-Step Instructions for Perfect Cinnamon Rock Candy
This is where we turn basic sugar into something incredible! Don’t let the temperature scare you; we just need to be patient and watch the thermometer like a hawk. The whole process, from starting the heat to pouring, is shockingly fast once you hit the magic number. I always tell myself, “Slow and steady wins the sugar race!”
First, get that baking sheet ready! Grease it lightly or slap down some parchment paper. When you’re dealing with molten sugar, you don’t want to scramble at the last second. Mix your sugar, corn syrup, and water in that heavy pan. We stir gently over medium heat just until everything dissolves—that’s the only time we stir!
Once it starts bubbling, put that spoon down! Seriously, hands off! We need the thermometer in there, and we are letting this boil until it screams “Hard Crack Stage,” which is exactly 300 degrees Fahrenheit. Watch it closely after 280 degrees; it seems to jump up fast!
Crucial Step: Reaching the Hard Crack Stage for Cinnamon Rock Candy
Why 300 degrees? That specific temperature ensures all the water has boiled off, leaving behind hardened, stable sugar molecules. If you pull it off the heat at, say, 290 degrees, you’ll get a delicious, softer, chewier candy—which is great if you want that, but we are aiming for that loud, crunchy snap of classic cinnamon rock candy! Lower temperatures mean more water left behind, leading to a sticky mess in humid weather.
Flavoring and Pouring Your Spicy Cinnamon Candy
The second that thermometer hits 300°F, yank that pan off the heat immediately—even residual heat keeps cooking it, so move fast! Let those furious bubbles calm down for just a second. Now, quickly stir in your cinnamon oil and color, if you’re using it. Remember, just a quick fold—over-stirring now is the quickest way to invite crystals into your batch! Then, immediately pour that beautiful, glossy syrup right onto your prepared surface. Don’t try to spread it or scrape the sides of the pan; just let it flow naturally.
Once it’s totally cool and hard, you can break it up, and the noise it makes will signal your success! If you want to read more about a different kind of baking success, check out how I tackle my cinnamon crunch quick bread!
Expert Tips for Crystallization Free Candy Making
I want to save you from the dreaded crystallization monster! Trust me, when you’ve cooked sugar that high, seeing those cloudy, grainy patches appear where there should be glass is heartbreaking. This is where being a seasoned candy maker—or just someone who paid close attention during my first few failed batches—really pays off.
The biggest culprit for crystals is actually just sugar granules clinging to the sides of the pot above the syrup line. When the syrup cools, those tiny, undissolved specks act as seeds for crystals to form throughout your beautiful batch. It’s a disaster for any batch of Homemade Rock Candy Recipe, but it’s so easy to prevent!
My number one defense—and what the very best cooks always do—is keeping the sides of the pot clean. Grab a clean pastry brush, dip it in plain water, and gently—and I mean *gently*—wash down any sugar clinging to the upper sides of the saucepan while it’s boiling. You’re essentially just rinsing those stray grains back into the main syrup where they can dissolve properly. It feels a little risky, but it saves the whole batch!
Also, don’t lean over the pot stirring or breathing heavily near the surface when it’s cooking, because moisture condensing and dripping back in can also trigger crystallization. It’s all about controlling the environment up there! If you want another fantastic dressing recipe that’s surprisingly easy, you should check out my homemade Caesar dressing; sometimes simple ingredients need the most precise handling!
Variations: Making Red Hot Candy Tutorial Style Cinnamon Rock Candy
Okay, so maybe you aren’t 100% sold on the potent flavor of pure cinnamon oil, or perhaps you just want that signature look of those classic, bright red candies. Don’t worry! This recipe is super adaptable, letting you pivot between intensely flavored candy and something more geared toward aesthetics.
If you prefer a flavor profile that’s a little softer—maybe you’re hoping for a classic **Spicy Cinnamon Candy** vibe rather than a punch of oil flavor—you can absolutely use ground cinnamon instead of oil. But here’s the caveat: if you put ground cinnamon directly into the syrup, you’re going to get a gritty, slightly unpleasant texture because the grounds won’t dissolve. Trust me on this one from past experience!
To nail the ground cinnamon look without the grit, you need to strain your hot syrup through a fine-mesh sieve or some cheesecloth right after you take it off the heat and *before* you pour it onto the sheet. It takes an extra minute, but that slight bitterness and earthiness from the ground spice is worth it for some folks.
Now, for the fun part: the color! If you want that fiery look, you’re going for a true **Red Hot Candy Tutorial** vibe. Just incorporate your red food coloring—I use the gel kind because it’s more vibrant—right alongside the cinnamon flavor (whether it’s oil or the strained ground spice) at the very end. Keep the coloring light; we want a glowing red, not a dark, murky red. If you’re looking for something else spicy that hits differently, you have to try my recipe for sweet and spicy baked cauliflower. It’s addictive!
Storing Your Crunchy Cinnamon Candy for Freshness
Phew! You made it! Your beautiful, sharp shards of spicy candy have cooled down, and they look perfect. But don’t get too comfortable just yet, because how you store this candy determines if you’ll have crunchy gems a week from now or a sticky puddle next Tuesday. Humidity is the sworn enemy of any hard candy, especially when we are dealing with these wonderful, **Old Fashioned Candy Recipes**.
The moment sugar absorbs moisture from the air, it starts dissolving again, which is why your perfectly cooked batch goes from glassy to tacky overnight if you leave it exposed. We have to treat this candy like a little jewel that needs a fortress against the damp air. You want to make sure the candy is completely, 100% cooled down before you even think about putting a lid on anything!
I learned this the hard way with some blackberry jelly once—never seal warm food! My jars looked fine, but the next day, they were weeping syrup. So, make sure the candy is room temperature and totally hard before moving on to these storage tips.
Always use an airtight container. I like using wide-mouth mason jars because they seal so tightly. Forget Ziploc bags unless you squeeze every bit of air out, and even then, I prefer a solid container. If you’re making a massive batch and have to store some for a long time, try putting a tiny silica packet (like the ones that come in vitamin bottles) in the jar with the candy. Just be sure the packet is food safe and keep it away from little hands!
If you’re planning on giving these away as Holiday Edible Gifts, wait until the day before wrapping them to put them in their final cellophane bags. Keep the main stash locked away in a cool, dry pantry. If you want something totally different but equally delicious for sharing, you should try my black raspberry jelly recipe—it stores beautifully in the pantry too!
Frequently Asked Questions About Cinnamon Rock Candy
I know you might still have a few little questions buzzing around, because getting candy right sometimes feels like alchemy! I’ve gathered the questions I get asked most often about making this spicy treat, especially those concerning texture and flavor adjustment. Hopefully, this clears up anything that’s holding you back from trying this batch of Spicy Sweet Treats!
Can I use a different flavor extract instead of cinnamon oil in this rock candy?
Oh, absolutely! That’s the beauty of making your own Simple Candy Recipes at home, right? If you can’t find the oil, you can certainly swap it out for a high-quality food-grade extract, like almond or peppermint, just be mindful of the strength. Extracts tend to be less potent than pure oils, so you might need a little more, maybe a teaspoon and a half instead of a teaspoon).
However, I have to give you a little warning here: because extracts are often alcohol-based, adding too much can sometimes interfere with the sugar syrup, or worse, cause it to seize up when you stir it in! If you use extract, focus mostly on the initial 300-degree cooking temperature—that’s what sets the hard candy texture.
What is the difference between Hard Crack Stage and Hard Ball Stage in this recipe?
This is the key difference between making soft chews and making shatteringly crisp cinnamon rock candy! The Hard Ball Stage hits around 250 to 265 degrees Fahrenheit. If you stop cooking there, you get a candy that’s firm but still has a little give when you chew it—like a gummy lifesaver, but spicy!
For the crunchy, classic texture we are aiming for—the real deal for any good Crunchy Cinnamon Candy—we absolutely have to hit the Hard Crack Stage, which is that magic 300°F. At that point, all the moisture is gone, and when it cools, it will snap! It’s the essential heat level for this particular recipe.
If you’re looking for other tips on kitchen success or want to reach out with more questions, you can always check out my contact page. Happy baking (and candy making)!
Estimated Nutritional Data for Cinnamon Confectionery
Because this is basically pure sugar and syrup, I’m going to be straight with you: this isn’t exactly health food! But hey, it’s a treat, and it’s necessary for some of those wonderful holiday celebrations we talked about. Since the final pieces aren’t uniform, the nutritional data is always just an estimate, but it gives you a good ballpark figure for serving sizes.
These numbers are calculated for about 1/8th of the batch, broken down into small pieces. Remember, this is built on the standard recipe using white sugar and corn syrup. If you start swapping things out for alternatives, the final count will change, obviously!
- Serving Size: About 1/8 cup pieces
- Calories: 180 per serving
- Sugar: 45g (Yep, it’s candy!)
- Fat: 0g (Thank goodness!)
- Protein: 0g
- Cholesterol: 0mg
This is why we only use this for special occasions or as sweet little pick-me-up gifts, not for daily snacking! If you’re ever curious about the guidelines I follow when sharing recipe nutrition estimates, you can always check out my disclaimer page before you dive into dessert!
PrintEasy Old-Fashioned Cinnamon Rock Candy Recipe
Follow these steps to make crunchy, spicy cinnamon rock candy at home. This guide includes tips to prevent sugar crystallization for a perfect hard candy texture.
- Prep Time: 5 min
- Cook Time: 30 min
- Total Time: 35 min
- Yield: About 2 cups
- Category: Dessert
- Method: Stovetop Cooking
- Cuisine: American
- Diet: Vegetarian
Ingredients
- 2 cups granulated white sugar
- 2/3 cup light corn syrup
- 3/4 cup water
- 1 teaspoon cinnamon oil (or 1 tablespoon ground cinnamon for a less intense flavor)
- 1/2 teaspoon red food coloring (optional, for ‘Red Hot’ look)
Instructions
- Prepare your surface: Lightly grease a baking sheet or line it with parchment paper. Set aside.
- Combine ingredients: In a heavy-bottomed saucepan, mix the sugar, corn syrup, and water. Stir gently over medium heat until the sugar dissolves completely. Do not stir once boiling begins.
- Cook the syrup: Insert a candy thermometer. Allow the mixture to boil without stirring until it reaches 300 degrees Fahrenheit (Hard Crack Stage). This usually takes 20 to 30 minutes. Watch the temperature closely after 280 degrees.
- Remove from heat: Immediately take the pan off the burner once 300 degrees is reached. Let the bubbling stop completely.
- Add flavor and color: Carefully stir in the cinnamon oil and red food coloring, if using. Stir only enough to incorporate the additions; over-stirring can cause crystallization.
- Pour the candy: Quickly pour the hot syrup onto the prepared baking sheet. Do not spread or scrape the sides of the pan.
- Cool and break: Let the candy cool completely and harden, about 30 to 45 minutes. Once hard, place the sheet in a sturdy plastic bag and break the candy into small, irregular pieces using a rolling pin or the back of a spoon.
- Store: Place the finished candy in an airtight container.
Notes
- To prevent crystallization, avoid stirring the syrup once it starts boiling. If crystals form on the sides of the pan, use a wet pastry brush to wash them down into the syrup.
- If you use ground cinnamon instead of oil, strain the mixture before pouring, or the candy will be gritty.
- For a softer, chewier candy, stop cooking at 290 degrees Fahrenheit (Hard Ball Stage).
Nutrition
- Serving Size: 1/8 cup pieces
- Calories: 180
- Sugar: 45g
- Sodium: 0mg
- Fat: 0g
- Saturated Fat: 0g
- Unsaturated Fat: 0g
- Trans Fat: 0g
- Carbohydrates: 45g
- Fiber: 0g
- Protein: 0g
- Cholesterol: 0mg


Comments are closed.