


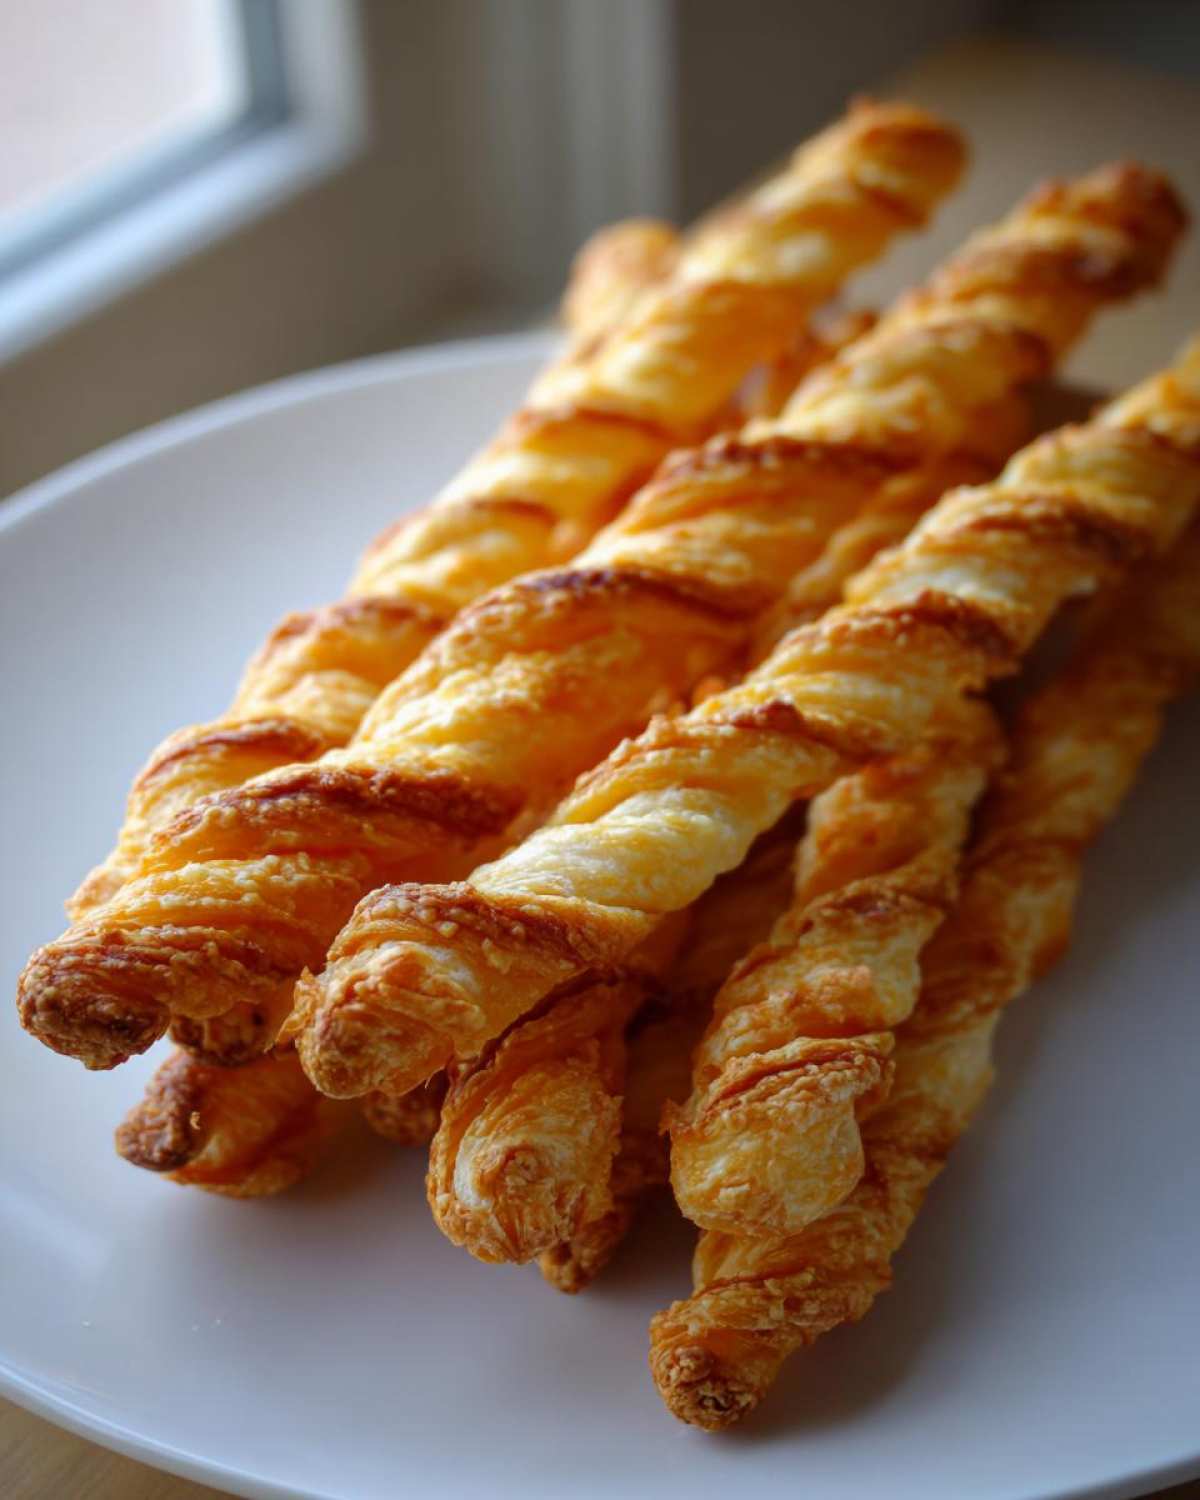
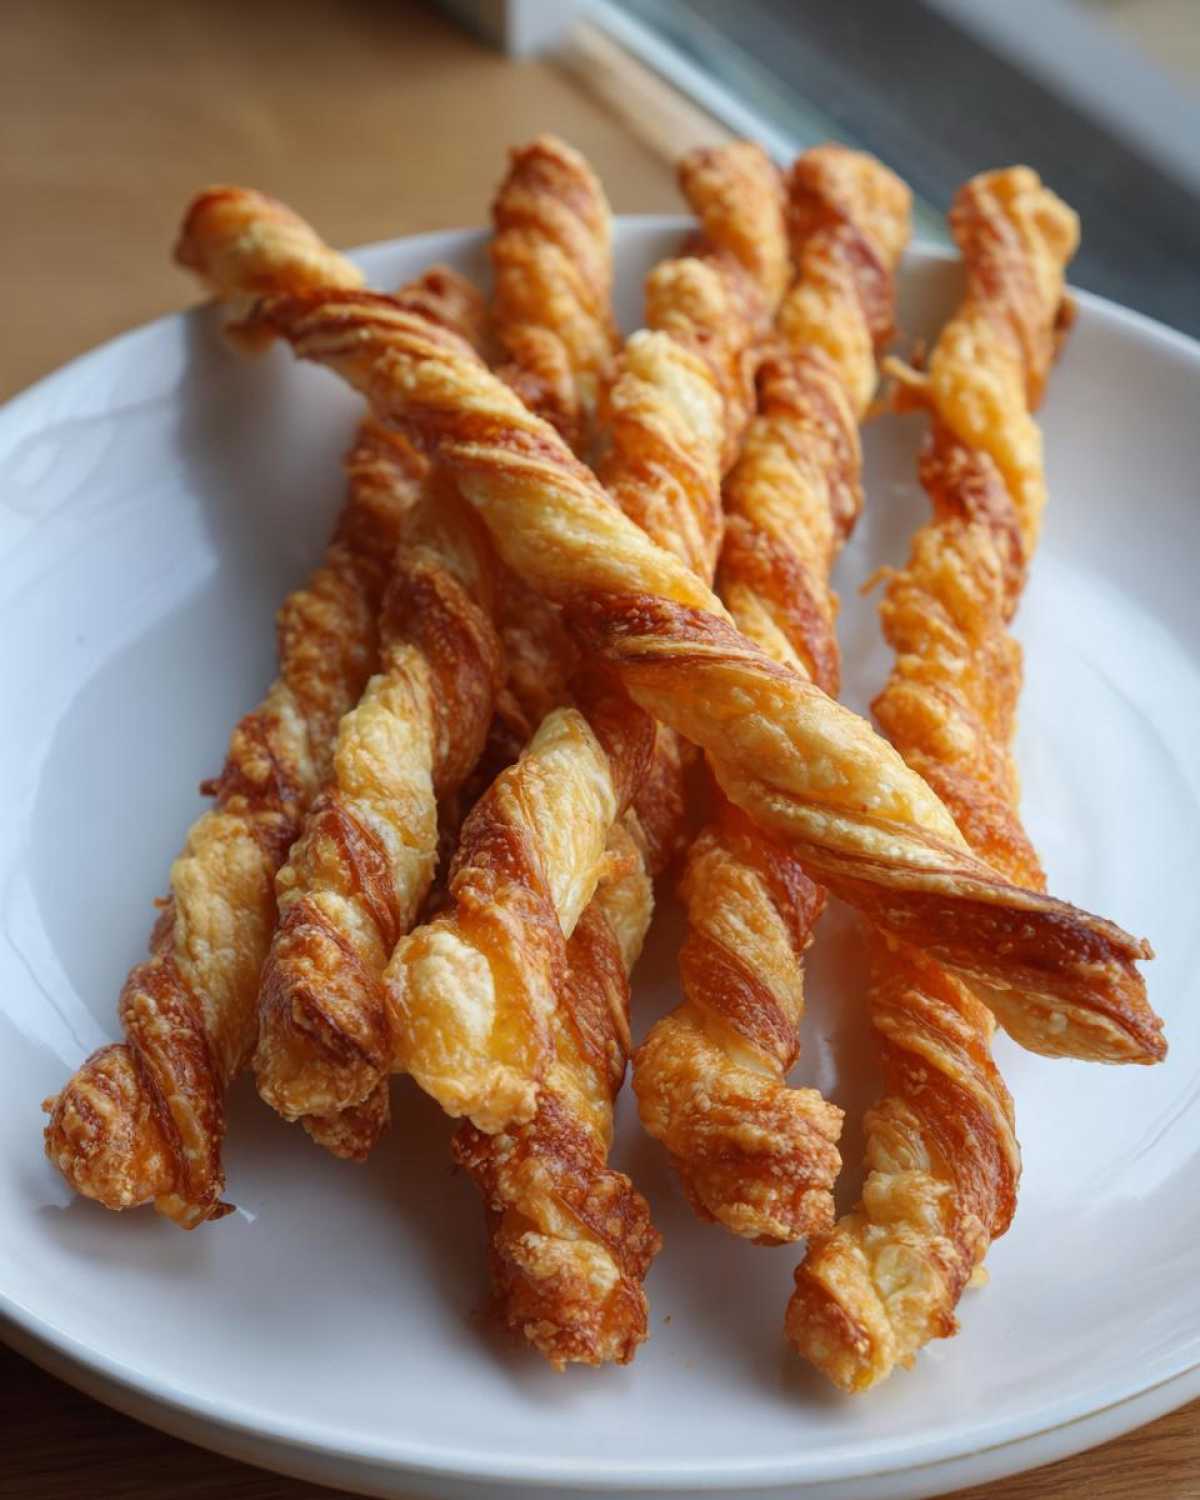
Oh my gosh, there is nothing—and I mean *nothing*—that beats that sound. That perfect, shattering, salty crunch when you bite into a stellar homemade savory snack! If you’ve ever been searching for the ultimate crunchy appetizer that disappears instantly at any party, stop looking. I’ve finally perfected my classic cheese straws recipe, and trust me, it focuses entirely on one main goal: ultimate crispiness.
I remember the first time I brought these to a neighborhood block party. They were okay, a little soft, honestly. But after tweaking the temperature and dialing in that chilling time, they came out like salty little shards of heaven! This Southern cheese straws version gets rave reviews every single time, and I bet it will for you too.
Why This Classic Southern cheese straws recipe Works (Expert Tips)
You might think making homemade cheese straws is simple, but getting that incredible, shatteringly crisp result takes more than just mixing flour and cheese. This is why I call this the best cheese straw recipe—it’s all about technique, just like my grandma taught me. We are aiming for a snack that holds up beautifully when you pick it up, not something that bends!
The success of these crispy cheese straws hinges on a few key steps. First, we use cold butter, cut precisely into tiny pieces. This creates pockets of steam when it hits the oven, which is what gives you that flaky, layered texture instead of a dense cracker. Second, you absolutely must use sharp cheddar. Mild cheddar just doesn’t have the flavor punch needed to stand up to the butter and salt.
Also, don’t skip the chilling time, even if you’re tempted to rush it. That time in the fridge lets the flour hydrate properly and firms up the butter again. You can check out some of my other savory favorites here if you need a quick batch, but for the perfect straw, patience pays off!
Achieving the Perfect Crispy Cheese Straws Texture
The secret sauce here is the ratio of flour to fat. We want enough flour to give it structure, but so much butter that it bakes up tender and flaky. When you mix the butter in, stop working the dough the second it looks like coarse cornmeal mixed with peas. Think shortbread consistency!
If you overmix the dough, you develop too much gluten, and your straws turn out tough, almost like a hard breadstick. We want that beautiful, crumbly shortbread base underneath all that sharp cheddar flavor. This careful incorporation is what guarantees a light, airy, and super crispy final straw.
Ingredients for the Ultimate cheese straws recipe
When it comes to baking these delicious appetizers, I really believe that high-quality ingredients are non-negotiable, especially when making a cheese straws recipe where bold flavor is the whole point! Seriously, don’t skimp on the cheese here. We need that fantastic, tangy bite that only good, aged sharp cheddar delivers. If you’re making these for a big crowd, remember that this recipe yields about three dozen little snack wonders, so you might want to double the batch right away!
I love that this list is so simple; it means we can whip up a batch of these cheddar cheese straws even when company is showing up sooner than expected. Check out my recipe for hot and cheesy corn fritters if you need another quick cheesy fix!
- 1 cup all-purpose flour
- 1/2 teaspoon salt
- 1/4 teaspoon cayenne pepper (adjust this based on your heat preference!)
- 1 cup (4 ounces) sharp cheddar cheese, shredded (This is crucial—shred it yourself!)
- 1/2 cup (1 stick) cold unsalted butter, cut into small pieces
- 1 large egg yolk
- 1 tablespoon cold water
Step-by-Step Instructions for Homemade cheese straws recipe
Okay, now for the fun part! This is where our simple ingredients turn into party gold. This is honestly the easy cheese straws method, even though we are aiming for that fancy, flaky result. The key thing to remember throughout these steps is *gentle handling*. We don’t want to beat this dough into submission; we just want it to hold hands long enough to get baked!
Follow these steps closely, especially that chilling time. Trust me, waiting 30 minutes for this dough to firm up is the difference between a spectacular, snap-crisp straw and a floppy snack. Once your oven is heating up to 375 degrees Fahrenheit, you’re ready to start assembling. If you need a quick side dish while these are baking, I highly recommend my simple roasted asparagus!
Mixing the Dough for Savory Straws Recipe
First thing’s first: grab your whisk and combine all your dry goods—flour, salt, and that little bit of cayenne for a kick. Next, toss in those cold, cubed butter pieces. Use a pastry blender or just your fingertips (working fast so the butter stays cold!) to cut the butter in until the mixture looks like coarse sand or tiny peas. Now, mix in all that gorgeous shredded sharp cheddar until it looks evenly coated in flour. That’s the base for our amazing savory straws recipe!
Chilling and Shaping Your cheese straws recipe Dough
Make a little well in the center and pour in your egg yolk and water mixture. Stir it just until you see a shaggy dough forming—seriously, stop mixing before it looks perfectly smooth! Flatten that shaggy mess into a disk, wrap it tight, and pop it in the fridge. Thirty minutes minimum! Once chilled, flour your surface lightly and roll it thin, about 1/8-inch thick—thinner is crispier! Cut strips about half an inch wide and five or six inches long. If you want them to look professional, give each strip a gentle little twist before placing it on the parchment paper.

Baking for Maximum Crispness
Lay those cut strips out on parchment-lined sheets, leaving a tiny bit of space between them so they can breathe while baking. Into the 375°F oven they go for about 12 to 15 minutes. You are looking for the edges to just start turning a beautiful, barely golden brown. As soon as they look set and slightly colored, pull them out. Here is the most important part for crispness: transfer them straight onto a wire rack immediately. They will seem a little soft when hot, but they harden up beautifully as they cool down completely!
Ingredient Notes and Variations for cheese straws recipe
Okay, let’s talk about making these little snacks truly yours! While this classic cheese straws recipe relies on sharp cheddar, I encourage a little experimentation once you’ve mastered the base. If you want to get really fancy, swap out about a third of that cheddar for a nice aged Parmesan. That blend gives you salty depth and a fantastic, nutty aroma when they bake. It gives them that extra ‘wow’ factor for any cheesy appetizer ideas you’re rolling out.

Now, I know some people look for that super light and flaky texture you get from pre-made dough, like puff pastry cheese straws. While this recipe uses traditional pastry dough for that satisfying crunch, you can certainly try cutting puff pastry into strips and topping it—it’s a much quicker snack, but the crumb structure is different! For ideas on using cheese in the air fryer, check out my recipe for cheesy garlic bread.
And don’t forget about spice! That tiny bit of cayenne in the base recipe is non-negotiable for me, but if you want something that really warms things up, try doubling the cayenne or maybe even stuffing them before baking, similar to how I prepare these poppers!
Flavor Twists: Rosemary Parmesan Straws and Spicy Cheese Straws
If you want a sophisticated twist that screams ‘gourmet party snacks,’ try adding a teaspoon of finely chopped fresh rosemary to the dry ingredients when you mix them up—instant rosemary parmesan straws! It’s amazing how fresh herbs wake up the cheddar flavor. For those who love heat, boosting that cayenne to a half teaspoon (or adding a pinch of black pepper right in the dough) will ramp up the spice factor perfectly to create some killer spicy cheese straws. Don’t be shy; they need that kick!
Making cheese straws appetizer Ahead of Time
Listen, when you’re planning a party, anything that saves you stress on the actual day of entertaining is a winner in my book! I absolutely love making this cheese straws recipe ahead of time because baking savory snacks early makes me feel like a true host magician. The good news is that the dough for these cheese straws appetizer is incredibly cooperative.
You can mix up the dough, shape it into a disk, wrap it tightly in plastic wrap, and stick it in the fridge for up to two full days. Sounds easy, right? When you’re ready to bake, just pull it out, let it sit on the counter for about ten minutes to soften *just* enough to roll flat, and then proceed with the slicing and baking instructions. Quick tip: check out my recipe for mini quiches too—those freeze beautifully!
As for the baked straws? They are best eaten within 48 hours for that absolute loudest crunch. If you absolutely must freeze them, I recommend placing the baked, completely cooled straws in an airtight, freezer-safe container with a layer of parchment between rows. When you want to serve them, let them thaw completely on the counter, still in the container, to prevent any condensation from making them soft. Never try to rush them in the oven!
Serving Suggestions for Your cheese straws recipe
Once you have these glorious, crunchy party snacks cooled down, half the battle is won! But what do you serve them *with*? Because these straws are already wonderfully savory and sharp, you don’t need heavy dips that will mask that amazing cheddar flavor. I usually serve them alongside simple spreads, or sometimes just on their own as the first thing guests grab.
They are fantastic alongside something cooling, like a bowl of my extra-loaded guacamole, oddly enough! The saltiness of the straw dipped into fresh avocado is just divine. If you’re hosting a summer gathering, these straws pair surprisingly well with a light, fruity cocktail, like this refreshing frozen peach rose slushy. It’s the perfect salty-sweet combination!
Frequently Asked Questions About cheese straws recipe
I know you probably have a few burning questions swirling around, especially if you’re new to making these from scratch! Everyone worries a little about getting the cheese right or keeping them crunchy. It’s totally normal! Here are the things I get asked most often about nailing this classic cheese straws recipe.
Can I use pre-shredded cheese in this cheese straws recipe?
Oh, please avoid that temptation! Pre-shredded cheese has anti-caking stuff dusted all over it, usually things like potato starch or cellulose, to stop the shreds from clumping in the bag. That stuff stops your dough from binding up nicely, and it definitely ruins that perfect, airy crunch we are after! For the best cheddar cheese straws, you absolutely must shred your own block right before using it.
What is the best way to store leftover crispy cheese straws?
The enemy of crispness is moisture, and the refrigerator is basically a moist environment! So, please, resist putting your leftovers in the fridge. Store your cooled, baked straws in a totally airtight container on your counter at room temperature. They are truly at their peak for about two days, but honestly, they never last that long here!
How can I make these cheese straws recipe gluten-free?
That’s a great question for my friends with dietary needs! You can absolutely swap out that all-purpose flour for a good quality 1-to-1 gluten-free baking blend. Just remember, every blend behaves a little differently. They might come out just a tiny bit heavier than the wheat version, but the sharp cheddar flavor still shines through wonderfully!
Storage and Reheating Instructions for Your Savory Straws Recipe
Keeping these crispy treats crunchy is just as vital as getting them baked right! See how important that cooling process is? You have to let them cool completely on the wire rack before you even *think* about storing them, or you’ll seal in steam and end up with soft, disappointing savory straws recipe bites.
Once they are rock hard and totally cool, grab an airtight container—one that doesn’t let air sneak in. Do not, under any circumstances, put them in the fridge! That cold environment turns them soggy in hours. I usually make a really good creamy Caesar dressing to go alongside them, but only serve the dressing when the straws are ready to eat.
If you do manage to have leftovers (good job!), storing them on the counter is best for two days. If you need to reheat them later, just pop them on a baking sheet at 300°F for five minutes. That little blast of dry heat brings back that glorious, perfect snap!
Share Your Homemade cheese straws recipe Experience
Now that you have the secrets to the best cheese straw recipe right in your hands, I seriously can’t wait to hear how they turned out for you! Did you go for the spicy kick, or did you stick with the classic sharp cheddar?
Please, if you make these gorgeous little appetizers, leave me a rating right here on the page so other bakers know they found the right recipe. And if you snap a picture of your beautiful twisted straws ready for your next gathering, tag me on social media! I love seeing your creations!
If you have any questions as you’re mixing or rolling, don’t hesitate to drop a line on my contact page. Happy snacking!
PrintClassic Southern Cheddar Cheese Straws

Make crispy, savory cheese straws using sharp cheddar cheese. This recipe yields a classic, flaky snack perfect for parties.
- Prep Time: 20 min
- Cook Time: 15 min
- Total Time: 35 min
- Yield: About 3 dozen
- Category: Appetizer
- Method: Baking
- Cuisine: American
- Diet: Vegetarian
Ingredients
- 1 cup all-purpose flour
- 1/2 teaspoon salt
- 1/4 teaspoon cayenne pepper
- 1 cup (4 ounces) sharp cheddar cheese, shredded
- 1/2 cup (1 stick) cold unsalted butter, cut into small pieces
- 1 large egg yolk
- 1 tablespoon cold water
Instructions
- In a large bowl, whisk together the flour, salt, and cayenne pepper.
- Cut in the cold butter using a pastry blender or your fingers until the mixture resembles coarse crumbs.
- Stir in the shredded cheddar cheese until evenly distributed.
- In a small bowl, whisk the egg yolk and cold water together. Add this mixture to the flour mixture and mix until a dough just comes together. Do not overmix.
- Shape the dough into a disk, wrap it in plastic wrap, and chill in the refrigerator for at least 30 minutes.
- Preheat your oven to 375 degrees Fahrenheit (190 degrees Celsius). Line baking sheets with parchment paper.
- On a lightly floured surface, roll the chilled dough out to about 1/8-inch thickness.
- Cut the dough into strips about 1/2-inch wide and 5 to 6 inches long. You can twist the strips gently for a spiral look if desired.
- Place the strips on the prepared baking sheets.
- Bake for 12 to 15 minutes, or until the edges are lightly golden brown and the straws are crisp.
- Transfer the cheese straws to a wire rack to cool completely. They will crisp up as they cool.
Notes
- For extra flavor, use a mix of cheddar and Parmesan cheese.
- You can make the dough up to two days ahead and keep it wrapped in the refrigerator.
- For a spicy version, increase the cayenne pepper to 1/2 teaspoon or add a pinch of black pepper.
Nutrition
- Serving Size: 3 straws
- Calories: 85
- Sugar: 0.1
- Sodium: 110
- Fat: 6.5
- Saturated Fat: 4.0
- Unsaturated Fat: 2.5
- Trans Fat: 0.1
- Carbohydrates: 4.5
- Fiber: 0.2
- Protein: 3.0
- Cholesterol: 25

Comments are closed.