


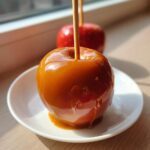
Oh my goodness, is there anything that screams ‘Fall’ louder than that perfect, chewy, slightly sticky caramel apple? I swear, the air just smells different when those first crisp apples hit the market! For years, I struggled. I mean, I tried every trick in the book—boiling until my arms ached—only to have the caramel slide off like a melted blanket the second it got warm. Ugh, it was the worst!
But trust me when I say I’ve cracked the code. After what felt like a thousand batches trying to nail that exact point where the caramel is chewy but soft, I finally landed on this foolproof method. We’re talking about homemade caramel apples that actually adhere to the skin and give you that satisfying pull when you bite in. This isn’t just any recipe; this is my tried-and-true formula perfected over many autumn seasons to guarantee you hit that magical Firm Ball stage every single time.
Why This Is the Best Chewy Caramel Apple Recipe
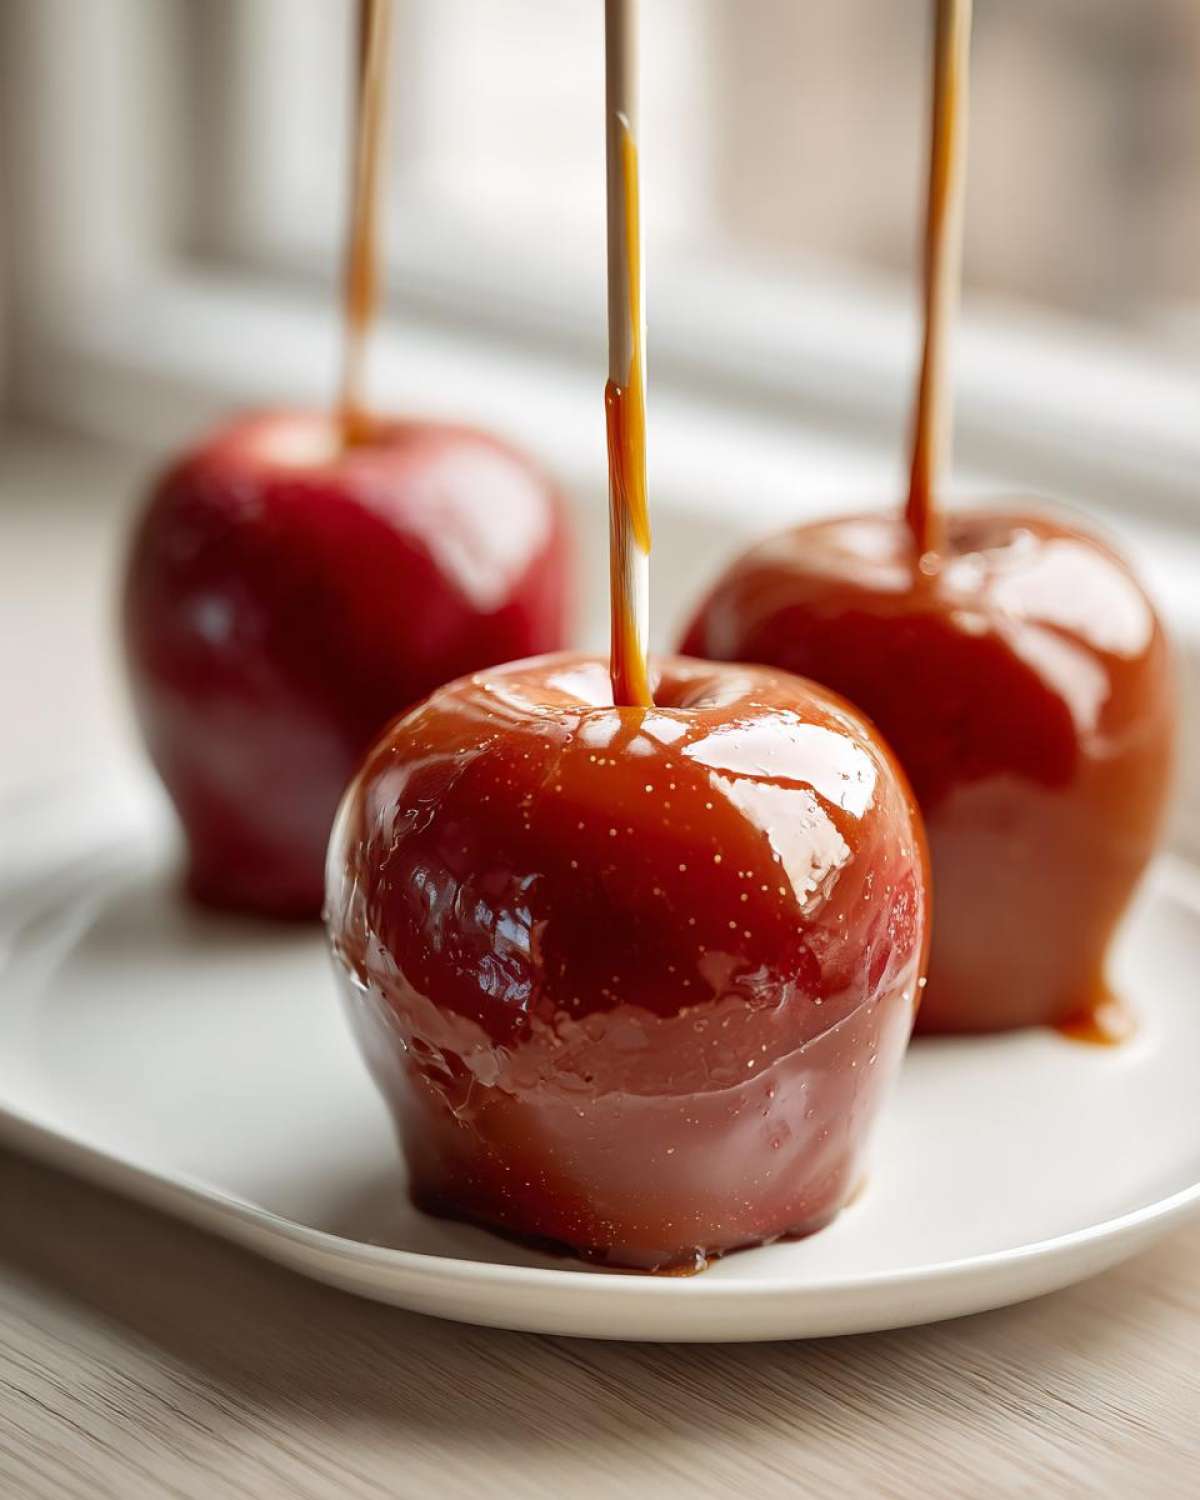
I’m telling you, you won’t find a better recipe for nailing that fantastic chewiness! We’ve moved far beyond runny candy that drips all over your hands. Because I’ve spent so much time testing, these are truly the best chewy caramel apples you can make at home. It’s a no fail caramel apples system, honestly!
- We hit the exact temperature (245°F) every time, which makes all the difference between hard candy and gooey chew.
- The prep steps I insist on—washing and chilling the apples—guarantee the caramel adheres perfectly. No more slides!
- You get that rich, buttery depth that only making it from scratch can provide.
It’s so satisfying when they come out looking like they belong in a gourmet shop. You can check out more about my kitchen philosophy over at my About Me page if you’re curious!
Gathering Supplies for Perfect Homemade Caramel Apples
Okay, before we even think about turning on the heat, let’s talk tools. Cooking sugar to that high temperature means you need reliable gear. Don’t try to eyeball this part—that’s how you end up with a sticky mess instead of a beautiful coating!
The absolute key to success here, and I cannot stress this enough, is having a reliable candy thermometer. This is non-negotiable if you want that perfect chew. Also, grab your heavy-bottomed saucepan; you want even heat distribution, trust me!
If you want to read my official stance on recipes and affiliate links, you can check out my disclaimer page, but right now, let’s focus on getting our gear ready!
Essential Equipment for Your Caramel Apple Tutorial
Get these items gathered right beside your stovetop before you even look at the butter:
- A heavy-bottomed saucepan, ideally 3-quart size.
- A reliable candy thermometer that clips securely to the side.
- Sturdy wooden spoon or silicone spatula for stirring.
- Parchment paper or a silicone baking mat for lining your trays.
- Wooden dowels or sturdy craft sticks for dipping.
Ingredients for Foolproof Caramel Apple Coating
Alright, time to check the pantry! The list for this batch of homemade caramel apples is delightfully short, which is why this recipe feels so accessible. We’re keeping the caramel pure, letting those classic flavors shine, but I definitely have an optional punch of warmth for you.
You’ll need two full cups of standard granulated sugar, that light corn syrup which is crucial for texture insurance, plus heavy cream and a whole cup of good unsalted butter. Don’t skimp on the butter; it’s what makes the chew so decadent! And vanilla, of course, plus salt to balance everything out. If you want to upgrade to spiced caramel apples, just mix in half a teaspoon of ground cinnamon right at the end.
Choosing the Right Apples for Caramel Apples
The apple itself is just as important as the coating! You absolutely must choose firm apples. I always go for Granny Smith because their tartness cuts through the richness of the caramel perfectly. Honeycrisp is another great choice if you like it a little sweeter. But here’s the absolute golden rule for your caramel apples that stick: they have to be bone dry.
Wash them well, take off the stems, and pay special attention to drying every drop of moisture off that skin. Any water lingering on the surface will cause the hot caramel to seize up or just slide right off. Seriously, if you skip the drying step, you’re cheating yourself out of success!
Step-by-Step: How to Make Caramel Coating for Apples
This part is where the magic happens, but you have to be attentive! We need to transition smoothly from mixing ingredients to hitting the perfect temperature, which is the secret handshake for these best chewy caramel apples. Get your tray ready first, lined with parchment paper, and those sticks inserted firmly into the tops of your clean, dry apples. I usually give the apples a little 30-minute chill in the fridge right before I start the goo; that really helps set the stage!
Now, onto the saucepan! Combine the sugar, corn syrup, butter, and heavy cream. Cook this over medium heat, stirring just until everything dissolves—that’s important. Once it starts a rolling boil, stop stirring completely. You have to trust the thermometer from this point forward. We are cooking this mixture, without touching it, until it hits precisely 245 degrees Fahrenheit. If you’re off by even a few degrees, your texture will suffer!
The Secret to Caramel Apples That Stick
Seriously, if you want the caramel to hug the apple and not slide off into a puddle, you need this prep work. First, wash your apples really well—you need to get rid of any waxy coating they put on there at the store. Then, dry them until you think they’re dry, and then dry them again! I mean it. Any hint of water or wax is the enemy of adhesion.
After drying, pop those beauties into the refrigerator for at least half an hour. When you dip them into that warm, thick caramel, the cold surface shock makes the caramel set almost instantly, locking it right into place. This cooling step is just as important as getting the temperature right!
Achieving Perfect Caramel Consistency
This is the critical window, folks! Once that thermometer hits 245°F, you kill the heat immediately. Resist the urge to keep boiling! This temperature is what ensures that beautiful, satisfying chewiness instead of a hard, brittle shell. As soon as it’s off the heat, carefully stir in your vanilla, salt, and the optional cinnamon if you’re going for those warming fall flavors.
Let that mixture sit for about five to ten minutes. It needs to cool down just a touch so it’s thick enough to coat evenly without dripping everything off. Tilt that pan, dip your apple swiftly, pull it straight up, let that excess drip back in (don’t forget to swirl if you’re doing a full coat!), and get it onto that prepared tray quickly. You can see how I made cider doughnuts too, which are great for dipping if you run out of apples! Check out that recipe here!
Troubleshooting Common Caramel Apple Issues
Listen, even with the best instructions, sometimes things go sideways in the kitchen. That’s totally normal! If you’re dealing with a coating crisis, don’t panic. It usually just means you missed a small temperature marker or skipped a drying step. I’ve had caramel turn runny, or worse, split on me halfway through a batch!
What if the caramel is sliding off no matter what you do? Nine times out of ten, either your apples weren’t cold enough when they hit the hot caramel, or you didn’t let the caramel cool for five minutes off the heat before dipping. It needs that slight cooldown period so it has body. If you’re worried about crystallization—that grainy texture—make sure you didn’t stir the sugar mixture after it started boiling vigorously. Stirring promotes crystals!
I always try to be transparent about kitchen mishaps, which you can read more about here in my Privacy Policy section, but trust me when I say knowing how to fix these little problems is what takes you from baking beginner to caramel master!
Gourmet Caramel Apples: Topping Ideas and Presentation
Now that you have this gorgeous, chewy coating that actually stays put—hello, success!—it’s time to make these truly shine. This is where you turn a simple classic into breathtaking gourmet caramel apples perfect for any party or holiday treat.
The best part is the decoration! You work fast, of course, while the caramel is still slightly tacky. I love rolling the dipped apples immediately into things that give texture. Think chopped pecans, crushed pretzels for that salty contrast, or even colourful sprinkles if we’re making holiday caramel apples.
If you want to elevate it even further, grab some melted dark chocolate. A quick drizzle haphazardly across the top adds such a decadent, professional look. I shared a killer recipe for brown butter cookies recently, and melted chocolate is the star there too—it just makes everything better!
Quick Spiced Caramel Apples Variations
If you didn’t add the cinnamon during the cooking phase, you absolutely can mix it into your final topping sprinkle! Another fun trick for spiced caramel apples is crushing up a few store-bought gingersnap cookies and rolling the tacky caramel in those crumbs. Wow, the smell alone is incredible on a chilly autumn evening!
Storing and Serving Your Homemade Caramel Apples
Once these beauties are set up, you have to think about storage, right? Since these are so rich—all that butter and cream—I find they are best stored at room temperature, especially if the house isn’t too hot. Lay them gently on fresh parchment paper so they don’t stick to the tray. They hold up great this way for at least two or three days. If your kitchen gets really warm, a quick stint in the fridge is okay, but take them out about an hour before serving!
When you’re ready to eat, just pull them out. They should be firm but give just slightly when you press them gently with your finger. If you must reheat them for any reason (maybe you want to drizzle more chocolate?), do it in very short bursts in the microwave—like five seconds at a time—otherwise, the caramel will get too liquidy. Don’t forget to drop me a line on my contact page if you have any last-minute questions as you set up your fall apple desserts spread!
Frequently Asked Questions About Making Caramel Apples
I figured you might have a few last-minute head-scratchers, so I put together the ones I get asked every single year about these caramel apple recipes for parties. Don’t worry if you’re aiming for quick caramel apples, or if you’re hunting down complex coating secrets—let’s clear these up!
Can I use store-bought caramel instead of making the caramel apple coating from scratch?
You *can*, but oh, honey, please don’t if you want the chewy texture! Store-bought caramels are usually made to be a dipping sauce consistency, and they’ll run right off your apple. If you absolutely must use a shortcut, you need to heat up that store-bought sauce and add a few tablespoons of powdered sugar to thicken it up significantly. For the best coating consistency, you need to master the caramel dipping sauce secrets and cook it to that 245°F mark, like we did here!
How do I prevent the caramel from sliding off the apple?
This question warms my heart because it means you’re striving for perfection! The sliding happens for two main reasons, and we cover both in detail. First, the apple surface must be totally clean, dry, and cold—think refrigeration for 30 minutes pre-dip. Second, the caramel needs to be cooked to exactly 245°F. If it’s too cool, it’s too thin; if it’s too hot, it’s too liquid. That specific temperature ensures that beautiful, instant set on contact!
I’ve shared all my recipe guarantees over on the Cookie Policy page, but know that sticking is 90% prep work!
Share Your Caramel Apple Success
Now that you’ve got the secrets to making those perfect, chewy, sticking-to-the-core caramel apple treats, I am dying to know how they turned out! Did you go for classic and simple, or did you go wild with the gourmet toppings?
Please, please leave me a rating right below this post! Five stars if you didn’t lose any caramel to the floor, that’s how I’m judging success around here! And if you managed to snap a picture of your beautiful holiday caramel apples, tag me on social media! Seeing your creations truly makes my day. I love reading about what toppings you chose—did you stick with nuts, or did you try something wild? I always check in on your comments, because honestly, sharing kitchen victories is the best part!
And just a heads-up, all my recipe guidelines and terms are available on my Terms and Conditions page, but mostly, I just hope your kitchen smells like pure autumn heaven!
PrintFoolproof Homemade Chewy Caramel Apples
Make chewy caramel apples that stick every time using this straightforward recipe. This guide focuses on achieving the perfect caramel texture for your fall treats.
- Prep Time: 20 min
- Cook Time: 25 min
- Total Time: 1 hour 45 min
- Yield: 12 apples
- Category: Dessert
- Method: Stovetop Cooking
- Cuisine: American
- Diet: Vegetarian
Ingredients
- 12 medium firm apples (like Granny Smith or Honeycrisp)
- 2 cups granulated sugar
- 1 cup light corn syrup
- 1 cup heavy cream
- 1 cup (2 sticks) unsalted butter
- 1 teaspoon vanilla extract
- 1/2 teaspoon salt
- Optional: 1/2 teaspoon ground cinnamon for spiced caramel
Instructions
- Wash and thoroughly dry the apples. Remove the stems. Insert a wooden stick firmly into the core of each apple.
- Line a baking sheet with parchment paper or a silicone mat. Lightly grease the paper with butter or cooking spray.
- In a heavy-bottomed saucepan, combine the sugar, corn syrup, heavy cream, and butter.
- Cook the mixture over medium heat, stirring constantly until the sugar dissolves. Stop stirring once it boils.
- Attach a candy thermometer to the side of the pan, ensuring the tip is submerged but not touching the bottom.
- Cook without stirring until the mixture reaches 245 degrees Fahrenheit (Firm Ball stage). This usually takes 15 to 20 minutes.
- Remove the pan from the heat immediately. Carefully stir in the vanilla extract, salt, and cinnamon (if using). Let the caramel cool for 5 to 10 minutes until it thickens slightly.
- Tilt the pan and dip each apple into the caramel, rotating to coat completely. Lift the apple and allow excess caramel to drip back into the pan.
- Place the coated apples onto the prepared baking sheet. Let them cool completely at room temperature until the caramel sets, about 1 hour.
Notes
- For best adhesion, chill the washed and dried apples in the refrigerator for at least 30 minutes before dipping. The cold surface helps the warm caramel set quickly.
- If the caramel seems too thin after dipping, let it cool for another 5 minutes before dipping the next apple.
- For gourmet finishing, immediately roll the dipped apples in chopped nuts, sprinkles, or mini chocolate chips before the caramel fully hardens.
Nutrition
- Serving Size: 1 apple
- Calories: 450
- Sugar: 65
- Sodium: 150
- Fat: 20
- Saturated Fat: 12
- Unsaturated Fat: 8
- Trans Fat: 0
- Carbohydrates: 70
- Fiber: 1
- Protein: 2
- Cholesterol: 75

Comments are closed.