


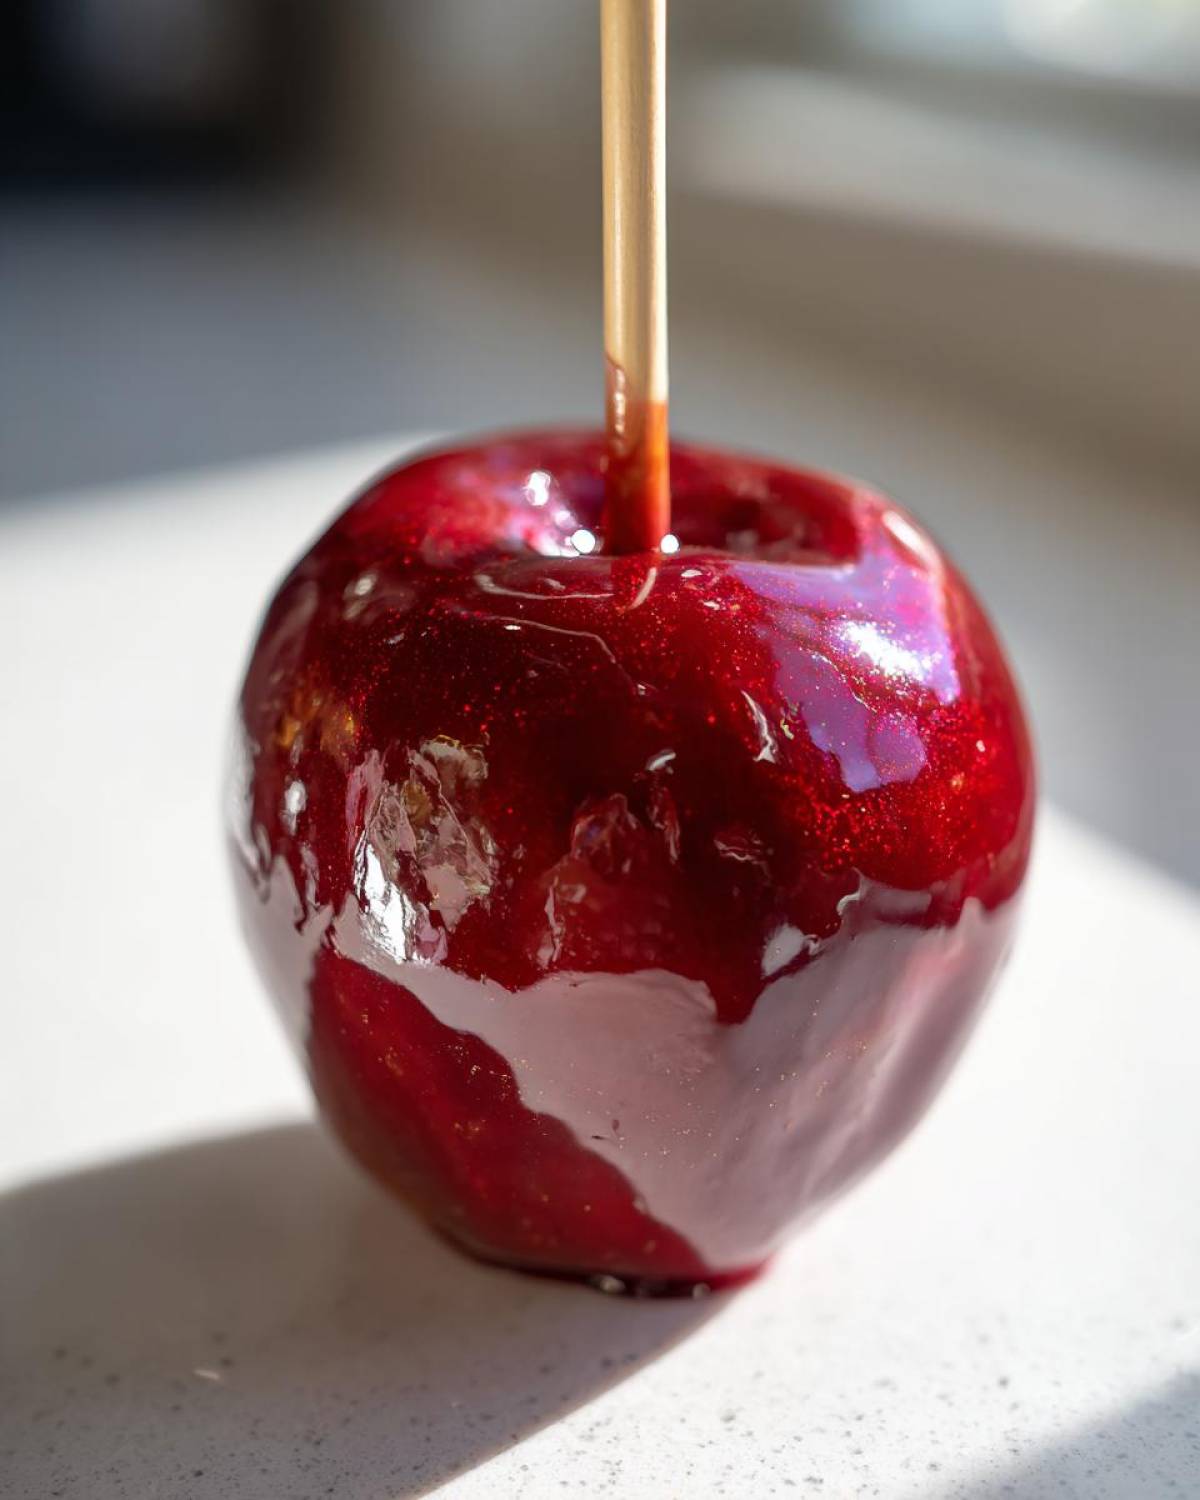
Oh my goodness, there is nothing that screams nostalgia quite like biting into a crunchy, bright red candy apple. You know the ones—the sticky, perfectly glossy treats you get at the fair or during the autumn harvest festivals! For years, I struggled with coatings that cracked the second you looked at them or turned cloudy after ten minutes on the counter. It drove me bonkers! But after about seven different test batches aiming strictly for that beautiful ‘hard crack’ stage, I finally cracked the code. Trust me when I say this candy apples recipe is the version you need. We are locking in that shine, and we are saying goodbye to cracks forever!
Why This Is the Ultimate Foolproof Recipe for Candy Apples
Why should you trust my messy kitchen notes for your next batch? Because this isn’t just any recipe; this is my perfected Classic candy apple recipe! I took all the guesswork out so you get exactly what you want every single time. Forget watery coatings or candy that shatters into a million pieces!
- We use the perfect apple that holds up to dipping and baking heat.
- The cooking time is precise—we hit that 300°F mark exactly for guaranteed shine.
- I show you the trick to stop that annoying final coating from cracking later!
Key Details for Perfect Candy Apples
Planning is half the battle, right? You want to know if you can squeeze this in between errands! Here are the essential deets from our kitchen notes:
- Prep Time: 15 min
- Cook Time: 15 min
- Yield: 6 servings
Ingredients Needed for Shiny Red Candy Apples
Gathering your ingredients is super important because once that sugar syrup hits the hard crack stage, you need everything ready to go—especially for dipping candy apples. Don’t skimp on the corn syrup; that’s what keeps everything smooth and glossy!
- 6 medium firm apples (Granny Smith or Honeycrisp work best!)
- 6 wooden skewers or sticks
- 2 cups granulated sugar
- 1 cup light corn syrup
- 1/2 cup water
- 1 teaspoon red food coloring (I always lean toward the gel kind for vibrant color)
- 1/2 teaspoon cinnamon extract or vanilla extract
Apple Preparation for Optimal Candy Apples Coating
This is the make-or-break moment for adhesion! If your apples have any wax left on them from the store, the candy coating will slide right off. Seriously, don’t skip this part. You need to wash those apples really well, dry them off completely—water equals steam bubbles later, which we absolutely don’t want.
Once they are totally dry, grab a cotton ball soaked in white vinegar and just wipe down the skin of each apple. It sounds wild, but that little scrub removes every trace of protective wax. Then, firmly thread your wooden skewer into the top where the stem was. Make sure it feels secure! We don’t want any apples falling off into the hot syrup.
Step-by-Step Instructions for Homemade Candy Apples
Okay, now for the exciting part—the cooking! If you follow these Step by step candy apples directions perfectly, the result will be that gorgeous, professional-looking shine. Get your apples prepped and standing ready first, because syrup moves fast once it hits temperature. In a medium saucepan, go ahead and combine your sugar, corn syrup, and water. Stir it gently over medium heat, but only until you absolutely can’t see any sugar crystals left clinging to the sides anymore.
Here’s the big moment: Stop stirring immediately once it starts boiling and slap that candy thermometer right in there. You are aiming for 300 degrees Fahrenheit. That precise temperature is the Hard Crack Stage, and hitting it is non-negotiable for a non-sticky, shatter-bright coating. Once it hits 300°F, yank that pan right off the burner! Quickly stir in your food coloring and that dash of cinnamon or vanilla extract—it will hiss a little, don’t panic! If during dipping your syrup seems to get too stiff, don’t worry! Just pop it back on very low heat for a tiny moment to loosen it up, but absolutely do not let it boil again. If you need other fun fall ideas, you might want to check out my Apple Cider Doughnuts recipe while you wait!
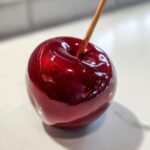
Achieving the Perfect Glossy Candy Coating
Once the syrup is ready, you need to work quickly but smoothly to get the best coating on your candy apples. Tilt the pan slightly so the syrup pools up deep on one side. Holding the apple firmly by the skewer, dip it straight down into the coating. Rotate it slowly beneath the surface to make sure every single spot is covered. Lift it out cleanly and let the extra syrup drip right back into the pot. Don’t worry about messy drips; they usually peel right off once hardened, but letting it drip ensures you don’t get those thick, lumpy spots clinging to the bottom!
Tips for How to Make Candy Apples Without Cracking
Listen, this is the make-or-break section for anyone asking how to make candy apples without cracking. Getting that stunning, durable shine comes down to understanding the sugar science. Remember I stressed hitting exactly 300°F? That’s the hard crack stage! If you go under, the candy stays soft, and it’ll get sticky the second the humidity changes. If you boil past it, you risk scorching the sugar, which tastes burnt and can cause minor cracking during cooling.
The second crucial thing is forgetting you even own a spoon once the syrup boils. I’m serious! Stirring after that point introduces air bubbles, and when the syrup cools, those bubbles become weak spots where the candy coating fractures. So, no stirring, keep the heat steady, and you’ve won half the battle for perfect candy apples.
Finally, the landing spot matters! You must set the hot, coated apples on something that won’t trap moisture underneath them. I always use a sheet of parchment paper or, even better, a silicone baking mat. These surfaces allow the coating to cool evenly and harden smoothly against the backdrop, ensuring they peel right off later without any sticky remnants or weak points.
Creative Variations for Gourmet Candy Apples
Okay, once you master that classic, beautiful shiny red coating, the world is your oyster! These are just the starting point for some truly stunning Gourmet candy apples. People go wild for themed treats, and you can customize the color and flavor faster than you can peel another apple. Think about holidays? You can switch that red coloring to electric blue for Hanukkah or deep purple for a spooky Halloween vibe!
If you ever want to check out my ridiculously good Brown Butter Raspberry Chocolate Chip Cookies, you should save that link for later. But back to apples! You can try breaking up hard candies—think Jolly Ranchers or even Starburst—and pressing them into the wet coating right after you dip. It gives you amazing color saturation and texture!
Flavor Twists and Unique Candy Apple Flavors
The extract you use in the syrup makes a huge difference. We used cinnamon extract in the main recipe, but just swapping that for peppermint extract in December transforms the flavor completely!
- For a tart twist, use lime or lemon extract instead of cinnamon, and use green food coloring.
- Try adding a little orange zest right along with the extract for an immediate burst of brightness in your candy apples.
- If you want that deep, classic carnival flavor that leans toward cherry cola, boost the red coloring and use just a tiny dash of almond extract instead of vanilla! Keep it subtle, though; we don’t want it tasting like cough syrup!
Storing and Serving Your Crispy Apple Treats
Once you’ve achieved that beautiful, hard shell coating on your candy apples, you have to treat them right so they stay perfect for your party! The absolute key is keeping them away from humidity. Do NOT put these in the fridge, I beg you! The moisture in the refrigerator will make the hard crack candy sweat and turn sticky almost instantly. Keep them sitting out on the counter or a cool pantry shelf at room temperature.
They are best eaten the day you make them, of course, but they usually hold up well for two long days if kept dry. I love making mine the day before a big event. These look amazing piled high on a rustic wooden platter—perfect for your Fall dessert recipes spread! If you’re doing a full spread for Halloween, these pair so well right next to my fun Mummy Hot Dogs. Everyone loves having something sweet and perfectly crunchy to balance the savory snacks!
Frequently Asked Questions About Candy Apples
I know you’re probably going to have a few questions once you get started—I certainly did! Making those perfect classic red candy apples can seem intimidating, but once you know the little secrets, it’s a snap. Here are the things people ask me most often when they try this trick for the first time!
Can I use Caramel Apples instead of Candy Apples?
That’s a fair question! People often get them confused, but they use totally different coatings. Caramel is soft and chewy, and it’s typically made with dairy, meaning it melts when it gets warm. This recipe is for that crunchy, bright, glass-like shell all the way through. If you are looking for soft toppings, you’ll want to check out a dedicated caramel recipe, as these are true Caramel apple alternatives—we’re sticking with the hard crack candy shell here!
Why is my candy coating turning cloudy or dull?
Oh, the dreaded dullness! This usually happens for one of two reasons. First, if you stirred the sugar mixture *after* it started boiling, you promoted crystal formation, which ruins the clarity. You have to let it completely dissolve, then stop stirring until you pull it off the heat. Second, humidity is the enemy! If it’s raining hard outside, the syrup will absorb moisture from the air and look immediately hazy. Try to make your candy apples on a dry day if you can!
What causes the candy coating to crack when cooled?
Cracking happens because you introduced air bubbles or you didn’t let the candy set up evenly. Remember how I stressed not stirring the syrup after it boils? Those trapped air bubbles are the weakest point, and as the candy cools and contracts, it fractures right there. Make sure your apples are cool (not cold!) when you dip them, and gently place them immediately onto parchment paper so the cooling process starts evenly across the whole surface. Following these tips really helps with how to make candy apples without cracking!
Estimated Nutritional Data for Classic Candy Apple Recipe
When you’re making treats this amazing, you probably aren’t worried about the nutrition label, but I know some folks like to plan ahead! I did a quick calculation based on the standard amounts of sugar and corn syrup we used here. Remember, this is an estimate based on the full recipe breakdown using standard ingredients and one apple serving size.
It’s a sugary treat, for sure, which is why we save these beauties for special occasions like fall parties or Halloween night!
- Serving Size: 1 apple
- Calories: 350
- Sugar: 85g
- Fat: 0g
- Saturated Fat: 0g
- Trans Fat: 0g
- Carbohydrates: 90g
- Fiber: 1g
- Protein: 0g
- Cholesterol: 0mg
Since this recipe contains a lot of pure sugar and syrup, the numbers lean heavily toward carbs and sugar—that’s just the reality of hard candy! Enjoy them for what they are: a gloriously crisp, festive indulgence!
Share Your Homemade Candy Apples Experience
Now I want to hear from you! Did you manage to get that mirror-like shine? If you tried out the vinegar trick or went wild with the flavoring extracts, let me know how it went down!
Please drop a rating below and tell me what you thought of this recipe for candy apples. I absolutely love seeing your creations, so if you snapped a photo, feel free to reach out via my contact page—I can’t wait to cheer you on! Happy dipping!
PrintThe Ultimate Foolproof Homemade Candy Apple Recipe
Make classic, shiny red candy apples with a perfect, crack-free coating using this simple step-by-step guide.
- Prep Time: 15 min
- Cook Time: 15 min
- Total Time: 45 min
- Yield: 6 servings
- Category: Dessert
- Method: Stovetop Cooking
- Cuisine: American
- Diet: Vegetarian
Ingredients
- 6 medium firm apples (like Granny Smith or Honeycrisp)
- 6 wooden skewers or sticks
- 2 cups granulated sugar
- 1 cup light corn syrup
- 1/2 cup water
- 1 teaspoon red food coloring (gel preferred)
- 1/2 teaspoon cinnamon extract or vanilla extract
Instructions
- Wash and thoroughly dry the apples. Remove the stems and insert a wooden skewer firmly into the top of each apple.
- In a medium saucepan, combine the sugar, corn syrup, and water. Stir over medium heat until the sugar dissolves completely.
- Stop stirring once the mixture boils. Insert a candy thermometer. Allow the mixture to boil until it reaches 300 degrees Fahrenheit (Hard Crack Stage).
- Remove the pan from the heat immediately when it reaches 300 degrees F. Quickly stir in the red food coloring and extract. Work fast, as the mixture will begin to set.
- Tilt the pan slightly. Dip and rotate each apple into the hot syrup, ensuring the entire surface is coated evenly. Lift the apple out, allowing excess syrup to drip back into the pan.
- Place the coated apples onto a baking sheet lined with parchment paper or a silicone mat. Let them cool completely and harden, about 30 minutes, before serving.
Notes
- For the best coating adhesion, wipe the apples with a small amount of white vinegar before inserting the sticks; this removes any wax residue.
- If the coating becomes too thick while dipping, return the syrup to low heat for a few seconds to thin it slightly, but do not let it boil again.
- To prevent bubbles in your coating, avoid stirring the syrup once it begins to boil.
Nutrition
- Serving Size: 1 apple
- Calories: 350
- Sugar: 85
- Sodium: 1
- Fat: 0
- Saturated Fat: 0
- Unsaturated Fat: 0
- Trans Fat: 0
- Carbohydrates: 90
- Fiber: 1
- Protein: 0
- Cholesterol: 0

Comments are closed.