


Oh my goodness, if you haven’t made a proper Basque cheesecake yet, stop what you’re doing! There’s nothing else quite like it on earth. Forget everything you know about fussy, temperamental cheesecakes that demand you babysit a water bath. This Spanish beauty is the total opposite. It’s rustic, it’s dramatic, and it practically begs you to mess up the parchment paper because the messier the better!
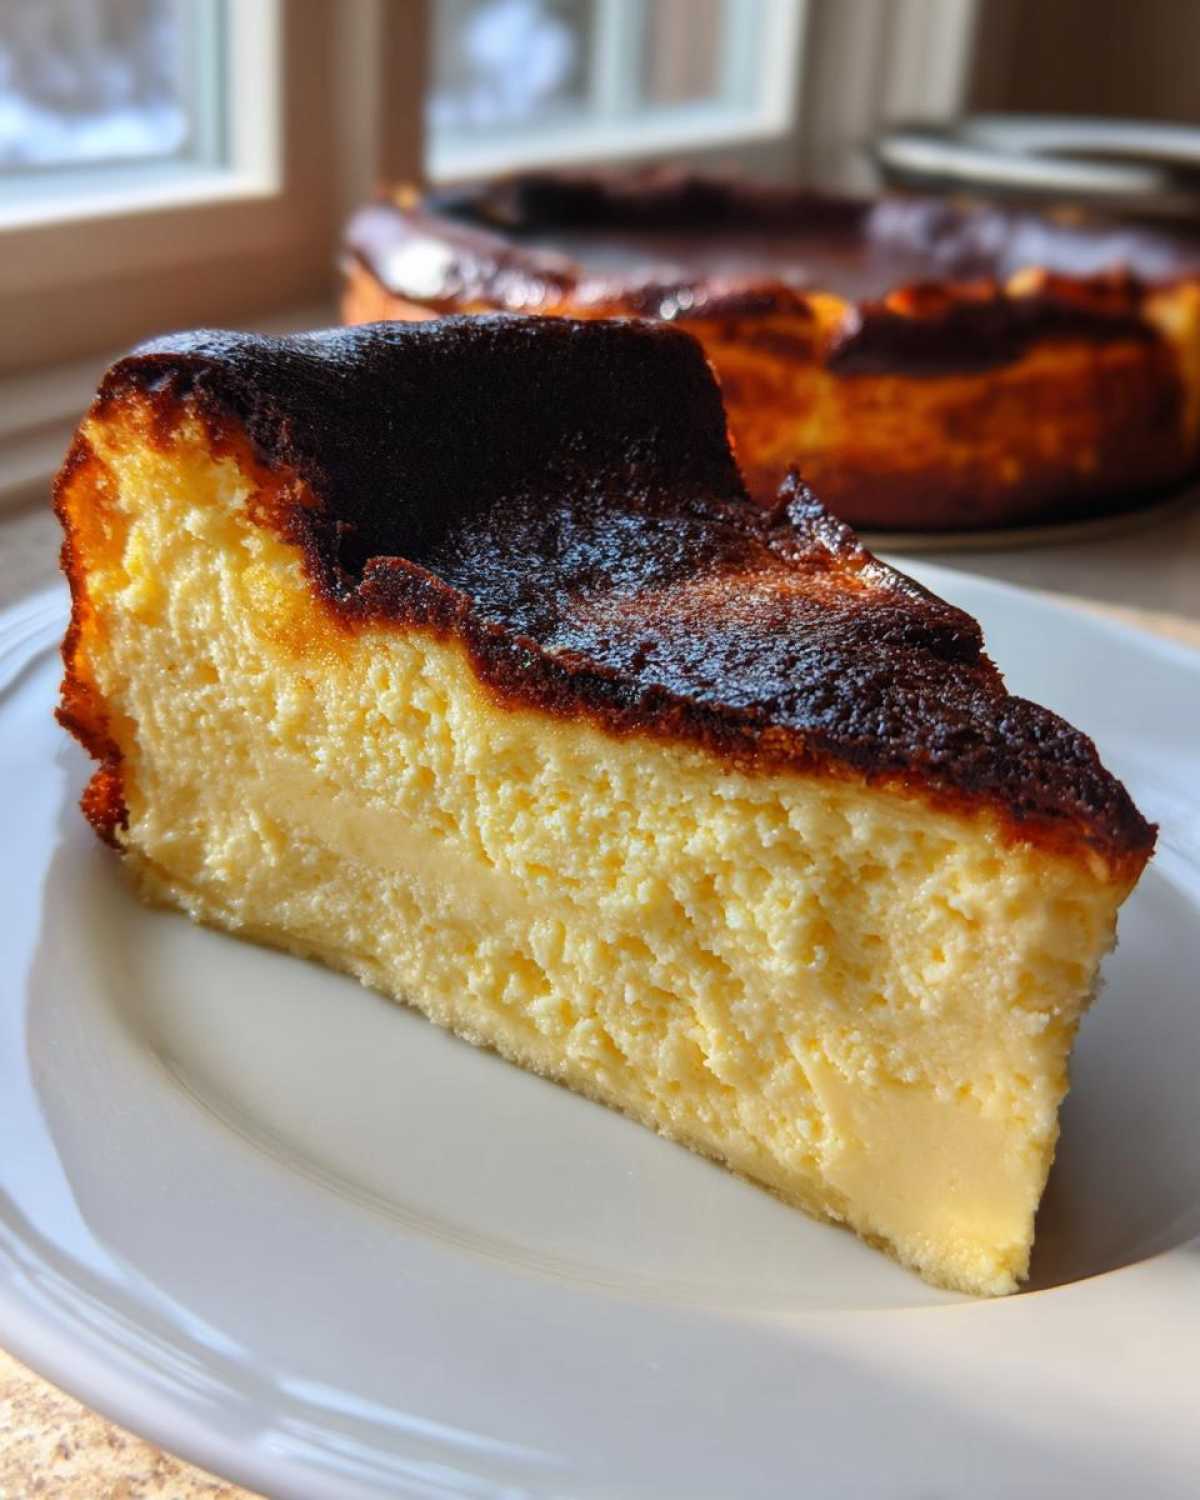
I spent way too long—okay, maybe a whole month—trying to nail the perfect San Sebastian style at home. I needed that intensely dark, almost black, caramelized top, but the inside had to be unbelievably creamy, like liquid silk or a rich mousse. Well, I finally cracked it. This is absolutely the best basque cheesecake recipe because it’s incredibly easy, naturally crustless, and you can walk away knowing the high heat does all the heavy lifting for you. Trust me; once you nail this texture, you won’t look back!
Why This is the Best Basque Cheesecake Recipe You Will Make
Honestly, when I first looked at pictures of this dessert, I thought it looked too complicated. I mean, it’s supposed to look burnt, right? But once you understand the science behind it, you realize this is the easiest, most impressive cheesecake you will ever attempt. Seriously, I’m convinced everyone needs this basque cheesecake recipe in their rotation.
What makes my version the ultimate go-to? Well, it checks all the boxes people worry about when they search online. It’s the perfect blend of simplicity and incredible flavor payoff.
- It’s completely crustless! Zero fuss with pressing crumbs or worrying about a soggy bottom. That’s time saved right there.
- It is naturally designed to be made without a water bath. High heat is the secret, not steam baths!
- The payoff in texture is huge—it gives you that unbelievably rich interior without feeling heavy.
Achieving the Signature Caramelized Top Dessert
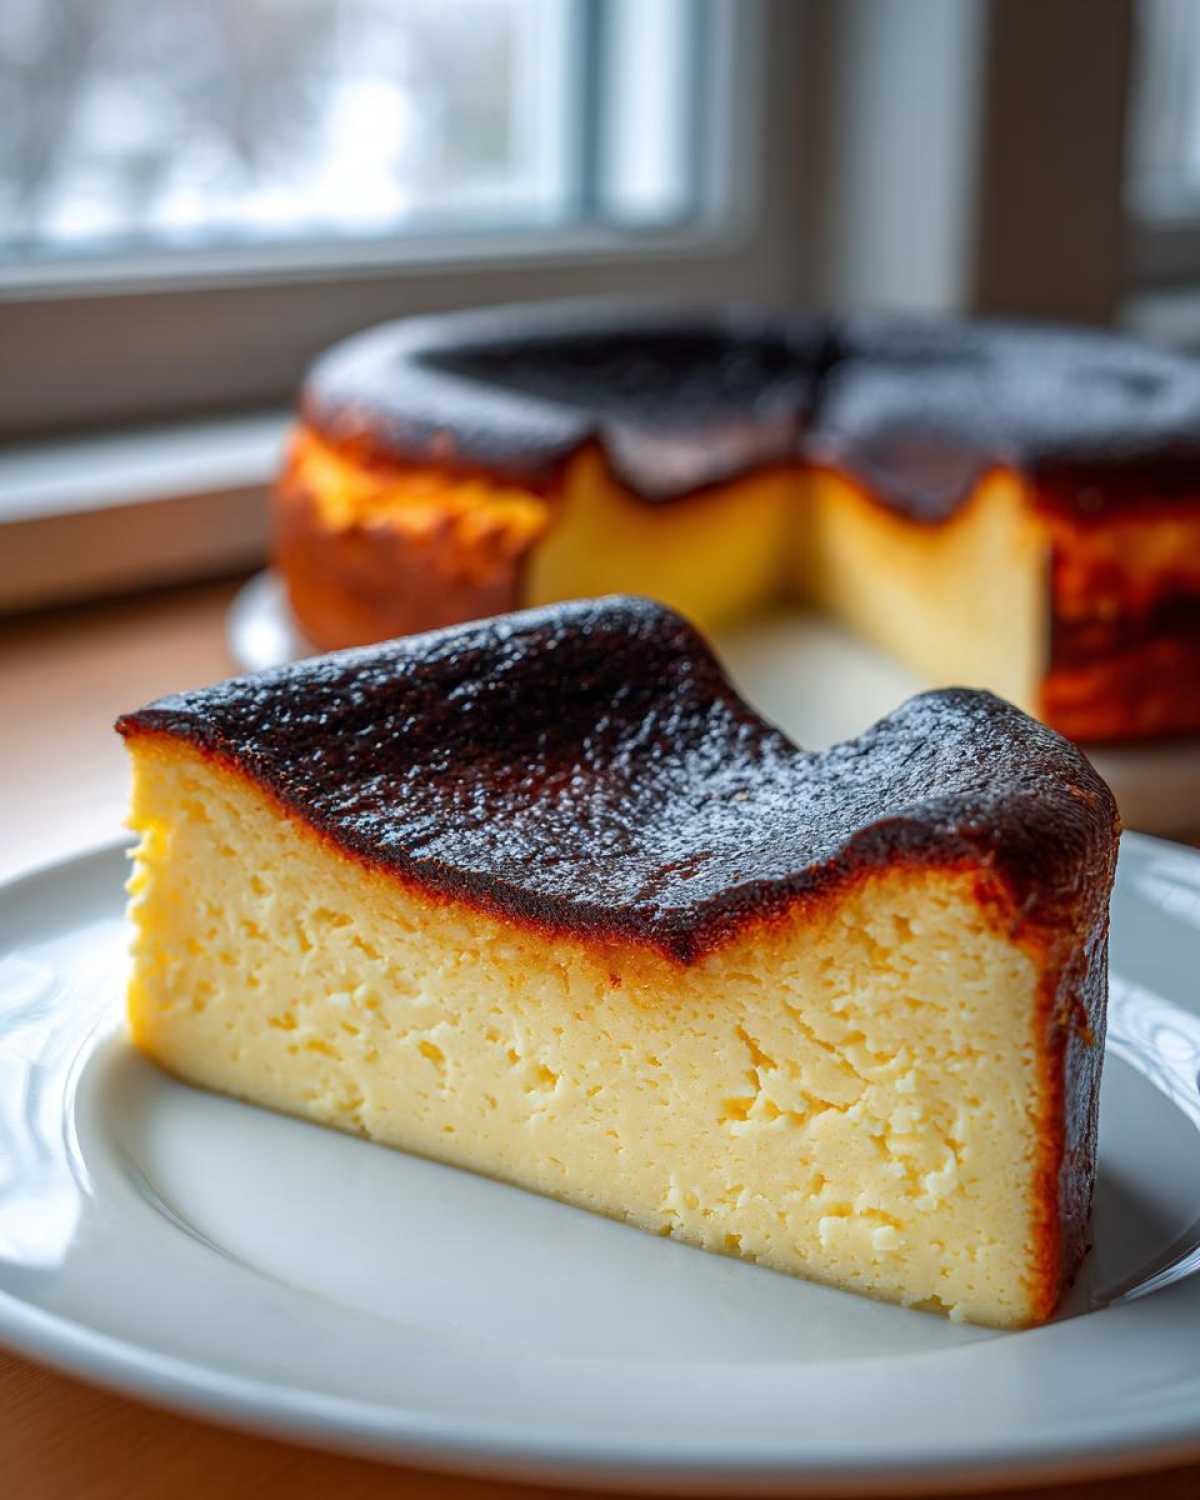
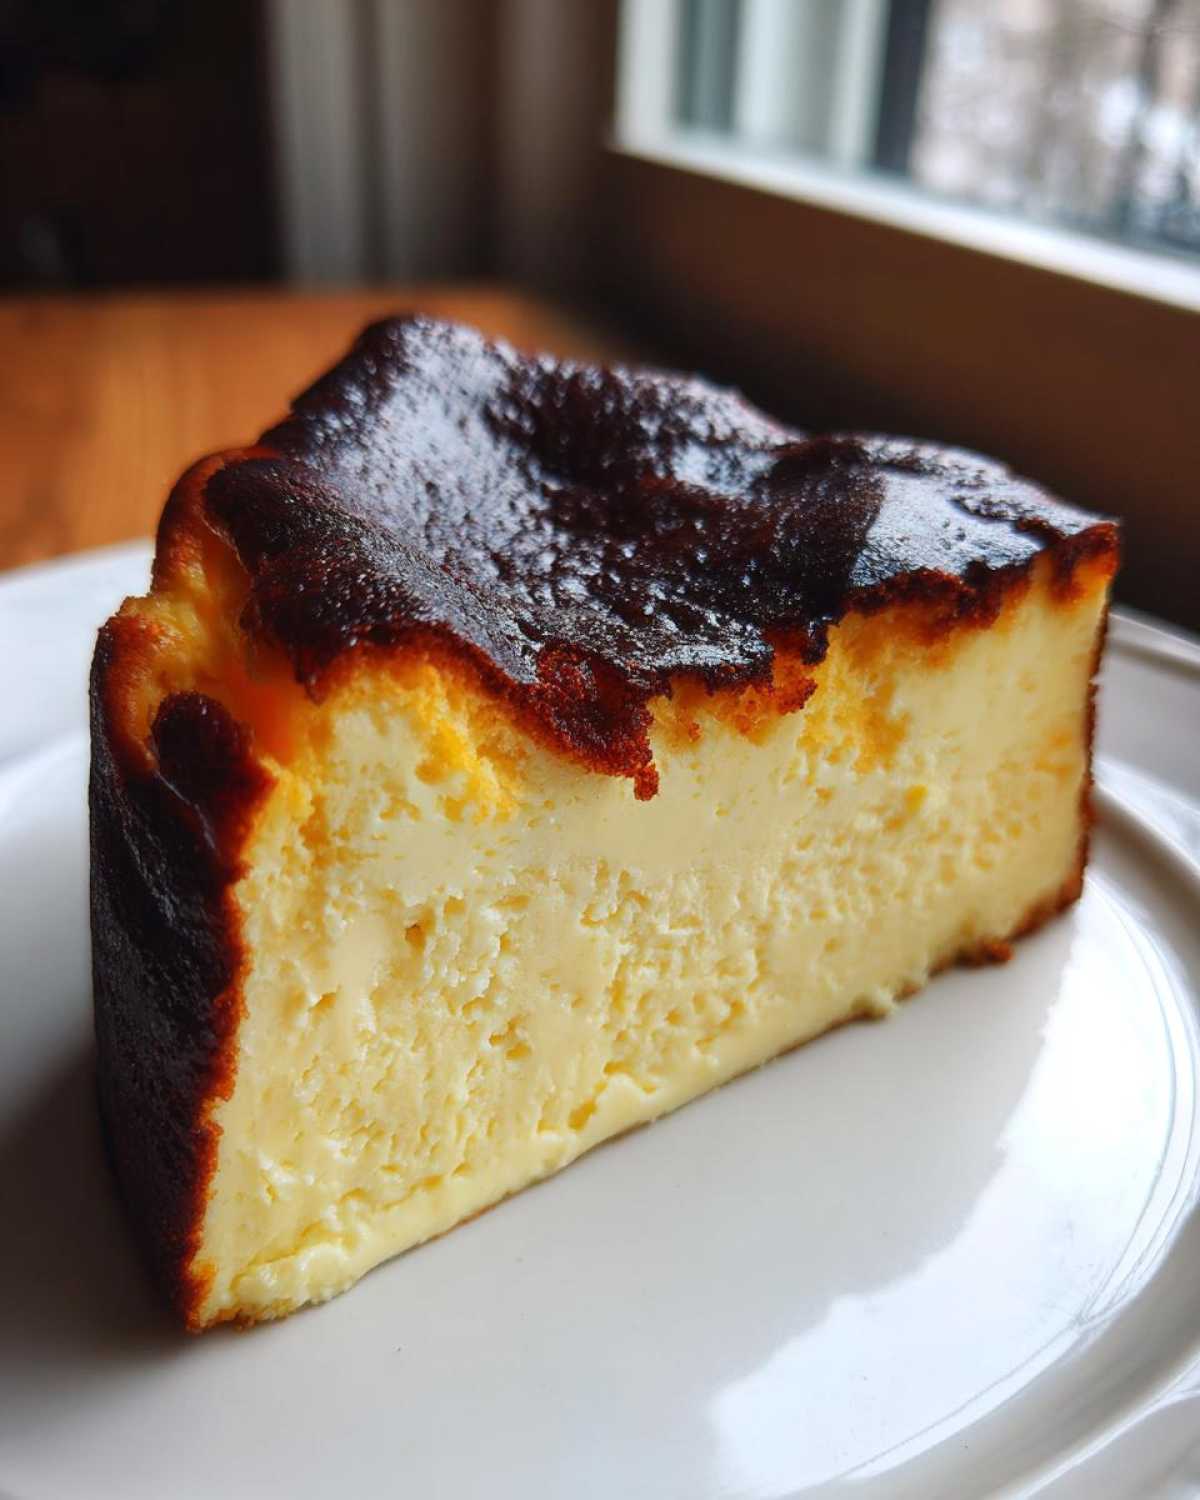
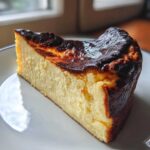
That dark top isn’t a mistake, I promise! We crank the heat up high—way higher than you’d ever bake a regular cheesecake—and this is what creates the most fantastic dark, bitter-sweet crust. It cuts through the sweetness of the interior. Think of it as the perfect, slightly bitter counterpoint to the creamy center. This deep caramelization is what turns it from just a cheesecake into my favorite caramelized top dessert.
The Secret to a Truly Creamy Spanish Cheesecake Interior
The magic truly happens inside. Because the batter is so thin—and yes, it will look too thin—the high heat sets the edges fast while the center steams itself into a glorious custard. That’s why this creamy spanish cheesecake tastes so decadent. You pull it out of the oven looking like a disaster, and two hours later, it’s the most elegant, creamy thing you’ve ever baked. It’s pure kitchen sorcery!
Gathering Ingredients for Your Easy No Crust Cheesecake
You really don’t need a long shopping list here, which is another reason I adore this dessert. It’s a very simple gourmet experience relying on quality. Since this is a true crustless cheesecake recipe, we are skipping the butter, graham crackers, and all that jazz. We are focusing purely on that rich, tangy, creamy body!
We are using a full nine blocks of cream cheese here—don’t skimp! The richness is non-negotiable for that perfect custardy cheesecake texture we are hunting for. I did link to some fun strawberry cheesecake bites if you feel like making smaller treats later, but for the big one, stick to the list!
- 900g full-fat cream cheese, make sure it’s fully softened!
- 1 1/2 cups granulated sugar (yes, that much, it helps with the caramelization!)
- 6 large eggs
- 3 cups heavy cream (don’t substitute this, we need the fat content)
- 1 teaspoon vanilla extract
- 1/4 teaspoon salt
- 1/4 cup all-purpose flour
Ingredient Clarity and Preparation Notes
Okay, pay attention because these small details make the difference between a perfect Basque cheesecake and one that might fight you a little bit.
First, the cream cheese absolutely has to be softened. I mean room temperature, utterly squashable. If it’s cold, you’ll end up with lumps, and nobody wants a lumpy custard! You can zap it in the microwave for 10 seconds if you’re impatient, but watch it closely.
For the eggs, use large eggs, chilled is totally fine here since they are going into the machine mix. We only need six eggs, which seems like a lot, but they act as a binder for this otherwise runny mixture.
And lastly, that flour! We are only using a tiny bit, and you must sift it over the batter right before you fold it in. Sifting prevents any little clumps because remember, we are mixing very gently once that flour hits the cream cheese. This honors the philosophy of a truly rustic cheesecake dessert where every ingredient must be perfectly integrated.
How to Prepare the Perfect Basque Cheesecake Without a Water Bath
Okay, let’s get down to the fun part—mixing and baking! This is where everything comes together, and I want to assure you right now: you absolutely do not need a basque cheesecake no water bath. That’s the beauty of the high-heat baking method. We are embracing simplicity here. I’ve got my cheesecake brownie cookies recipe somewhere, but this is much easier, I promise!
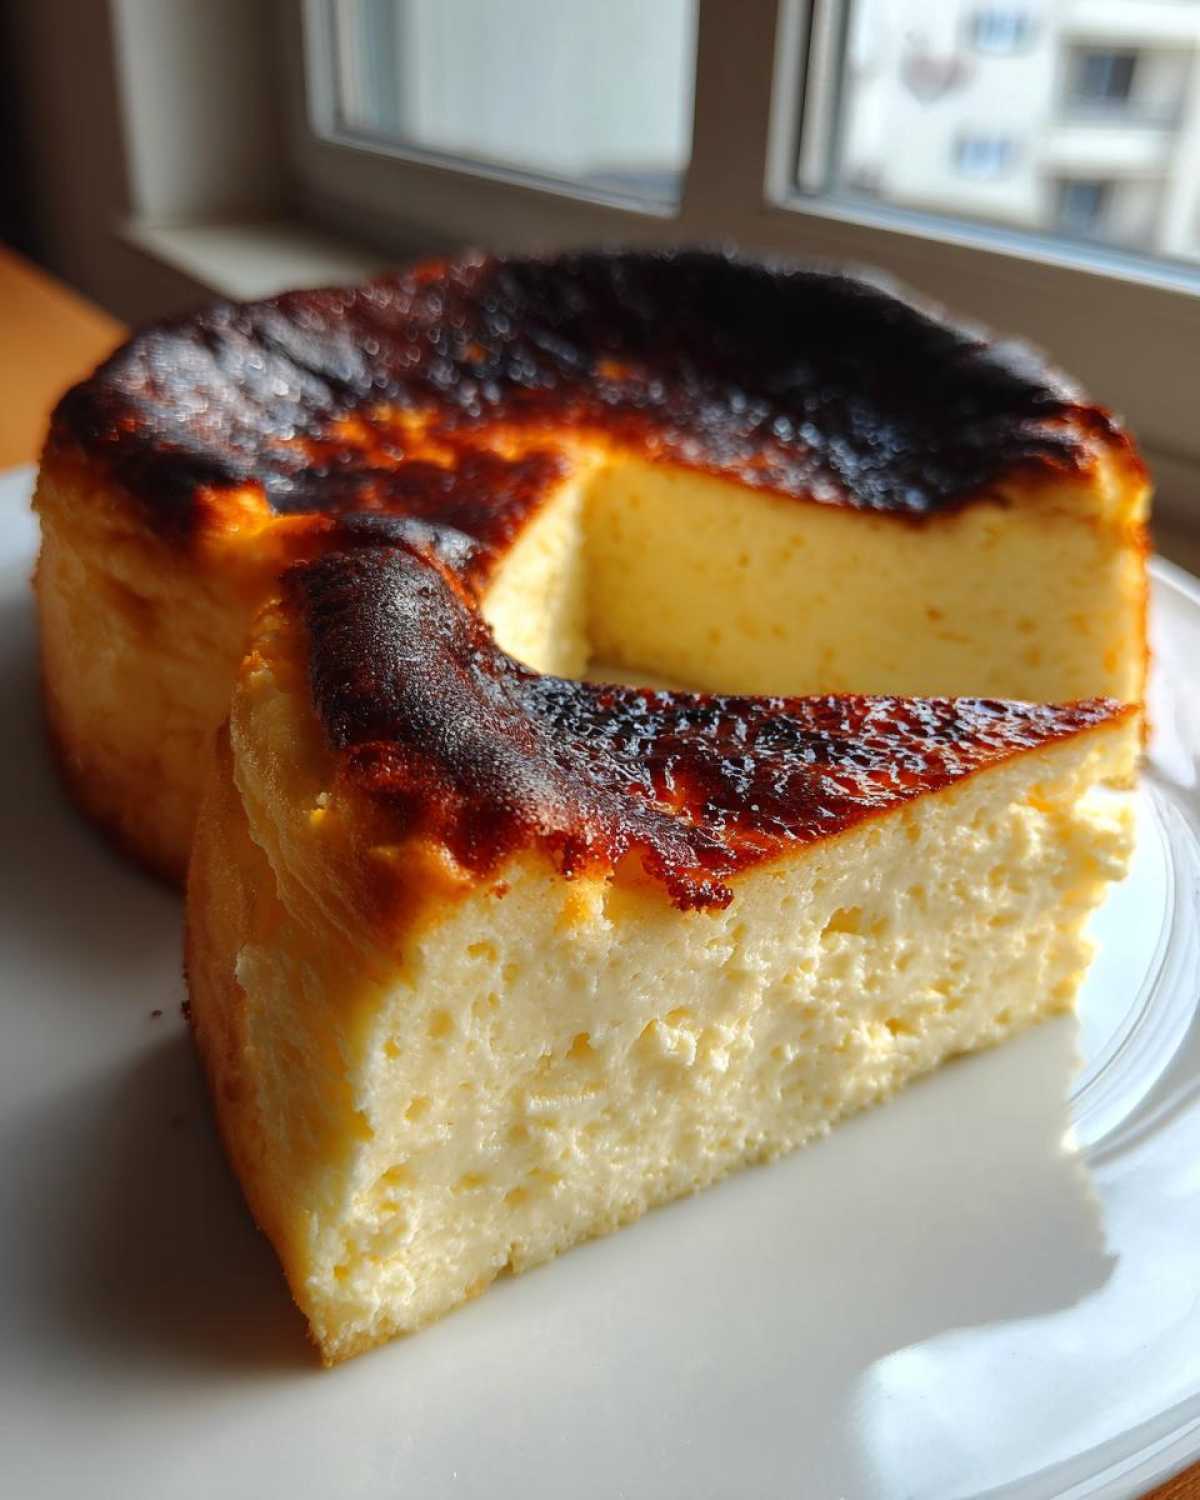
Preheating is essential. We need that oven screaming hot—set it to 400 degrees Fahrenheit (or 200 Celsius). Next up is perhaps the most important physical step: the pan prep. You need a 9-inch springform pan, and you need parchment paper. I double-line it, making sure the paper sticks up about two or three inches over the sides. This serves two purposes: it protects the edges from charring too fast, and it gives the cake its signature jagged, rustic edge when you peel it away.
Pan Preparation and Batter Mixing for Basque Cheesecake
Here’s my little trick for getting that authentic look: once you’ve laid your two layers of parchment paper crisscrossed in the pan, use your hands and deliberately *crumple* it a little bit before pressing it down against the bottom and sides. Do not try to make it lie flat! Those crinkles transfer beautiful texture right onto the side of the cake. It looks intentional, which is exactly what we want for this rustic cheesecake dessert.
Now for mixing the batter, remember what I said about mixing gently? You beat the softened cream cheese until it’s super smooth, then add sugar slowly. Get those six eggs incorporated one at a time. The risk we run here is whipping too much air into it, which can cause cracking or a tough texture later. We want smooth, but not fluffy.
Once the cream, vanilla, and salt are in, you’re almost done! Sift that small amount of flour directly over the top. Now, stop using the mixer and grab a spatula. Gently fold that flour through until you see no white streaks remaining. The batter will be very thin, almost like pancake batter—it’s supposed to be like that! Remember, we love easy no crust cheesecake, so don’t worry about perfection here; just ensure the flour is mixed evenly.
Baking and Cooling: Key Steps for Custardy Cheesecake Texture
Pour that thin mixture right into your crinkly paper-lined pan. Don’t try to smooth the top! Just let it settle. Slide it into that hot 400°F oven and try to forget about it for about 50 to 60 minutes. You are looking for the top to be deeply browned, almost black in spots. That is your indicator that the caramelization is happening perfectly.
The biggest test for this burnt basque cheesecake recipe is the wobble test. When you gently shake the pan (carefully!), the edges of the cake should look set, maybe even slightly pulling away from the paper, but the absolute center should still be jiggly—I mean, significantly wobbly, like very soft Jell-O. Don’t panic! That wobble is the beginning of your amazing custardy cheesecake center.
Cooling is where successful baking happens, resist the urge! Pull it out and let it sit on a rack at room temperature for a good two hours until it’s no longer hot to the touch. Then, cover it loosely and move it to the refrigerator for a minimum of six hours. Seriously, overnight is best. This slow chill is absolutely non-negotiable for fully setting that creamy interior. Patience pays off huge here, trust me on the chilling!
Tips for Success When Making a Burnt Basque Cheesecake Recipe
I know that first look coming out of the oven can be scary. You’ve followed the steps, you see the dark color, and you think, “Oops, I ruined it!” But let me tell you, that deep color is exactly what we want for this burnt basque cheesecake recipe. If it comes out pale, it won’t have that signature complex flavor contrast—you’ll just have a very rich, unchallenging baked cheesecake.
Don’t sweat the cracks! Unlike traditional New York style, this cheesecake is supposed to look a little wild. When it cools, it collapses dramatically in the center, creating those gorgeous wrinkles and curves around the edges. That is proof it worked! If you’ve got a few cracks coming through the dark spots, just lean into it; it adds to the character of this rustic cheesecake dessert.
If you are worried about the color not being dark enough, here’s a little secret I learned halfway through my testing phase: about ten minutes before the typical bake time is up, bump that oven temperature up another 25 degrees, and just watch it like a hawk. I mean, literally stand there and watch it color up. It goes from dark brown to true mahogany surprisingly fast!
Another thing I realized is that the parchment paper plays a huge role in the look. If your paper stays too flat, the cake rises too evenly. Remember how I told you to crumple it? If you see one side that looks a little flatter than the rest, that’s probably where your parchment paper didn’t have as many big crinkles. It’s all part of the charm, so a little unevenness is actually a badge of honor for an easy no crust cheesecake!
Variations: Trying a Loaf Pan Basque Cheesecake
So, maybe you’re just serving two people, or perhaps you want the leftovers all to yourself—I’m not judging! Sometimes, the full 9-inch round pan is just too much cheesecake for one week, even if we both know it freezes wonderfully. That’s why I absolutely love adapting this recipe into individual servings, and the loaf pan basque cheesecake is hands-down my favorite way to do it.
You’ll use the same batter, which is a huge win! You just need a standard 8.5 by 4.5 inch loaf pan. The key change here is lining it with parchment paper, just like the round one, but you really want those paper sides sticking up high so you can pull it out easily once it’s baked and slightly deflated.
Because the depth changes, the cooking time changes too. Don’t just pour your 900g of batter into one loaf pan—you might need two, or you can divide the batter between two pans if you want standard servings. With less height, the heat penetrates faster, meaning you’ll shave off about 10 to 15 minutes from the baking time we used for the round pan. I check it around the 35-minute mark.
When testing, you’re still looking for that wobbly center. If you end up with a single, thicker loaf, you might need to add five extra minutes, but always check for that set edge/wiggly middle combo. I saw a fantastic peach ricotta layer cake recipe recently, and I think the same principle applies—smaller or flatter bakes cook faster overall! Making a loaf pan basque cheesecake lets you control serving sizes so easily. Plus, those loaf edges get perfectly caramelized and delicious!
Serving Suggestions for This Rustic Cheesecake Dessert
When you finally get to slice into this masterpiece, the presentation is surprisingly easy! Because this rustic cheesecake dessert is so rich and intensely flavored—thanks to all that cream cheese, sugar, and dark caramelization—you actually want to serve it with things that are light, bright, or slightly tart. Overly sweet toppings just compete with the exterior flavor we worked so hard to achieve.
I think the very best way to serve it is just naked, slightly chilled, maybe dusted lightly with a tiny bit more powdered sugar if you’re feeling fancy. But if you want to add a beautiful flair that really pops against that dark crust, try pairing it with fresh fruit. Think seasonal strawberries—they’re just perfect. Or maybe a few tart raspberries. They bring a beautiful color contrast, too!
If you want something decadent but still cutting, I sometimes whip up a very quick acidic sauce. A spoonful of tart cherry compote or a rich blueberry reduction works amazing. Just don’t drown the beautiful cake; a little spoonful alongside makes a perfect bite.
And speaking of bright accompaniments, if you’re serving this after a heavy dinner party, you need a light, refreshing drink to wash it down. I made the most fantastic frozen peach rose slushy the other day, and it paired shockingly well with the richness of the cheesecake. It washes the palate clean without being heavy.
The key takeaway is that this Basque cheesecake already has intense flavor built right in. It really doesn’t need heavy frosting or complicated layers. Just let that smoky, creamy custard speak for itself!
Storage and Reheating Instructions for Basque Cheesecake
Okay, you’ve made it through the baking process, and now you might have a whole glorious, dark-topped cheesecake left over. Good news! This basque cheesecake is one of the easiest desserts to keep around because it actually improves overnight in the fridge. Unlike other delicate cheesecakes, this one doesn’t mind the cold.
Here’s what I do: once it’s fully cooled down from the counter (I mentioned two hours earlier, remember?), wrap the whole thing tightly in plastic wrap. You want to prevent it from absorbing any weird smells from the fridge, and you want to keep that beautiful top from drying out.
It holds up brilliantly in the refrigerator for about four to five days. Honestly, it tastes just as good on day four as it did on day one, maybe even slightly better once the intense custard flavor has had a chance to deepen. This makes it such a fantastic dessert for a dinner party because you can make it days ahead!
Serving Temperature Matters
This is a small but crucial detail for serving your creamy spanish cheesecake. While it needs that long chill time to set its custardy structure, I really don’t love eating it straight out of the coldest part of the fridge. When it’s ice cold, the texture tightens up a bit too much.
For the absolute best experience, pull your slice out of the refrigerator about 20 to 30 minutes before you plan on eating it. Letting it warm up just slightly brings back some of that unbelievable smoothness and lets the caramel notes in the crust really sing. It should be cool, but definitely not frosty cold.
Freezing Your Crustless Cheesecake Recipe
What if you really don’t think you can get through that whole thing in five days? Don’t panic about leftovers going bad! This crustless cheesecake recipe freezes like a dream. Again, make sure it’s fully chilled first, then wrap individual slices really well in plastic wrap, followed by a layer of foil. This double protection keeps freezer burn away.
You can freeze these babies for up to two months! When you’re ready to serve, transfer the wrapped slice right into the refrigerator overnight to thaw slowly. Then, follow my serving advice: let it sit on the counter for about 20 minutes before slicing. It comes back to life perfectly, retaining that fantastic rich decadent dessert quality!
Frequently Asked Questions About Making Basque Cheesecake
I totally get it—baking something that looks so dramatically different can lead to a ton of questions! When I was first learning how to make this Basque cheesecake, I wrote down every single query that popped into my head. Here are the ones I hear most often from everyone trying this easy no crust cheesecake at home.
Why is my basque cheesecake batter so thin?
Oh, this is the classic first reaction! Don’t worry, you haven’t made a mistake, seriously. Unlike a New York style or a traditional cheesecake that relies on eggs for structure, this creamy spanish cheesecake is famous for its very high ratio of liquid ingredients, specifically that 3 cups of heavy cream, compared to the solids. The batter is supposed to be thin—almost like buttermilk! If it were thick, it would bake up dense and heavy. That thinness is the direct secret to getting that unbelievably custardy cheesecake texture.
How important is chilling time for the best texture?
It’s not just important; it’s mandatory! I know you want to dive in immediately after smelling that incredible caramelized top dessert coming out of the oven, but you absolutely must practice patience here. The minimum chilling time of six hours—and I still suggest overnight—is non-negotiable for getting that perfect texture. When it comes out of the oven, the center is barely set. The long, slow chill allows the custard to firm up into that rich, silky mouthfeel we are aiming for. If you cut it too soon, it will slump out onto your serving plate, although it will still taste great, just not structurally sound!
What if my cheesecake doesn’t look burnt enough?
Some ovens just run cooler, or maybe you got nervous and pulled it out early. That’s okay! If your burnt basque cheesecake recipe came out more golden than deeply mahogany, it still means you have a delicious cheesecake, but it’s missing that signature flavor contrast. Next time, try turning the heat up for the last 10 minutes, like I mentioned earlier, but watch it closely! You can even switch the oven to broil for the last 3 to 5 minutes, keeping the oven door slightly ajar and watching every second until it reaches that perfect dark color.
Can I use low-fat cream cheese or substitute the sugar?
I really advise against it for your first attempt. This recipe is designed to be rich and decadent, and the fat content in the cream cheese and the heavy cream is what keeps the cake creamy and prevents it from becoming grainy or dry when exposed to high heat. Using low-fat substitutes dramatically changes that structure. Regarding sugar, that high amount is needed not just for sweetness but for the caramelization process on top. If you cut it down too much, you risk losing that beautiful, slightly smoky crust. If you want to try a different style later, check out my guide for New York Cheesecake, which handles substitutions a bit differently!
Estimated Nutritional Information for This Rich Decadent Dessert
Now, let’s talk numbers. I always hesitate a little bit putting up nutrition facts because, let’s be real, this Basque cheesecake is meant to be indulged in! This is a statement piece, a rich, decadent dessert, and it delivers on that promise with richness.
The figures below are based on my standard recipe, using full-fat dairy and large eggs, and calculated for 10 slices. Please remember that these are just estimates. How dark you caramelize the top, the exact brand of cream cheese you use, or if you happen to make a smaller loaf pan basque cheesecake will change these numbers slightly.
For those keeping track, here is the breakdown:
- Serving Size: 1 slice
- Calories: 450
- Total Fat: 32g (Of which Saturated Fat is around 20g)
- Total Carbohydrates: 30g
- Sugar: 35g
- Protein: 8g
- Cholesterol: 150mg
We knew this was a rich one, right? That high fat content is what gives us that incredible, almost molten center!
A lot of that sugar contributes to the beautiful caramelized top—it’s doing important flavor work!
Don’t worry about the details too much. What matters is that every single bite of this crustless cheesecake recipe is worth the indulgence. When you serve this at your next gathering, the conversation will be about how good it tastes, not the macros!
PrintEasy Crustless Burnt Basque Cheesecake
Make a rich, creamy, and custardy Basque cheesecake with a signature caramelized top. This recipe requires no water bath and is naturally crustless for simple preparation.
- Prep Time: 15 min
- Cook Time: 60 min
- Total Time: 7 hours 15 min
- Yield: 10 servings
- Category: Dessert
- Method: Baking
- Cuisine: Spanish
- Diet: Vegetarian
Ingredients
- 900g cream cheese, softened
- 1 1/2 cups granulated sugar
- 6 large eggs
- 3 cups heavy cream
- 1 teaspoon vanilla extract
- 1/4 teaspoon salt
- 1/4 cup all-purpose flour
Instructions
- Preheat your oven to 400 degrees Fahrenheit (200 degrees Celsius). Line a 9-inch springform pan with two layers of parchment paper, allowing the paper to extend several inches above the rim of the pan. Crumple the paper slightly before placing it in the pan to help achieve the rustic look.
- In a large bowl, beat the softened cream cheese until smooth.
- Add the sugar and beat until just combined. Do not overmix.
- Add the eggs one at a time, mixing briefly after each addition until incorporated.
- Slowly mix in the heavy cream, vanilla extract, and salt until the batter is smooth.
- Sift the flour over the batter and gently fold it in until no streaks of flour remain. The batter will be thin.
- Pour the batter into the prepared pan.
- Bake for 50 to 60 minutes. The top should be deeply caramelized, almost black in spots, and the edges should be set, but the center should still wobble significantly when gently shaken.
- Remove the cheesecake from the oven and let it cool completely on a wire rack at room temperature for at least 2 hours.
- Chill the cheesecake in the refrigerator for a minimum of 6 hours, preferably overnight, before serving.
- When ready to serve, carefully remove the parchment paper sides.
Notes
- For a loaf pan variation, use an 8.5 x 4.5 inch loaf pan lined with parchment paper and reduce the baking time by about 10 to 15 minutes.
- The high heat is necessary to achieve the signature burnt exterior while keeping the inside creamy.
- Do not try to smooth the top of the batter after pouring; the rustic appearance is part of the style.
Nutrition
- Serving Size: 1 slice
- Calories: 450
- Sugar: 35
- Sodium: 150
- Fat: 32
- Saturated Fat: 20
- Unsaturated Fat: 12
- Trans Fat: 1
- Carbohydrates: 30
- Fiber: 0
- Protein: 8
- Cholesterol: 150


Comments are closed.